Scratch is a visual block based programming language aimed at getting kids into programming. Recently the LimeSDR team have been working at creating a Scratch interface for their LimeSDR Mini. It is basically working as a wrapper/interface to the processing backend which is handled by LuaRadio.
The idea is to keep the barrier of entry to SDR as low as possible, by making SDR programming accessible to kids as well. The software is currently a work in progress, but they write that they are attempting to develop the Scratch blocks necessary to enable the transmission and reception of text messages. Something like that would make a great learning tool for educators.
The video demo shows Scratch and the LimeSDR running on a Raspberry Pi 3. During the demo he creates a simple 433 MHz spectrum display by connecting up several blocks.
Scratch running with a LimeSDR Mini on a Raspberry Pi
The servers that are currently online include some streaming from Airspy HF+ devices, which is the hotly anticipated but as of yet unreleased HF receiver from Airspy. Over the last few months and weeks a number of prototype devices went out to testers and programmers and some have now put them online with a SpyServer. There are also some Airspy One/Mini and RTL-SDR devices available for streaming too.
To connect to one of the servers simply download the latest version of SDR# from airspy.com, and then in SDR# select SpyServer from the Source menu. Enter the URL from the list into the box and press the play button up the top. Note that you must ensure that there are no spaces after entering the URL in SDR#.
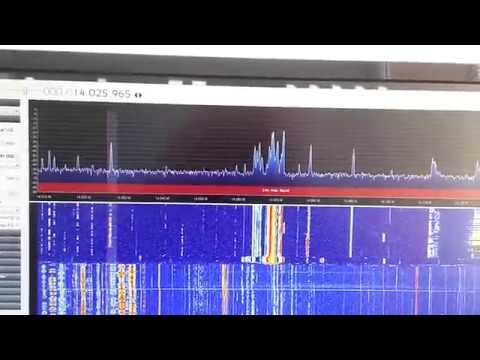
Most servers are locked to a particular frequency band, but some allow for free tuning. But if more than one person is connected to the server free tuning will be locked until there is only one person connected again. Currently streaming from most servers seems smooth, but it's possible that some may struggle if many users are connected at once.
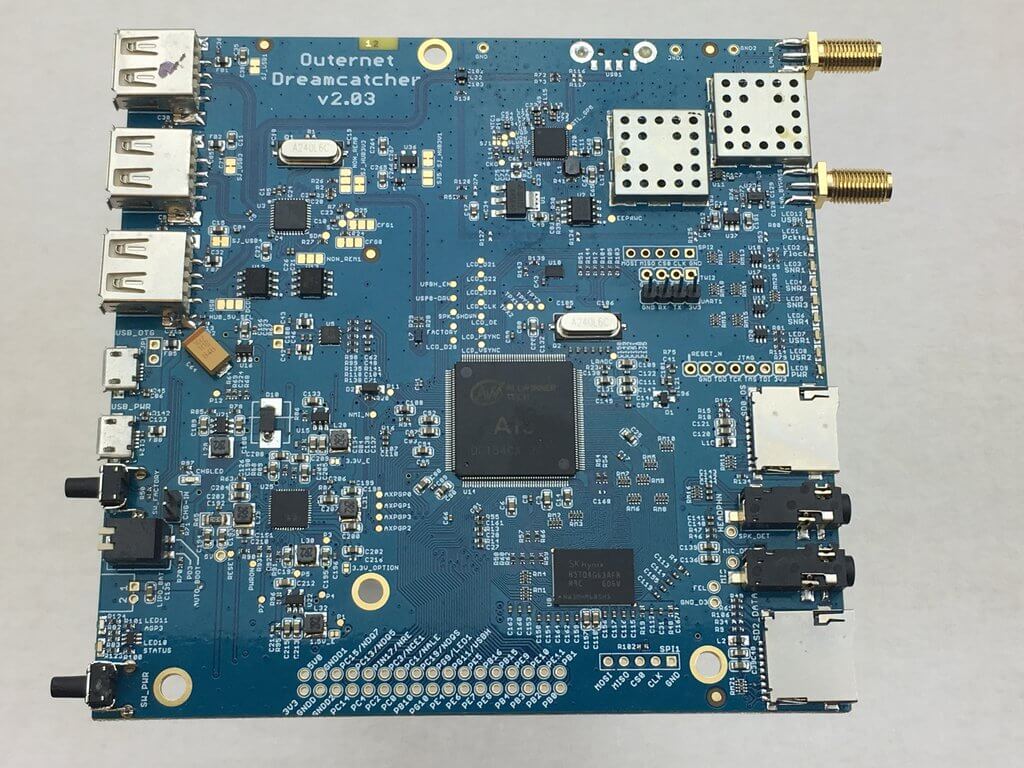
The Outernet Dreamcatcher is a single board PC with a built in RTL-SDR. It has a TCXO and two SMA ports, one being amplified and filtered for L-band applications and the other being a regular port for all other applications.
With built in computing hardware the Dreamcatcher can be used as a standalone unit for various applications. As the Dreamcatcher is now on sale we've decided to create a brief tutorial that shows how to set one up as a cheap ADS-B aircraft radar receiver, and also how to set it up as a PiAware feeder. PiAware is software that allows you to feed FlightAware.com which is an ADS-B aggregatpr.
Any simple SMA antenna can be used, like our Dipole kit, an old RTL-SDR whip antenna, or even a short piece of wire.
We also have a previous review of the Dreamcatcher available here. In the past the main problem with the $59 USD Dreamcatcher was that you could get a more powerful Raspberry Pi 3 and RTL-SDR dongle for a similar price. But now at the sale price of $39 USD the Dreamcatcher is definitely a great deal.
Note that we'd recommend NOT purchasing the Dreamcatcher specifically for the Outernet data signal as we're unsure exactly how long that signal will continue to be broadcasting for.
The Outernet Dreamcatcher
What follows below is a tutorial that shows how to set up a Dreamcatcher. The tutorial installs dump1090 at the same time, but afterwards could be used for a number of other applications.
Over on YouTube Adam 9A4QV has uploaded a video of him testing out his 'UP-64' upconverter together with an RTL-SDR. An upconverter moves low frequencies 'up' into a higher frequency. This is useful for HF reception, as normal reception on an RTL-SDR starts at about 24 MHz (without using direct sampling mode).
Adam previously manufactured and sold his UP-100 upconverter, which was an upconverter of his own design that utilized a 100 MHz oscillator. These days it has been accepted that using an upconversion frequency that avoids the broadcast FM band is generally better as it avoids the interference that can come from very strong FM signals. The 64 MHz oscillator on the UP-64 avoids the broadcast FM band for the most part unlike the older UP-100.
Back in September we posted [1, 2] about the QRadioLink software which is an RTL-SDR compatible digital amateur radio voice decoder and encoder program for Linux and Android (with chroot). It supports modern digital voice codecs like Codec2 and Opus. It is capable of being used with multiple SDRs, and can be used for transmitting digital voice too if you have a transmit capable SDR.
Andrian the developer recently wrote in to let us know that QRadioLink now has a website at qradiolink.org that you can follow for updates about its development. The website also explains some of the features of the software, and lists possible performance values of digital voice. The features include:
Receives and transmits analog voice, digital voice, low resolution video, text, IP protocol.
Narrow band modem with Codec2 or wideband modem and Opus.
Digital Modems: BPSKQPSK2FSK4FSK
Modes: narrow FM, SSB, digital voice, digital video, digital data
Typical Receiver performance is given in the following table, with all values being measured on an R820T RTL-SDR.
Mode
Condition
Sensitivity (dBm)
Codec2 700B
20 db SINAD
-115
Codec2 1400
20 db SINAD
-112
Opus
20 db SINAD
-102
Narrow FM
12 db SINAD
-118
In the future Adrian hopes to expand the software to include features like VOIP integration, SSB transceiver, DTMF & CTCSS encoder/decoders, multi-channel RX, HD video, remote control and a GUI improvement.
This is just an announcement post to say that the RTL-SDR Blog V3 is now back in stock at Amazon USA and should be ready for shipping from there soon.
These include our bundle that comes with the new multipurpose dipole antenna kit for $25.95 USD. Please go to rtl-sdr.com/DIPOLE for further information about the new dipole kit.
The Outernet Dreamcatcher has recently gone on sale and is now only $39 USD. Previously it was priced at $79 and $59 USD. The Dreamcatcher is an RTL-SDR and computing board all built onto the same PCB. It has two SMA inputs - one is an L-band filtered and amplified input and the other is a standard wideband port good for all frequencies covered by a standard R820T2 RTL-SDR. For $39 it appears that you get the board itself, and a WiFi dongle, but no antennas, cables or SD cards are supplied with the unit.
In you are interested in the Dreamcatcher then back in June we posted a comprehensive review of it as well as their ceramic L-band patch antenna. Since then we've found that the Dreamcatcher has become much more stable and is very useful for applications like setting up a dedicated ADS-B receiver/feeder. At this price the Dreamcatcher is even better value than using a Raspberry Pi 3 plus external RTL-SDR dongle which can end up costing over $60 USD.
According to Outernet stocks appear to be fairly limited so this price probably won't last for too long.
Note: We'd advise not purchasing this for use with the Outernet data signal as we're unsure if that signal is going to last for much longer. Purchase it as a general purpose radio/computer instead.
A number of people have asked how to use SDR#'s SpyServer with an RTL-SDR. In this tutorial we will show how to set up SpyServer on both Windows and Linux systems. We try to assume as little knowledge as possible, but we do assume that you have decent experience with computers. Also for the Linux/Raspberry Pi setup we need to assume that you have some basic experience with Linux and setting up Raspberry Pi's.
What is SpyServer?
SpyServer is a free RTL-SDR compatible SDR server that is designed to work with the popular SDR# software. It is actually designed for the Airspy range of products, but the author has also made it compatible with RTL-SDR dongles. Running a SpyServer allows you to connect to and use a remotely positioned RTL-SDR over a network connection (such as a local LAN/WiFi or the Internet). Once connected, using the dongle is the same as if the dongle was directly connected to the users PC.
An example SpyServer Overview (Can use an RTL-SDR instead of the Airspy HF+)
Remote servers are useful as you may want to set up an antenna in a remote location (such as up on your roof or shack), and don't want to run a long lossy coax cable down to the PC. Instead you could run Ethernet cable, or avoid cables by using WiFi. All you'd need is power for a remote computing device like a Raspberry Pi 3. Perhaps you also have a great antenna location at a friends house, or other property and want to access that antenna remotely. Or maybe you want to use your radio while travelling.
SpyServer is similar to another tool that you may already be familiar with called rtl_tcp. However, SpyServer is regarded as superior because it is signficantly more efficient at network usage. Instead of sending the entire raw data like rtl_tcp does, SpyServer only sends the IQ data of the currently tuned in signal. Waterfall data is processed on the server and sent in compressed form. There is one disadvantage to SpyServer in that it requires slightly more powerful computing hardware like a Pi 2 or Pi 3, whereas rtl_tcp can run on the lowest end hardware.
Network usage when streaming with SpyServer will be about 120 KB/s when listening to WFM and about 38 KB/s when listening to narrow band modes for one client being connected. Multiple clients can connect to the SpyServer and share the same currently tuned bandwidth.