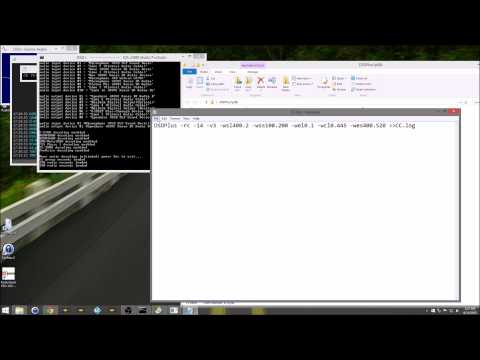
Over on YouTube user AVT Marketing has uploaded a five part video series that very clearly and slowly shows how to use an RTL-SDR to set up trunking and digital voice monitoring. In the videos he uses SDR#, Unitrunker, DSD+ and VBCable for the monitoring.
The first video in the series shows a brief overview of the digital trunking voice set up, and explains a bit about digital voice communications. The second video shows how to install an RTL-SDR, and walks you through downloading Unitrunker and DSD+. The third video is a tutorial about SDR# and also explains how trunking radio systems works. The fourth video shows how to install Unitrunker, DSD+, VBCable, and how to configure each program. Finally the fifth and last video in the series shows the final steps in using Unitrunker and DSD+.
This looks like a very good video series, especially for those that like to see every step in the process played out in full.
Cheap Digital Trunked Scanning Using SDR for the Absolute Beginner
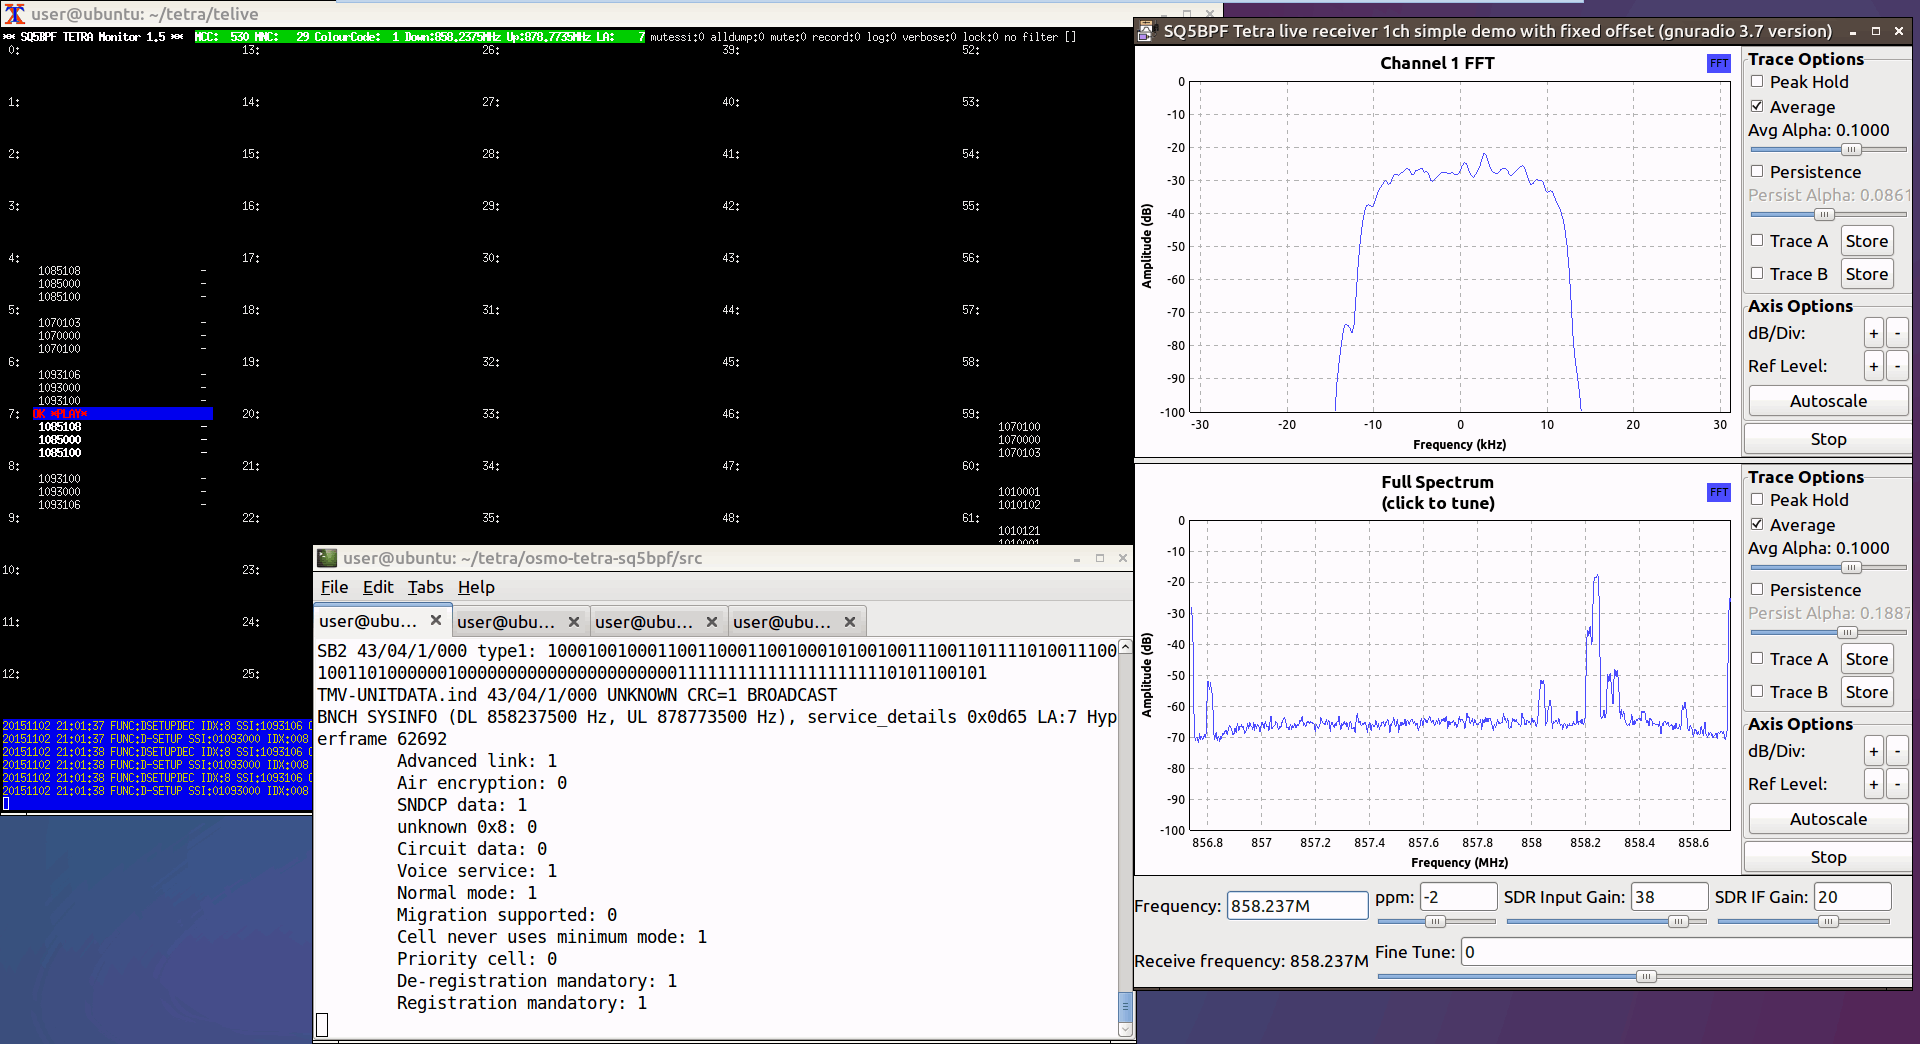
TETRA is a type of digital voice and trunked radio communications system that stands for “Terrestrial Trunked Radio”. It is used heavily in many parts of the world, except for the USA. Telive is a decoder for TETRA which is compatible with RTL-SDR dongles, and has been around and in use for almost 2 years now. If you have unencrypted TETRA signals available in your area it can be used to listen in on them.
However, now a TETRA experimenter by the handle of “cURLy bOi” has released a new prototype of a telive modification that works on Windows systems. It makes use of the GNU Radio for Windows development. The telive Windows file can be downloaded from curly’s webserver. His reademe file shows how to install and use the software and it reads:
This has been put together as lowest-effort configuration to run telive on Windows system. I have also optimized to process (for example adding the CQPSK block to GRC since the python code in the original telive package is IN FACT some unused part of GNU Radio)
Warning: ——— This package contains pre-compiled binaries that work on my 64-bit system. I have compiled them inside the M-SYS2 package. If you don’t trust me, you can follow the installation guide from telive docs, just be prepared you are going to need a lot of packages for the M-SYS2 (pacman -S gcc automake git wget, etc.)
Install: ——— 1) Download GNU Radio for Windows from http://www.gcndevelopment.com/gnuradio/downloads.htm and install 2) Copy contents of gnuradio_mod to c:\Program Files\GNURadio-3.7\ 3) Download and install M-SYS2 from https://sourceforge.net/projects/msys2/ and install 4) Copy contents of msys_root to your M-SYS2 installation directory 5) Download FFmpeg for Windows (64-bit Shared) from https://ffmpeg.zeranoe.com/builds/ and extract everything from bin to usr\bin in your M-SYS2 installation directory 6) In M-SYS2 shell execute “pacman -S socat” 7) Get GNU Radio Companion (GRC) projects from original telive package at https://github.com/sq5bpf/telive/tree/master/gnuradio-companion (only udp or xmlrpc, pipes won’t work) 8) Open whatever GRC project you want to use and edit it: – Delete the link between (all) Fractional Resampler and UDP Sink – From the modules on the right (ctrl-f to search) drag CQPSK Demod to project (If you don’t see CQPSK Demod then you have messed up #2) – Connect Fractional Resampler -> CQPSK Demod -> UDP Sink – Change UDP Sink Input Type to Float in its properties – Save
Use: —— 1) Open GRC project of your choice (already with the CQPSK Demod box) 2) Use the Project/Execute to run the project from the GRC – OR – If you had headless (without GUI) project, use Project/Generate option to generate top_block.py file in the GRC project directory. Then open GNURadio Command Prompt from Start menu, the use this command c:\Program Files\GNURadio-3.7\gr-python27\python.exe -u c:\path\to\grc\project\top_block.py This will enhance performance. 3) Open new M-SYS2 shell for every channel in that project and execute command “receiver1udp X” where X is the number of each channel in GRC project 4) Open new M-SYS2 shell, resize it to 203×60 and execute: – cd /tetra/bin – ./rxx OR ./rxx_xmlrpc (if you are using XMLRPC GRC project) You can edit these files to match your preferences 5) That’s it, should work.
Note that we have not tested this out ourselves yet and can’t guarantee the file safety or that it works, but we have no reason to believe that it wouldn’t be safe or not work.
Luke uses his own Trunk Recorder software and writes that he has modified it to support multiple SDR’s. His software has the following description:
Trunk Recorder is able to record the calls on a trunked radio system. It uses 1 or more Software Defined Radios (SDRs) to do. The SDRs capture large swatches of RF and then use software to process what was recieved. GNURadio is used to do this processing and provides lots of convienent RF blocks that can be pieced together to do complex RF processing. Right now it can only record one Trunked System at a time.
Trunk Recorder currently supports the following:
P25 & SmartNet Trunking Systems
SDRs that use the OsmoSDR source ( HackRF, RTL – TV Dongles, BladeRF, and more)
Ettus USRP
P25 Phase 1 & Analog voice
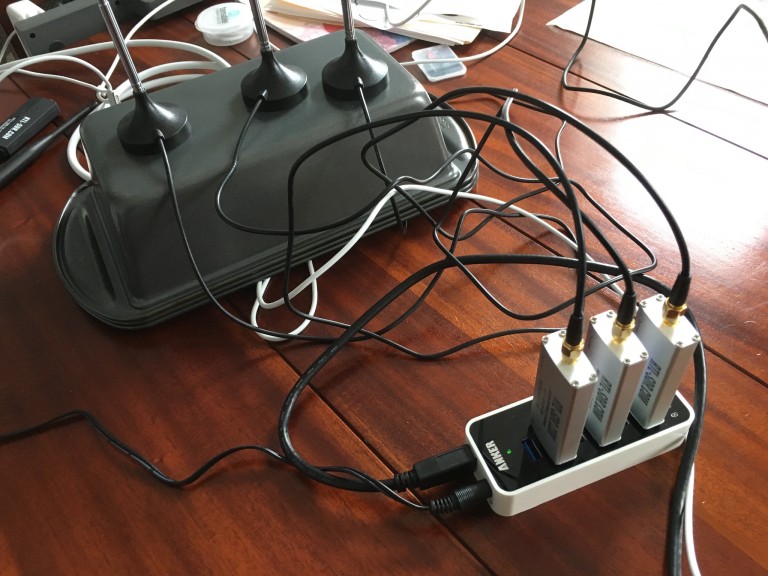
Luke also mentions that using three RTL-SDRs like this seems to be more efficient on the CPU than using a single SDR that has 8 MHz of bandwidth due to the amount of down sampling that needs to be done on larger bandwidth SDRs.
When I was using a single SDR, each Recorder had to take in the full 8MHz and pull out the small 12.5KHz that was interesting. The end results is that I could only record about 3 channels at once before the CPU got overloaded. Since that control channel was going at the same time, that was the equivalent of about 32MHz of bandwidth to process.
With the RTL-SDR, each Recorder only has to look at 2MHz, which puts a lot lighter load on the CPU. Roughly speaking, having 3 Recorders active, plus the control channel would mean that only a total of 8MHz was being processed. As you can see, this means that it scales much more efficiently.
Using three RTL-SDR’s to monitor a 6 MHz trunking system.
DSD+ stands for Digital Speech Decoder Plus and is a software program that can allow you to decode digital voice signals such as P25 and MotoTRBO/DMR. DSD+ is under continual development, and in their last public update they began offering early access to the latest DSD+ features in development through their fast lane subscription. The fast lane subscription costs $10 USD for one year and $25 for unlimited early access. Information about joining the fast lane service can be found in the readme file of the latest DSD+ 1.074 public release.
Over on YouTube user John Miller has been testing the latest early access version DSD+ 1.08t. This new version adds trunking support which allows you to follow conversations. Previously other software like Unitrunker was required to follow the trunking signal. On YouTube John has uploaded a video first showing trunking in action, and a second video showing how to set up DSD+ 1.08t for trunking.
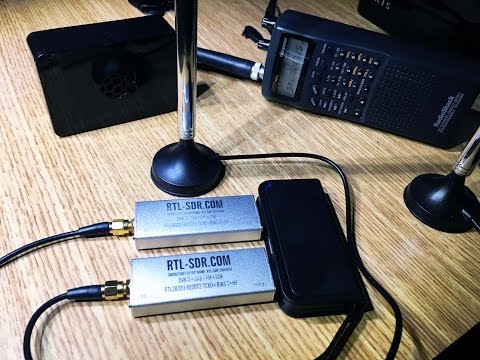
Usually to listen to trunked radio systems, two RTL-SDR dongles are required. One for decoding the trunking control channel and another for listening to the audio channel. However if the audio channels are within the same chunk of received bandwidth as the control channel it is possible to use just one dongle to follow trunked conservations.
NOTE: There is now a plugin available for SDR# that will decode TETRA fairly easily. It is still in beta and misses a few features found in telive. Check it out in this post.
TETRA is a trunked radio communications system that stands for "Terrestrial Trunked Radio". It is used heavily in many parts of the world, except for the USA. Recently, a software program called Tetra Live Monitor (telive) was released on GitHub. This software can be used along with the (patched) Osmo-TETRA software to monitor and listen to unencrypted TETRA communications.
Below we show a tutorial on how to listen to TETRA communications using a RTL-SDR RTL2832U software defined radio. This tutorial is based heavily on the telive_doc.pdf file that is written by the author of telive and included in the telive git download. Please refer to that pdf file for further details on how the software works. We have modified their tutorial slightly to make it a little easier to understand. As this code is still under heavy development if you have trouble please check their PDF file for modifications to the procedures.
Most of this tutorial is performed in Linux and we assume that you have some decent Linux experience. We also assume you have some experience with the RTL-SDR dongle and have a decent antenna capable of picking up TETRA signals in your area. If you don't have a RTL-SDR dongle yet see our Buy RTL-SDR dongles page.
Note: As of October 2016 there is now a Windows port of the Telive decoding software available. This may be an option for you if you prefer to run in Windows. More information here.
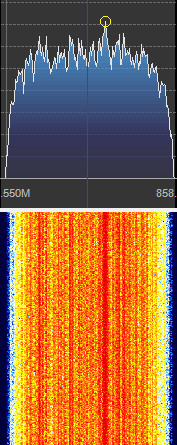
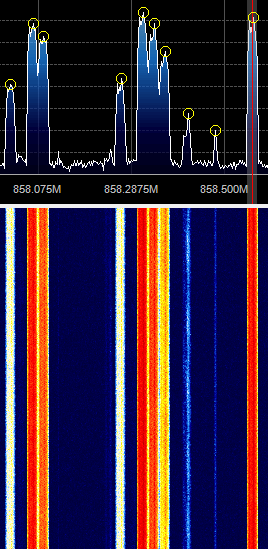
First, we will need to find some TETRA signals. The easiest way to do this is to open SDR# or another program like GQRX and look for them. TETRA signals are continuously broadcasting with a bandwidth of around 25 kHz. In most European countries they can be found at 390 - 470 MHz. In some countries they may be found around 850 MHz or 915 - 933 MHz. There may be several TETRA signals grouped in close proximity to one another. See the example images below.
A Zoomed in TETRA Signal
A Grouping of TETRA Signals Zoomed Out
An example audio clip of a TETRA signal recorded in NFM mode is shown below.
Once you have found some TETRA signals, record their frequencies. Now close SDR#, or whatever software you were using and boot into Linux. In this tutorial we use a 32-bit Ubuntu 14.04 virtual machine running on VMWare Player as our Linux system. Some of the commands may vary if you are using a different system.
The popular trunking decoding software Unitrunker now supports the RTL2832U R820T RTL-SDR directly in its new version. This means that extra SDR receiver software like SDR# is no longer required to use Unitrunker.
In a normal radio system, one company (or talkgroup) might use a single frequency for radio communications. However, this is very inefficient as the frequency may not be in use for the majority of the time. In a trunked radio system, a small set number of frequencies are shared between a large number of talkgroups. Each radio receives a special computer controlled control channel. The control channel determines a vacant frequency that a particular talkgroup should use. This helps to make radio frequency allocations more efficient.
Because a talkgroup might switch between various frequencies often, it can make listening to a conversation difficult for radio scanners. Unitrunker can be used to decode the control channel and follow a voice conversation as it hops across various frequencies. With two RTL-SDR dongles you can set up a trunking receiver station with just Unitrunker. What follows below is a tutorial on how to set this up.
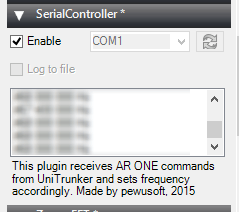
Reddit user rtlsdr_is_fun has updated the SDRSharp Unitrunker trunking plugin so that it works with the latest versions of SDRSharp. See the thread here for more information and a download link. Use this plugin to allow Unitrunker to control SDRSharp, so you can listen to trunked radio conversations. A new tutorial on doing this can be found here.