Setting up and Testing Osmo-FL2K
A few days ago we posted about Osmo-FL2K, which is a newly released piece of software by Steve M from Osmocom that turns a common $5-$15 USB to VGA adapter into a transmit only capable SDR. It is very complimentary to the RTL-SDR.
Any USB to VGA adapter that contains a FL2K chip appears to be compatible and yesterday we received one and have been playing with it. This post is a demonstration of some of the results.
Hardware Used
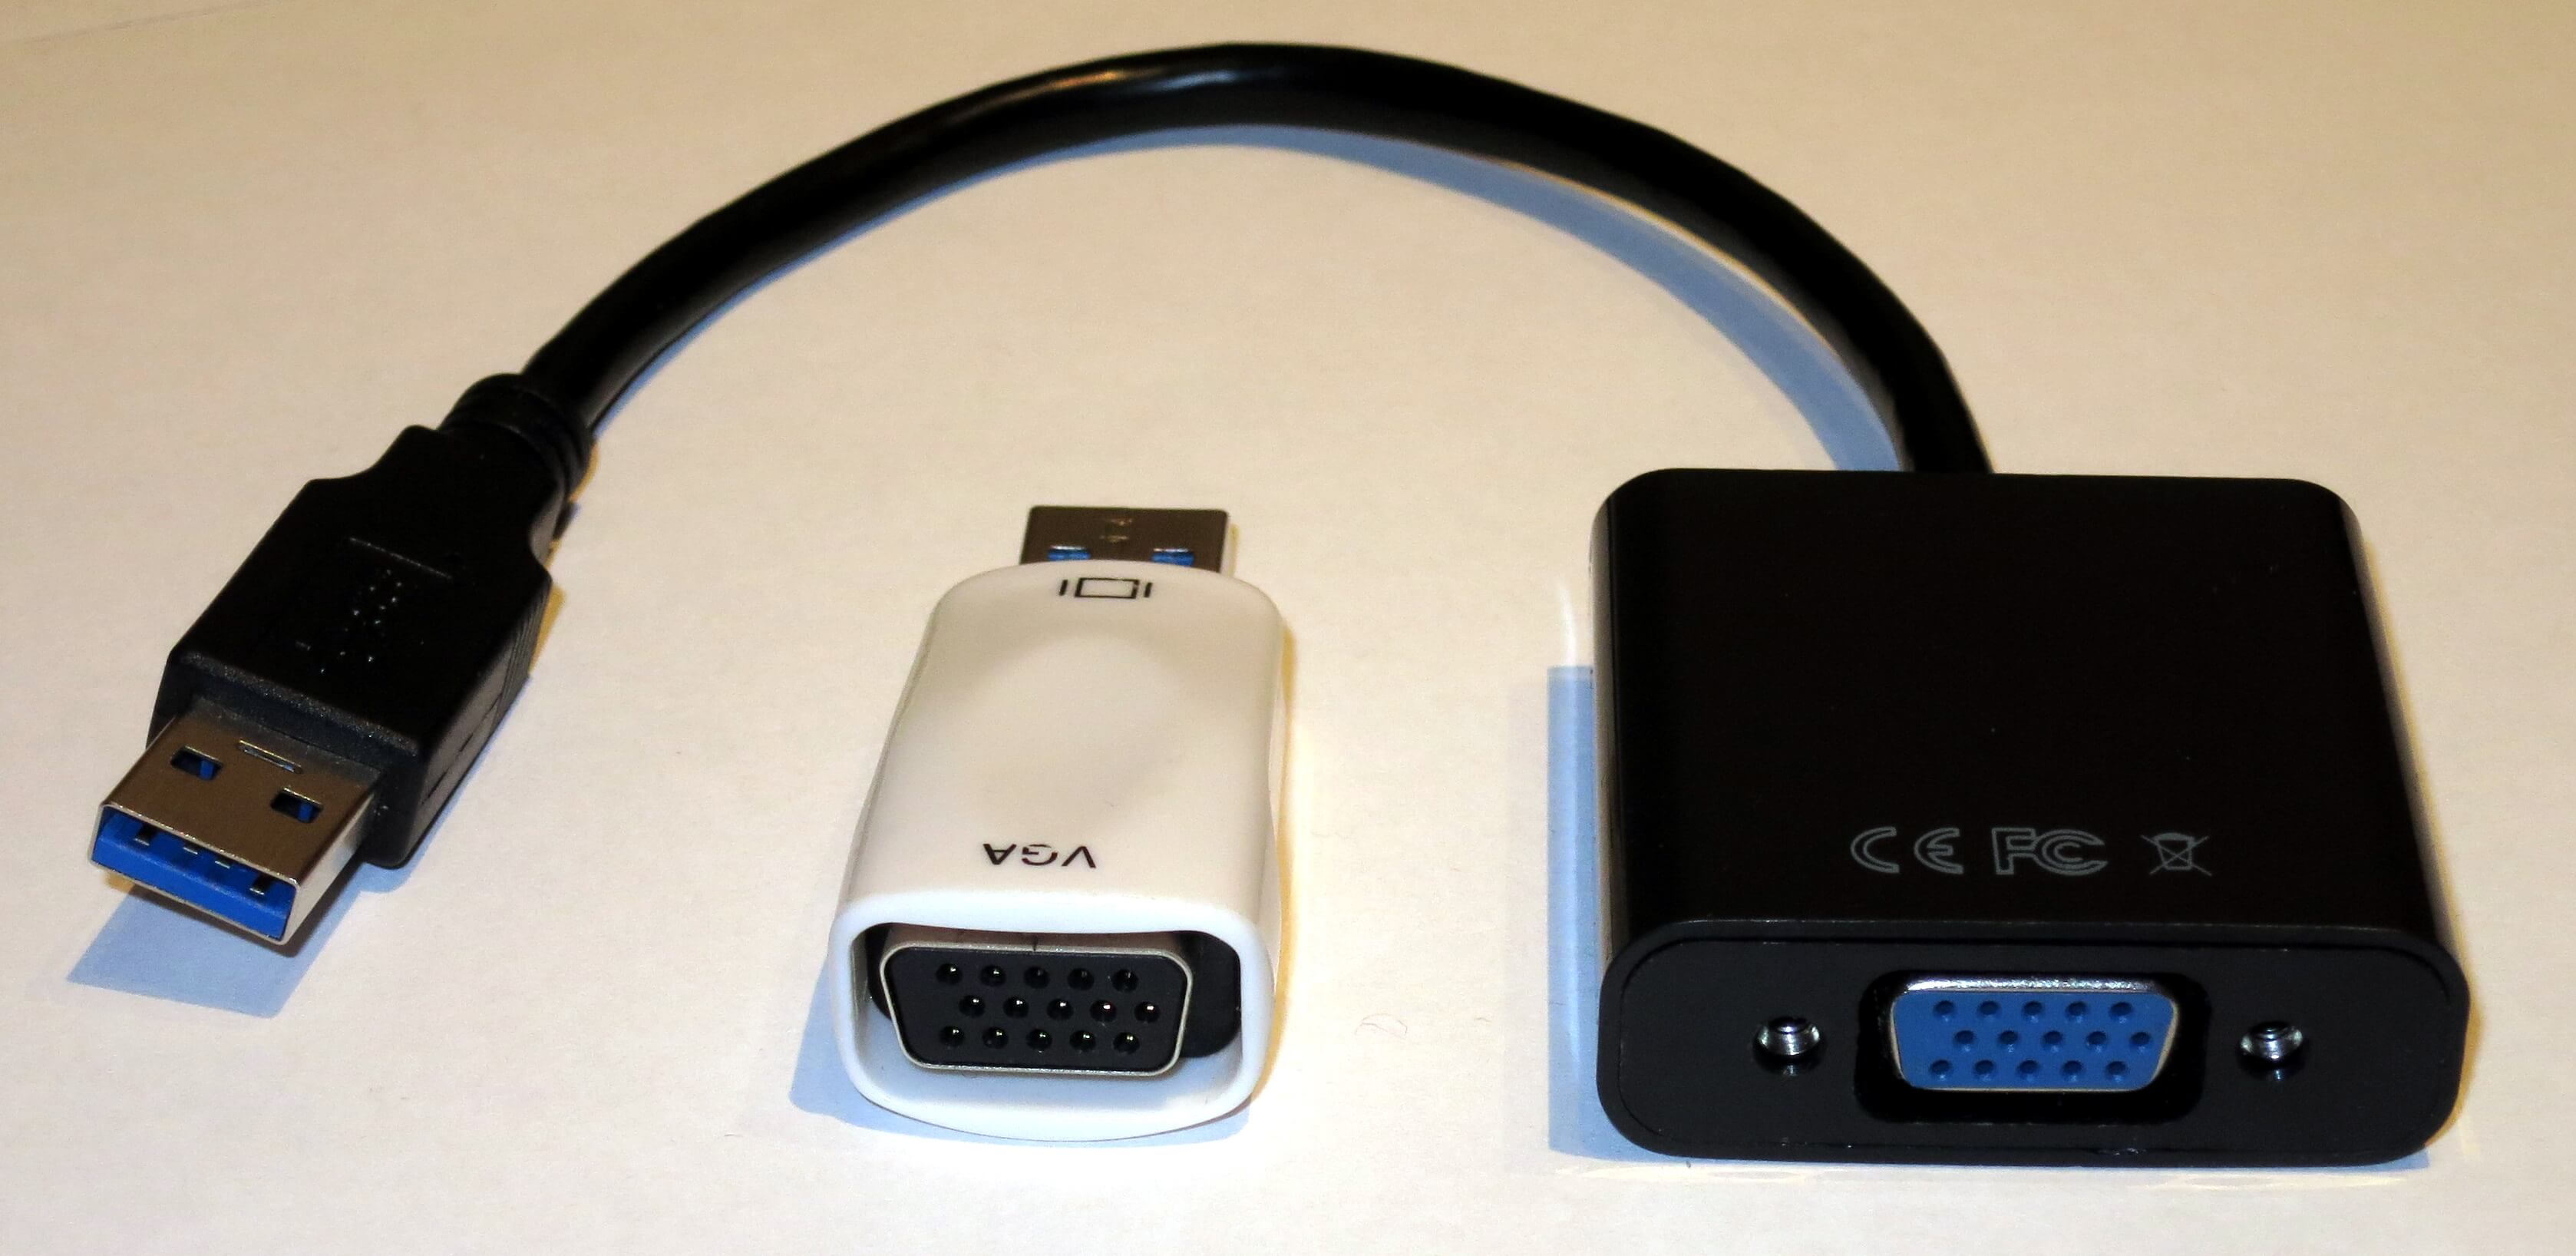
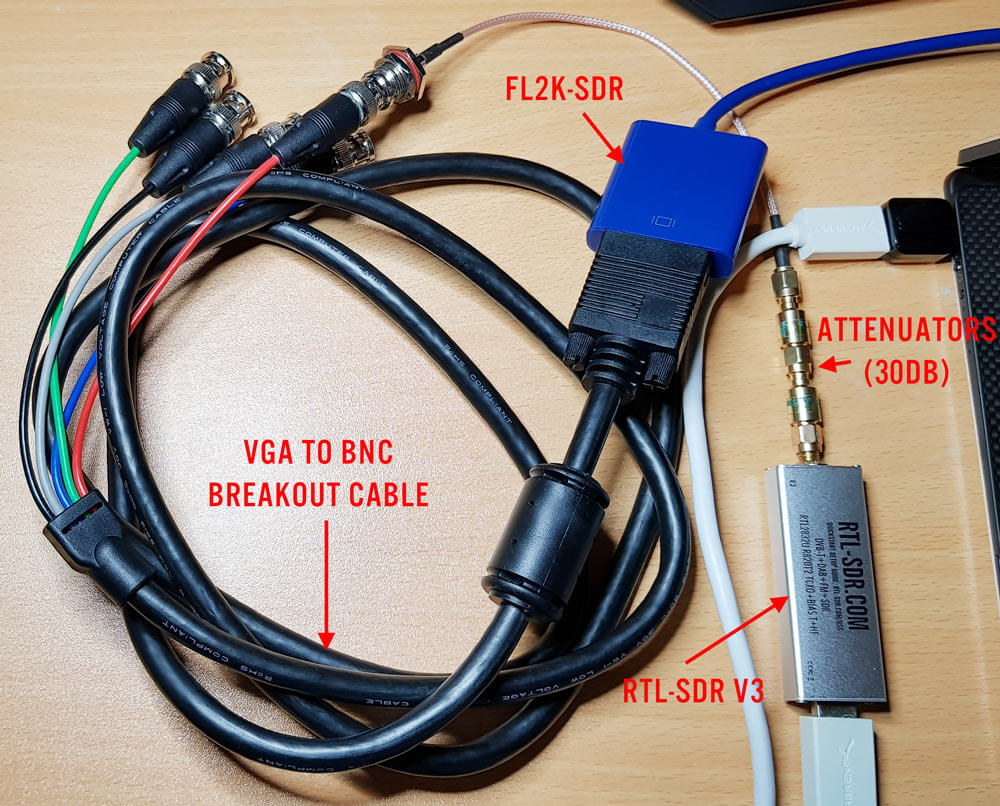
- The cheapest USB to VGA adapter found on the market. It seems all of the low cost $5 - $15 adapters that indicate "USB 3.0 to VGA", and max resolutions of 1920 x 1080 are compatible as they use the FL2K chip. More expensive units are not compatible. Compatible units all have a similar design (box at the end of a short USB cable, although there are other types too). The brand does not matter. (Amazon) (Aliexpress)
- A VGA to BNC breakout cable to connect the FL2K SDR directly to an RTL-SDR (via a BNC to SMA adapter) without illegally transmitting over the air. The Red color breakout is the one connected to the TX pin. (Amazon) (Aliexpress)
- A low cost 20dB or more attenuator to avoid overloading the dongle. (Amazon) (Aliexpress)
Setup
Note that you must have a USB 3.0 port to use Osmo-FL2K, although a USB 2.0 might work although at significantly reduced bandwidths.
Osmo-FL2K is Linux only at the moment, but it may be possible for someone to compile a Windows version, just like with RTL-SDR. Instructions for downloading and compiling the software are available on the official wiki. It is a standard git clone, cmake, make type procedure which can be done in 2 minutes. You'll also need to probably do an 'sudo apt-get install sox pv' if you want to run the WBFM example.
First we tried to boot into the GNU Radio Live Linux bootable image on a tablet like laptop that only has USB C 3.0 ports. Unfortunately while the FL2K-SDR was recognized, and Osmo-FL2K detected it, there was no signal coming out during test transmissions. It seems that there may be issues when a USB C to USB Type A converter is used.
Next we tried the GNU Radio Live Linux bootable image on a desktop PC and this time Osmo-FL2K worked fine when plugged into a USB 3.0 port. However, plugging it into extended ports seemed to cause it to not be detected. So if you're having trouble getting Osmo-FL2K to work, try other USB 3.0 ports on your PC, and avoid USB C adapters if possible.
We also tried Virtual Box, however the FL2K-SDR wouldn't connect to the Linux guest system, even though USB 3.0 was enabled and the extensions were installed. For VMWare it appears only that the paid versions support USB 3.0.
Testing
WBFM
Following the instructions on the official Osmo-FL2K page we were able to get an WBFM transmission up and running almost instantly. The provided example routes audio from your soundcard into the FL2K-SDR, causing it to transmit WBFM audio at 95 MHz. With this we were easily able to broadcast audio from YouTube to another PC via the FL2K-SDR although there is about two seconds of delay.
To choose the frequency you choose the carrier frequency and the sample rate, and then the transmit frequencies will be the sample rate +/- carrier frequency + harmonics.


Harmonics
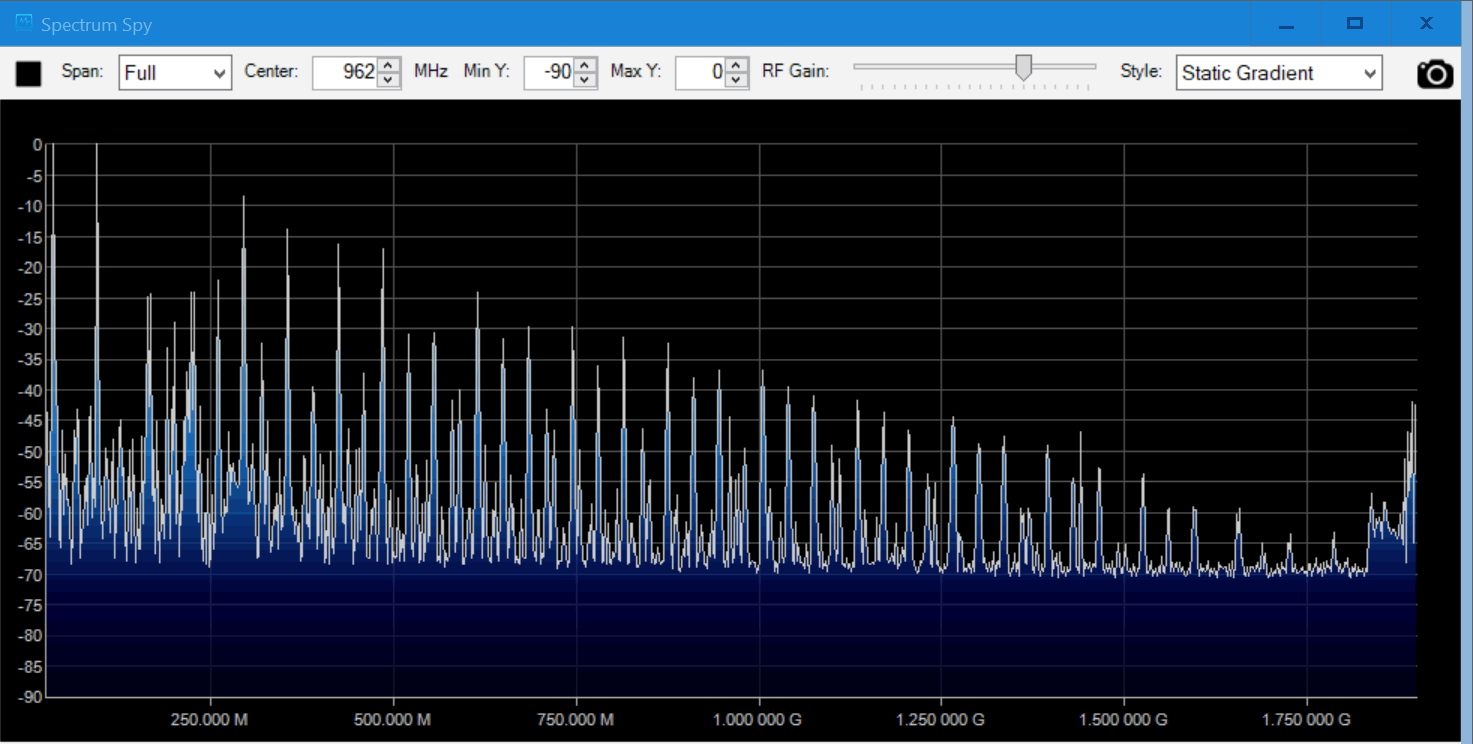
Speaking of the harmonics we had a look at them using an Airspy and the SpectrumSpy software. The image below shows that the harmonics of a signal transmitted at 95 MHz extend all the way up to the maximum range of the Airspy at 1.8 GHz, and probably further. So filtering is very necessary if you ever want to transmit over the air.
Note that when broadcasting at 95 MHz (sample rate 130 MHz, carrier 35 MHz), there is also a strong signal at the carrier frequency. So band pass filtering would be required.
DVB-T
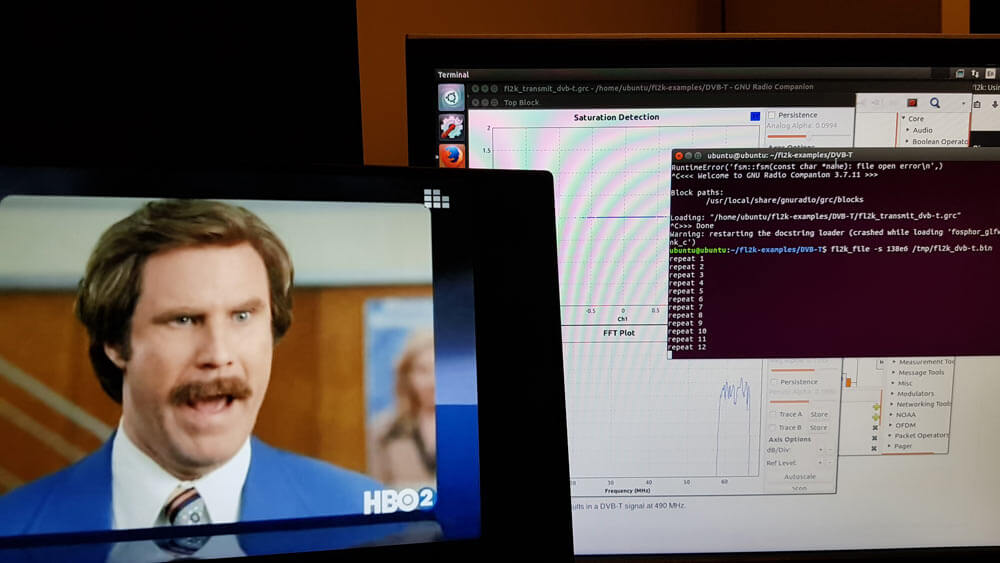
We also tested the DVB-T example found at https://github.com/steve-m/fl2k-examples, which worked flawlessly. By using the connected RTL-SDR dongle with the original DVB-T drivers we were able to receive a transmitted stream at 490 MHz using the ProgDVB software.
To do this follow the instructions in the fl2k-examples/DVB-T readme file to generate samples which Osmo-FL2K can transmit. Then on another PC install the DVB-T drivers for the RTL-SDR, and use ProgDVB to scan 490 MHz by manually editing the multiplexes options.
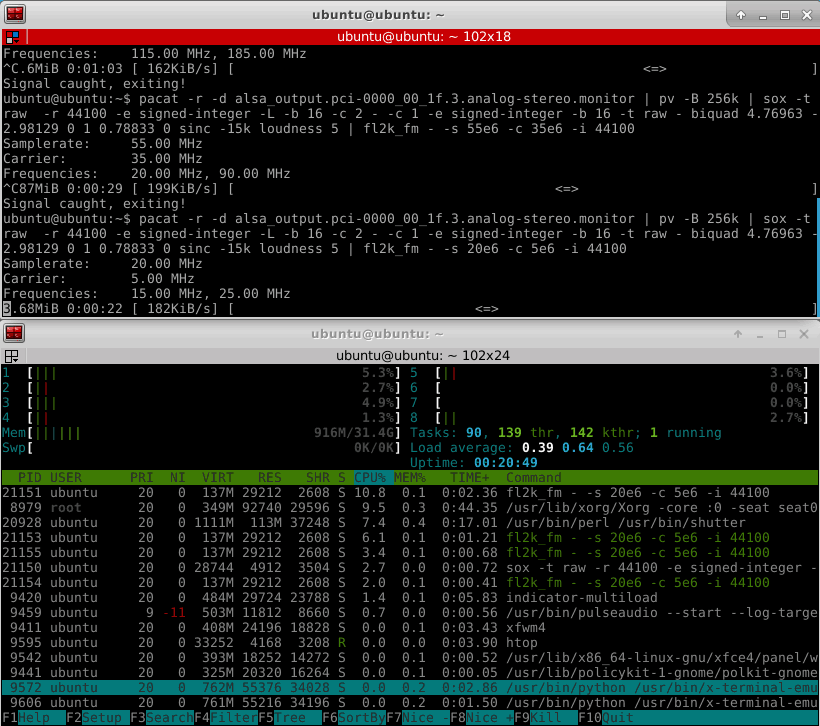
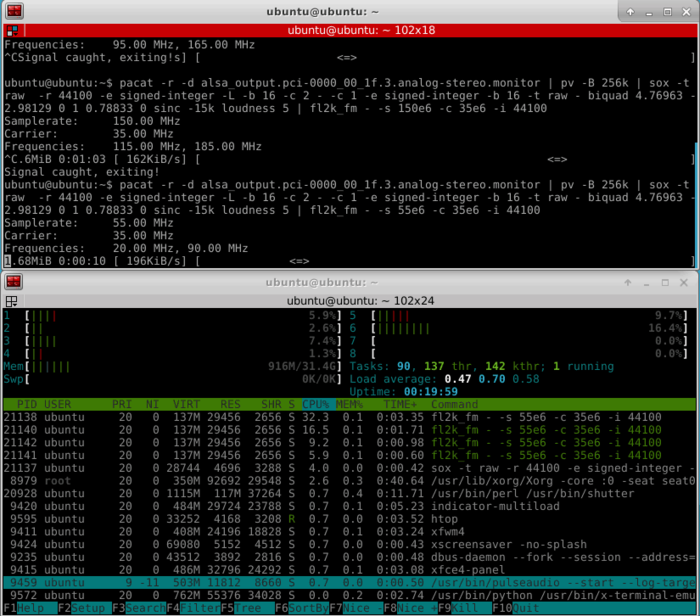
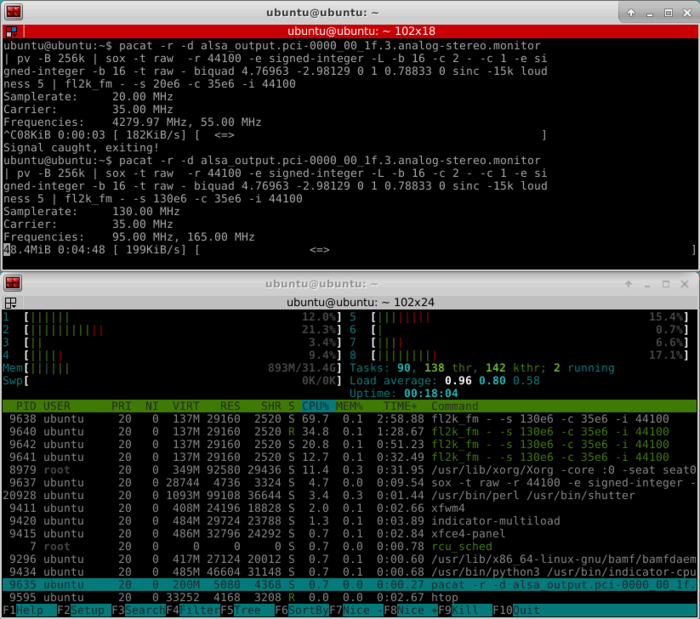
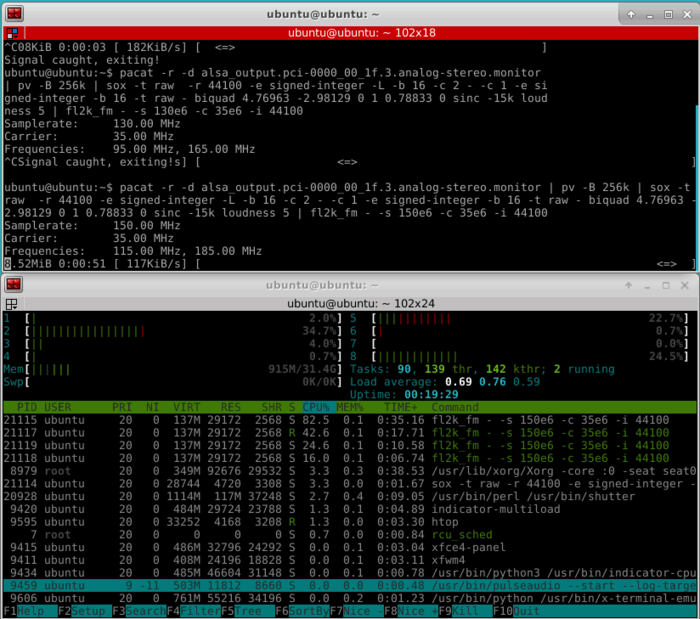
CPU Usage
Osmo-FL2K is quite CPU intensive, especially if higher sample rates are used. For this reason it might struggle on singe board computers that support USB 3.0. The images below show some CPU usage examples for sample rates of 20, 55, 130 and 155 MS/S. The test PC uses a fairly powerful i7-6700 CPU.