Thank you to Simone Spadino (SWL ID I8926BA), who wrote in to share his low-cost WSPR setup. WSPR (Weak Signal Propagation Reporter) is an amateur radio mode designed to test propagation paths using very low-power transmissions, with receiving stations reporting spots in real time to the WSPRnet map.
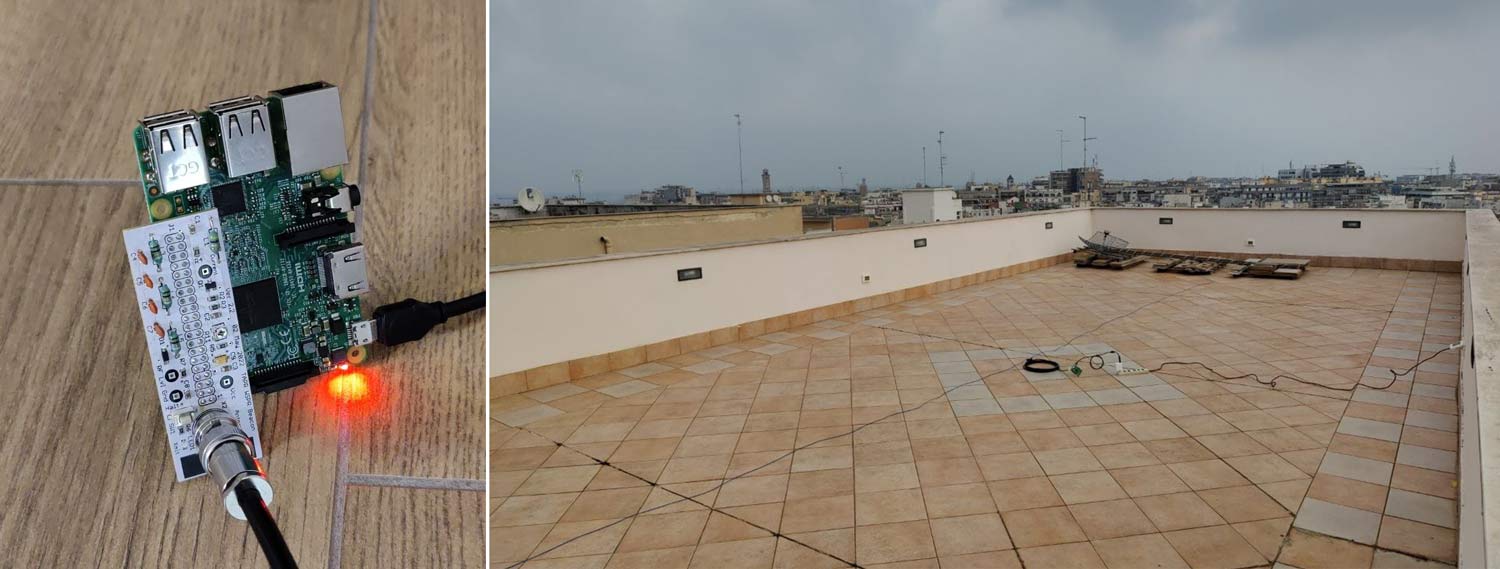
Simone's setup consists of a Raspberry Pi 3B+, which can be made to modulate a square wave RF signal on one of its GPIO pins via the WsprryPi software. Because a square wave generates many harmonics, he used the 20m WSPR shield from TAPR, which provides a low-pass filter to remove them. A dipole made from simple electrical monopole wire was connected to the shield via 50 ohm coax, and the signal was transmitted at 14.0971 MHz.
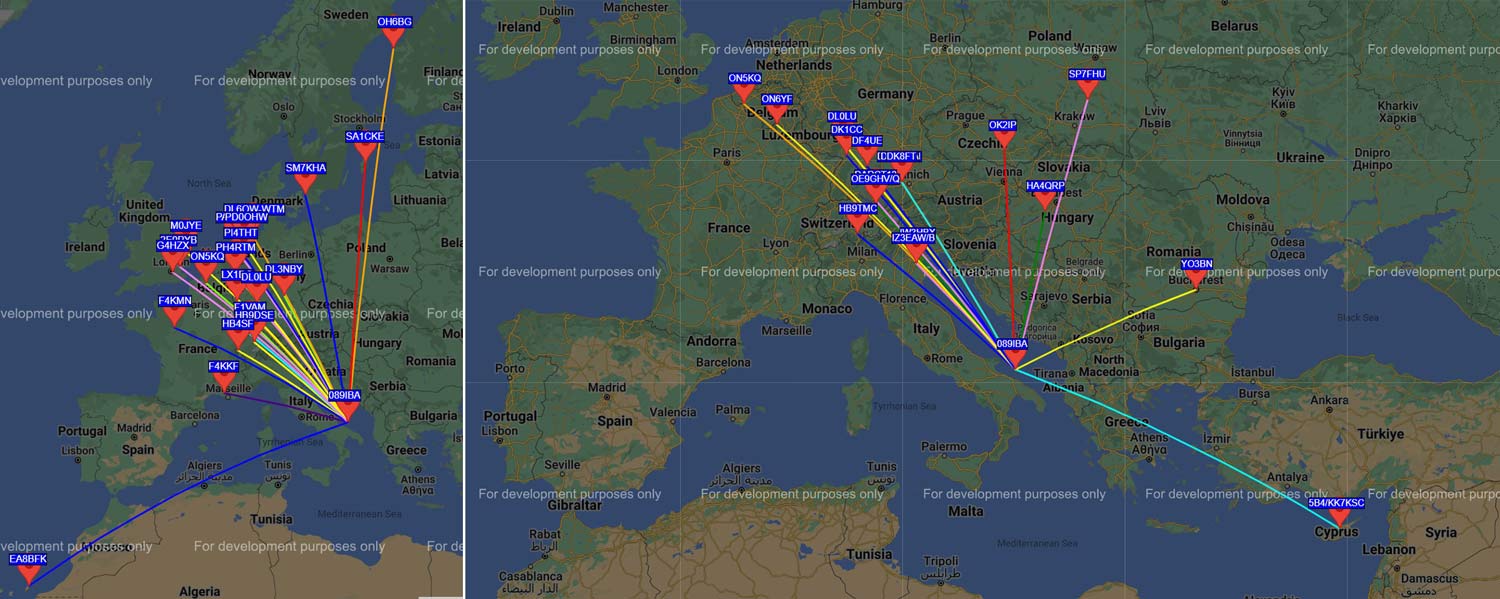
Transmitting from his rooftop in the center of Bari in southern Italy, Simone had his beacon received in England, Finland, Cyprus, and the Canary Islands, all more than 3100 km away. He repeated the experiment a week later with similar results. This is a reminder of how far low-cost hardware can transmit with a resilient protocol like WSPR.
Simone's WsprryPi SetupWSPR Range with the Raspberry Pi 3
Thank you to David Bourgoyne (KK7TCY) for submitting news about his new software called Rigflow, an open source client/server SDR application for amateur radio written in Rust and released under the MIT license.
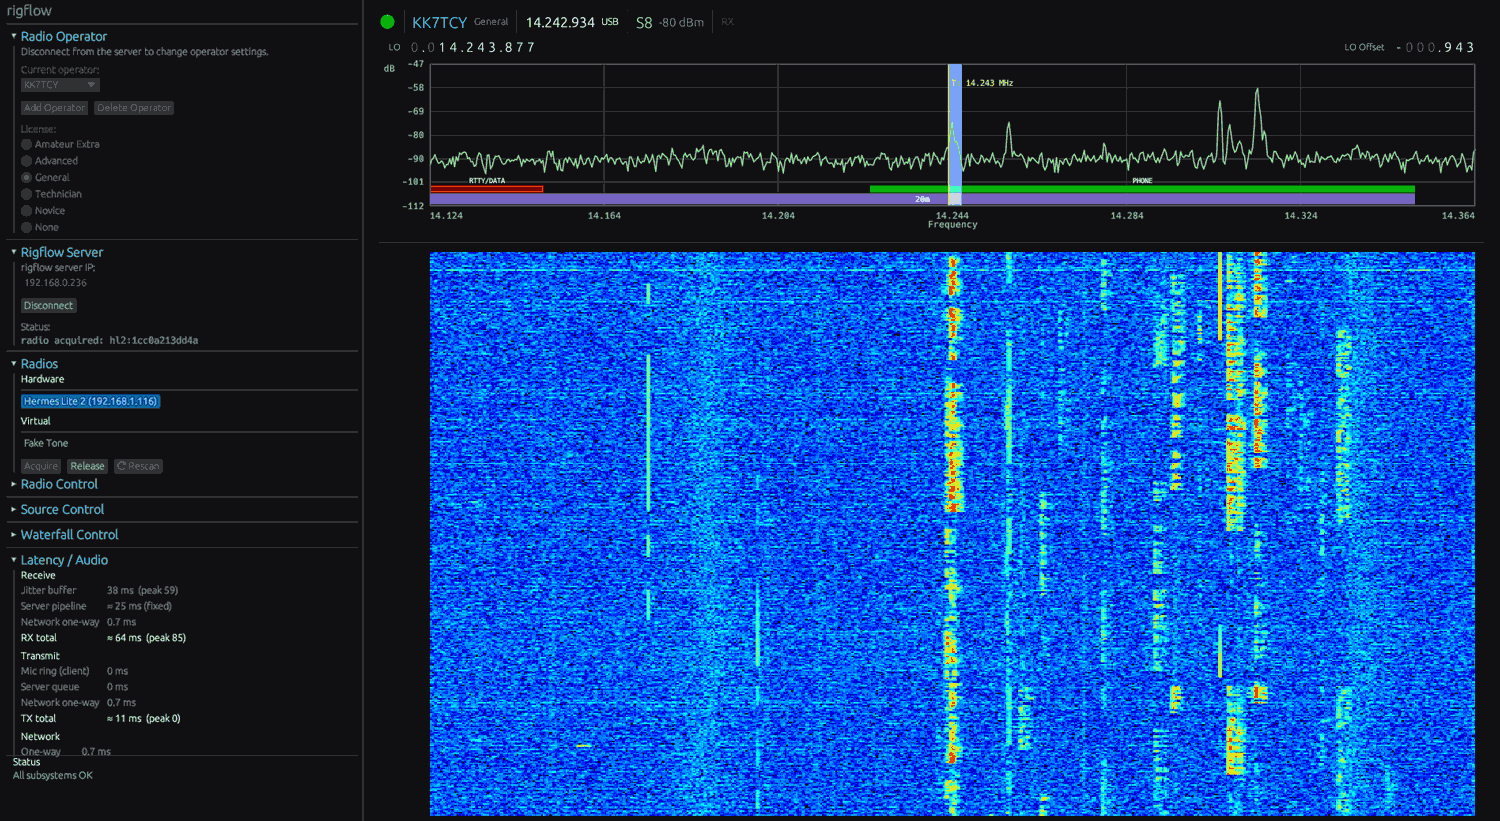
The core idea behind Regflow is to split the radio from the operating position over the network. A lightweight server owns the radio hardware and DSP and runs on a low-power machine right at the antenna, such as a Raspberry Pi, while a desktop client provides the spectrum and waterfall display, tuning, and controls. The two communicate over a small WebSocket control channel plus UDP for media, so you can sit anywhere on the network, and one client can work with multiple radios.
For receivers, the RTL-SDR is supported as a source, including direct sampling HF, and you get WFM, NFM, AM, SSB, CW, and Data modes, a real-time spectrum and waterfall, NR2 noise reduction, AGC, squelch, bookmarks, amateur band and privilege overlays, and IQ recording and playback. Paired instead with a TX capable Hermes Lite 2, the software also transmits, with SSB from your microphone, CW via straight key or text to CW macros, and digital modes like FT8 through WSJT-X over virtual audio or TCI. There is also optional Hardrock-50 amplifier control with band tracking, ATU and SWR/power monitoring over USB serial.
Rigflow can be run on Linux(x86/x64) and Raspbery Pi/ARM as well as MacOS. Prebuilt binaries are available on the GitHub Releases page.
Thank you to Ihar Yatsevich for writing in about his release of rpitx-ui, a modernized fork of F5OEO's popular rpitx project. If you were unaware, rpitx is software that turns a Raspberry Pi (most Pi hardware apart from the Pi 5 is supported) into a low cost RF transmitter by generating signals directly on a GPIO pin, requiring no extra hardware beyond a wire antenna. Ihar writes:
rpitx-ui started as a fork of F5OEO’s rpitx and has evolved into a modernized, easier-to-use version of the original Raspberry Pi RF transmitter project. The goal is to make rpitx easier to build, install, use, and extend on modern Raspberry Pi OS systems.
In rpitx-ui, the build system has been migrated to CMake, the project installs system-wide, and it has been adapted for 64-bit Raspberry Pi OS (Debian Trixie). Most transmitter binaries have been rewritten in modern C++20 with shared DSP, audio, and CLI libraries. SSB and AM now use an internal DSP chain with direct DMA output instead of shell pipelines (removing the large SSB startup delay), NFM is a standalone transmitter with wide/narrow deviation presets, WFM with RDS has configurable PI, PS, RadioText and 50/75 us pre-emphasis, CW/Morse has safer parsing with adjustable WPM, and a new RFgen mode supports noise, sweep, and multitone generation. Audio modes also now accept any libsndfile compatible format rather than only WAV.
The UI itself has been improved with file selection for common modes, loop or once playback, custom messages for POCSAG/RTTY/CW, Opera call sign input, SSB sideband selection, NFM deviation selection, and RDS parameter setup. Full source and build instructions can be found on the rpitx-ui GitHub page.
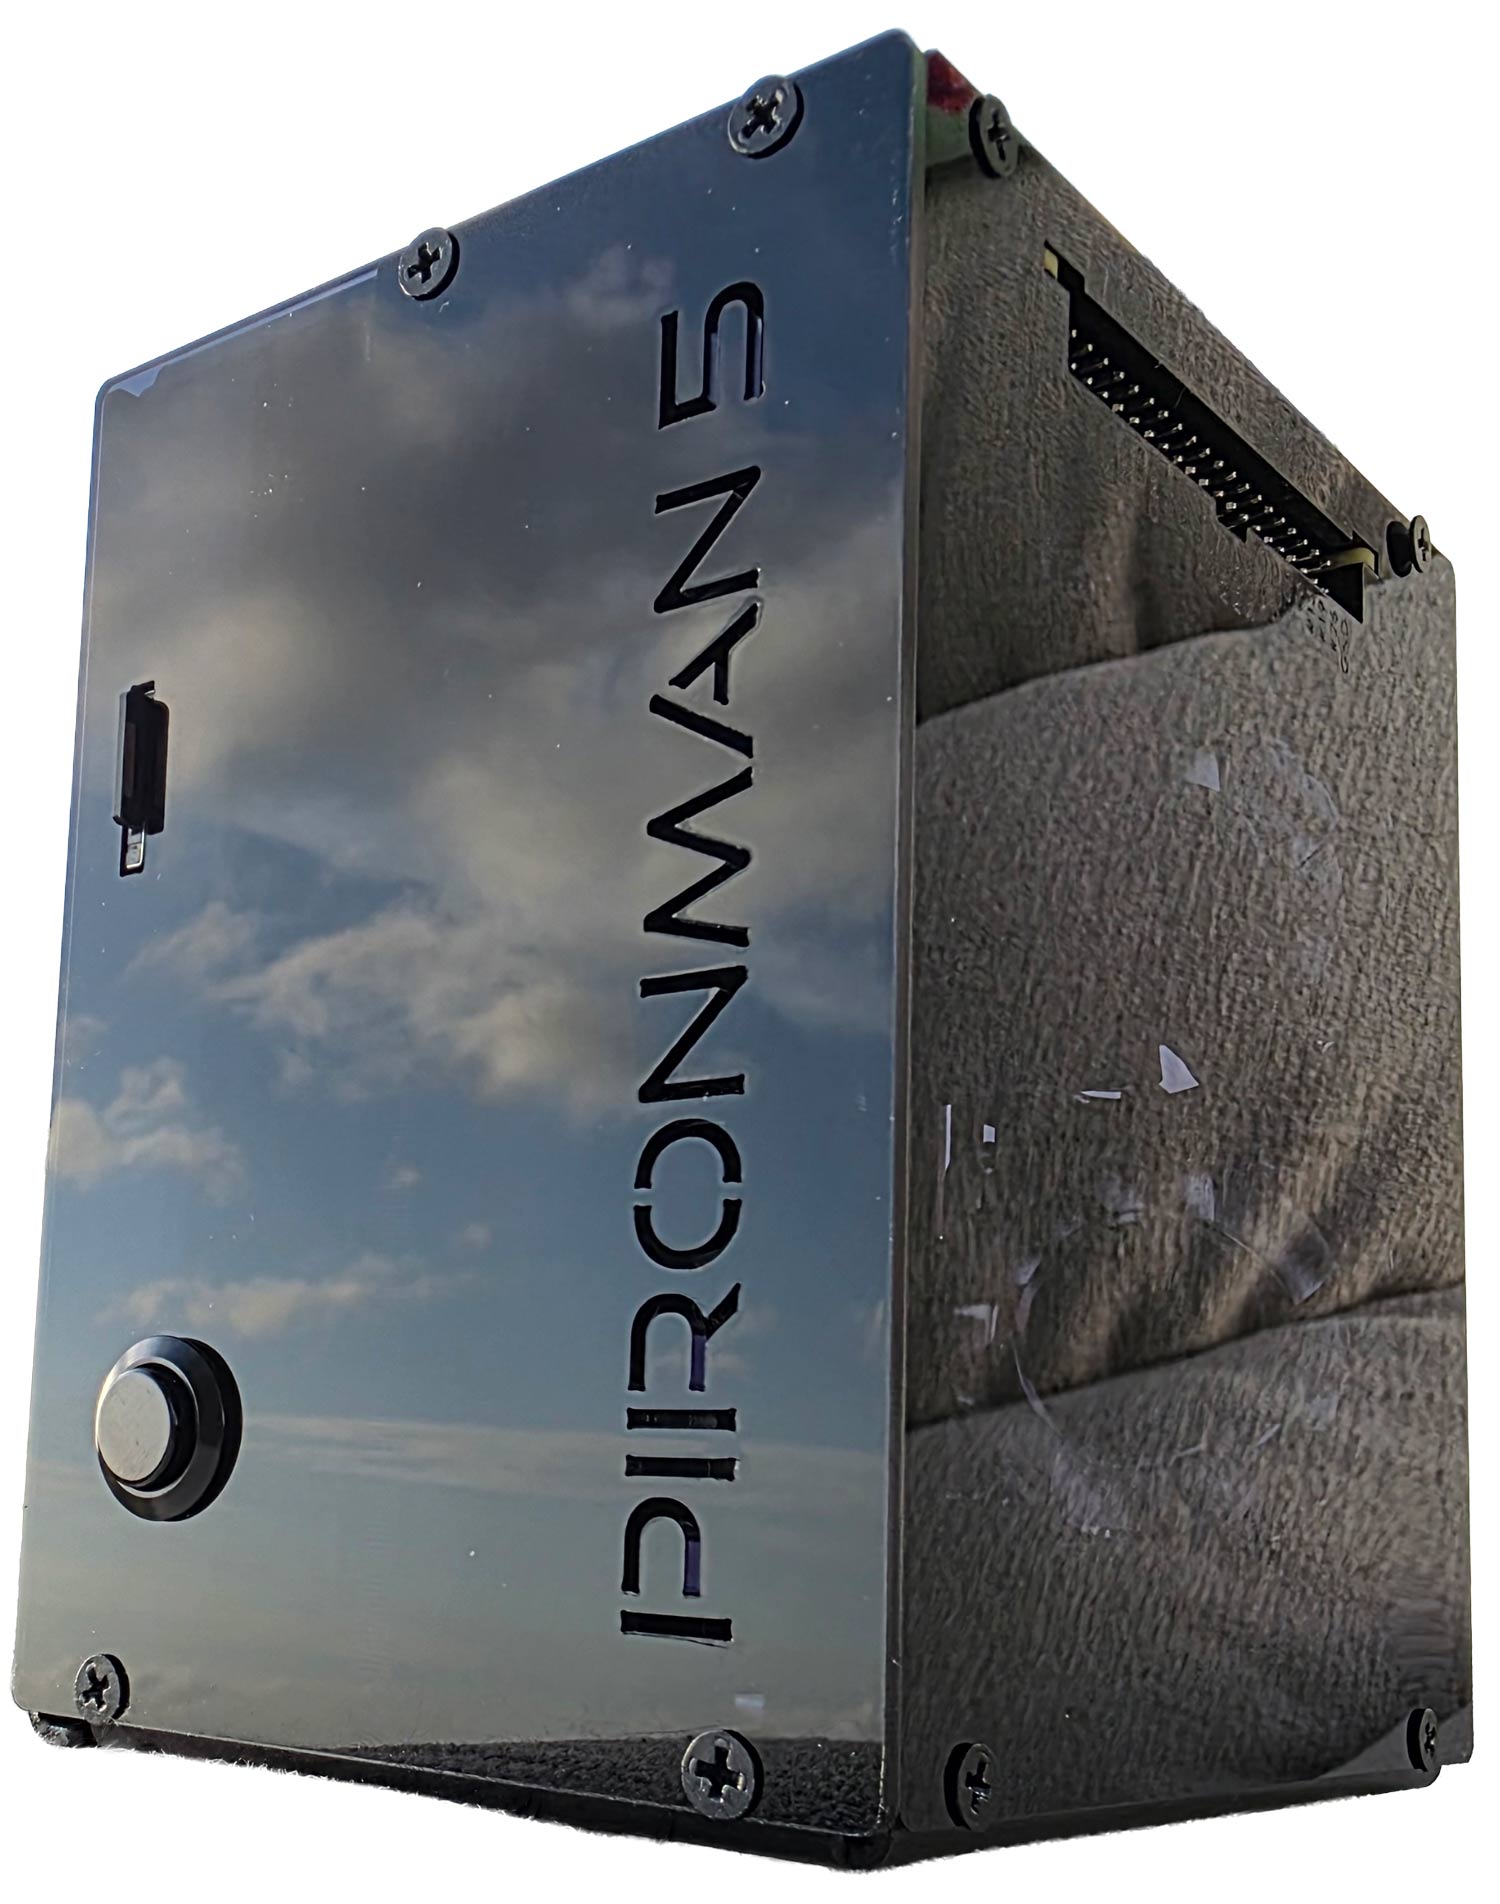
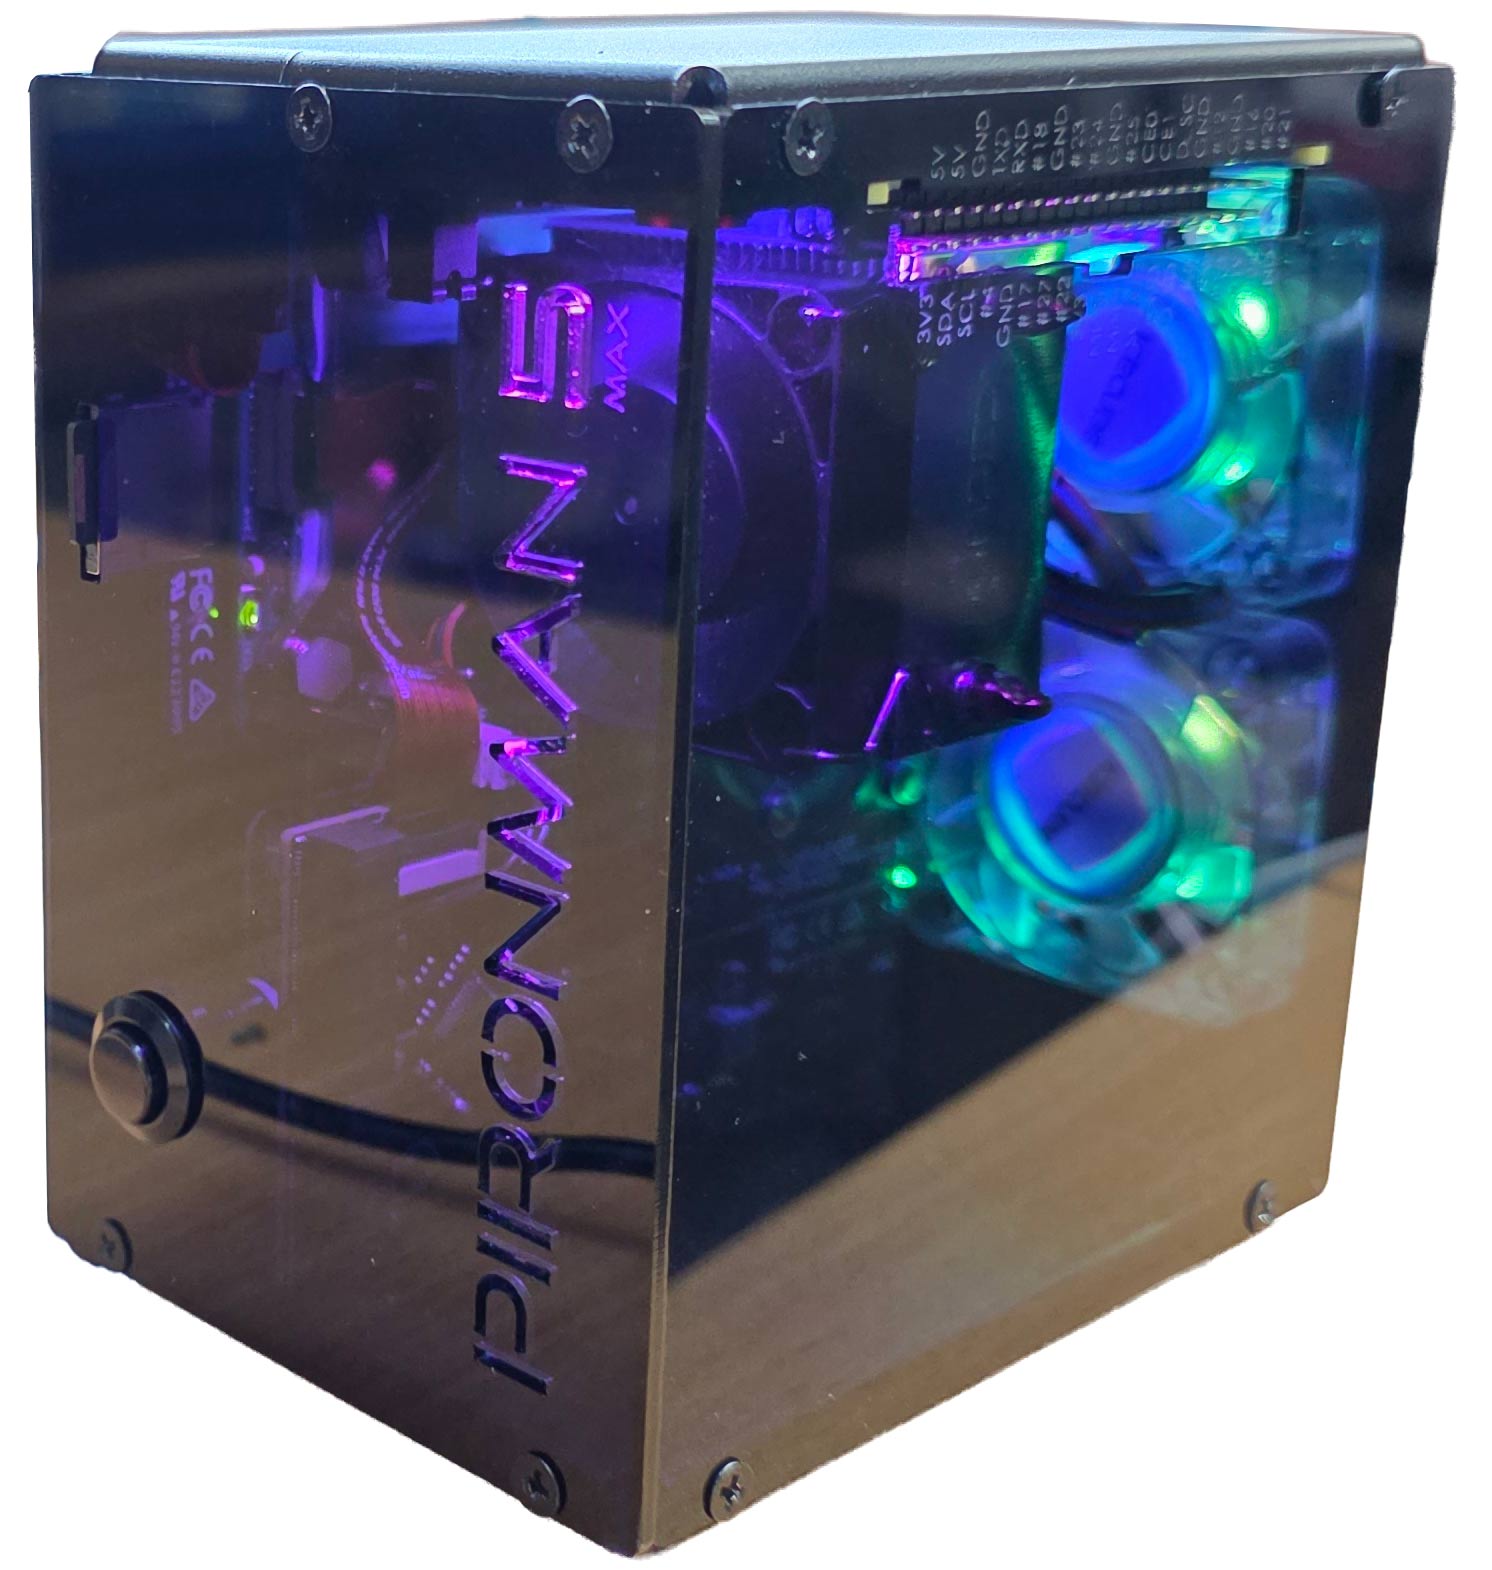
Recently, SunFounder sent us a free review unit of their latest "Pironman 5 MAX" enclosure for Raspberry Pi 5 devices. While not directly related to SDR, we thought we'd accept the unit and review this product, as RTL-SDRs are often used together with Raspberry Pi 5 single-board computers. Depending on the number of SDRs connected and the software used, SDR applications can consume a significant amount of CPU, causing heat and throttling down of CPU speeds; therefore, adequate cooling may be necessary.
The Pironman 5 costs US$94.99 if purchased directly from the SunFounder website, and they advertise that US duties and EU VAT are included in the pricing. There is also the slightly lower Pironman 5 model available for US$79.99. The main difference between the 5 and 5 MAX is that there is only one SSD expansion slot vs two on the 5 MAX, and no tap-to-wake OLED functionality.
Overview
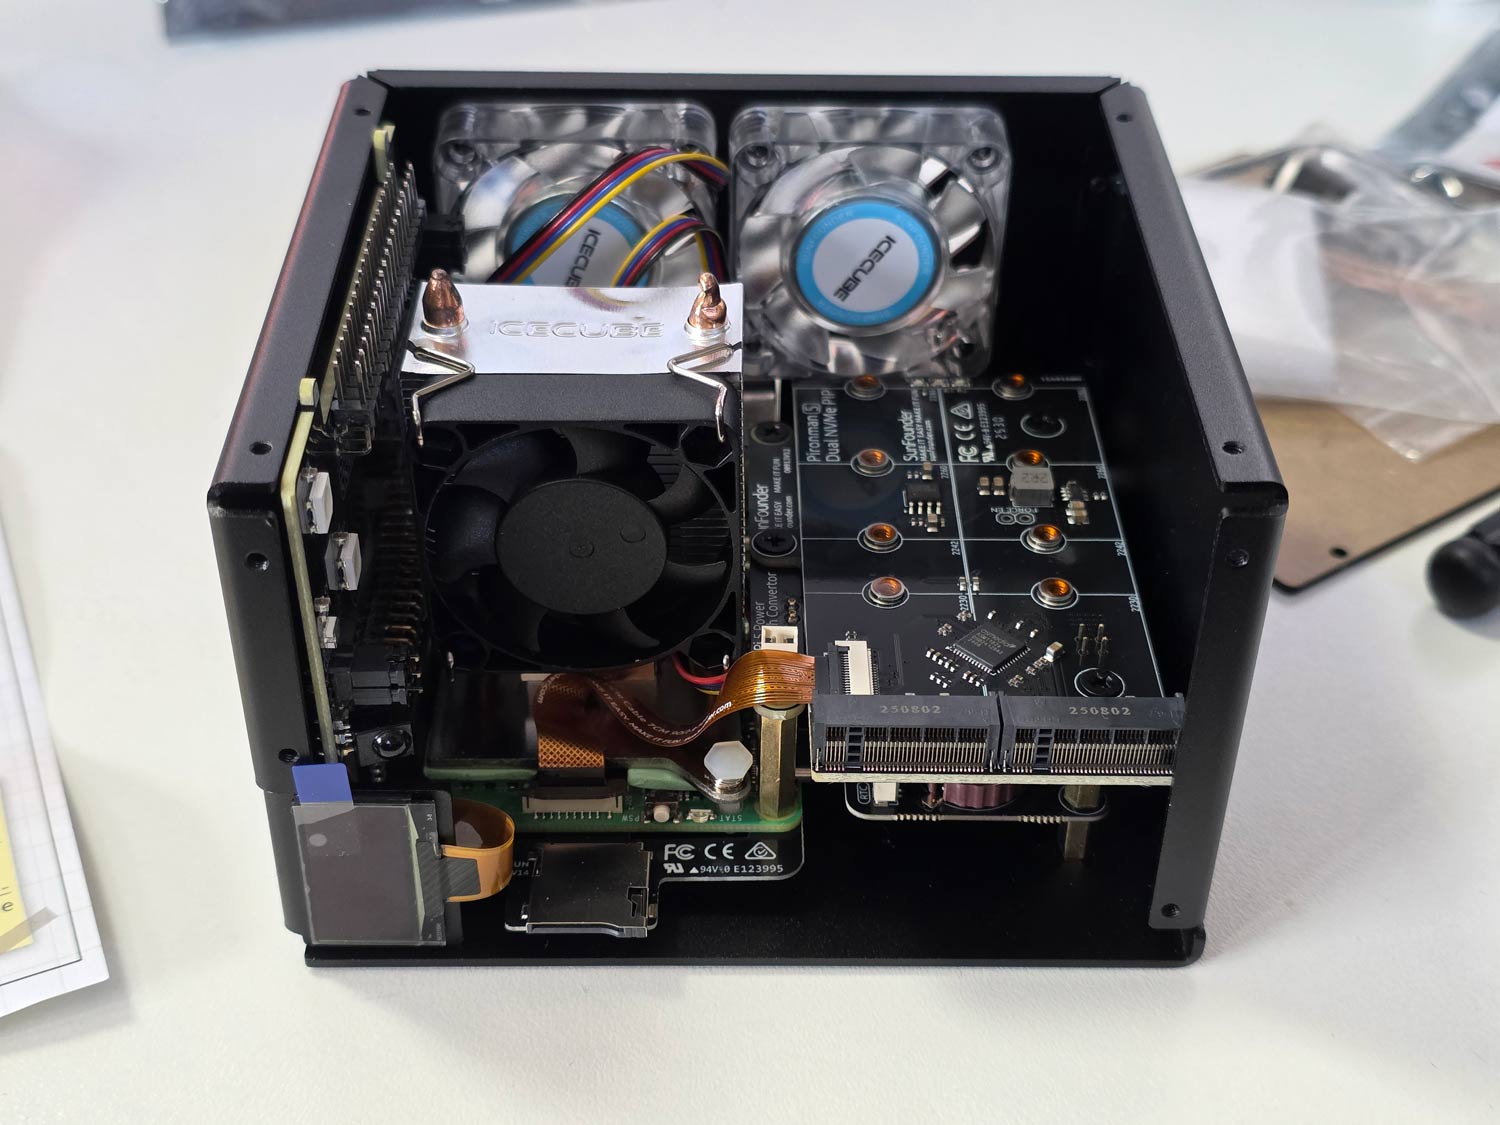
The Pironman 5 is what we would consider a high-end enclosure for the Raspberry Pi. It includes a large CPU tower cooling heatsink with a fan, along with two case fans to keep the internal temperatures down.
It also adds a dual slot NVME M.2 expansion board to the Pi 5, so that you can install two SSDs or one SSD and a Hailo AI accelerator module. SSDs might be useful for RTL-SDR users who are recording large amounts of IQ data, or saving many weather satellite images, for example. The Hailo AI accelerator module could turn a Raspberry Pi and RTL-SDR into an RF intelligence powerhouse. One advanced AI use-case might involve running local Whisper speech recognition to log voice communications to text, followed by using a local LLM to summarize daily received data (noting that you'll need to wait for the Hailo-10H model to run local LLMs).
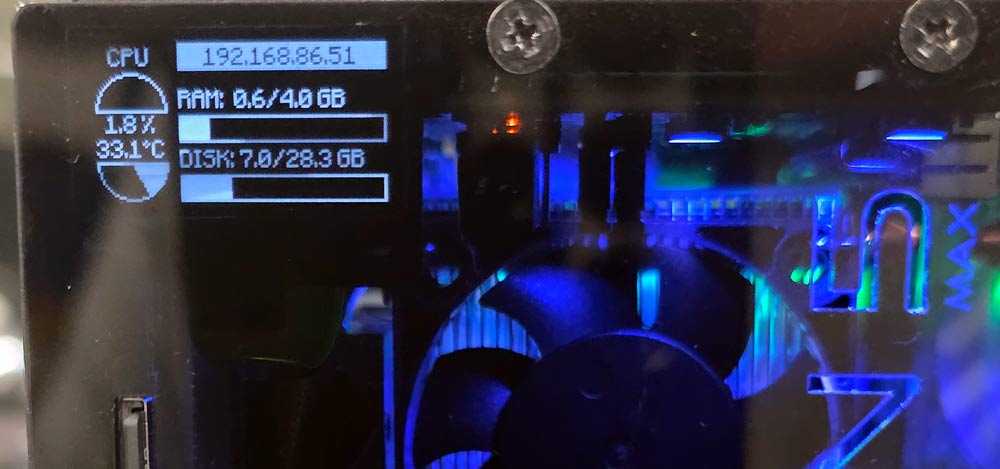
Finally, it also adds an OLED status display, which shows current CPU temperature and fan speeds, as well as an on off button.
Another plus is that the GPIO header remains accessible on the outside of the enclosure, thanks to an extender included in the design.
Pironman 5 Fully Assembled
Assembly
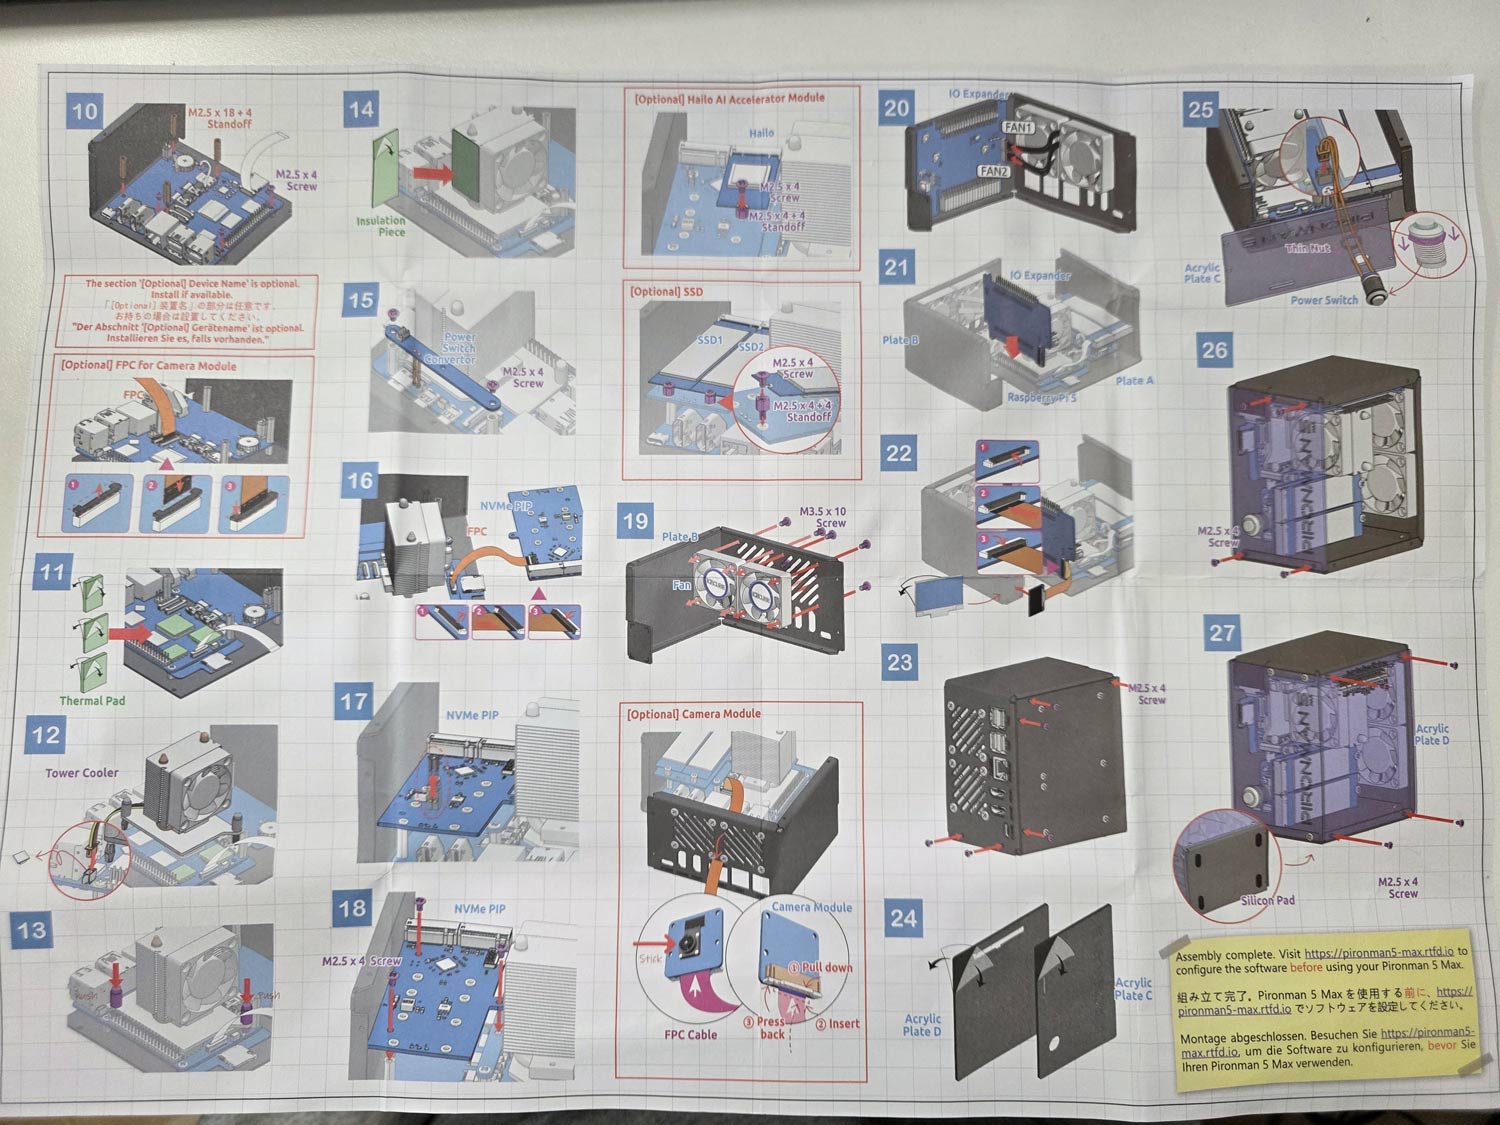
Assembly of the Pironman 5 took just over 30 minutes. It involves screwing in standoffs, seating the heatsink/fans, connecting jumpers and ribbon cables, and screwing down the panels. A nice color paper assembly manual is provided, making the installation easy to follow. Anyone who is mildly familiar with installing connectorized PC components should have no trouble.
All parts included with the Pironman 5.Pironman 5 Assembly ManualPironman 5 Built (Acrylic side panels off)
Software Installation and Usage
After assembly, you can simply insert a freshly burned Raspbian image into the SD card slot and power on the unit.
At this stage, you now need to install some software to properly control the OLED, CPU fans, and case fans. This involves installing some software from their GitHub, but you can simply copy and paste the commands in the terminal one by one.
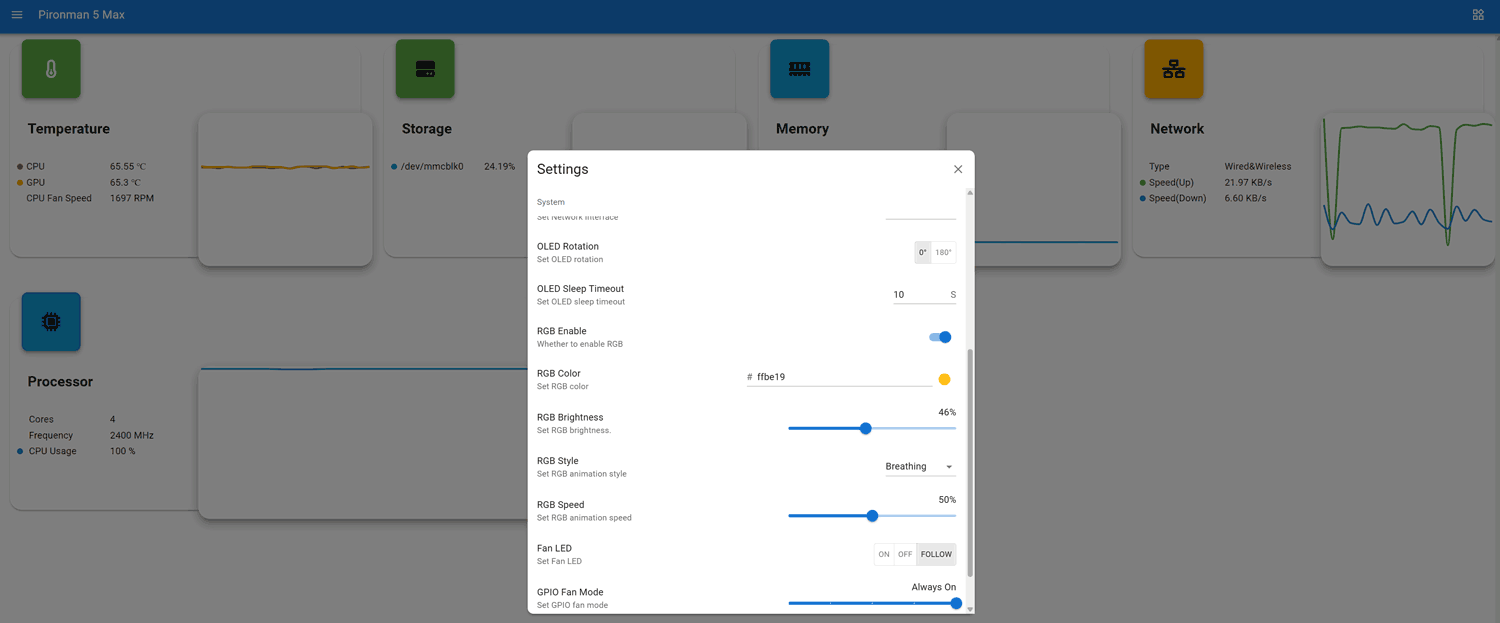
Once the software is installed a web UI is exposed at <IP_ADDR>:34001. Here you can monitor various stats including CPU temps, and make changes to the OLED, RGB and fan behaviour.
Pironman 5 Web UI
OLED QC Problems?
Unfortunately, our unit had a problem where the OLED screen wouldn't work. We attempted fresh software installs and reseated all cables and connectors, but had no luck. Upon contacting SunFounder, they immediately sent us a new OLED screen to try. But the replacement also did not work.
However, when trying the new screen, we noticed that the screen would briefly light up when we pressed on the FPC connector. Upon inspecting the FPC connector, we noticed that some pins on the PCB looked suspiciously low on solder compared to the others, so we applied flux and used a hot soldering iron to refresh them. After doing this, the OLED screen began working again.
Based on our dealings with SunFounder, we believe that they're support is good, and any customer facing similar issues would be supplied with replacement parts if required.
Pironman OLED Screen Working
Usage and Performance with RTL-SDR
As expected, with the great cooling in place, the Raspberry Pi 5 never throttled down when running an RTL-SDR with SDR++. We also tested it with our KrakenSDR system, which requires more CPU, and found great performance too.
The rear GPIO fans are quiet enough, and the CPU fan makes almost no noise inside the enclosure. We ran a stress test using the 'stress' Linux package, which can push all four CPU cores to 100%. With the fans running in a room with an ambient temperature of 22 degrees, we saw that the CPU temperature never went above 55 degrees C.
While still running 'stress', we manually disabled the two GPIO fans, and the temperature stabilized at around 66 degrees C. So the rear fans may only be required to be on when you have an SSD or AI module installed.
Conclusion
If you're looking for a high-quality enclosure and cooling solution for the Raspberry Pi 5, the Pironman 5 MAX is probably the best high-end solution available. Not only does the enclosure protect the Raspberry Pi 5 completely, but the cooling performance is excellent, and the ability to add SSDs and AI modules is great too.
Disclaimer: We were given a unit for free in exchange for an honest review. We received no other compensation.
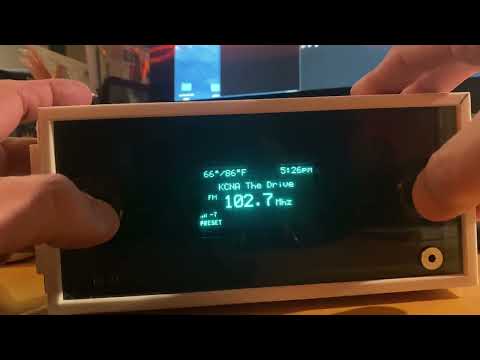
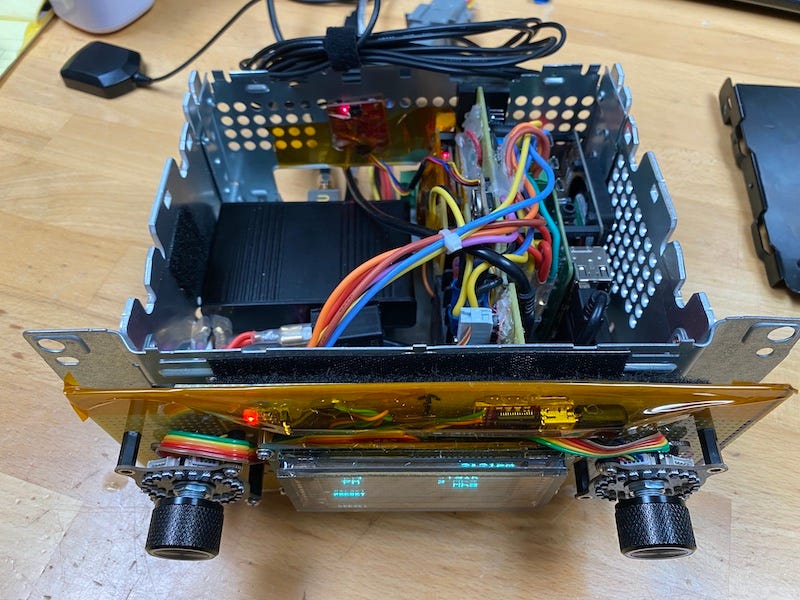
Thank you to Vinnie Moscaritolo for writing in and sharing with us PiCar, a project to develop a homebrew car radio head unit out of a Raspberry Pi and RTL-SDR. The advantage of PiCar over a standard vehicle head unit is that PiCar is not just a broadcast AM/FM tuner, but is also capable of tuning to and scanning for other signals, such as public safety. In addition, Vinnie has also added various other features to PiCar, such as a GPS nav system, and CAN bus snooper.
Vinnie writes:
What happens when a radio nerd with a Jeep and a Raspberry Pi decides factory dashboards are too boring? You get PiCar — a DIY car radio replacement with a VFD display, a couple of knobs, and a whole lot of hacker soul.
Built around RTL-SDR and Raspberry Pi, PiCar does AM/FM, GPS nav, CAN bus snooping, 1-wire sensors, and even streams tunes from your iPhone — all without draining your Jeep’s battery. It's not just a head unit, it's a rolling testbed for software-defined radio, CAN hacking, and embedded Linux audio.
Vinnie has posted a full 9-part series on PiCar over on his blog. The series covers the why and the how, with several demonstration pictures and videos.
Over on the TechMinds YouTube channel, Matt has uploaded a video demonstrating a portable ADS-B aircraft tracker with VHF airband radio reception as well. The build consists of a 7-inch screen, Raspberry Pi 4 and two RTL-SDR dongles.
In the video, Matt shows what hardware is required, how it's all put together, and how to install the OS and software and set it up. The software Matt uses for displaying aircraft is tar1090, a comprehensive web interface for ADS-B data. For receiving AM VHF airband communications, he uses an HTML5-based RTL-SDR receiver that can run directly in the Chromium browser and connect to a local RTL-SDR through the web interface.
Your Very Own Aircraft Tracker With VHF Airband Radio - RTL-SDR & PiADSB
Over on his YouTube channel and Hackaday.io blog page, Nicholas LaBonte has shown his "Cyberdeck Handheld" which is a portable computer consisting of a Raspberry Pi 5, LCD screen, custom CNC'd keyboard, UPS module, and an RTL-SDR. All the components are placed in an aesthetically pleasing custom enclosure, made of some interesting premium materials like Sepele hardwood and Richlite. Nicholas writes:
Having been inspired by the uConsole and similar projects, I wanted to try my hand at building my own with off-the-shelf components. Richlite and Sepele hardwood would be used for the housing, materials that I have worked with furnishing yacht interiors. Combined with a bronze heatsink, I wanted to merge cyberpunk and nautical aesthetics. Since the keyboard was the biggest challenge, I started there by combining concepts from both Bobricius and the Ello 2M keyboards, settling on tabbed keys atop PCB-mounted microswitches.
Over on YouTube Mirko Pavleski has uploaded a video showing how he took a US$199 "Pi Terminal-7” 1024*600 All-In-One Module Raspberry Pi" from Elecrow, and combined it with an RTL-SDR Blog V4 to create a portable standalone SDR radio platform.
The build includes a cooling fan, external WiFi antenna, speaker, power switch and physical tuning knob. The built-in Raspberry Pi 4 compute module runs the HamPi image which includes multiple free SDR programs. In the video, Mirko shows the system in action with it running SDR++ and GQRX.