RTL-SDR Tutorial: Following Trunked Radio with Unitrunker
The popular trunking decoding software Unitrunker now supports the RTL2832U R820T RTL-SDR directly in its new version. This means that extra SDR receiver software like SDR# is no longer required to use Unitrunker.
You can download the latest version of Unitrunker here. (NOTE: Unitrunker has recently been updated to V2.1 and so the tutorial below may look a little different now)
In a normal radio system, one company (or talkgroup) might use a single frequency for radio communications. However, this is very inefficient as the frequency may not be in use for the majority of the time. In a trunked radio system, a small set number of frequencies are shared between a large number of talkgroups. Each radio receives a special computer controlled control channel. The control channel determines a vacant frequency that a particular talkgroup should use. This helps to make radio frequency allocations more efficient.
Because a talkgroup might switch between various frequencies often, it can make listening to a conversation difficult for radio scanners. Unitrunker can be used to decode the control channel and follow a voice conversation as it hops across various frequencies. With two RTL-SDR dongles you can set up a trunking receiver station with just Unitrunker. What follows below is a tutorial on how to set this up.
Unitrunker Voice Trunking Following Tutorial
To set up a trunking station we will assume that you have been through the Quickstart guide and thus have a working RTL-SDR setup. In addition you will need
- 2x R820T RTL2832U RTL-SDR dongles. See the Buy RTL-SDR dongles page if you don't already have two. You will need one dongle to receive the control channel and one dongle to receive the voice channel. Only the R820T appears to be supported at the moment. You can also use other supported and more advanced SDR's such as the Airspy.
- The Unitrunker software (Choose the latest version from http://www.unitrunker.com/download/)
- One antenna that splits into two connections for the two dongles, or two antennas that can receive the trunking frequencies you are interested in.
Now follow these steps to set up Unitrunker with the RTL2832U.
Setting up the Signal (Control Channel) Receiver
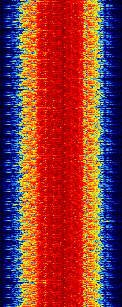
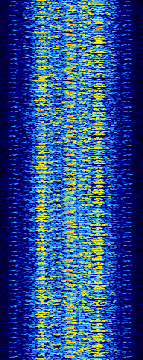
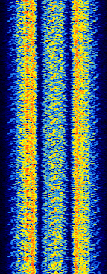
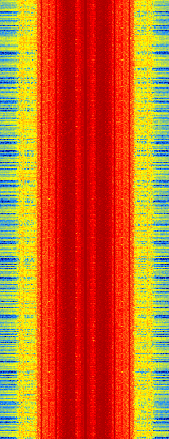
- First determine a trunking control channel that you are interested in monitoring. You can use SDR# or a similar program to search for these first. They will be signals that are continuously transmitting with no breaks. Here are some examples of some common trunking modes. The are commonly found in the 400 and 800 MHz bands.
|
APCO P25 |
EDACS96 |
|
MPT 1327 |
- Plug in both dongles and then open Unitrunker.
- Press the 'Add new receiver' button
 , and then on the bar that pops up click on the RTL2832 button.
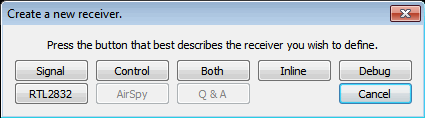
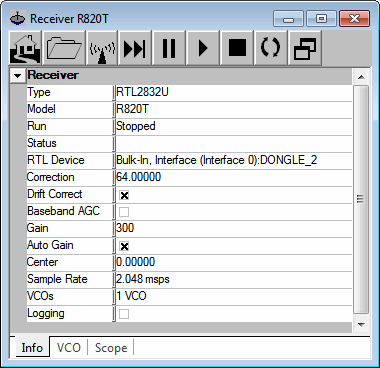
Add new receiver - In the new window that pops up choose your first RTL-SDR under “RTL Device”.
- Enter that units PPM correction value under “Correction”. Note: Make sure that you are entering the correct value for the correct dongle. If you are unsure which dongle is which then you may like to try labeling the dongles with rtl_eeprom first. Note 2: Dongles with TCXO's in them will not require any correction, so for those dongles this value can be left at zero.
- We also recommend enabling “Baseband AGC”, turning on “Auto Gain”, enabling “Drift Correct”, setting the sample rate to 2.048 msps and settings “VCOs” to 1 VCO. If you have an older and slower PC you may wish to set the sample rate lower.
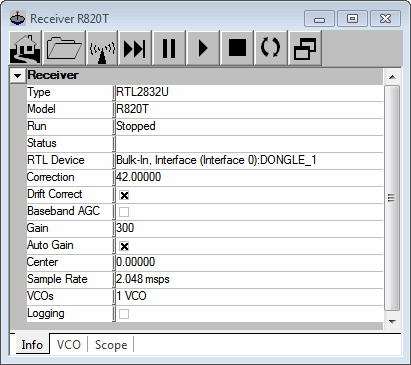
Set sample rate, gains and PPM offset - Click on the first VCO tab at the bottom of the window.
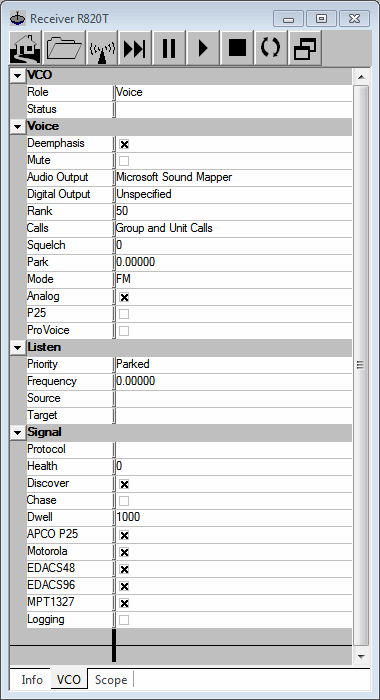
- Change the “Role” to “Signal”.
- Change the “Park” value to the frequency in MHz of the trunking control channel that you want to monitor. For example if you wish to monitor a control frequency at 862.839700 MHz, then enter 862.839700 into the box.
- Under the “Signal” heading ensure that all the control channel protocols that you want to possibly decode are checked and that “Discover” is also checked.
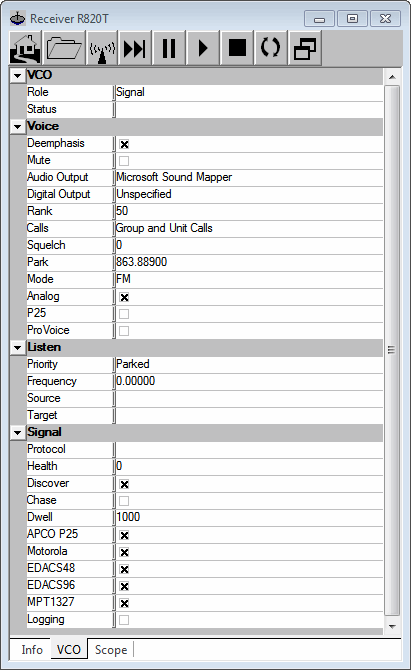
Set the role to Signal, set the park frequency and choose the protocols - Now at the top of this window press the Play button
 .
. - If everything is tuned correctly a new Site window should soon pop up and you should audibly hear the control channel sound coming through your speakers. In the VCO tab you should also see under the “Signal” heading the protocol dectected and it’s “Health”, which measures the quality of reception.
- If every thing worked correctly, then go back to the first VCO tab, and ensure that “Mute” is checked. This will mute the control channel audio.
- If no new site window popped up and/or you don’t hear the control channel then go back to the first VCO tab and ensure the “Audio Outout” is set to your speakers, and that the park frequency is set correctly. Also go back to the Info tab and check that the PPM Correction is set correctly. You may also need to adjust the gain settings - try manual gain by unchecking both “Baseband AGC” and “Auto Gain” and using trial and error to choose a gain value between (0 - 500). Monitor the “Health” reading of the signal under the “Signal” heading in the VCO tab. If it is below 100 it may indicate reception problems which will need to be solved by tuning the signal correctly, adjusting the gain, or using a better antenna.
- The Site window shows the frequencies in use, and logs each call. If the frequencies are not showing, click the ‘Wizard’ button
 whose icon looks like a calculator. Then choose the system used in your country. If unsure, try ‘Standard’ first as this is the most commonly used.
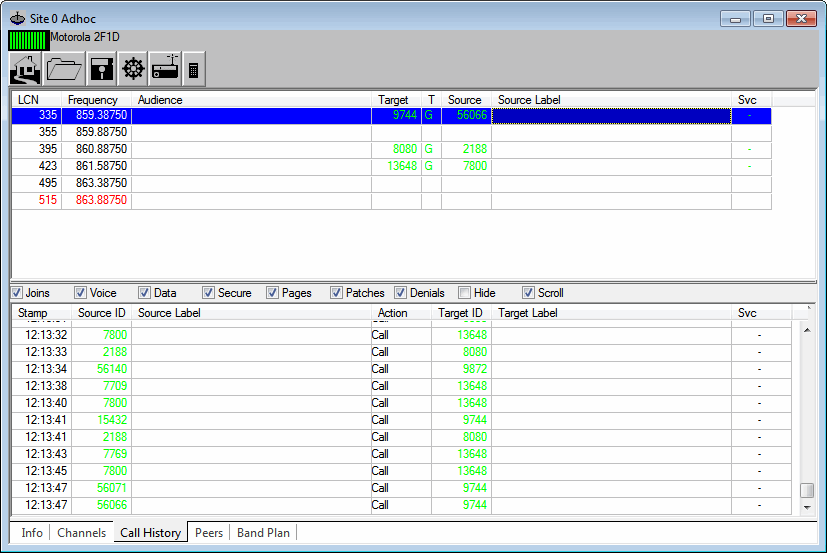
The new site window - (Optional) If you have a RadioReference.com account, you can click on the gear icon and enter your RadioReference account credentials. This will download information provided by RadioReference.com, including site information and some talk group labels.
- Close the Receiver R820T options window for the signal channel, move the new site window out of the way (don’t close it) and go back to the main Unitrunker Window.
Setting up the Voice Channel Receiver
Now that we have added the signal receiver and decoder we will add the voice receiver.
- Press the 'Add new receiver' button once again, and then on the bar that pops up click on the RTL2832 button.
- Set the “RTL Device” to the second RTL-SDR dongle you have plugged in.
- As in the previous steps enter that units PPM correction value (only required for non-TCXO dongles) under “Correction”, enable “Drift Correct”, enable “Baseband AGC”, enable “Auto Gain” and set the sample rate to 2.048 msps.
Create the second receiver - Click on the first VCO tab at the bottom of the window.
- Change the “Role” to “Voice”.
- Ensure that “Mute” is unchecked, and set the “Audio Output” to your speakers.
Set up the voice receiver - Press the Play button .
- You should now be listening to trunked conversations! If you hear a lot of static in between calls, you may wish to set the “Squelch” option. In the voice receiver options, under the VCO tab adjust the “Squelch” value, until the static disappears, but voice still comes through.
Monitoring Multiple Control Channels with Multiple VCOs
More recent versions of Unitrunker have the option to use multiple VCO’s. Basically this allows you to tune and monitor to multiple control channels with a single dongle, as long as they all fit within the dongles bandwidth. Unitrunker allows the RTL-SDR bandwidth to be set up to 2.56 MHz. To enable monitoring of multiple VCO’s
- Open the options for your Signal receiver and go to the info tab.
- Change the “VCOs” setting to 2 VCOs, or however many you want.
- Go to the second VCO tab.
- Set the “Role” to “Signal”.
- Set the “Park” frequency to the second control channel you wish to monitor.
- Do this for all VCOs if you have selected more than two.
Monitoring with only One Dongle
If you only have one RTL-SDR dongle it is still possible to monitor trunked conversations using the multiple VCO’s feature of Unitrunker. This will work well as long as the voice channels are within the same bandwidth as the control channel. For the RTL-SDR this should be within about 2.56 MHz of bandwidth.
- Press the ‘Add new receiver’ button and then on the bar that pops up click on the RTL2832 button.
- Under “RTL Device” select your dongle.
- Set the PPM offset correction, enable “Drift Correction”, enable “Baseband AGC”, enable “Auto Gain” and set the sample rate to 2.560 msps, and set the number of VCOs to 2 VCOs.
- Go to the first VCO tab, and set the “Role” to Signal.
- Set the “Park” frequency to the frequency of the control channel.
- Ensure that “Mute” is checked.
- Go to the second VCO tab, and set the “Role” to voice.
- Press the Play button . A new site window should pop up.
- If the frequencies are not showing, click the ‘Wizard’ button whose icon looks like a calculator. Then choose the system used in your country. If unsure, try ‘Standard’ first as this is the most commonly used.
- You should now be listening to trunked conversations!
- Once you have the system running to improve performance we recommend disabling “Auto Gain” and instead setting the gain manally using the “Gain” entry under the “Info” tab in both the Signal and Control RTL-SDR options. The gain can be set from 0 to 500.
Decoding Digital Voice (P25/DMR/Mototrbo/NXDN/ProVoice)
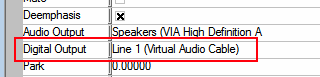
Decoding of unencrypted digital voice signals like P25/DMR/Mototrbo can be set up in the same way as the analog system shown above. However, instead of outputting audio to the speakers, audio should be output to a virtual audio pipe such as Virtual Audio Cable (VAC) or VB Cable using the Digital Output audio selection in Unitrunker. Then DSD+ should be used to listen to the audio pipe. Audio will only be piped to the Digital Output during a digital call.
DSD+ is a program that is capable of decoding digital voice protocols such as P25, DMR/Mototrbo, NXDN and ProVoice. It is not capable of decoding encrypted digital voice channels. DSD+ is similar to DSD 1.6, but it has vastly improved decoding in terms of voice quality. You can find the latest download for DSD+ at www.dsdplus.com. To install DSDPlua download both the latest DSDPlus and DSDPlus DLL zip files. Then extract both zip files into the same folder.
To run DSD+ simply double click on DSDPlus.exe. This will open up several windows. DSD+ will listen to the default sound device in the Windows audio recording properties.
Make sure that the Deemphasis option in Unitrunker is turned OFF for the voice receiver to make it work with DSD+.
Tips:
- For digital voice you may need to play with the Windows volume settings of your audio pipe to improve decoding.
- You will require a decent antenna that is capable of receiving the trunking frequencies you are interested in.
- Unitrunker can be coupled with a radioreference.com account to get trunk group names.
 If you enjoyed this tutorial you may like our ebook available on Amazon. The Hobbyist's Guide to the RTL-SDR: Really Cheap Software Defined radio. |


