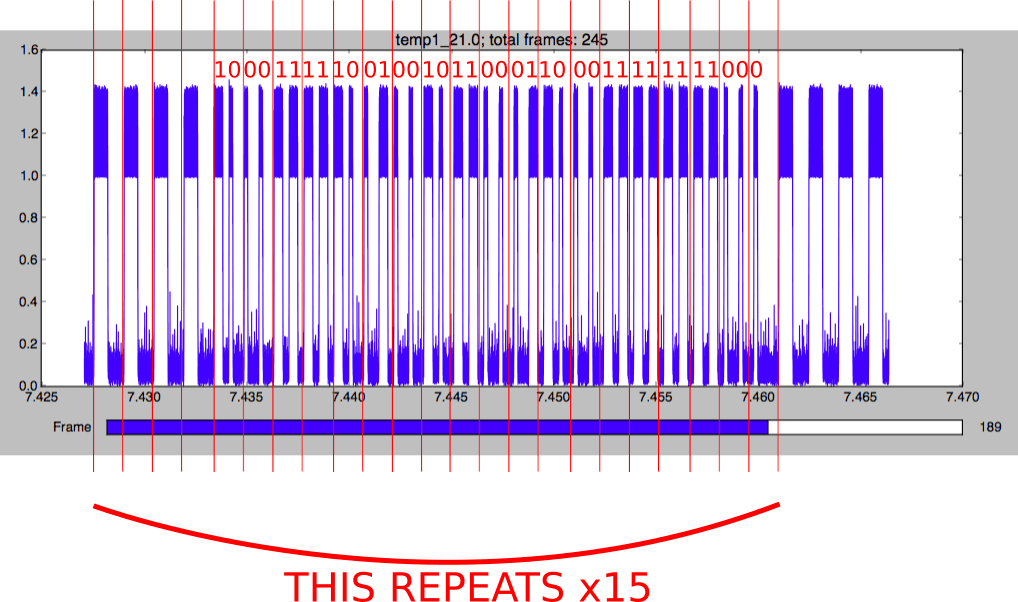
First he explains how he used Python to extract the data from the RTL-SDR I/Q samples. From those samples he calculates the amplitude data, and plots it on a graph which shows the digital signal. He then decimates the signal to reduce the number of samples and figures out how to detect the preamble, data bits and packet repetitions. Then to decode the signal he explains how he does clock recovery, convolution and thresholding, and also the importance and meaning of those steps.
If you’re new to reverse engineering signals and don’t have a DSP background, then spenmcgee’s write up is an excellent starting point. It’s written in a way that even a layman should be able to understand with a little effort. If you have a Lacross TX29 wireless temperature meter that you just want to decode, then his code will also be of use.
NOTE: Please do not go to the Nongles.com site linked in this post as it has been taken over by explicit content. This post is from 2016 and is outdated as ThumbNet have moved away from dongle hardware. This post is now only kept up for archival purposes.
A few days ago we received a production sample of the new ThumbNet N3 receiver. Our sample came with the works, which includes the green aluminum enclosure and shielding can soldered on over the PCB. This full set costs $33.50 USD + $4.50 USD international shipping, but there are cheaper options if you do not want the aluminum case or the RFI shield.
We've only had a brief time to play around with it so far, but it's performance seems very similar to the prototype unit that they sent us earlier. We intend to give the N3 a longer review next week but our first impressions are favorable. In this post we'll simply unbox the unit, show some photos and give it a quick turn on test.
The N3 comes in a protective cardboard box with the N3 and Thumbnet/Nongles logo on it. Inside sits the ThumbNet N3 unit itself, and there is a power plug terminal block adapter located on the bottom of the box. Excluding the F-type connector, the ThumbNet unit has dimensions of 6.2 cm x 4 cm x 2.1 cm, and weighs 58g. The green enclosure is strong and rugged.
Unlike the prototype they sent, this unit can run direct from USB power alone. We saw that it draws about 400 mA of power, and we had no trouble running it from our 1A capable USB ports. Of course one of the main advantages to the N3 is the ability to power it with a low noise external power supply, and we will be testing that in the next review.
Nongles SDR Lego
ThumbNet have also announced their new sister site, Nongles.com. On this site they intend to soon begin selling something called "Nongles" which is a mashup of "NOt a dONGLE". Nongles are an idea that can be best described as a type of "SDR Lego", and we think will be very interesting to people interested in experimenting with different SDR set ups and for use in education. Nongles will be based on the RTL-SDR design, but they are going to be split the RTL-SDR up into several discrete PCB modules/blocks such as:
R820T2 Module
RTL2832U Module
Experimenter Module
External Clock Module
LNA
Bias Tee
Signal Amplifier
50 - 75 Ohm Transformer
Filter blocks such as SAW/FM Bandstop/High Pass/Low Pass and other DIY kits
Obviously you'll at least need the R820T2 and RTL2832U blocks to have a working system. Then the other blocks can then be added in as needed. The Nongles are not ready for sale yet so keep an eye on their website for news of their release.
Akos from the radio for everyone blog (formerly known as the rtlsdr4everyone blog) has uploaded two new posts. On the first post he shows some further tests on the new FlightAware Prostick plus. The Prostick is an RTL-SDR that contains a built in LNA and the Prostick plus adds an additional SAW filter on the stick. For him the Prostick Plus works significantly better than the regular Protstick + external FA cavity filter and also gets about twice the ADS-B reception reports as our V3 which does not use an additional internal LNA. Next week we hope to release our own review of the Prostick Plus, and we’ll hopefully be able to show and explain why some people see better performance with the plus and why some instead see degraded performance.
In his second post Akos shows a tutorial on building an easy helical antenna for Outernet reception. The antenna is constructed from readily available household materials such as a soda bottle, coax cable, electrical tape and a cookie tin. With the cookie tin used he was able to get a SNR reading between 7 – 9 dB, which is pretty good considering that only 3 dB is required for Outernet decoding to work.
Outernet hardware plus the homemade helical antenna made by Akos.
Two days ago the RSP2 was released for sale as we released a review of a pre-production unit that they sent us. Since then there have been some more review that have come out from other users who had a review unit.
Hamradioscience.com have released a good review of the RSP2 along with a video. The author writes how he’s impressed with the additional shielding, the software switchable antennas and the bias tee. Like in our review he also tested the RSP2 bias tee with the Outernet LNA and found good results. He notes that the RSP1 and RSP2 are very similar in terms of RF performance, but writes that he noticed times when the RSP2 seemed to be more sensitive or exhibit a lower noise floor than the RSP1.
SDRPlay RSP2 First Look
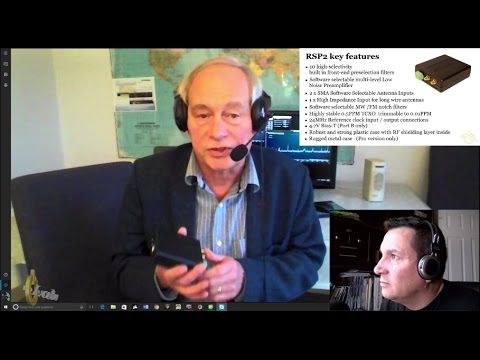
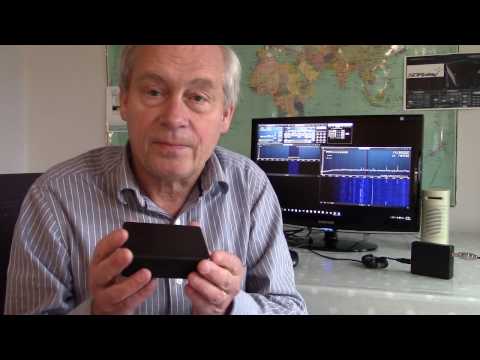
On YouTube user Laboenligne.ca reviews the RSP2 and also has a live Skype interview with Jon the head of marketing at SDRplay. Jon gives a good overview of the new features and some applications that they could be used for.
NEW SDRplay RSP2 SDR receiver - Interview with Jon Hudson
Over on NN4F.com Paul Jones also reviewed his RSP2. He was very impressed with the performance of the Hi-Z port, the performance of the BCFM notch filters and the stability of the TCXO.
The author of swling.com has also released his review and he too was impressed by the improvements.
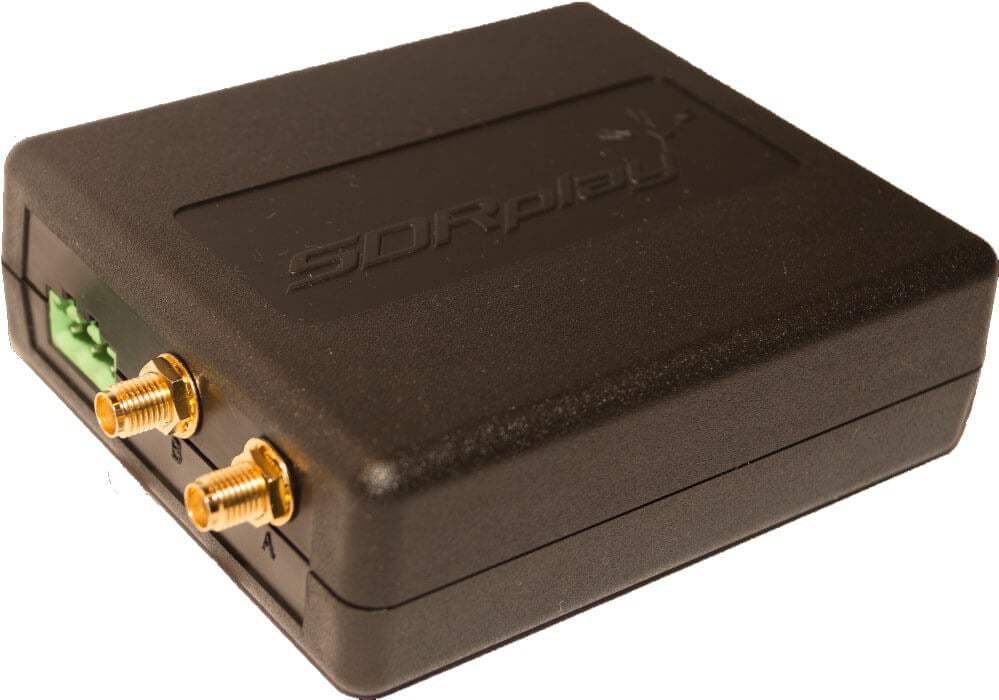
Today SDRplay have just released their newest software defined radio – the Radio Spectrum Processor 2 (RSP2) which is the successor of the RSP1. The RSP2 costs $169.95 USD, and the older RSP1 is still for sale at $129.95 USD. There is also the “RSP2pro” model which is an RSP2 in a metal enclosure, and this sells for $192.95 USD.
The RSP2 has nearly the same base specifications as the RSP1 (12 bit ADC, 10 MHz bandwidth, 10 kHz – 2 GHz range), but now comes with additional features and enhancements such as a software switchable BCFM and BCAM notch filter, TCXO, multiple antenna ports, HF optimized Hi-Z antenna port, clock in and out ports, better shielding and can also now tune down to 1 kHz.
SDRplay Limited has today announced the launch of a second Software Defined Radio product – the RSP2.
Building on the popularity of our first product, the RSP1, we have now launched the RSP2. The RSP2 delivers a significant number of additional features which result in a higher spec for specialist amateur radio users as well as benefits for additional scientific, educational and industrial SDR applications.
Here are the main additional features of the RSP2:
10 built in front-end pre-selection filters, with substantially enhanced selectivity
Frequency coverage extended down to 1 KHz
Software selectable variable gain Low Noise Preamplifier
2 x SMA Software Selectable 50Ω RF ports (1.5 MHz – 2 GHz)
1 x High Impedance RF port (1 kHz – 30 MHz)
Built in software selectable MW /FM notch filters
Highly stable 0.5PPM TCXO trimmable to 0.01PPM
24MHz Reference clock input / output connections
4.7V Bias-T option (on one of the software selectable antenna inputs)
RF screening within a strong plastic case for the standard RSP2
A Rugged metal box version – the ‘RSP2pro’
When used together SDRplay’s own SDRuno software, the RSP2 becomes a high performance SDR platform. The benefits of using the RSP2 with SDRuno include:
Highly integrated native support for the RSP2 professional grade software based upon class leading ‘Studio 1’, free of charge
Calibrated S-Meter including support for IARU S-Meter Standard
Calibrated RF Power Meter with in excess of 100 dB of usable range
Best in class audio quality
Currently the RSP2 requires the use of SDRuno software, but in the coming weeks we plan to provide support for HDSDR, Gnu Radio, CubicSDR and we are working with Simon Brown to get support within SDR Console.
We believe that the RSP1 will continue to prove very popular as the lowest cost 12-bit SDR for general applications such as Short Wave Listening or for use as a panadapter and we pleased that we can now offer more choice to the growing community of RSP users.
The RSP2 is expected to retail at approximately £130 (excluding taxes) or $169 (excluding taxes)
For more information visit our website on www.sdrplay.com
The new RSP2
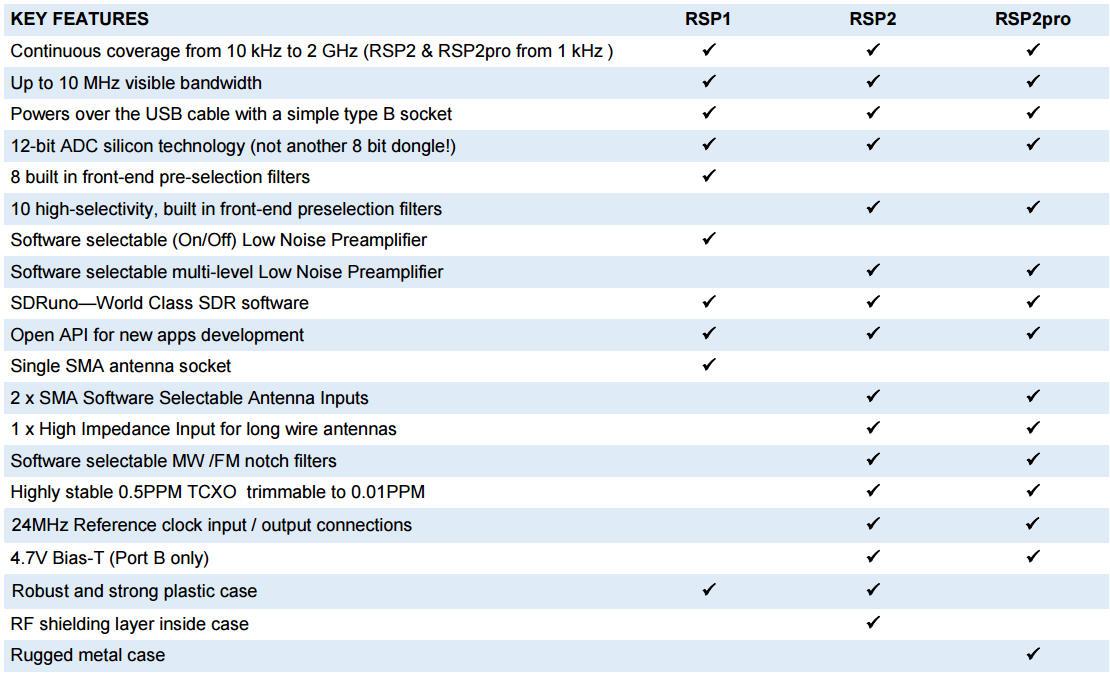
The table below shows a comparison of the RSP1, RSP2 and RSP2pro. A datasheet can be found on SDRplay’s new RSP2 webpage.
Thanks to the generosity of the SDRplay team we were fortunate enough to receive an early pre-production review model of the standard (not pro) RSP2 unit. The unit arrived a few days ago, and here we give it an initial review. In a previous review we did a comparison of the Airspy SDR, SDRplay RSP1 and HackRF. We found that the RSP1 and Airspy had similar overall performance, but that the Airspy would be better for those people who needed high dynamic range performance in strong signal environments, and that the SDRplay RSP1 would be best for people who wanted a low cost all-in-one unit with performance better than an RTL-SDR.
The Inside
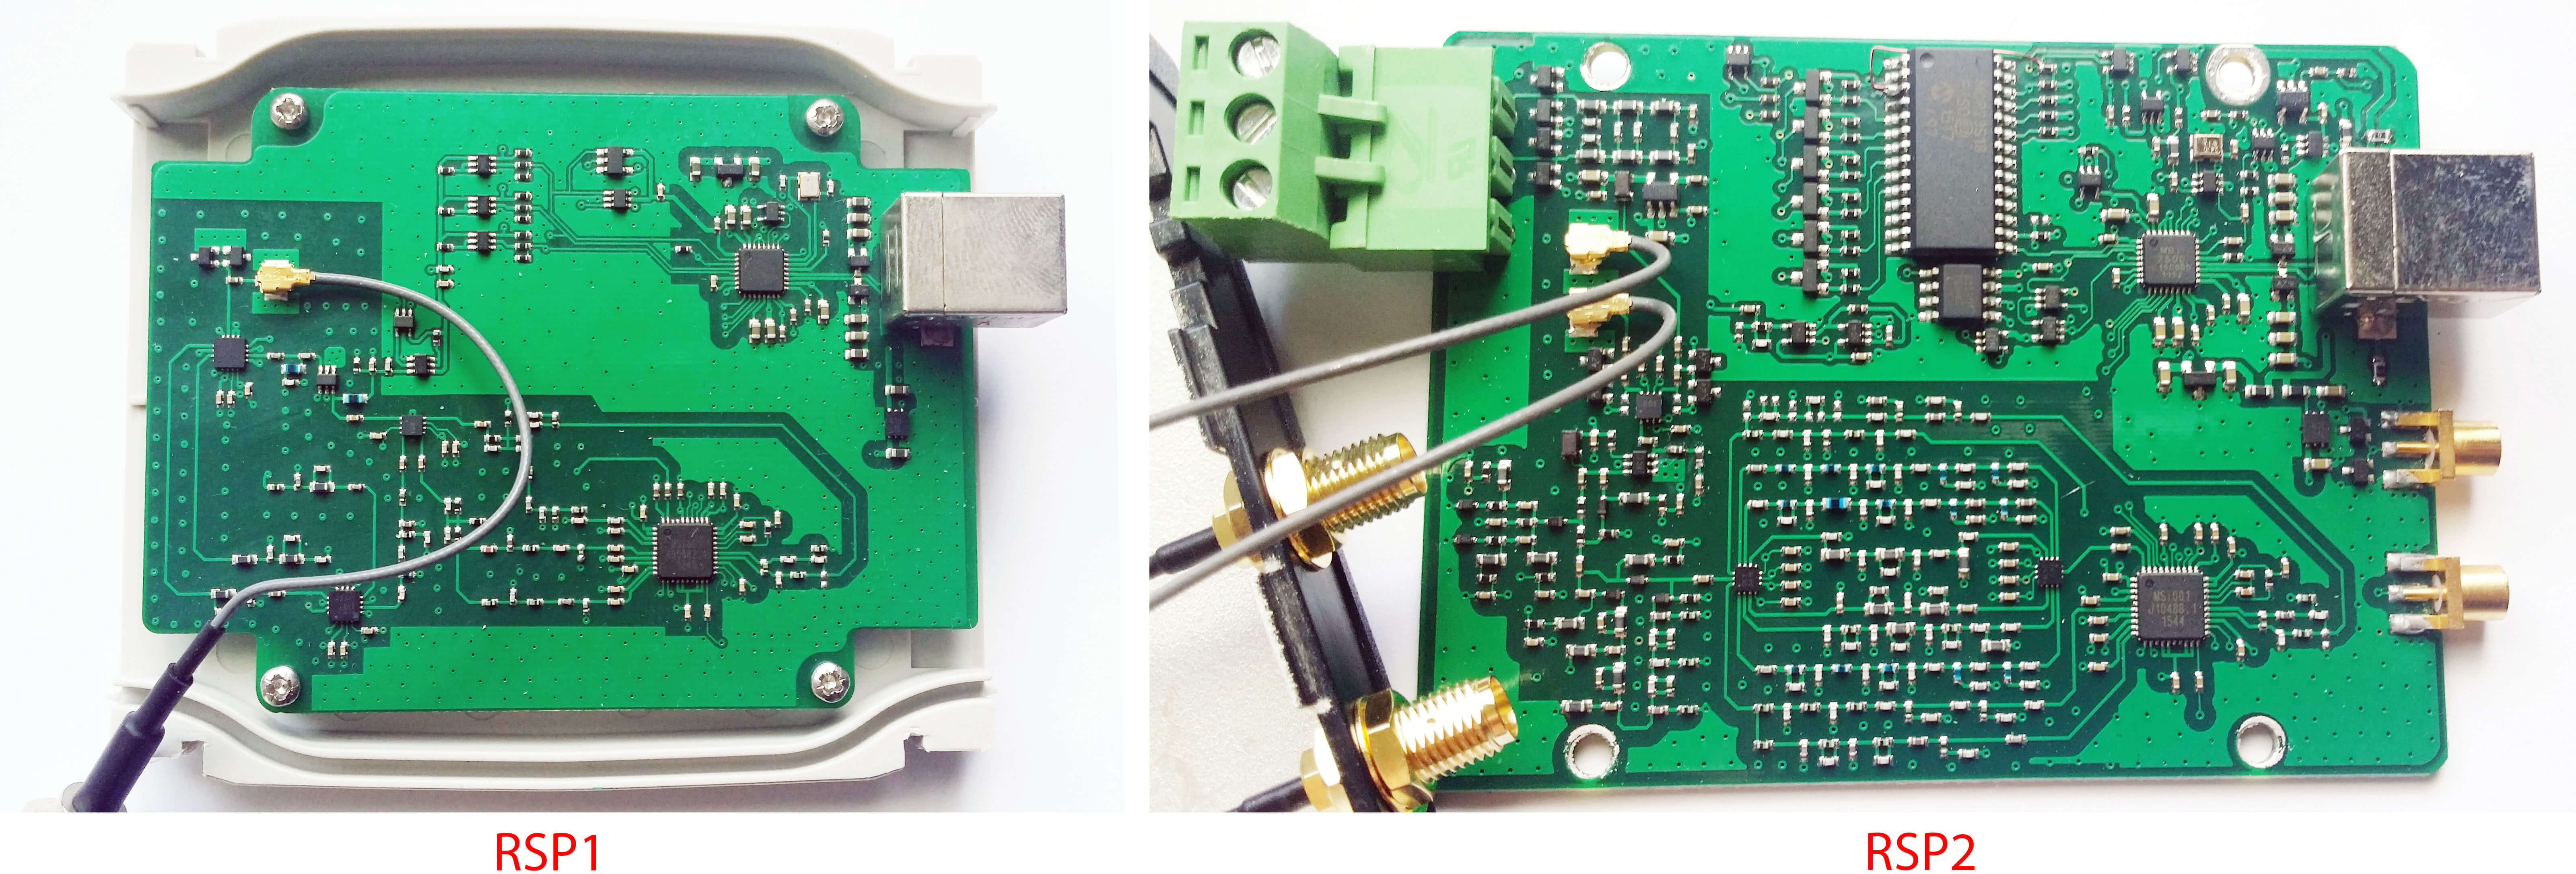
We decided to take a look inside and see how much the PCB has changed from the RSP1 to the RSP2. Judging from the two photos we can see that there is quite a significant increase in the number of components used. What was once a sparse PCB is now populated much more heavily with additional filter banks and several new switches. However, the core design of the RSP2 remains similar to the RSP1. The RSP2 uses the same Mirics MSi001 tuner chip and MSi2500 ADC chips.
The standard plastic enclosure is also now spray painted on the inside with conductive metal paint which helps by acting as a Faraday cage. This prevents interference from getting through and should be almost as good as a metal enclosure.
The conductive paint seems to be working well, as in our tests the RSP2 does not receive any signals with the antenna disconnected, whereas the RSP1 does weakly receive some very strong pager signals.
RSP1 & RSP2 PCBsConductive paint on the plastic case inside.
The mods of the /r/RTL-SDR community on the Reddit discussion platform are currently hosting an RTL-SDR themed giveaway. The prizes up for grabs include units which have been donated from ThumbNet (Nongles.com) and us at RTL-SDR.com. The prizes also include several donated home brew projects including filters and downconverters. See the table at the end of this post for the full prize list.
To enter all you need to do is write a comment on the competition thread at reddit.com/r/rtlsdr and mention what you like about SDR and what you hope to do with a prize if you win. While you’re at it we strongly suggest subscribing to /r/rtlsdr if you haven’t already as that is one of the the largest and most active communities of rtlsdr users on the web.
The competition closes on December 3rd and only one entry per household is allowed.
Outernet is a relatively new satellite based file delivery service which can be received with an RTL-SDR dongle. They continuously send out useful data like weather reports, news, APRS data as well as files like Wikipeda pages, images, videos and books. Previously we posted a tutorial that shows how to set up an Outernet receiver here.
If you instead prefer video tutorials, then two YouTube channels have uploaded Outernet set up tutorials. The first tutorial is by MKme Lab. In this video they set up Outernet using a Raspberry Pi and a Lipo battery for portable operation. Once setup he shows the Outernet browser and weather app in action.
The second video is by John’s DIY Playground and is similar, but goes a bit deeper into setting up the software on the Raspberry Pi and shows how to point the patch antenna towards the satellite.
Over on YouTube user GetOffMyHack has uploaded a video that shows his development of a Mac based general purpose tuning app for the RTL-SDR, which was written in the Swift programming language. Swift is a programming language which is designed for creating apps for a wide range of smart Apple devices.
GetOffMyHack’s program currently has a spectrum and waterfall view, can tune to any frequency, demodulate NFM and AM, and it also has a built in CTCSS decoder. At the moment the software and code is unreleased, but he writes that in the future the code will be released and made open source once he reaches the next version in the development cycle. Keep an eye on his YouTube channel for any updates.