ExaGear is an x86 emulator for ARM computing devices. In the past we posted about ExaGear as together with WINE, it was an affordable solution that allowed Windows SDR apps to run on ARM devices like the Raspberry Pi 3. With ExaGear and WINE we were able to get Windows only SDR programs like Unitrunker, WinSTD C, DSD+, MultiPSK, PC-HFDL, Orbitron and Sondemonitor to run smoothly. In another previous post, DE8MSH was also able to use ExaGear to get Speclab running on his Raspberry Pi 3.
Unfortunately it appears that ExaGear is to be discontinued from February 28 onwards although they note that all previously purchased licences will continue to work. No reason has been given other than noting that it is their business decision. For now the downloads and ability to purchase licences is still active until February 28, so if ExaGear was a product you were interested in, you have just over a week to obtain it.
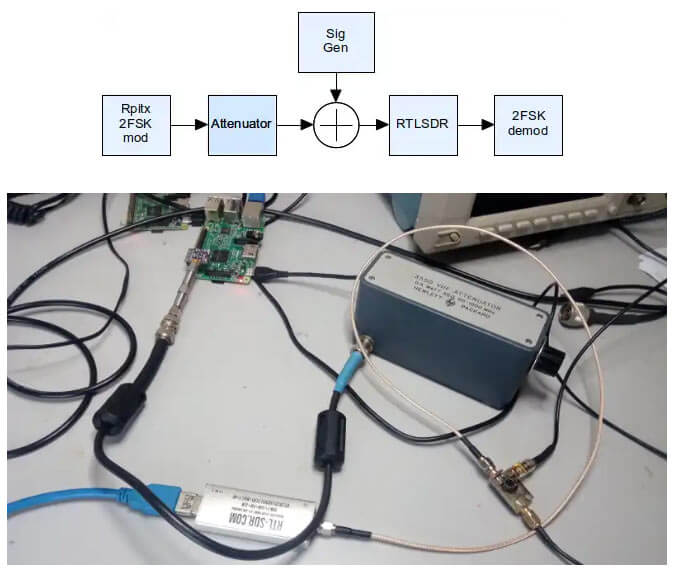
In the first test he uses RPiTX to generate a 2-FSK signal, which is then received and decoded by a RTL-SDR V3 connected to an attenuator and laptop. The Bit Error Rate (BER) is then measured while the attenuation is increased until the decoder fails. With this test he found a MDS somewhere between -115 dBm and -125 dBm, and a maximum input power of -30 dBm before clipping.
In another test he measures the RTL-SDR's ability to withstand a blocking CW signal. The results show that even with a 65 dB stronger signal just 7 kHz away, the 2-FSK modem system was able to continue working.
Finally he concludes:
So I figure for the lower HF bands this receivers performance is OK – the ADC quantisation noise isn’t likely to impact performance and the strong signal performance is good enough. An overload of -30dBm (S9+40dB) is also acceptable given the use case is remote communications where there is unlikely to be any nearby transmitters in the input filter passband.
Thanks to DE8MSH for writing in about his project that involves using a Raspberry Pi 3 and cheap 7€ USB sound card connected to an old Grahn GS1 VLF antenna to detect the SAQ VLF station. Standard PC or USB sound cards can be used as a narrowband VLF capable SDR simply by connecting an antenna to the sound inputs. SAQ (aka Grimeton Radio Station) is a heritage VLF transmitter in Sweden that transmits CW at 17.2 kHz, normally only on Alexanderson Day and Christmas Day, but can sometimes unofficially transmit without announcement due to maintenance, training or local events.
In terms of software running on the Pi 3 DE8MSH uses Spectrum Laboratory (speclab) to monitor the sound card waterfall, and has written a Python script that uploads the processed images from speclab to a Twitter account every 20 minutes. This way he hopes to be able to detect any unannounced SAQ transmissions from his station in Sweden.
Spectrum Laboratory is actually a Windows and x86 only program, however as shown in one of our previous posts, it is possible to use a special compatibility emulator called Exagear which allows you to run x86 programs on ARM hardware. Together with Wine you can then run x86 Windows programs on single board computers like the Raspberry Pi 3 which run Linux on ARM hardware.
Speclab Screenshot from DE8MSHs Pi3 soundcard monitoring system
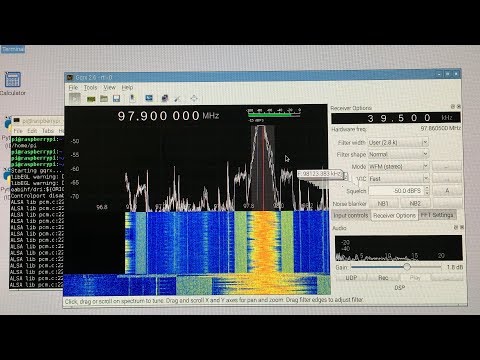
Over on his YouTube channel AVT Marketing has uploaded a new beginner friendly video that shows how to easily install and use GQRX on a Raspberry Pi single board Linux computer. GQRX is a Linux based general purpose SDR receiver program which is compatible with the RTL-SDR. The Raspberry Pi 3 has enough processing power run this software easily with the RTL-SDR.
The tutorial is a 2-part series, with the first video showing how to install the software from scratch. AVT shows every necessary step including installing git, cmake, build-essential, getting and installing the drivers from the Osmocom github and installing libusb. For someone very new to Linux this tutorial is a simple step by step start. The second video goes on to show how to actually use GQRX on the Raspberry Pi.
There is a great advantage to running SDR decoder apps on a single board PC like a Raspberry Pi 3. For example instead of committing a whole PC to become a dedicated decoder, a cheap Pi 3 can be used instead. However, unfortunately many decoder apps are written for the x86 CPU architecture and/or Windows, making them impossible to run on ARM and/or primarily Linux devices like the Raspberry Pi 3.
That is unless you use an emulator combination like Eltechs Exagear and Wine. Exagear is an emulator that emulates an x86 environment on a device like a Raspberry Pi 3 which uses an ARM CPU. Wine is a Windows compatibility layer that allows you to run x86 Windows apps on an x86 Linux installation. So by combining Exagear together with Wine it is possible to run Windows apps on ARM Linux devices.
Exagear is not free (although there is a free trial). It currently costs $22.95 USD for a Pi 3 licence, and $16.95 USD for a Pi 2 licence and $11.45 for a Pi 1/Zero licence. They also have versions for Odroid, Cubieboard, BananaPi, Jetson and many other ARMv7 and ARMv8 devices like the super cheap and powerful Orange Pi’s. There are free alternatives out there like QEMU, however when we tested QEMU it was far too slow on the Pi 3 to even run notepad responsively, let alone a decoder. Exagear on the other hand seems to run apps at near native speeds, without much lag at all. So in this respect the price seems to be worth it.
We decided to test the Exagear + Wine combination on a Pi 3 and were successful in running a number of apps including Unitrunker, WinSTD-C, WXtoImg, DSDPlus, PC-HFDL, MultiPSK, Orbitron and Sondemonitor.
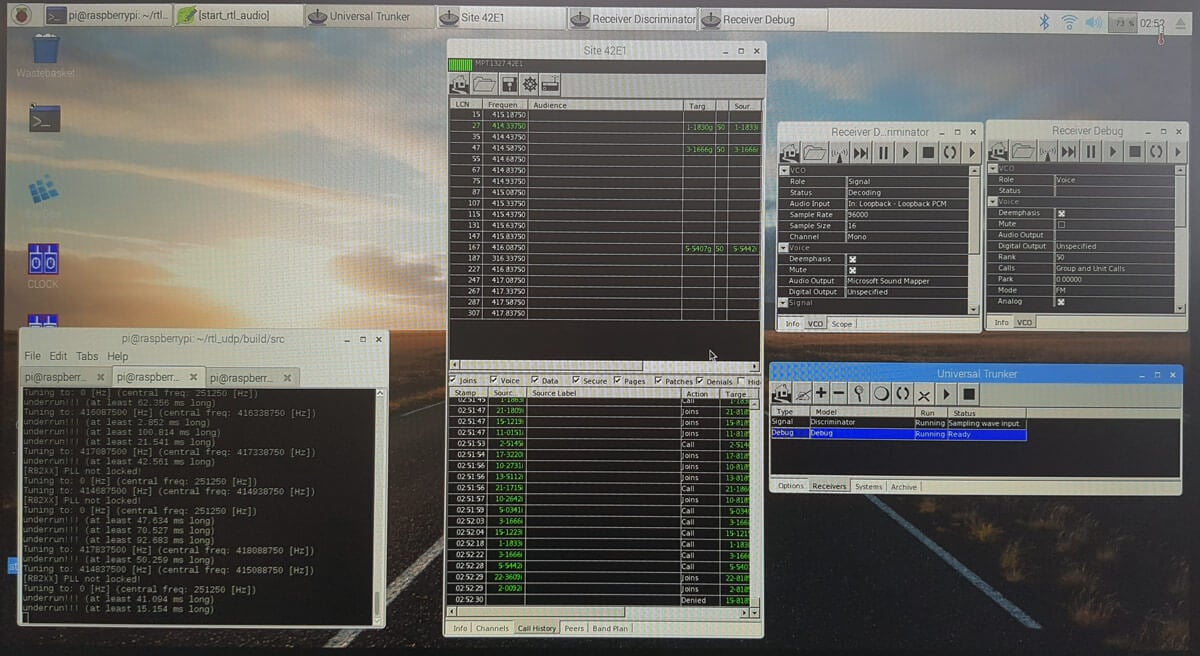
Trunking setup with Unitrunker on a Raspberry Pi 3
With Unitrunker we were able to set up a full trunk tracking system using two RTL-SDR dongles, rtl_fm, rtl_udp and a custom script to control rtl_udp.
Unitrunker running on a Raspberry Pi 3
In the future we may put up a full double checked tutorial with images, but for now a roughly written tutorial is presented below. The tutorial is fairly involved and assumes decent Linux experience. The tutorial starts from a fresh install of Raspbian.
The basic idea of operation is based around the fact that the RTL-SDR cannot be used directly within Wine (or so it seems). So the control signal audio is routed from rtl_fm running on one dongle into Unitrunker on Wine using alsa loopback. Then we use the old Unitrunker remote.dll method to generate a sdrsharptrunking.log file which is a text file that contains the current frequency that the voice receiver should tune to. A simple shell script continuously reads this file and extracts the frequency, and then commands an instance of rtl_udp running with the second dongle to tune to that frequency.
Over on YouTube user Kevin Loughin has uploaded a video demonstrating his SDRplay RSP2 running on a Raspberry Pi 3. The software he uses is CubicSDR which is a multiplatform program that is similar to software like SDRUno, SDR#, SDR-Console, HDSDR etc. The video shows CubicSDR running, but the interface is quite slow and laggy, although the audio is at least not choppy.
In a previous post we showed one of Kevin’s earlier videos where he does a tutorial and some scripts that help to actually set up the SDRplay drivers and CubicSDR in Linux. In the new video he first goes over a specific hack that needs to be done in Raspbian to fix the PulseAudio server. Then he explains that you can run the Linux build script mentioned in his previous tutorial video and it should work on the Raspberry Pi 3 just fine. Finally he mentions that CubicSDR and the SDRplay use a high amount of CPU processing on the pi3 so some sort of cooling mechanism is required or the pi3 may throttle down its CPU.
Ham Radio - SDRPlay running with CubicSDR on a raspberry Pi 3