Thanks to Manuel aka Tysonpower for submitting to us his extremely cheap ADS-B antenna build. Manuels ADS-B antenna consists of a simple SMA connector with flange and some wires cut to the correct resonant length for 1090 MHz ADS-B. This ground plane design has been around for years on the internet with atouk’s guide being the most commonly used, although atouk’s design uses a larger SO-239 connector instead. Manuel takes the design one step cheaper by using cheap single core copper wire for the elements, and a low cost SMA connector. The wires are soldered onto the SMA connector flange so you will need to know how to solder to complete the antenna.
Manuel has uploaded a video which shows the build steps for his cheap antenna in a step by step guide. We note that the video is narrated in German, but there are English subtitles.
Over on his blog Akos has uploaded several new posts all relating to ADS-B reception. His first post shows how to build a very simple yet effective “Coketenna” ADS-B antenna which can be built with an empty coke can and some coax cable. This antenna is essentially a 1/4 wave ground plane antenna with the ground plane being a coke can cut in half and mounted upside down. The whip sticking up is simply the coax inner wire. In his post Akos shows exactly how to construct one.
Cantenna and Coketenna
In his second post Akos offers some advice on mounting and positioning ADS-B antennas, discusses the ‘range myth’, talks a bit about LNA’s and filters and shows the differences between a stock RTL-SDR dongle, and one optimized for ADS-B reception like a FlightAware Protstick.
In his third post Akos shows his results from long term ADS-B reception comparisons between a generic RTL-SDR dongle, an RTL-SDR.com V3 dongle with 1090 MHz LNA powered by bias tee, a FlightAware Prostick and a FlightAware Prostick Plus. The V3 dongle with bias tee powered LNA is used as the benchmark receiver and the results show that it received the most signals. The next best was the Prostick Plus, followed by the Prostick and finally the generic dongle.
ADS-B Comparisons between 4 different RTL-SDR setups.
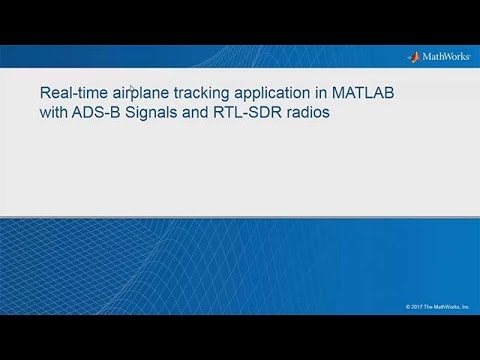
Over on YouTube the official MATLAB channel has uploaded a new video that is a tutorial on setting up ADS-B decoding in MATLAB. MATLAB is a technical computing language that is frequently used by many scientists and engineers around the world. They write:
Use the software-defined radio capabilities that are part of Communications System Toolbox™ to capture and decode ADS-B messages. ADS-B is a relatively simple standard used by commercial aircraft to transmit flight data such as aircraft ID, position, velocity, and altitude to air traffic control centers. ADS-B messages are 56 or 112 bits long, the data rate is 1 Mbit/sec, and the messages are amplitude modulated signals, transmitted at a carrier frequency of 1090 MHz
The video goes over what ADS-B is, how to receive it, and then goes on to explain a bit of the MATLAB code. This is a good introduction for people wanting to use an RTL-SDR in MATLAB, or for anyone wanting to learn about ADS-B.
Real-time Airplane Tracking with ADS-B Signals and RTL-SDR Radios
RadarBox.com is an ADS-B aggregator which is very similar to other aggregators like FlightAware.com and FlightRadar24.com. These services use ADS-B data provided from volunteers all around the world to create a live worldwide snapshot of current air traffic. The data is then used by airlines, airports, aerospace companies, as well as enthusiasts and regular people to track aircraft and estimate arrival times.
Typically contributors to these services use an RTL-SDR combined with a Raspberry Pi as the receiver. Some sites also use their own proprietary hardware, but they seem to be slowly falling out of favor as the RTL-SDR solution tends to be cheaper and more effective.
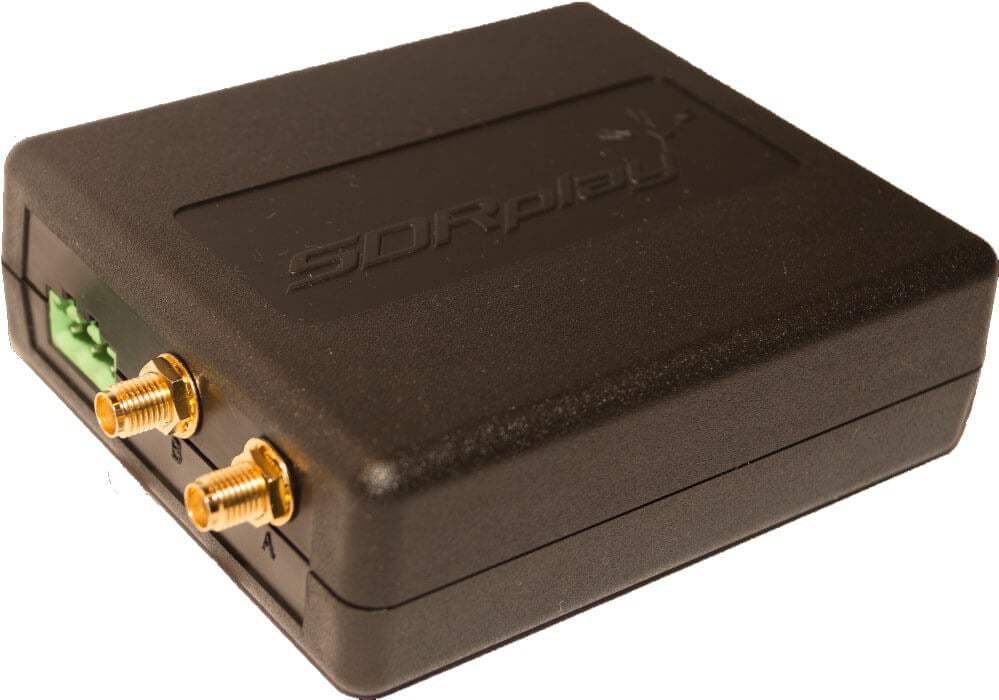
Over on our store we now have a limited amount of “Low Power V2” RTL-SDR dongles available for sale for $16.95 USD incl. free international shipping. These are dongles that were produced for the Stratux project which aims to provide a very low cost ADS-B and UAT receiver for small airplane pilots. These Stratux kits typically consist of a Raspberry Pi, two nano RTL-SDR dongles, a GPS dongle and a Android or iOS tablet. The two RTL-SDR dongles receive both 1090 MHz ADS-B and 978 MHz UAT which are decoded on the Raspberry Pi. The Raspberry Pi then sends the decoded aircraft position and weather data to the tablet via WiFi which is running commercial navigation software.
A full Stratux setup including: Raspberry Pi, two RTL-SDR nano dongles, GPS module, fan, and 1090 + 978 MHz antennas.
One issue that Stratux users continually run into, is that the Raspberry Pi is sometimes unable to power two or more RTL-SDR dongles. When running a Pi with two RTL-SDR dongles, a GPS dongle, and cooling fan the total power draw is above 1A which can cause power supply problems and glitching. By using a low power RTL-SDR these problems can be avoided by keeping the total current draw under 1A.
The Low Power V2 Stratux RTL-SDR’s draw about 160-170 mA, whereas standard dongles draw about 260 mA, so that’s a saving of almost 100 mA. On battery power this current saving can mean a few hours more of operation. The Low Power RTL-SDR dongle achieves its lower current consumption by using a switch mode power supply instead of a linear regulator which is commonly used on most other RTL-SDR dongles. The trade off is that switch mode supplies are inherently RF noisy, so increased noise can be seen on the spectrum. Despite the increased noise, most applications like ADS-B are not significantly degraded. We have seen switch mode supplies used on some other RTL2832U dongles sold in the HDTV market as well. For example all the R828D based DVB-T2 dongles that we have seen use switch mode supplies as well, and also draw about 170 mA.
We think that these low power RTL-SDRs could be useful in other non-stratux related applications too. For example, they could be used on mobile Android devices. One of the key problems with Android usage is that RTL-SDR dongles tend to drain the battery quickly. They could also be used on solar and battery powered installations to help achieve longer run times. Or like with Stratux they could be used on a Raspberry Pi running other applications, to ensure that multiple dongles can be attached.
Currently we are selling these dongles for $16.95 USD with free international shipping included. Note that these dongles do not come with an enclosure (just a bare PCB), and they do not have a TCXO. Below is more information about these dongles.
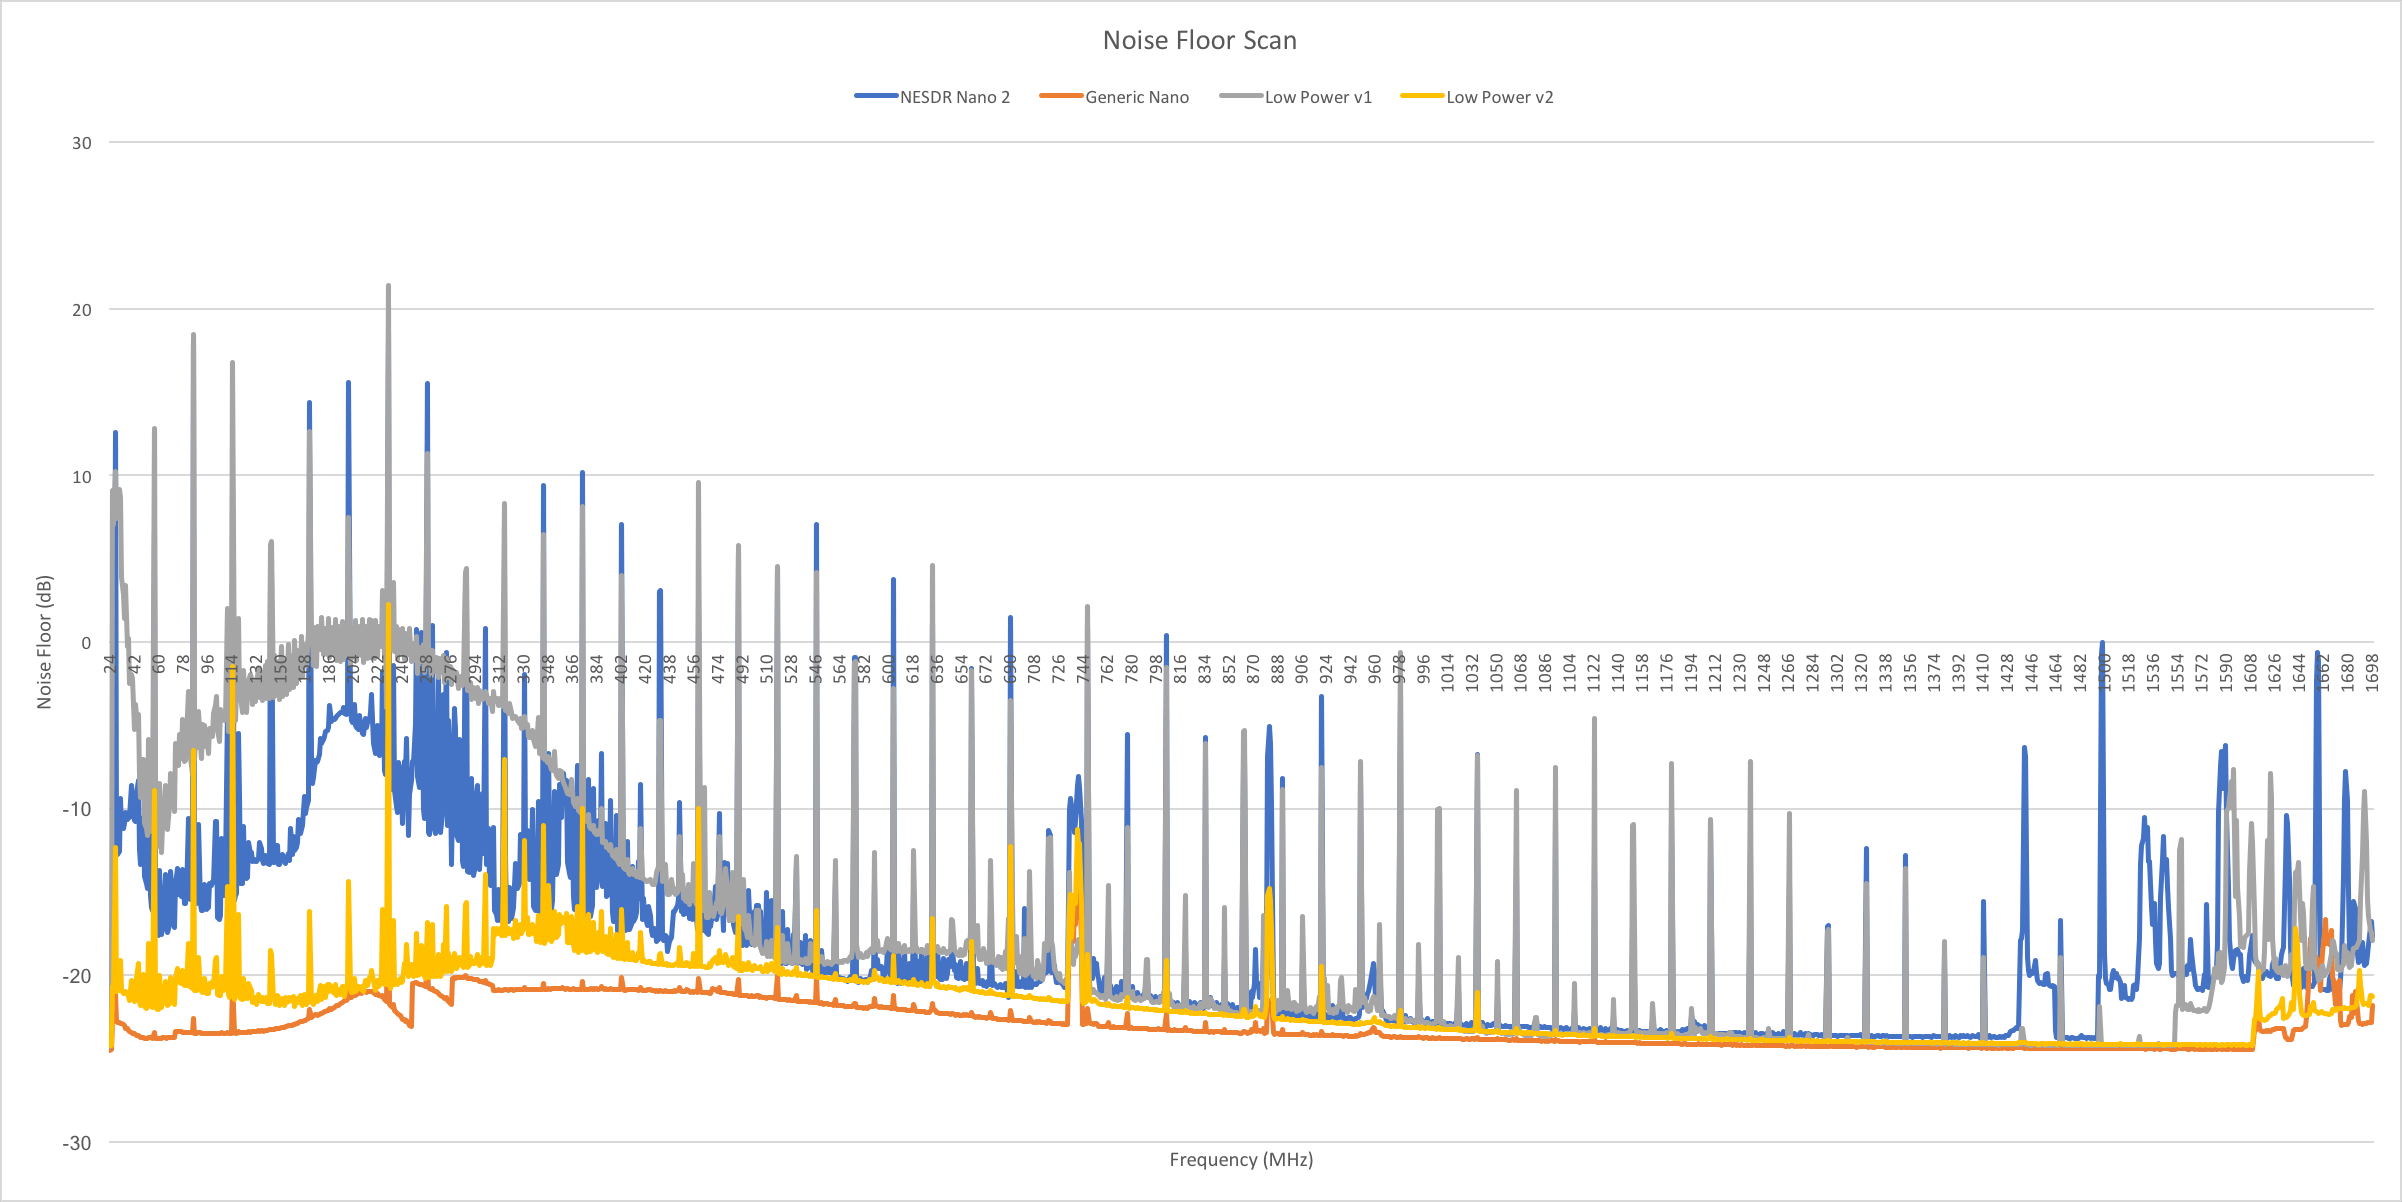
Back in November 2016 we posted a review on the Low Power V1 dongles. Since then Chris (the man behind producing these dongles) has brought out the Low Power V2 models which improves upon V1 significantly. By switching to a 4-layer PCB the dongle is now much quieter in terms of RF noise produced from the switch mode power supply, and it also now runs significantly cooler. The dongle also now uses even less power and is more sensitive compared with V1.
Noise Floor Comparisons between four Nano styled dongles. NESDR Nano 2 (Blue), Generic Nano (Orange), Low Power V1 (Gray), Low Power V2 (Yellow).
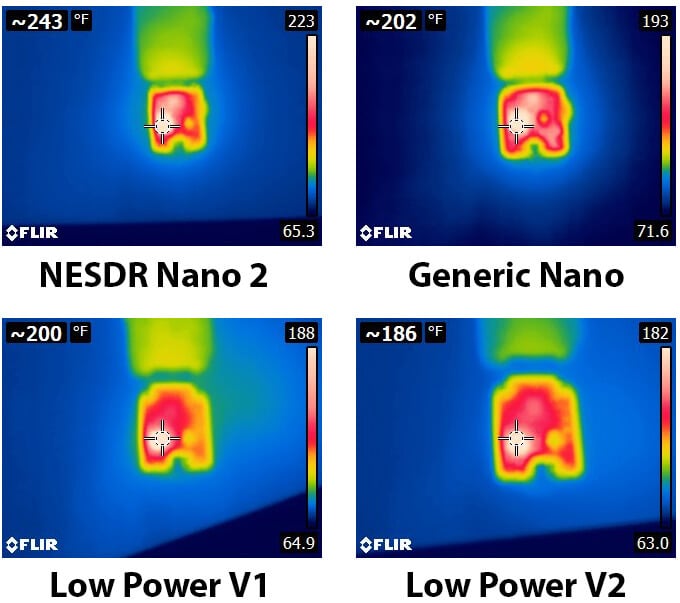
In terms of heat produced and power used, the NESDR Nano 2 is the hottest and most power hungry, followed by the Generic Nano, the Low Power V1 and then the Low Power V2. For comparison the NESDR Nano 2 draws 1.362W of power, the generic nano 1.318W, the Low Power V1 1.003W, and the new Low Power V2 draws only 0.933W.
The Pi Zero is one of the cheapest single board computers available, costing only $5 USD, and the wireless model with WiFi connectivity only costs $10 USD. It is powerful enough with its 1 GHz CPU and 512 MB of RAM to run an RTL-SDR and run several non CPU intensive applications such as ADS-B decoding.
The tutorial starts from the beginning by installing a fresh Raspbian image onto the Pi Zero. He then goes on to show how to install the PiAware tracking and feeding software from flightaware.com. Later in the tutorial he also shows how to collect data straight from the flightaware.com API, and also how to build and control an RGB matrix which can display live flight numbers.
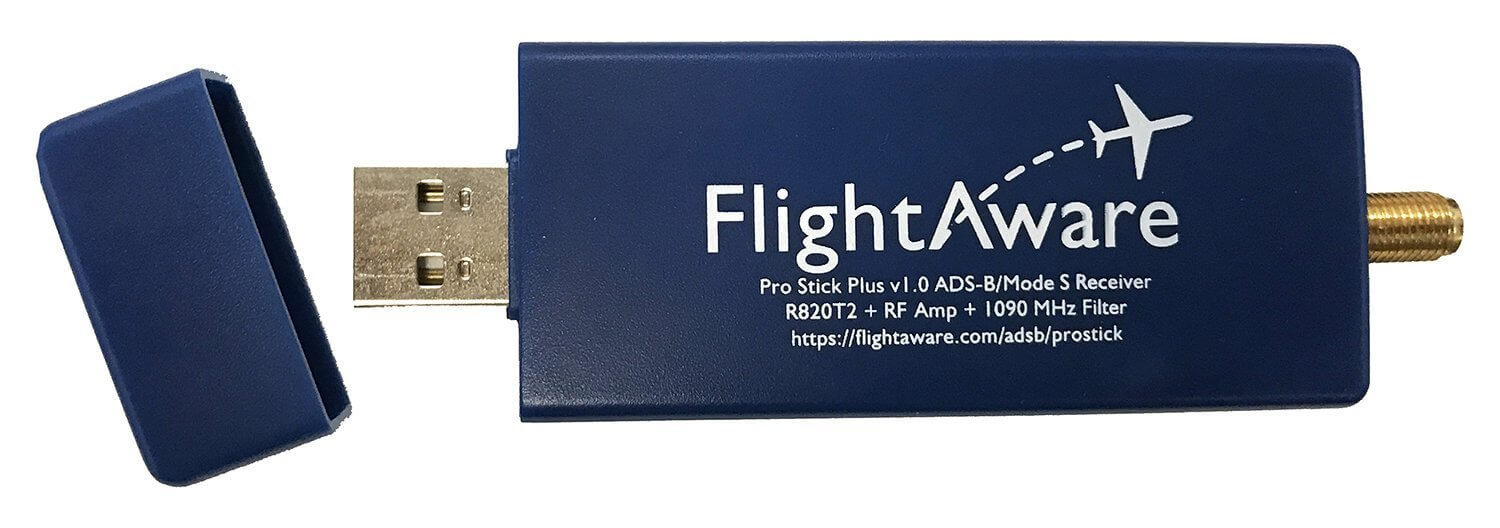
The FlightAware ProStick Plus is an modified RTL-SDR designed specifically for ADS-B reception. Its main defining feature is that it has a built in low noise figure LNA, and a 1090 MHz SAW filter. The LNA reduces the noise figure of the RTL-SDR, improving ADS-B reception and thus increasing the number of messages received and the receivable range of aircraft. The SAW filter helps remove out of band signals which can cause the RTL-SDR to overload if they are particularly strong. The Prostick Plus also comes with a TCXO, and SMA connector.
If you are mainly interested in ADS-B reception, or are looking to set up an ADS-B station then the Prostick Plus is one of the best choices you can make. See our previous review here.
We are now reselling some of FlightAware’s Prostick Plus dongles in our store now. They cost $24.95 USD including free shipping worldwide. We intend to sell them mainly to customers outside of the USA, as FlightAware already sell them officially on Amazon, but we offer free shipping anywhere in the world.
![[EN subs] ADSB Antenne für 2€ - DIY](https://www.rtl-sdr.com/wp-content/plugins/wp-youtube-lyte/lyteCache.php?origThumbUrl=https%3A%2F%2Fi.ytimg.com%2Fvi%2FU6ae4E75ICY%2F0.jpg)