Building a DIY Off-Grid Weather Station with a Raspberry Pi and RTL-SDR Receiver
Thank you to Vinnie for writing in and sharing with us his home made Raspberry Pi based off-grid weather station, which uses an RTL-SDR to receive data.
Being somewhat disappointed with a cheap all-in-one weather station's data, lack of local storage and customisation possibilities, Vinnie decided he could do better and build his own custom solution instead. While working on an existing Raspberry Pi based ADS-B station that he had already deployed, he realised that the hardware was largely underutilised and would make an ideal platform for additional RF decoding tasks.
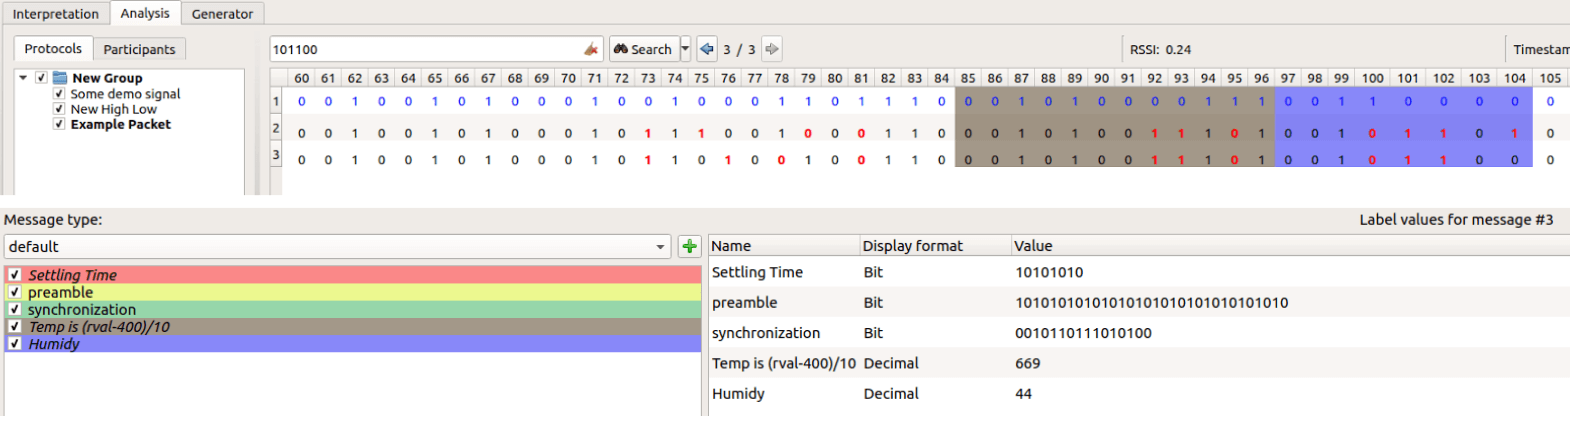
By adding a second RTL-SDR dongle and using the popular rtl_433 software, Vinnie was able to receive and decode data from an Ecowitt WS90 all-in-one outdoor weather sensor. Unlike many consumer weather stations, the WS90 operates as a simple one-way RF transmitter with no cloud dependency, making it ideal for local SDR-based decoding and long-term data ownership.
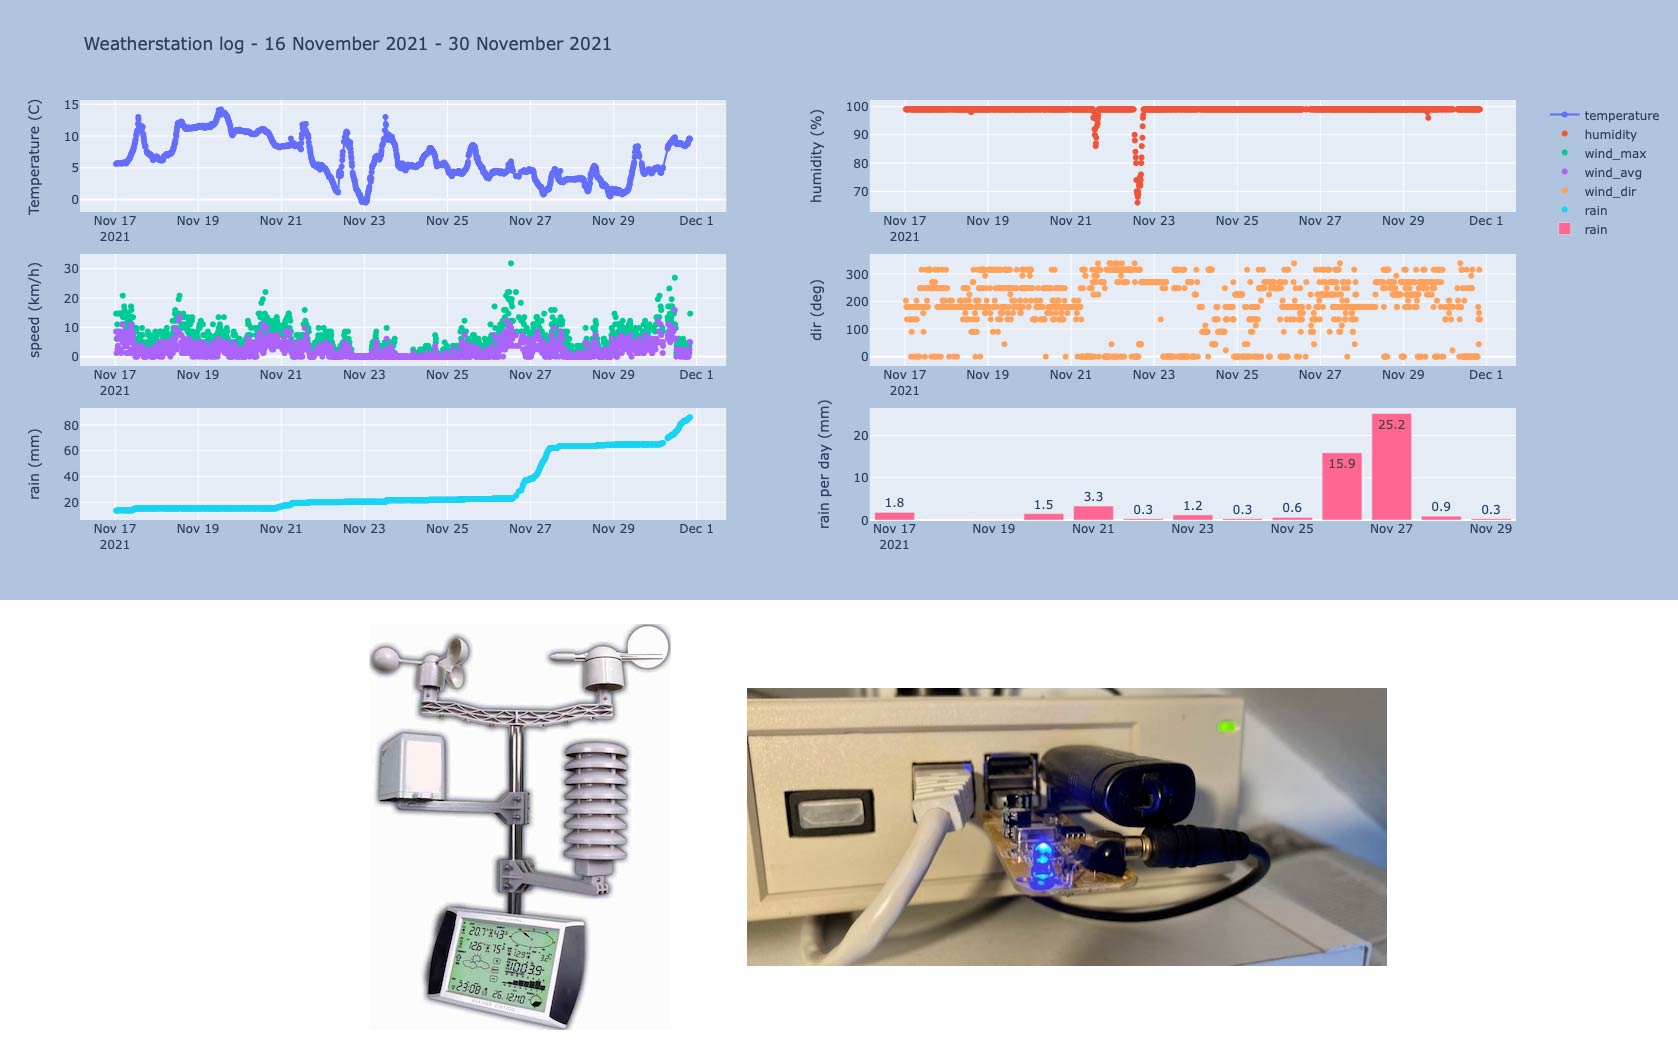
All weather data is received locally over RF, decoded into JSON, processed on the Raspberry Pi, and stored locally without relying on third-party cloud services. Rainfall totals, daily highs and lows, and historical trends are calculated entirely in software, giving full transparency and flexibility over how the data is handled. A simple web dashboard then displays current conditions and recent history on the local network.
The entire system runs in Docker containers alongside the ADS-B feeder, keeping services isolated and easy to maintain. Optional one-way data sharing to weather aggregation services can be enabled if desired, but the station functions fully offline by default.
In his post, Vinnie has written an in-depth overview of the hardware choices, RF decoding, data pipeline, and software architecture behind the project, including why certain sensors were chosen and how rainfall is calculated from raw impulse data. The code is all opensource and available on his GitHub.