RTL-SDR 433: A New Android App for Decoding 433 MHz Sensors with rtl_433
Thank you to Christian Ebner from ebcTech, who has submitted news about his newly released Android app RTL-SDR 433, which lets you run the rtl_433 decoder directly on your phone using an RTL-SDR dongle connected via a USB OTG cable.
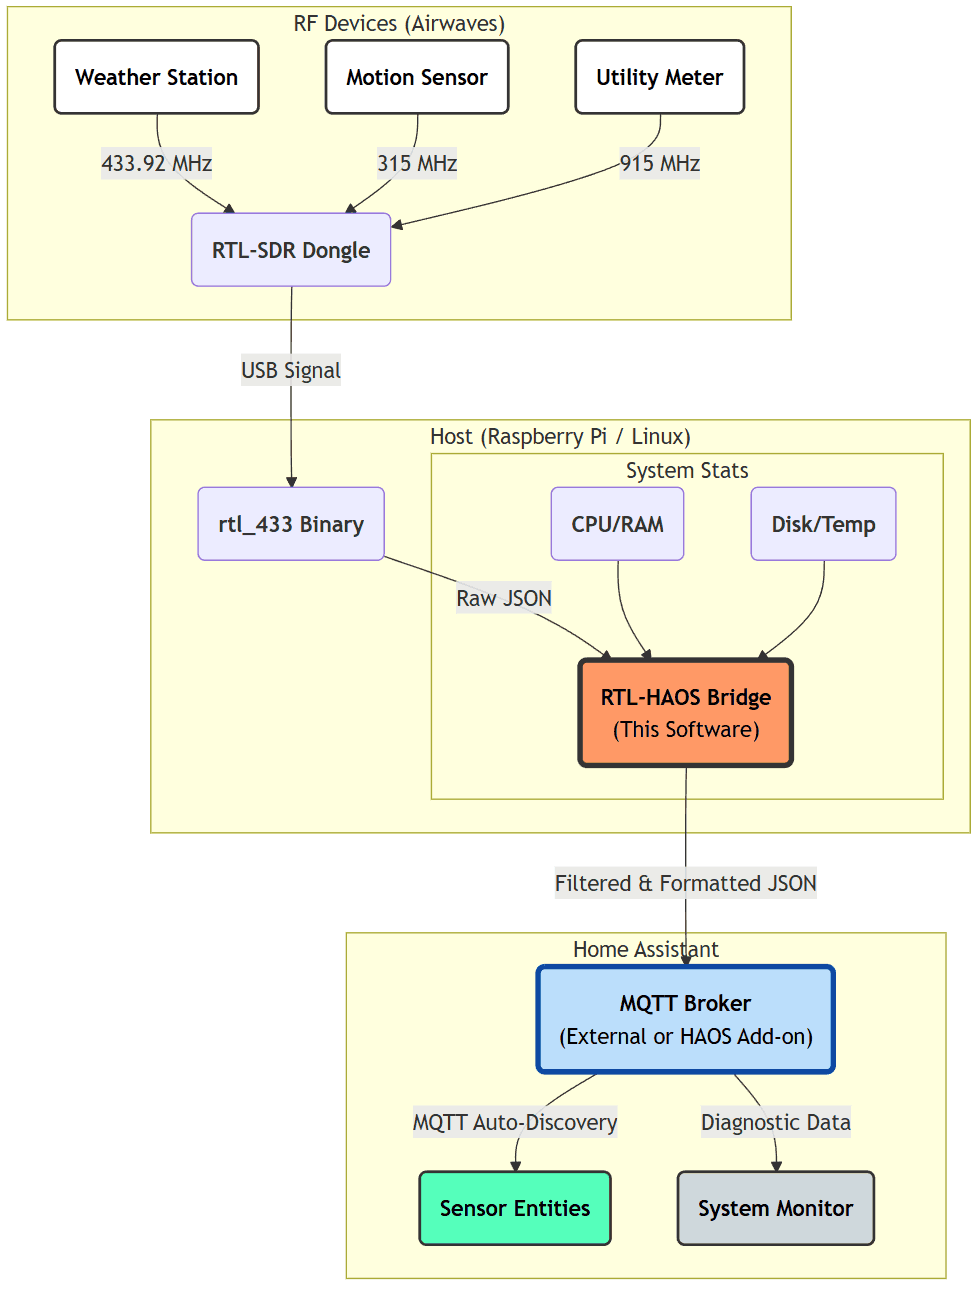
The app bundles rtl_433 as a native Android library and supports all 258 device protocols out of the box, including weather stations, TPMS, wireless doorbells, PIR motion sensors, energy meters, door/window contacts, and remote sockets. Decoding runs entirely on-device with no internet connection required, no root, and no special drivers. It uses the standard Android USB Host API together with a libusb Android port.
The UI is built with Jetpack Compose and Material 3, and shows a live list of unique sensors with expandable cards (temperature, pressure, RSSI, raw JSON) plus a full history log. The app is free to try with a decreasing per-session reading limit, and a one-time purchase for a few dollars removes the limit permanently.
We note that the GPL-licensed native layer (rtl_433, rtl-sdr, libusb Android port and EBC's integration glue) is published openly at github.com/ebc81/rtlsdr433-native-gpl in compliance with GPL-2.0, while the UI layer remains closed-source.
More information about the app is available on the ebcTech page at https://ebctech.eu/rtl-sdr-433-android.