Aaron, creator of DragonOS, has uploaded a video on his YouTube channel showing him testing out long-range communications via 802.11ah Wireless Networking and a T-HaLow bridge on two drones. 802.11ah (aka HaLow) is a WiFi protocol designed for long range IoT communications of up to 1 km (without obstructions).
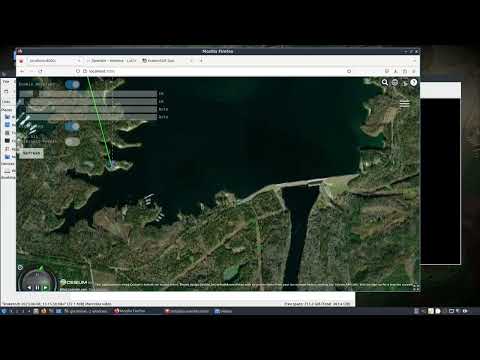
In the video, Aaron attempts to stream IQ data with SDR++ over 802.11ah HaLow from a Pi + KrakenSDR operating over 1.6km away. The communication is established via two drones in the air that act as a relay bridge between the two ground stations. Although there are issues with keeping the connection stable, these experiments serve as a great first test of this capability.
Join me on an exciting month long+ journey as I push the boundaries of wireless communication using the Lilygo T-HaLow 802.11ah devices in bridge mode! In this video, I demonstrate how I successfully established an SSH connection from my laptop, across six T-HaLow units—some mounted on two drones and others on the ground—to a Raspberry Pi ground station equipped with DragonOS pi64 and a KrakenSDR.
What You'll See:
Innovative Network Setup: I configured three pairs of T-HaLow units, each pair consisting of an access point and a client. The first pair connected my laptop to the first drone. On each drone, I bridged two T-HaLow units via Ethernet, effectively creating a relay system. The second pair connected the two drones, and the third pair linked the second drone to the ground station Raspberry Pi.
Successful Long-Distance Communication: By the third attempt, I achieved a stable ping across the entire bridge and streamed IQ data from the SDR++ server on the Raspberry Pi to the SDR++ client on my laptop—over a distance of 1.6 km between drones!
Challenges and Triumphs: Experience the hurdles I faced, from connectivity issues to environmental obstacles, and how perseverance led to a successful connection.
Stunning Aerial Footage: Enjoy breathtaking drone shots that not only showcase the technology but also add a visual treat to the technical journey.
Why This Matters:
This project highlights the potential of increasing the standoff distance between equipment using 802.11ah technology, also known as Wi-Fi HaLow. Operating in the sub-1 GHz unlicensed bands, 802.11ah offers extended range and improved propagation through obstacles compared to traditional Wi-Fi frequencies. It's designed for low-power, long-range connectivity with lower power consumption—ideal for IoT applications, remote deployments, and innovative projects like this DragonBridge.
Over several years Aaron (@cemaxecuter) has been working on DragonOS, a popular Linux distribution that comes preinstalled with many different programs for software defined radios. A Linux distribution like this takes the hassle out of having to figure out how to compile and install various SDR programs, some of which can be quite tricky to get running.
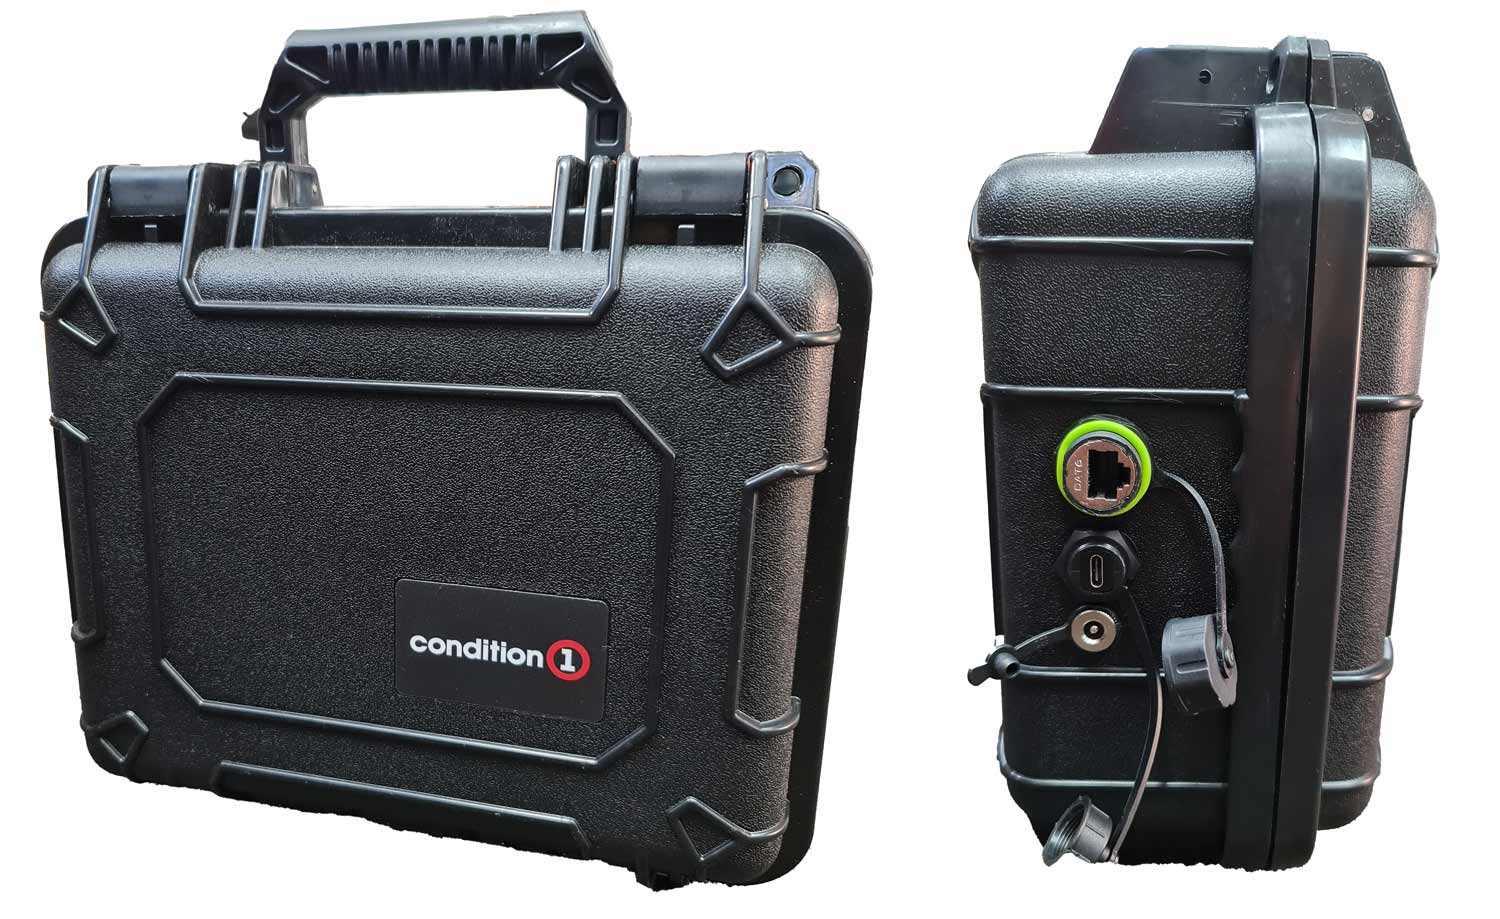
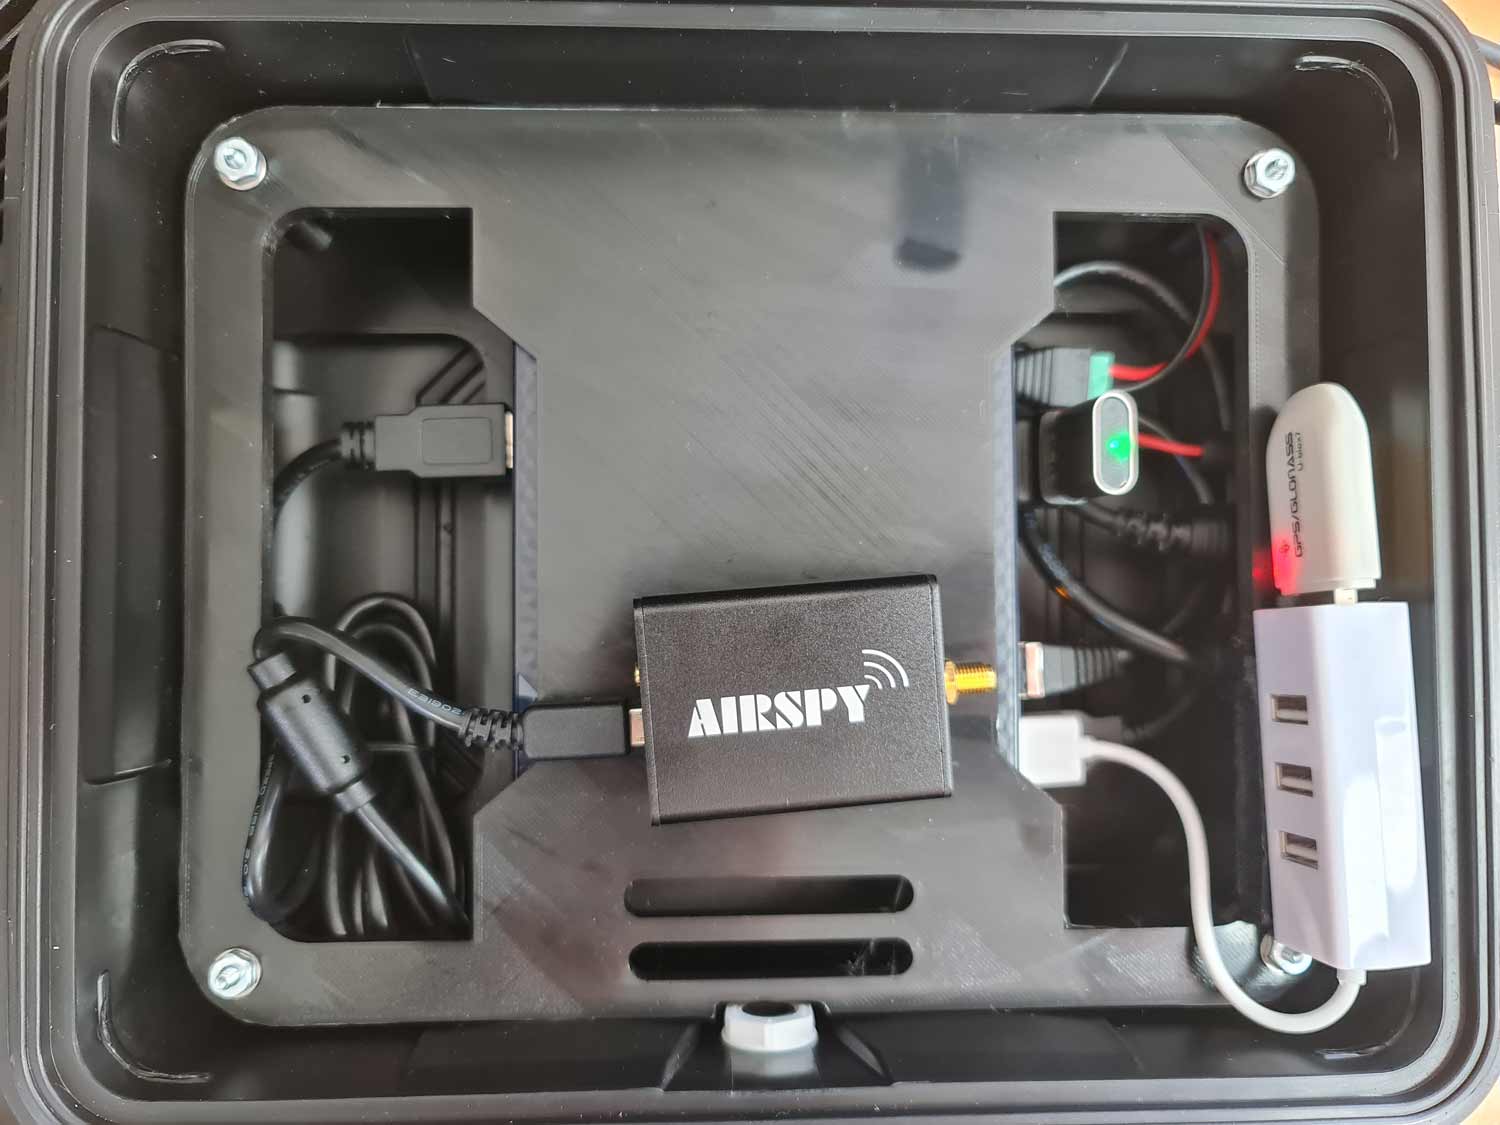
Recently Aaron has also been working on WarDragon, which is a set of components that he's carefully tested and put together as a ready-to-use portable SDR kit. At its core is an Airspy R2 software defined radio and x86 Mini PC that comes with DragonOS pre-installed. It also includes a USB hub and GPS dongle, as well as an HDMI dummy plug for enabling remote desktop. Everything is held together by a 3D printed frame, and enclosed in a plastic carry hard case, with the external Ethernet, USB-C, and power ports routed to the outside of the enclosure.
Aaron kindly sent us a WarDragon for an honest review. We note that we do not get to keep the WarDragon, and it will be forwarded to someone else after this review.
WarDragon Outer EnclosureInside WarDragon (Intel PC hidden underneath)WarDragon with an LCD screen connected
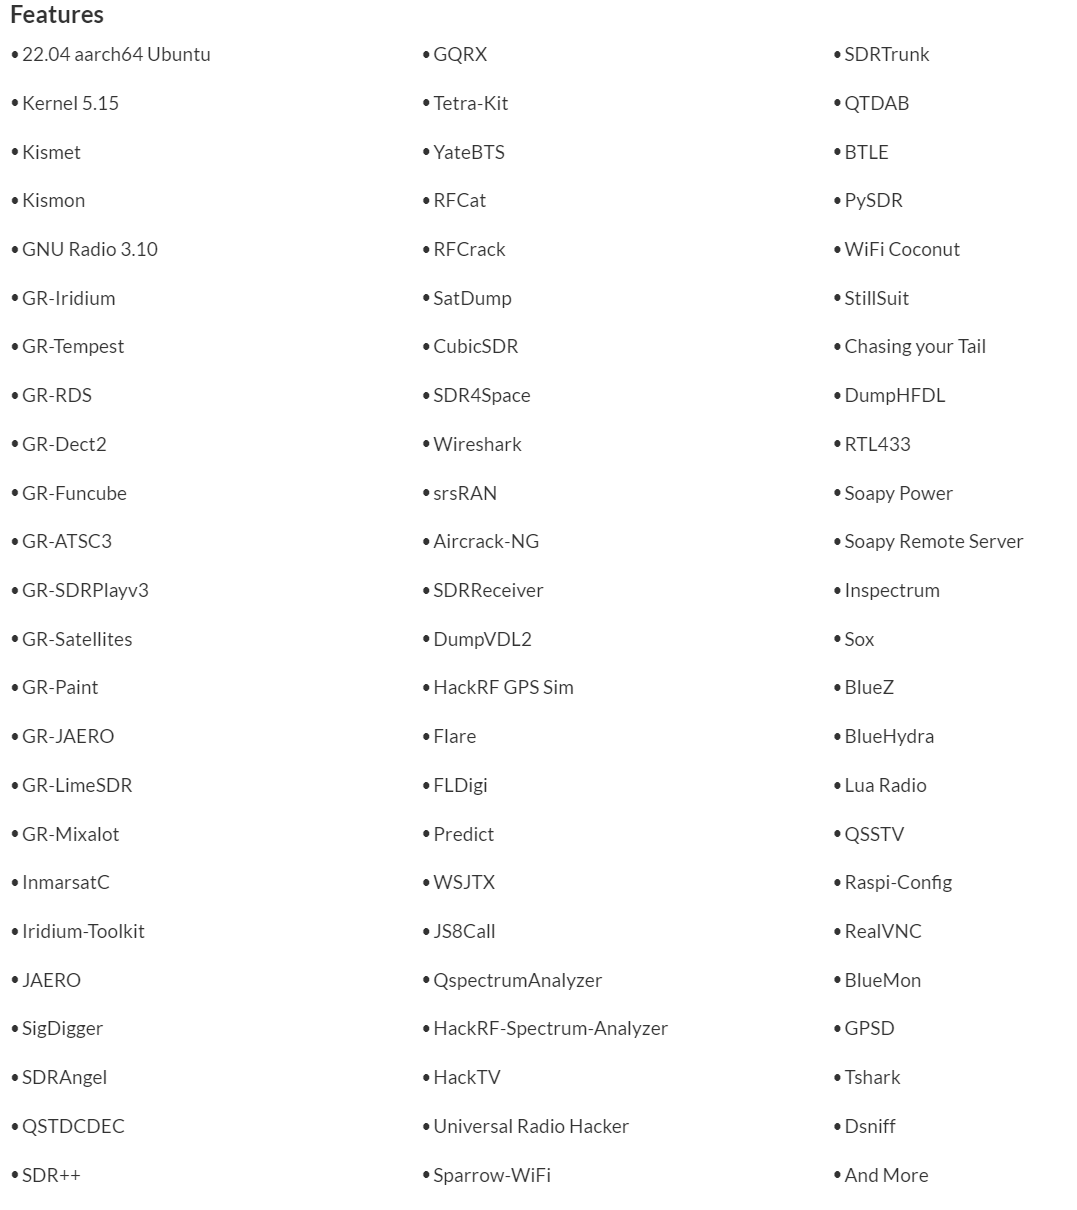
Getting started with WarDragon is simple. Open the hard-shell case, connect an antenna to the Airspy, remove the dummy HDMI plug, connect a monitor to the HDMI port and a keyboard/mouse to a USB port, connect 12V power, and start the mini PC. A few seconds later DragonOS has booted, and you can run any of the programs pre-installed. And there are certainly a lot of programs available to play with as shown below.
List of software pre-installed in DragonOS
To get started with running it remotely we followed the instructions on the desktop to install OpenSSH, and ran the Rustdesk appimage stored in the 'post install' folder on the desktop. This allowed us to connect remotely to the unit via Rustdesk, a remote desktop interface. From there we were able to run software like SDR++, GQRX, and anything else that was preinstalled.
Aaron notes that every WarDragon will come with a free license for SDR4Space which is a command-line SDR tool for satellites. It can be used for scripting various operations, such as "recording IQ samples, predicting satellite passes and to start a record for a specific satellite and correct doppler at the same time".
The KrakenSDR software is also pre-installed on WarDragon, so the Airspy can easily be swapped out for a KrakenSDR too (or almost any other SDR as well). You can also add extra RTL-SDR units on the USB hub if desired.
Once you're done simply unplug everything and put the HDMI dummy plug back in. Close the enclosure up and you're ready to get on the move again.
One minor concern we have is that while the components are contained with the 3D printed frame, the frame itself is not held down inside the enclosure, so it can move a little during transport. Not a big deal if you are sensible about carrying it, but if you are expecting to throw the box around, something could eventually go wrong. Aaron also notes in the instructions that care should be taken to not leave WarDragon exposed to direct sunlight or in a parked car to avoid the 3D printed insert from warping. This could probably be solved by printing in a material like ABS.
Performance
The mini-PC included with WarDragon runs a 12th Generation Intel Alder Lake - N95 that can turbo up to 3.4 GHz, has 8GB of RAM, and a 256GB SSD built-in. These specs are powerful enough that the system is very snappy, software opens quickly, and software runs smoothly, even at the max 10 MHz bandwidth the Airspy supports.
These x86 mini-PCs appear to be quite a bit more powerful than their similarly priced ARM counterparts, but they do draw more power. The mini-PC running SDR++ and Airspy at 10 MHz oscillates around 20-30W of power draw, whereas a Raspberry Pi 5 running SDR++ only draws 5W.
What We'd Like to See Improved
Because the carry case is fully sealed when closed, the mini PC inside cannot be run when the case is closed, as there would be no airflow for cooling. We'd like to see some thought put into adding an external fan, and indeed Aaron has noted that in future versions he will be adding this. However, adding a fan does come at the expense of water tightness but we don't imagine many people would be throwing this in a body of water. As long as rain resistance is kept it should be alright.
We'd also like to see the SMA port brought out to the side, so an external antenna can be connected with the enclosure closed.
We can also imagine that some users might like to see a more expensive version that comes with a small screen and keyboard/mouse as part of the combo too. Aaron does note that the most common use case for operating via SSH or remote desktop via a field laptop though.
Price Review / Value
The Wardragon consists of the following components:
Beelink Mini PC (N95 8G+256G) - US$159 on Amazon.
Airspy R2 - US$169 on iTead.
Condition 1 11" Carry Case - US$36.99 on condition1.com
Other parts (cables, USB hub, USB GPS, HDMI dummy plug, outside connectors, 3D printed frame) - $US35 (estimated)
SDR4Space License - $US???
So that's a total of US$400 in parts (not including shipping costs) plus a bit of value from the SDR4Space license which is usually obtained on an inquiry-only basis. WarDragon currently sells for US$580. So for the extra $180, you are paying for the time to preinstall of DragonOS, drill the external mounting holes, 3D print the mount, the build time, testing time, and the ability to get support directly from Aaron himself. And we can't forget to mention the time Aaron puts into creating YouTube videos for WarDragon.
Obviously, if you are on a tight budget it would make sense to try and build your own system. But overall we think WarDragon is not a bad deal if your time is worth more and you just want a portable system to get up and running with DragonOS ASAP.
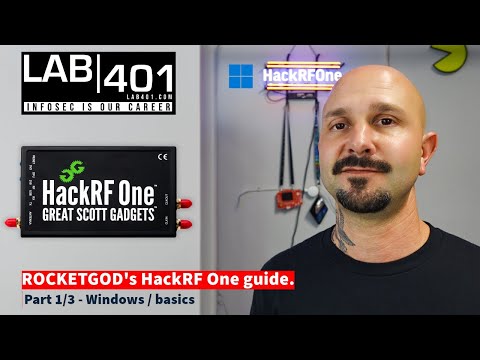
Over on the Lab401 YouTube channel, 'RocketGod' has uploaded three videos that are various tutorials for the HackRF on Windows. The first video covers the basics like installing software and shows how to decode pager signals with PDW.
The second video shows how to decode police transmissions, car key fobs, use rtl_433, and how to use Universal Radio Hacker to capture and analyze signals.
The third video is not yet released, but is due to premier on YouTube in 10 hours from the time of this post. In that video RocketGod will show how to install and use DragonOS, and how to install and use SDR Trunk which turns the HackRF into a police scanner. Finally, he will demonstrate SDR Angel and show it decoding ADS-B signals from aircraft to show you live flight tracking data.
Over on his YouTube channel Aaron who created and maintains the DragonOS SDR Linux distribution, has uploaded a video demonstrating how to use the GNSS-SDR software together with an RTL-SDR and patch antenna to obtain a live GPS position.
Previously we had only seen a Windows method involving GNSS-SDRLIB and RTKNAVI working as GNSS-SDR on Linux seemed impossible to get running. However, Aaron managed to find a working RTL-SDR configuration for GNSS-SDR which made it come alive. This is great as now GNSS-SDR should be able to run on a portable single board computer like a Raspberry Pi.
The video is a tutorial that shows how to install all the required dependencies, how to compile GNSS-SDR, how to configure it for an RTL-SDR, and how to use it with our RTL-SDR Blog L-band patch antenna.
DragonOS FocalX Setup GNSS-SDR and Obtain GPS Position w/ RTLSDR (Patch Antenna, WarDragon)
DragonOS is a ready to use Ubuntu Linux image that comes preinstalled with multiple SDR software packages including a tool called DF Aggregator, which can be used for radio direction finding with a device like our KrakenSDR.
In his latest video, Aaron, creator of DragonOS tests out a long range one kilometer WiFi link between a KrakenSDR, and his base station running DF Aggregator. The WiFi link is achieved by using a ALFA Network 802.11ah (900 MHz US) adapter. The remote KrakenSDR is running on a 'DragonDeck', which is a SteamDeck gaming console with DragonOS installed on it.
In the video Aaron shows that when he transmits with his handheld radio, the remote KrakenSDR is able to provide an accurate bearing towards the transmitter. At the end Aaron also briefly tests out automatic speech transcribing via WhisperCPP.
Aarons tests were run together with @VibesGoon who shows a few great pictures of his KrakenSDR setup on his Twitter Feed.
I linked up with @cemaxecuter to test out using the kraken with long range wifi. We used a HackRF to identify the signal, the kraken to DF the signal, and another software to transcribe the transmissions. We used a long range wifi set up to communicate over 1km line of sight and… pic.twitter.com/29pKNQAd7t
DragonOS is a ready to use Ubuntu Linux image that comes preinstalled with multiple SDR software packages. The creator Aaron also runs a YouTube channel showing how to use the various packages installed.
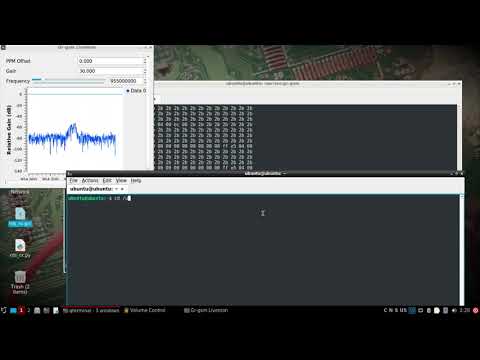
In his latest video Aaron tests his Pi64 image with GR-GSM and IMSI Catcher running with the GNU Radio 3.10 platform on a Raspberry Pi 4. He tests operation with an RTL-SDR and LimeSDR.
GR-GSM is a GNU Radio based program capable of receiving and analyzing mobile GSM data. We note that it cannot decode actual messages without additional information about the encryption key, but it can be interesting to investigate the metadata. GSM is mostly outdated these days, but still used in some areas by some older phones and devices. IMSI Catcher is a script that will record all detected GSM 'IMSI' numbers received by the mobile tower which can be used to uniquely identify devices.
Short video setting up and testing GR-GSM on DragonOS Pi64 w/ GNU Radio 3.10 and the RTL-SDR. The current DragonOS Pi64 build has GNU Radio 3.8 and all the necessary tools to accomplish what's shown in this video. If you'd like to test the build shown in this video, it's temporarily available here until I finish and put it on Source Forge.
A LimeSDR and DragonOS Focal's Osmo-NITB-Scripts was used to create the GSM900 lab environment. The RTL-SDR was able to see and decode the GSM900 network and although only briefly shown in the video, the IMSI Catcher script works.
Here's the fork used for this video and for testing. There's also a pull request on the main GR-GSM repo for this code to be added.
In the past we've posted many times about DragonOS which is an Ubuntu Linux image that comes preinstalled with multiple SDR software packages. This takes the hassle out of needing to compile and install programs on Linux, some of which can often be very difficult and time consuming to get up and running. Aaron who is the creator of DragonOS also runs a YouTube channel where he provides multiple tutorials and demos of the software installed.
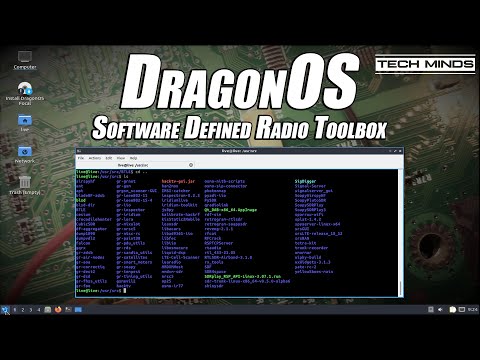
This week on the Tech Minds YouTube channel, host Matt tests out DragonOS in a Virtual Machine and gives a broad overview of what DragonOS is capable of. He shows how to set up VMWare Workstation in order to create the virtual machine, installs Dragon OS, shows what programs are included and demonstrates a few programs in action.
DRAGON OS FOCAL - The Software Defined Radio Toolbox
DragonOS is a ready to use Ubuntu Linux image that comes preinstalled with multiple SDR software packages. The creator Aaron also runs a YouTube channel showing how to use the various packages installed. In his latest video Aaron shows how to use the new Signal-Server GUI that has recently been added to DragonOS.
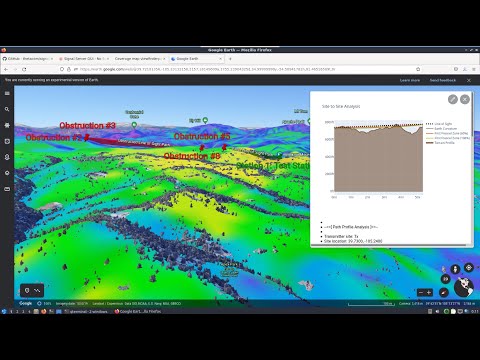
We posted about Signal Server before as it's a very powerful open source tool for creating RF Propagation simulations. With this tool you can determine how a signal from a transmitter might propagate, by taking into account factors like frequency, EIRP, and geographic elevation maps. The resulting propagation map can then be plotted on Google Earth.
Aarons recent work adds thetacoms GUI to the Signal Server install on DragonOS, and his video shows how to use it, including an introduction to RF propagation analysis in general. This version of DragonOS with the GUI is not yet available for download, but it will be in a future version. For now the video also shows how to install the GUI.
DragonOS Focal New Signal Server GUI Setup + Intro to RF Propagation Analysis (Signal-Server) Part 1