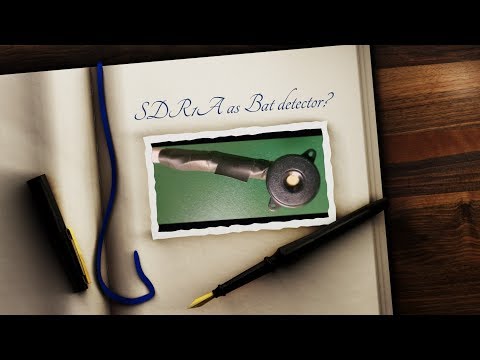
Over on YouTube user Jan de Jong has uploaded a few screenshots and sounds on a video which shows that he was able to receive the ultrasonic sound of bats by connecting a small piezo speaker to an SDRplay RSP1A.
The piezo speaker used in reverse as a microphone appears to pickup bat echolocation sound waves which are typically between 20 to 200 kHz. The piezo is resonant in the 40 - 55 kHz range and converts sounds from that range into electric pulses that can be received directly by the RSP1A.
Last month we posted that the website for the popular NOAA APT weather satellite decoding software known as WxtoImg went down. Since then we've been in contact with the developer of the software, and he did indicate that he may restore the site at some time in the future, but is currently busy with other projects so doesn't have much time to devote to his old software at the moment.
In the meantime (or perhaps permanently) a WXtoImg fan has created a clone of the original website which he's called "WXtoImg Restored". The site contains most of the downloads as well as a professional edition update key, which was released for free by the original author before. If you don't trust the third party site, some downloads are also still available from the internet archival project's copies of the original WXtoImg website.
There are still some files missing on WXtoImg Restored, and these are outlined on the new website's homepage, so if you have them please contribute them to the site email.
As mentioned in our previous post about the Outernet LoRa chat application, Outernet is currently holding a 33% off sale on their 'Dreamcatcher' satellite data receiver. To get the discount use the coupon "33%OFFJULY4SALE" on their store. The sale lasts until Midnight Central Time on Wednesday 4 July. The code is valid site wide, so applies to the moRFeus product as well.
In this post we'll highlight the Outernet data service which can be received in the Continental USA with the Dreamcatcher 3 hardware.
Outernet is a free download only satellite based information service that aims to be a sort of 'library in the sky'. Their aim to to have satellites constantly broadcasting down weather, news, books, radio, web pages, and files to everyone in the world. As it's satellite based, the service is censorship resistant, and useful for remote/marine areas without or with slow/capped internet access.
Currently the Outernet data service is considered to be beta, and is only available for those in the Continental United States.
The New Outernet Data Service
Originally a few years ago Outernet started with a 12 GHz DVB-S satellite service that gave 1GB of content a day, but that service required a large dish antenna which severely hampered user adoption. Their second attempt was with an L-band service that only needed a small patch antenna. This service used RTL-SDR dongles as the receiver, so it was very cheap to set up. Unfortunately the L-band service had a very slow data rates (less than 20MB of content a day), and leasing an L-band transmitter on a satellite proved to be far too expensive for Outernet to continue with. Both these services have now been discontinued.
Outernet 3.0 aims to fix their previous issues by giving us a service that provides over 300MB of data a day, with a relatively cheap receiver, computer and antenna combination that is small and easy to set up. The new receiver uses a standard Ku-Band LNB as the antenna, which is very cheaply available as they are often used for satellite TV reception. The receiver is called 'Dreamcatcher 3', and is a custom PCB containing a hardware receiver (non-SDR based) with a LoRa decoder, as well as an embedded ARM computer capable of running Linux.
LoRa is an RF protocol that is most often associated with small Internet of Things (IoT) devices, but Outernet have chosen it as their satellite protocol for Outernet 3.0 because it is very tolerant to interference. In Outernet 3.0 the LNB is pointed directly at the satellite without any directive satellite dish, meaning that interference from other satellites can be a problem. But LoRa solves that problem by being tolerant to interference.
The Data Service
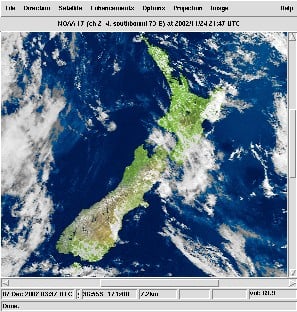
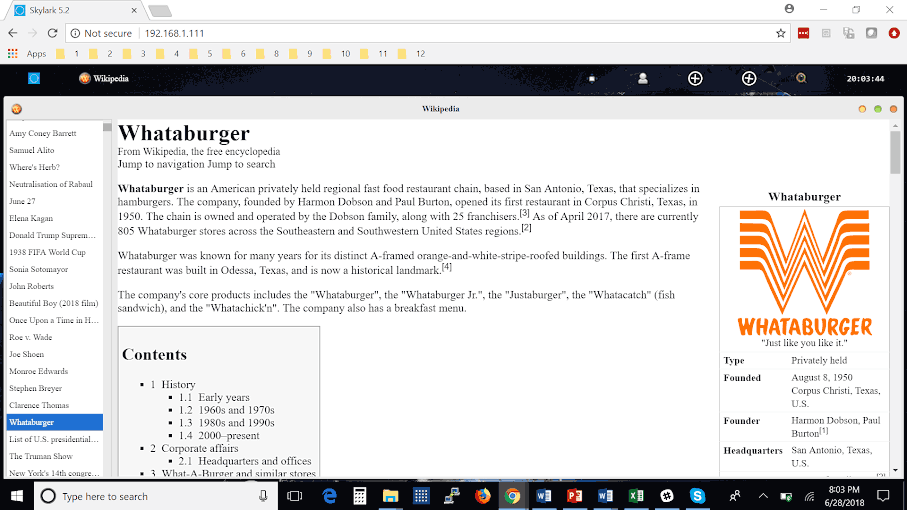
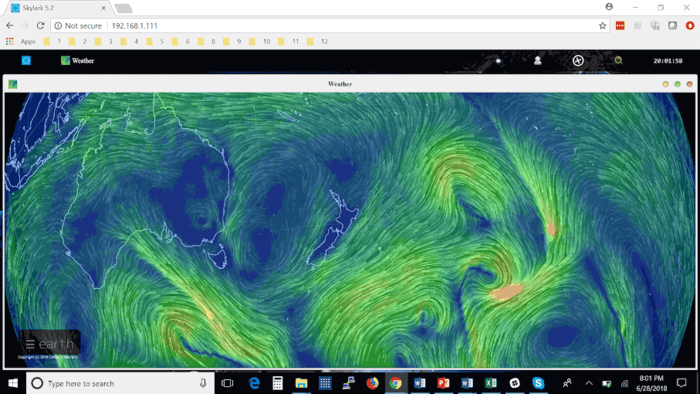
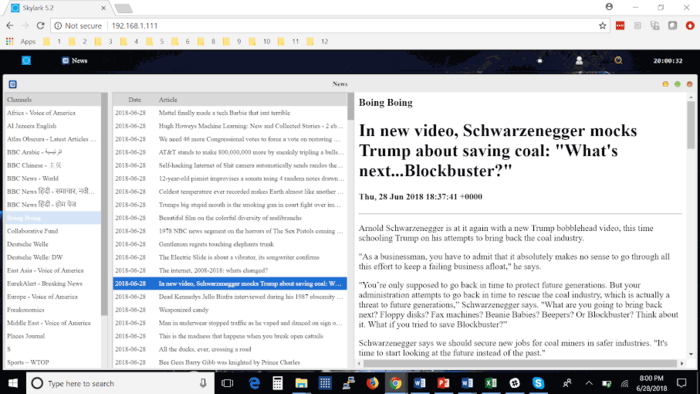
Currently, Dreamcatcher 3 users are receiving data such as hundreds of daily news articles, global weather information and the top 100 most searched Wikipedia articles of the day. A new satellite radio broadcast service is also being tested (kind of similar to Sirius XM, but only one channel at the moment). Compared to the older L-band Outernet service, the larger data rates allow for a lot more data and thus articles to come down.
Like previous iterations, the Dreamcatcher 3 board runs remotely on a WiFi connection. You then connect to the Dreamcatcher 'Skylark' web interface via a PC or mobile browser. On this web interface you can browse all your downloaded files. The user guide is a good read for understanding the set up procedure.
Some screenshots of example received data are shown below.
Conclusion
Outernet have been working hard to perfect their service over the years, and the current offering is the best compromise between ease of use and data rates that we've seen so far. Unfortunately the service is only available in the Continental USA at the moment, but we're looking forward to future expansion.
Currently we'd only recommend purchasing the Dreamcatcher 3 receiver for the Outernet data service if you understand that the service is in beta, requires a little bit of technical know-how, and like previous Outernet iterations is subject to possible change. Support is only available via their forums.
We can see the service being popular with those who live and work in remote areas without or with expensive internet. Censorship resistance is also another big plus, but satellites would need to be rented for these areas first.
There are also more creative uses. 'Unplugged' getaways are becoming popular in the modern world. Perhaps you want an internet free holiday, but don't want to miss out on important breaking news and weather updates for safety. In the future Outernet could also be used for Bitcoin or other Cryptocurrency blockchain transmission. In past Outernet iterations it was also possible to send a tweet that would be re-transmitted by Outernet. A similar messaging service could be used to control remote devices.
Over on YouTube user Jan de Jong has uploaded a few screenshots and sounds on a video which shows that he was able to receive the ultrasonic sound of bats by connecting a small piezo speaker to an SDRplay RSP1A.
The piezo speaker used in reverse as a microphone appears to pickup bat echolocation sound waves which are typically between 20 to 200 kHz. The piezo is resonant in the 40 - 55 kHz range and converts sounds from that range into electric pulses that can be received directly by the RSP1A.
Last month we posted that the website for the popular NOAA APT weather satellite decoding software known as WxtoImg went down. Since then we've been in contact with the developer of the software, and he did indicate that he may restore the site at some time in the future, but is currently busy with other projects so doesn't have much time to devote to his old software at the moment.
In the meantime (or perhaps permanently) a WXtoImg fan has created a clone of the original website which he's called "WXtoImg Restored". The site contains most of the downloads as well as a professional edition update key, which was released for free by the original author before. If you don't trust the third party site, some downloads are also still available from the internet archival project's copies of the original WXtoImg website.
There are still some files missing on WXtoImg Restored, and these are outlined on the new website's homepage, so if you have them please contribute them to the site email.
As mentioned in our previous post about the Outernet LoRa chat application, Outernet is currently holding a 33% off sale on their 'Dreamcatcher' satellite data receiver. To get the discount use the coupon "33%OFFJULY4SALE" on their store. The sale lasts until Midnight Central Time on Wednesday 4 July. The code is valid site wide, so applies to the moRFeus product as well.
In this post we'll highlight the Outernet data service which can be received in the Continental USA with the Dreamcatcher 3 hardware.
Outernet is a free download only satellite based information service that aims to be a sort of 'library in the sky'. Their aim to to have satellites constantly broadcasting down weather, news, books, radio, web pages, and files to everyone in the world. As it's satellite based, the service is censorship resistant, and useful for remote/marine areas without or with slow/capped internet access.
Currently the Outernet data service is considered to be beta, and is only available for those in the Continental United States.
The New Outernet Data Service
Originally a few years ago Outernet started with a 12 GHz DVB-S satellite service that gave 1GB of content a day, but that service required a large dish antenna which severely hampered user adoption. Their second attempt was with an L-band service that only needed a small patch antenna. This service used RTL-SDR dongles as the receiver, so it was very cheap to set up. Unfortunately the L-band service had a very slow data rates (less than 20MB of content a day), and leasing an L-band transmitter on a satellite proved to be far too expensive for Outernet to continue with. Both these services have now been discontinued.
Outernet 3.0 aims to fix their previous issues by giving us a service that provides over 300MB of data a day, with a relatively cheap receiver, computer and antenna combination that is small and easy to set up. The new receiver uses a standard Ku-Band LNB as the antenna, which is very cheaply available as they are often used for satellite TV reception. The receiver is called 'Dreamcatcher 3', and is a custom PCB containing a hardware receiver (non-SDR based) with a LoRa decoder, as well as an embedded ARM computer capable of running Linux.
LoRa is an RF protocol that is most often associated with small Internet of Things (IoT) devices, but Outernet have chosen it as their satellite protocol for Outernet 3.0 because it is very tolerant to interference. In Outernet 3.0 the LNB is pointed directly at the satellite without any directive satellite dish, meaning that interference from other satellites can be a problem. But LoRa solves that problem by being tolerant to interference.
The Data Service
Currently, Dreamcatcher 3 users are receiving data such as hundreds of daily news articles, global weather information and the top 100 most searched Wikipedia articles of the day. A new satellite radio broadcast service is also being tested (kind of similar to Sirius XM, but only one channel at the moment). Compared to the older L-band Outernet service, the larger data rates allow for a lot more data and thus articles to come down.
Like previous iterations, the Dreamcatcher 3 board runs remotely on a WiFi connection. You then connect to the Dreamcatcher 'Skylark' web interface via a PC or mobile browser. On this web interface you can browse all your downloaded files. The user guide is a good read for understanding the set up procedure.
Some screenshots of example received data are shown below.
Conclusion
Outernet have been working hard to perfect their service over the years, and the current offering is the best compromise between ease of use and data rates that we've seen so far. Unfortunately the service is only available in the Continental USA at the moment, but we're looking forward to future expansion.
Currently we'd only recommend purchasing the Dreamcatcher 3 receiver for the Outernet data service if you understand that the service is in beta, requires a little bit of technical know-how, and like previous Outernet iterations is subject to possible change. Support is only available via their forums.
We can see the service being popular with those who live and work in remote areas without or with expensive internet. Censorship resistance is also another big plus, but satellites would need to be rented for these areas first.
There are also more creative uses. 'Unplugged' getaways are becoming popular in the modern world. Perhaps you want an internet free holiday, but don't want to miss out on important breaking news and weather updates for safety. In the future Outernet could also be used for Bitcoin or other Cryptocurrency blockchain transmission. In past Outernet iterations it was also possible to send a tweet that would be re-transmitted by Outernet. A similar messaging service could be used to control remote devices.
The Dreamcatcher v3.0 is Outernet's latest revision of their satellite receiver hardware. The freely available Outernet ku-band satellite service aims to keep us up to date with the latest news, provide books, videos, a daily selection of Wikipedia articles and satellite radio. Compared to the internet, Outernet is download only, and is received via their Dreamcatcher 3 hardware with an an antenna pointed to a satellite. At the moment their Ku-band service is in beta testing and so is only available in the continental United States, but they hope to eventually expand to cover more areas of the world.
Starting from today Outernet are holding a 33% off sale. This means that their Dreamcatcher 3 is only US$99 each. To get the discount use the coupon "33%OFFJULY4SALE" on their store. The sale lasts until Midnight Central Time on Wednesday 4 July. The code is valid site wide, so applies to the moRFeus product as well.
Previous Dreamcatcher implementations utilized an RTL-SDR to receive their L-Band network, however that network has now been discontinued. Dreamcatcher 3 utilizes a hardware based LoRa radio to receive their new ku-band satellite LoRa data stream. However, Dreamcatcher 3 has alternative applications, and doesn't need to be used only for the Outernet data service. Dreamcatcher 3.0 is a full LoRa radio that can transmit and receive, and in this post we'll focus on testing that out.
LoRa is a popular wireless protocol that has been designed for Internet of Things (IoT) devices. It is robust against interference and can be used in low power devices.
Dreamcatcher 3 LoRa Chat
Outernet have provided a LoRa two way open source text chat application that runs on the Dreamcatcher 3. To use it you'll need two Dreamcatcher 3 boards. With the application you'll be able to chat with short text messages in real time between the boards. Amateur radio enthusiasts may be interested in the boards as an easy way to set up LoRa experiments.
We note that Outernet are not advertising the transmit features specifically as the board is not FCC approved as an intentional radiator, so it cannot legally be used as an ISM band LoRa device for transmitting and listening to LoRa IoT sensors. But as a ham you are able to transmit with it if you can ensure that the output is clean and legal and on the ham bands.
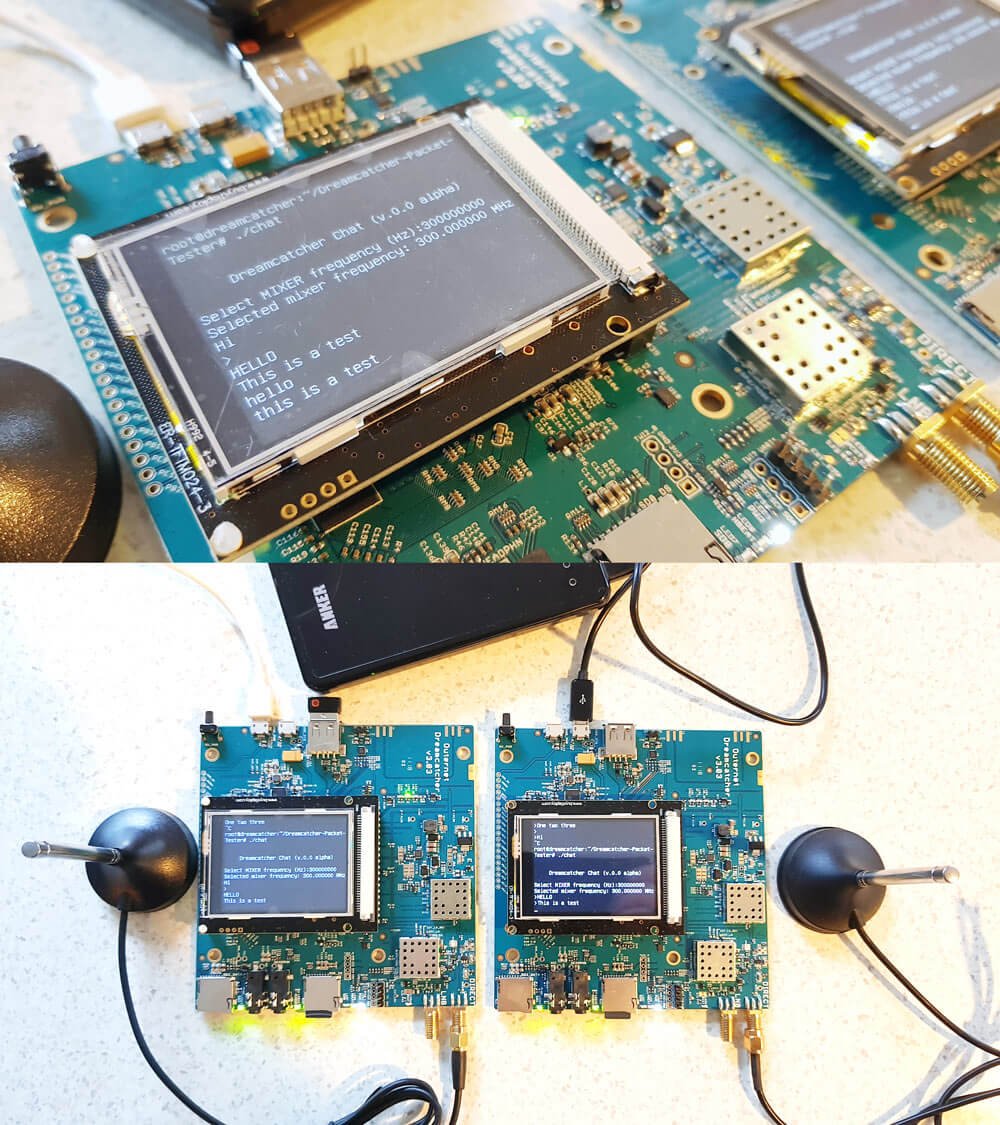
Dreamcatcher 3.0 Running the LoRa Chat App
A brief demo of the chat running below is shown. In the video we're using the default 'spreading factor' setting which results in robust communications, but results in a latency of about 2 seconds. Later we'll show how to change the spreading factor to reduce latency.
The Dreamcatcher v3.0
Outernet kindly provided us with two Dreamcatcher 3 boards to test the chat application with.
Like the previous versions, the Dreamcatcher is a full computing board with radio built into it. Except this time instead of an RTL-SDR, the radio is a hardware LoRa module. Another difference is that now there is a built in LCD screen.
On the board there are two SMA ports, one labelled "Direct" and the other labelled "LNB". The direct port is what we'll need to use for the chat application as this is the port that can transmit. There are also two SD Card slots, one for the OS and one for storage, a microphone and headphone jack, a USB-A slot with a supplied WiFi adapter, and two USB micro slots, one for USB OTG and one for power.
The package also comes with an LNB that is designed to be used with the Outernet satellite service. The LNB is receive only, so cannot be used with the chat application, so you'll need to use your own antenna if experimenting with the LoRa transmitter.
Chat Setup and Usage
First we burnt the latest version of Dreamcatcher Armbian OS to two SD cards and inserted one into each board. Since Dreamcatcher 3 has a built in LCD screen, you can login and access the terminal through the screen. But as there is only one USB port available, you'll need a USB hub to be able to plug in a mouse and keyboard, and the included USB WiFi adapter. Alternatively, if you connect the USB OTG port to a PC, you can connect to it via a USB serial connection. Instructions for connecting via serial, and for setting up a WiFi connection are the same as in our previous Dreamcatcher 2.0 tutorial.
Upon running the program you'll be asked to enter a MIXER frequency. This frequency doesn't really seem to matter and we're not sure why we're asked for it. But you can enter any frequency such as 300000000 Hz (300 MHz).
Once you've opened the chat program on both Dreamcatchers you should be able to type in text on the console, and have it show up on the other Dreamcatcher after pressing enter. Remember to plug an antenna in to the DIRECT port of both Dreamcatchers, or run of attenuated coax between them. The provided LNB cannot be used for the chat application.
Playing with LoRa Settings
The actual RF output frequency is by default hard coded in at 2.4 GHz. If you want to change it you can edit the main.cpp file with a terminal based text editor like nano, and look for the #define RF_FREQUENCY entry. Then you will need to recompile by running 'make' again. However note that at the time of this post, according to Outernet the software only works properly at around 2.4 GHz. Apparently this is simply a software limitation and once this is fixed you should be able to transmit at any frequency between 85 MHz to 5400 MHz.
Also by default, the LoRa 'Spreading Factor' is set to the maximum of 12. This means that there is roughly a latency of about 1 second between sending a message, and receiving it on the other unit.
The spreading factor can also be adjusted in the code by editing the "modulationParams.Params.LoRa.SpreadingFactor" variable. This determines how spread out in time the packet it. Larger spreading factors result in more robust error free communications, whereas smaller factors result in lower latency. Below are some valid spreading factor entries for the code.
Note that if you reduce the spreading factor you'll also want to reduce the RX_TIMEOUT_VALUE and TX_TIMEOUT_VALUE #defines (you'll need to search for these lines in the code. Hint: In Nano CTRL+W is search.). For a spreading factor of 7 a timeout of 100 ms works well.
It is also possible to adjust the bandwidth from 200 kHz up to 1600 kHz using the following code on the "modulationParams.Params.LoRa.Bandwidth" variable.
You can also adjust the TX output power by adjusting the value specified by #define TX_OUTPUT_POWER. By default it is set to the maximum output power of 13 dBm. The lowest value available is -18 dBm.
Remember that after making a change in the main.cpp file, you'll have to recompile the chat program by running 'make'.
Below we visualized the different LoRa spreading factors with a HackRF. It's interesting to see how the spreading factor changes the packet transmit time.
Comparing LoRa Spreading Factors
Conclusion
Overall the Dreamcatcher 3 LoRa chat software works, but is still very much in early development. Regardless it is an interesting tool for experimenting with LoRa. The hardware is ready, and software now just needs to be developed to make use of the LoRa protocol. We also note that the Dreamcatcher is not a plug and play device, and that it's mostly suited to people who enjoy tinkering with new beta products.
We'd also just like to remind that in order to legally transmit you'll need a ham licence. The board is not FCC approved for regular ISM band LoRa use. While the output power of the Dreamcatcher isn't too strong at a maximum of 13 dBm, we still recommend that you make sure to reduce the output TX power, or run a direct attenuated coax connection when testing. There are also weak signal images present at some harmonics, so any ham using this with an amplifier would be of course expected to provide sufficient filtering.
As expected, the AIR-T is not a cheap with it coming in at US$5,699, and this is with a 10% discount off the MSRP. However, the AIR-T is likely to be more of interest to high end industry and university researchers who have research money to spend. Also, compared to Ettus E310/N310 and LimeNET Mini SDRs which have built in non-GPU based computing platforms and similar SDR performance, the AIR-T could be seen as reasonably priced assuming that the software and drivers for it are decent. In the future we expect to see the price of similar SDR-AI development boards eventually reduce down to hobbyist level prices.
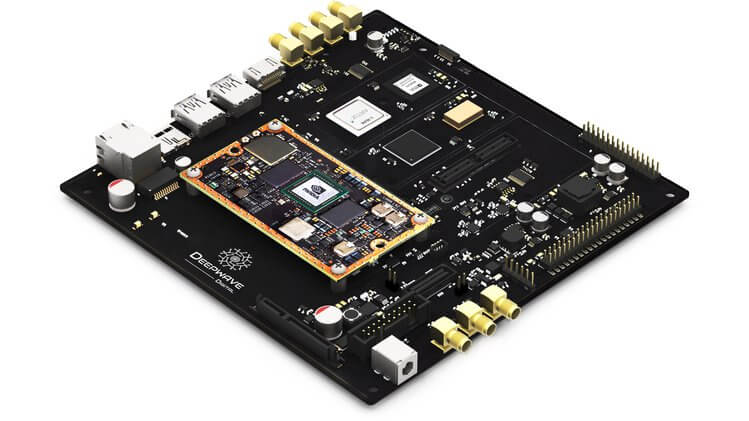
The basic idea behind the AIR-T is to combine a 2x2 MIMO SDR transceiver with a NVIDIA Jetson TX2 GPU that can be used to run artificial intelligence (AI) software fast. They will include software that will allow GNU Radio and Python code to be easily ported to the GPU architecture.
Why build tomorrow’s tech with yesterday’s signal processing tools? The Artificial Intelligence Radio - Transceiver (AIR-T) is a fully integrated, single-board, artificial intelligence equipped, software defined radio platform with continuous frequency coverage from 300 MHz to 6 GHz. Designed for new engineers with little wireless experience to advanced engineers and researchers who develop low-cost AI, deep learning, and high-performance wireless systems, AIR-T combines the AD9371 RFIC transceiver providing up to 2 x 2 MIMO of 100 MHz of receiving bandwidth, 100 MHz of transmitting bandwidth in an open and reprogrammable Xilinx 7 FPGA, with fast USB 3.0 connectivity.
The AIR-T has custom and open Ubuntu software and custom FPGA blocks interfacing with GNU Radio, allowing you to immediately begin developing without having to make changes to existing code. With 256 NVIDIA cores, you can develop and deploy your AI application on hardware without having to code CUDA or VHDL. Freed from the limited compute power of a single CPU, with AIR-T, you can get right to work pushing your telecom, defense, or wireless systems to the limit of what’s possible.
The Artificial Intelligence Receiver - Transceiver (AIR-T) SDR
Over on Crowd funding site Crowd Supply, a new SDR product is currently awaiting release of its crowd funding stage. The proposed product is called the AIR-T, which stands for Artificial Intelligence Radio - Transceiver. The basic idea behind the board is to combine a 2x2 MIMO SDR transceiver with a NVIDIA Jetson TX2 GPU that can be used to run artificial intelligence (AI) software fast.
The SDR transceiver chip used is a Analog Devices 9371. This is a high end chip that can be found on high end SDR hardware like USRPs. If you're interested we had a post about decapping the AD9361 recently, which is a similar chip. It provides 2x2 MIMO channels, with up to 100 MHz RX bandwidth and 250 MHz TX bandwidth. The NVDIA Jetson TX2 is a GPU 'supercomputer' module specifically designed for AI processing. Many AI/machine learning algorithms, such as neural networks and deep learning run significantly faster on GPU type processors when compared to more general CPU's.
These are not cheap chips with the AD9371 coming in at over US$250 each, and the Jetson TX2 coming in at US $467. Although we don't know what sort of bulk discounts the AIR-T manufactures could get. But it will be certain that the AIR-T will not be for the budget minded.
The board is still awaiting release of it's crowdfunding round, and you can sign up to be notified of when the project launches on their Crowd Supply page.
The melding of AI and the RF spectrum will be common in the future, and a development board like this is one of the first steps. Some of the interesting use cases that they present are pasted below:
Wireless
From Wi-Fi to OpenBTS, use deep learning to maximize these applications. By pairing a GPU directly with an RF front-end it eliminates the need of having to purchase an additional computer or server for processing. Just power the AIR-T on and plug in a keyboard, mouse, and monitor and get started. Use GNURadio blocks to quickly develop and deploy your current or new wireless system. For those who need more control, talk directly with the drivers using Python or C+. And for those superusers out there, the AIR-T is an open-platform, so you can program the FPGA and GPU directly.
Satellite Communications
Communicating past Pluto is hard. With the power of a single-board SDR with an embedded GPU, the AIR-T can certainly prove out concepts before you launch them into space. Reduce development time and costs by adding deep learning to your satellite communication system.
Ground Communications
There is an endless number of terrestrial communication systems with more being developed every day. As the spectral density becomes more congested, AI will be needed to maximize these resources. The AIR-T is well-positioned to easily and quickly help you prototype and deploy your wireless system.
Video/Image/Audio Recognition
The AIR-T allows you to demodulate a signal and apply deep learning to the image, video, or audio data in one integrated platform. For example, directly receiving a signal that contains audio and peforming speech recognition previously required multiple devices. The AIR-T integrates this into one easy to use package. Whatever your application is, from speech recognition to digital signal processing, the integrated NVIDIA GPU will jump start your applications.
Pattern Recognition
For many communications and radar applications once the signal is collected it must be sent to an off-board computer for additional processing and storage. This consumes valuable time. The AIR-T eliminates this. From its inception, it was designed to process signals in real-time and eliminate unnecessary latency.
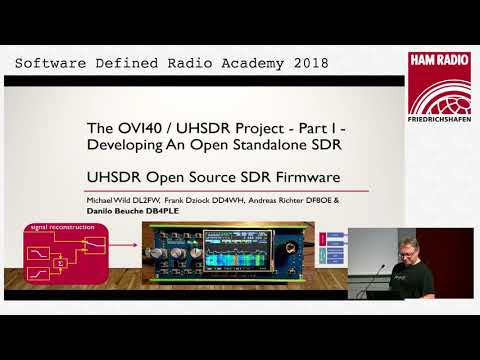
Several new software defined radio talks have been released on YouTube this week from the big European 2018 Friedrichshafen Ham Radio Convention which just finished this month. The full list of 14 new videos can be found on the Software Defined Radio Academy YouTube channel. Below are two of our favorites:
The OVI40 / UHSDR Project, Developing An Open Standalone SDR
OVI40 is an Open Source standalone homewbrew SDR TRX project (VLF to 2m), developed with the aim of being modular and future-proof. The talk describes the hardware and the UHSDR software including a discussion on the evolution from the "single-system" software used for the well-known mcHF (initially written by Chris, M0NKA and Clint KA7OEI) to the multi-SDR approach in the UHSDR software project.
DF8OE, DB4PLE, DL2FW, DD4WH: The OVI40 / UHSDR Project - Part 1 and 2
András Retzler, HA7ILM: Let's code a simple receiver in C
For using SDR in amateur radio applications, it is easier to use existing receiver software, or create GNU Radio flowgraphs with pre-build blocks. On the contrary, in the do-it-yourself spirit of amateur radio, this talk will guide you through the steps of implementing a simple AM/FM/SSB receiver from scratch, in plan old C, in order to get a deeper understanding of what happens actually under the hood in popular SDR software. The talk builds on the author's learning experience of creating the open source CSDR command line tool, which is used for DSP in the OpneWebRX web based SDR receiver.
András Retzler, HA7ILM: Let's code a simple receiver in C
Analog Devices has recently released a new text book for free called "Software-Defined Radio for Engineers, 2018". This is an advanced university level text book that covers communication systems theory as well as software defined radio theory and practice. The book uses the PlutoSDR as reference hardware and for practical examples. The PlutoSDR is Analog Devices $150 RX/TX capable SDR that was released about a year ago.
The objective of this book is to provide a hands-on learning experience using Software Defined Radio for engineering students and industry practitioners who are interested in mastering the design, implementation, and experimentation of communication systems. This book provides a fresh perspective on understanding and creating new communication systems from scratch. Communication system engineers need to understand the impact of the hardware on the performance of the communication algorithms being used and how well the overall system operates in terms of successfully recovering the intercepted signal.
This book is written for both industry practitioners who are seeking to enhance their skill set by learning about the design and implementation of communication systems using SDR technology, as well as both undergraduate and graduate students who would like to learn about and master communication systems technology in order to become the next generation of industry practitioners and academic researchers. The book contains theoretical explanations about the various elements forming a communication system, practical hands-on examples and lessons that help synthesize these concepts, and a wealth of important facts and details to take into consideration when building a real-world communication system.
The companion site for the book which contains links to complimentary online lectures, slides, and example MATLAB code can be found at https://sdrforengineers.github.io. MATLAB is a very powerful programming language and toolset used by scientists and engineers. MATLAB is not a cheap tool, but there is a home user licence available for a more reasonable price. To do some of the exercises in the book you'll probably at least require the core MATLAB plus the Communications System Toolkit which is an extra add on.