Using a HackRF to Spoof GPS Navigation in Cars and Divert Drivers

Researchers at Virginia Tech, the University of Electronic Science and Technology of China and Microsoft recently released a paper discussing how they were able to perform a GPS spoofing attack that was able to divert drivers to a wrong destination (pdf) without being noticed. The hardware they used to perform the attack was low cost and made from off the shelf hardware. It consisted of a Raspberry Pi 3, HackRF SDR, small whip antenna and a mobile battery pack, together forming a total cost of only $225. The HackRF is a transmit capable SDR.

The idea is to use the HackRF to create a fake GPS signal that causes Google Maps running on an Android phone to believe that it's current location is different. They use a clever algorithm that ensures that the spoofed GPS location remains consistent with the actual physical road networks, to avoid the driver noticing that anything is wrong.

The attack is limited in that it relies on the driver paying attention only to the turn by turn directions, and not looking closely at the map, or having knowledge of the roads already. For example, spoofing to a nearby location on another road can make the GPS give the wrong 'left/right' audio direction. However, in their real world tests they were able to show that 95% of test subjects followed the spoofed navigation to an incorrect destination.

In past posts we've seen the HackRF and other transmit capable SDRs used to spoof GPS in other situations too. For example some players of the once popular Pokemon Go augmented reality game were cheating by using a HackRF to spoof GPS. Others have used GPS spoofing to bypass drone no-fly restrictions, and divert a superyacht. It is also believed that the Iranian government used GPS spoofing to safely divert and capture an American stealth drone back in 2011.

Other researchers are working on making GPS more robust. Aerospace Corp. are using a HackRF to try and fuse GPS together with other localization methods, such as by using localizing signals from radio towers and other satellites.

[Also seen on Arstechnica]

Hardware and Method used to Spoof Car GPS Navigation.

Video Tutorial About Decoding 433 MHz ISM Devices with rtl_433

Over on his YouTube channel Tech Minds has recently uploaded a video that demonstrates and shows how to use the rtl_433 software with an RTL-SDR to decode 433 MHz ISM band low power devices. Typically these devices include things like home wireless temperature and weather sensors, tire pressure sensors, remote controls, and other various sensors.

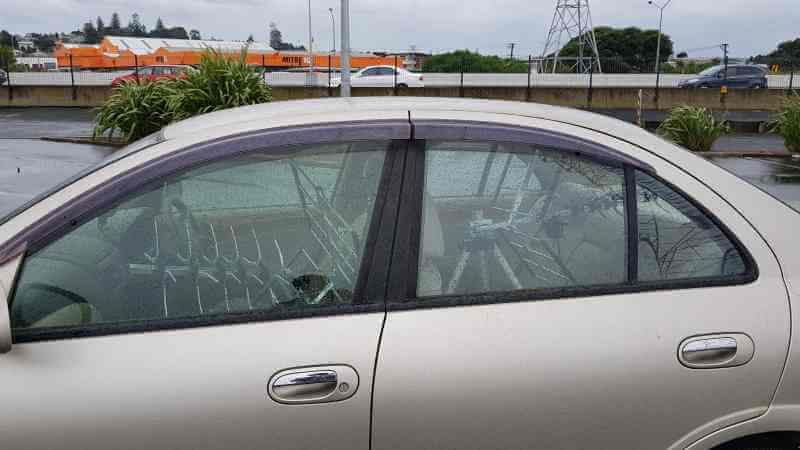
In the video he sets up an RTL-SDR and magmount antenna by his window and is able to receive data from several of his neighbors weather stations, and some car key remotes. He shows how to run the software on both Linux and on Windows.

How To Decode 433Mhz Low Power Devices Using RTL433 And A RTL-SDR Receiver

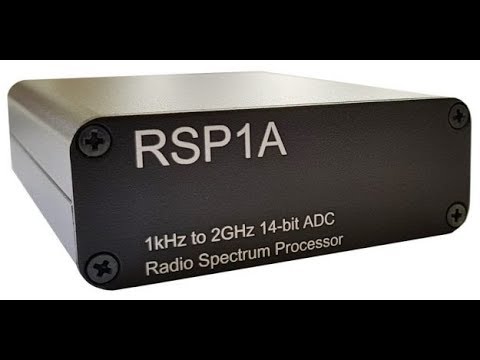
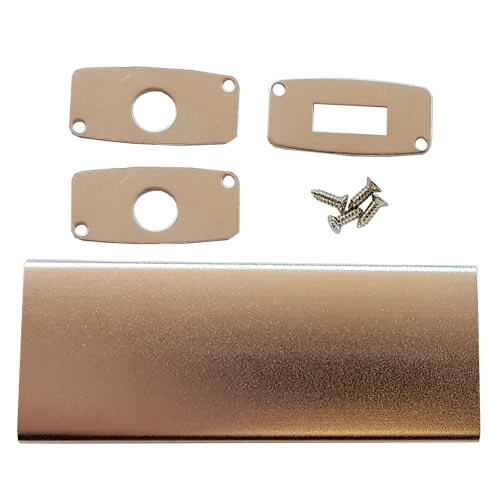
New Store Products: SDRplay RSP1A Metal Case Upgrade + Portable Antenna Set

Over on our store we've just released two new products for sale. The first is a metal case upgrade kit for the SDRplay RSP1A. It is similar to the previous enclosure that we sold for the RSP1, but no longer comes with an included BCFM filter since the RSP1A has this filter built in as a software switchable option.

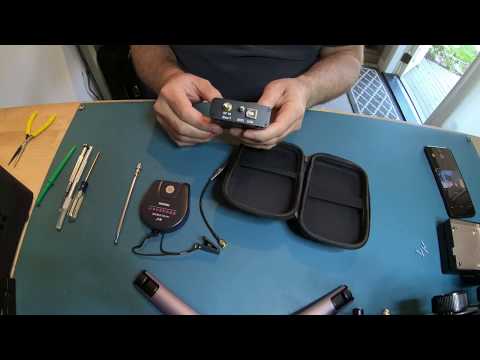
Instead we've included a portable 7 meter (23 feet) long wire antenna spool (Tecsun AN-03L) with SMA adapter, and an 11 cm to 48 cm adjustable SMA telescopic antenna. The 7 meter antenna is great for HF SWLing, and neatly rolls up into the spool for travelling. The telescopic antenna is a portable VHF/UHF antenna that can plug directly into the SMA port of the RSP1A. Both antennas fit neatly into the supplied semi-hardshell carry case. The set costs US$29.95 including shipping and is available on our store, and will be on US Amazon in a couple of weeks.

The second product is the portable antenna set just by itself. The set includes the 7m Tecsun AN-03L antenna spool, the mono plug to SMA adapter and the 11 cm to 48 cm telescopic antenna. It can be used on any SDR with SMA ports. The set costs US$11.95 and is also available on our store. It will also be on Amazon in a couple of weeks. 

Cloned SDRPlay and Airspy Units Now Appearing on Aliexpress/eBay

Recently we've found that there are now cloned units of SDRplay RSP1 and Airspy R2 units appearing on Aliexpress and eBay. (We won't link them here to avoid improving the Google ranking of the clone listings). This post is just a warning and reminder that these are not official products of SDRplay or Airspy, and as such you would not receive any support if something went wrong with them. The performance and long term software support of the clones also isn't known. Buying clones also damages the original developers abilities to bring out exciting new products like we've seen so far constantly with Airspy and SDRplay.

SDRplay

We've been in contact with SDRplay for a statement and they believe that the unit is a clone of the older and now discontinued RSP1, and not the RSP1A, despite the listings advertising RSP1A features such as additional filtering. SDRplay note from the pictures of the circuit board that the cloned unit's circuit board looks like an RSP1, and that the listing description is probably just blindly copied directly from the official RSP1A description.

Currently given that the price of the cloned RSP1 is $139, which is higher than the $109 cost of an original and newer model RSP1A, we don't see many taking up the offer.

Airspy

The Airspy R2 has also recently been cloned and now appears on Aliexpress with the lowest price being US$139 without any metal enclosure. Given that the price of an original Airspy R2 with metal enclosure is US$169, we again don't see many taking up the offer of the clone with such a small price difference.

HackRF

The HackRF is a different story in respect to clones. The HackRF design and circuits are open source, so unlike the closed source designs of the SDRplay and Airspy, in a way HackRF clones are actually encouraged and are legal. For some time now it's been possible to find cloned HackRF's on Aliexpress for only US$120 at the lowest, and from $150 - $200 including antennas and TCXO upgrades. This is quite a saving on the $299+ cost of the original HackRF. Reports from buyers indicate that the HackRF clones are actually decent and work well. The advantage of buying the original version is that you support Michael Ossmann, the creator of the HackRF, and may potentially get a better performing unit.

We've also seen clones of the HackRF Portapack on Aliexpress, which is an add-on for the HackRF that allows you to go portable. The clones go for $139 vs $220 for the original. No word yet on the quality.

RTL-SDR V3

We also note that recently there have been several green color RTL-SDRs released on the market with some being advertised as "RTL-SDR Blog V3" units. These are not our units, and are not even actual clones of the V3. These green units appear to just be standard RTL-SDRs without any real improvements apart from a TCXO. Some listings even advertise the V3's bias tee and HF features, but they are not implemented. Real V3 units come in a silver enclosure branded with RTL-SDR.COM.

Final Words

If you know how China works, you'll understand that it's highly unlikely that there is any legal recourse for SDRplay and Airspy to remove these products from sale. Once a product is popular it is almost a given that it will be cloned. It's possible that the clones might be able to be gimped via blacklisting official software, but that the companies would implement this is a stretch, and would probably be easy to get around. In the end while not ethical in a business fairness sense, these clones may be good for the consumer as they force the original designers to lower their prices and improve added value services.

If readers are interested in a comparison between the clones and original units, please let us know as we may consider an article on it.

Cloned SDRs Roundup
Cloned SDRs Roundup

New Alternative WxToImg Website with Most Files

Last month we posted that the website for the popular NOAA APT weather satellite decoding software known as WxtoImg went down. Since then we've been in contact with the developer of the software, and he did indicate that he may restore the site at some time in the future, but is currently busy with other projects so doesn't have much time to devote to his old software at the moment.

In the meantime (or perhaps permanently) a WXtoImg fan has created a clone of the original website which he's called "WXtoImg Restored". The site contains most of the downloads as well as a professional edition update key, which was released for free by the original author before. If you don't trust the third party site, some downloads are also still available from the internet archival project's copies of the original WXtoImg website.

There are still some files missing on WXtoImg Restored, and these are outlined on the new website's homepage, so if you have them please contribute them to the site email.

RS41 RadioSonde Tracking Software

A radiosonde is a small weather sensor package that is typically attached to a weather balloon. As it rises into the atmosphere it measures parameters such as temperature, humidity, pressure, GPS location etc, and transmits this data back down to a receiver base station using a radio signal. The RS41 is one of the newer radiosonde modules sold by  radiosonde manufacturer Vaisala, and is currently one of the most popular radiosondes in use by meteorological agencies. The signal is typically found at around 400 MHz and can be received with an RTL-SDR and an antenna tuned for 400 MHz. We have a general tutorial on radiosonde decoding available here.

There are several software packages that can decode RS41 data, such as the multi-radiosonde decoder Windows program called SondeMonitor (25 euros), or the free Linux command line software called RS. Recently a new free Windows GUI based RS41 decoder has been released by IW1GIS. The software can display on Google maps the current location and previous path of the radiosonde, as well as it's weather data telemetry.

Main features are:

  • Directly decoding of GFSK signal received by the FM radio receiver (the use of a Software Defined Radio is recommended).
  • Capability to connect and command SDRSharp software by mean of Net Remote Control plugin.
  • Advanced frequencies scan and decode: RS41 Tracker is able to look for RS41 radiosonde signal in a given list of frequencies, starting the radiosonde decoding when a valid signal is detected.
  • Real time showing radiosonde position on google map (internet connection is required)
  • Map auto centered on radiosonde position
  • Map type selectable by user (road, satellite, hybrid, terrain).
  • Burst killer detailed information and launch time estimation.
  • Radiosonde RAW data save
  • Post processing of RS41 RAW data file
  • Tracking information (elevation, bearing, slant range)
  • Radiosonde track saved on kml file
  • Ghost track shown on map (loading from kml file)
  • Shortcut for google maps in browser
RS41 Tracker Software

New TETRA Trunk Tracker for use with SDR# and the TETRA Demodulator Plugin

Over on our forums user thewraith2008 has just released news about his new software called TETRA Trunk Tracker. The software works in conjunction with the TETRA demodulator plugin for SDR#. It works by using two dongles, one to monitor a TETRA trunking channel, and the other to decode voice audio, although a single receiver mode is also available which works with a reduced and fixed bandwidth.

TETRA Trunk Tracker
TETRA Trunk Tracker

The post reads:

TETRA Trunk Tracker will follow calls on a TETRA network.

TETRA Trunk Tracker reads DATA that is output from the SDR# plug-in TETRA Demodulator (by TSSDR) via the 'Network Info' calls log window.

It interprets this DATA to determine when a call is set-up, then instructs SDR# (VC) to move to the carrier (frequency) that the call will be on.

It will also watch out for other PDUs to determine when a SSI starts or completes transmissions and when calls are complete (Released).

Features:

  • A basic call recording (All or Selective call recording).
  • Display current call details with list of seen SSIs for that call. (SSI populate as they TX).
  • GSSI holding - will only allow calls with selected GSSI to be heard.
  • Call lockout based on GSSI. Can be unchecked in list to lockout GSSI.
  • Call Priority. (Only normal version)
  • GSSI weighted 0-9, 9 is highest. If on active call and other call event occurs, if new call has higher
  • priority then will switch to it.
  • Collect/Save all seen GSSIs with Labels and Priority, By Network.
  • Collect/Save seen SSIs with Labels and Last seen Date/Time, By Network.
  • Set a call time-out. Returns to idle state if call does not see a release PDU
    after X time in seconds.
  • Log call events to screen and file, if enabled.
  • Log raw CC and VC PDU messages as seen by the 'TETRA Demodulator' plug-in, if enabled.
  • Log GSSI daily call activity. (Simple version does not play calls when this is selected)
  • Set base frequency via UI.
  • Set CC park carrier # via UI.
  • Set VC park carrier # via UI.
  • Suppress some PDUs. (unchecked is mainly for testing only)
  • Suppress lockout messages.
  • Sort SSI and GSSIs/Lockouts (by GSSI). This only occurs on start-up.
  • Country Code label, defined via file (shown as menu item)
  • Network label, defined via file (shown in tool tip where MNC,LA is in 'Call Details' panel)
  • Location Area label, defined via file (shown in tool tip where MNC,LA is in 'Call Details' panel)
    Only shown when Network label used.
  • Ignores Encrypted PDUs (with no reference to them)
  • Set a seen GSSI priority via UI.
  • Update a seen GSSI/SSI label via UI.
  • Call active indicator.
  • Restore SDR# windows to a defined position.

If the TETRA Demodulator does not work for you this program will do nothing to change that.

This is the third release of this program. (TETRA Trunk Tracker v0.99.6)
And 2nd release for (TETRA Trunk Tracker v0.99.6s - Simple)

Two versions are available:

  • Normal (Uses 2 SDR# and 2 Dongles) with TETRA Demodulator and Net Remote plug-ins
  • Simple (Uses 1 SDR# and 1 Dongles with some features not available) with TETRA Demodulator and Net Remote plug-ins

Backup your "Tetra-trunk-tracker.dat" settings file.
Then delete "Tetra-trunk-tracker.dat" as it has changed and old one will cause error on load.

Some work as gone into trying to make TETRA Trunk Tracker easier to run once the initial setup has been done.

A MCC (Country Code) label file is included for your convenience "TETRA_mcc.txt".

It has only been tested on Windows 7 - Professional SP1 (32 bit), English

You MUST have a PC that is capable of running SDR# x 2 with the TETRA plug-in. (Not overloaded CPU usage.)

It is in alpha stage. This means is may contain errors that may cause issues with the other programs it
works with. i.e. crashing them or itself.

The TETRA plug-in currently been developed by TSSDR is also in early development. Because of this
any changes made in plug-in releases most likely will break this program.

I have created it to suit my needs. And it currently works for me with the TETRA network I monitor.

I make no claim that it will work for other networks.

Please read the provided files for set-up and usage:

  • TTT_set-up_manual.pdf
  • TTT_Features_and_Usage.pdf

I have tried to be as thorough as possible with the documentation to explain usage and features.
I believe any questions can be answered by reading these files.
These files most likely are not complete and contain errors and are not laid out as good as they could be.

It only works with the provided TETRA plug-in supplied in zip. (2018-June-06).
This version uses a custom compiled version of 'Net Remote' supplied in zip

It is only meant to be a temporary solution until something better comes along.

Hopefully all goes well for you setting it up.

Download link

MD5 HASH 6f33fcf9662573b77e177e899793b9f9

Video showing starting it and it running
Video showing starting it and it running - Simple version

Testing out the New Airspy HF+ Preselector

The Airspy team have recently been working on a preselector retrofit product for their HF+. The Airspy HF+ already has excellent dynamic range and sensitivity, but by adding a preselector they seek to improve performance enough to claim that the HF+ is as good as or even better than much more pricey SDRs like the Perseus by achieving dynamic range figures of more than 105 dBm.

A preselector is a filter or bank of filters that attenuates out of band signals. This is useful as radios can desensitize if an unwanted signal comes in too strongly. For example, if you are tuned to the 20m band, but there is a very strong MW signal, the SNR of your desired 20m band signal might be reduced. Radios with a natural high dynamic range design like the Airspy HF+ are less affected by this problem, but for the strongest of signals use of a preselector can still help.

The Airspy HF+ preselector needs to be soldered directly onto the HF+'s PCB, and once installed it automatically switches bands using GPIO expansion ports controlled automatically via tuning in SDR#, so no external switching is required.

The expected pricing of the HF+ preselector is US$49, and it will be ready for sale in a few weeks.

Measurements

We received a prototype of the filter a few days ago and have been testing it out. From measurements on a VNA, we found that the preselector features four bands of operation:

  • 0 - 5.2 MHz
  • 5.2 - 10 MHz
  • 10 - 17 MHz
  • 17 - 30 MHz

Airspy have also provided us with a block diagram schematic which we show below.

HF+ Preselector Schematic

Insertion loss appears to be mostly below 3 dB with fairly steep skirts especially on the lower side. The top three filters do an excellent job at blocking out the broadcast AM band. Below are some VNA plots that show the filter responses.

Installation

The preselector comes in a small 3.2 x 1.7 cm sized PCB that is fully covered with a metal shielding can. To install it you need to carefully solder it onto the HF+ PCB. This can be a little tricky since the pads are so small, but if you're experienced with soldering it shouldn't be an issue.

  • First you need to open the HF+ and remove R3 from the HF+ PCB, which is a zero ohm resistor.
  • The preselector PCB can then be positioned and the two IN and OUT pads soldered in place.
  • Then you'll also need to connect the power and 2x GPIO lines to the preselector using wires.
  • Now you need to bridge the two shielding CANs with a thick bit of wire. We simply used two cuts of copper solder braid to do this.
  • Finally is also recommended to update the HF+ firmware to the latest version and download the latest version of SDR#.

Once soldered in place the preselector is ready to use, and the HF+ cover can be put back on. It is expected that the commercially sold versions of the preselector will come with detailed installation instructions. 

In the first photo below we removed the shield to see what was inside, and the second photo shows it installed on the HF+ PCB.

Using it on a RTL-SDR V3

Whilst the preselector is designed for the Airspy HF+, there's no reason why it couldn't also be retrofitted onto other SDRs, such as our RTL-SDR V3, for use in improving direct sampling mode performance.

The V3 has spare GPIO ports that can be used to control the filter, and 5V for powering the filter could be tapped off the PCB as well. Currently we're considering making a breakout PCB for the filter than might aide with this.

We did a quick test with the preselector connected to the RTL-SDR V3 running in direct sampling mode, and as expected performance is much better, especially above 5 MHz once the second filter kicks in. This is because the second, third and fourth filters all heavily attenuate the MW broadcast AM band, which is the main source of overload issues on HF.

The following screenshots show how much the filter was able to reduce the signal strength of AM broadcast when the second 5.2 - 10 MHz filter was turned on. This reduction was enough to prevent overload on all the higher bands.

Preselector OFF
Preselector ON
Preselector OFF
Preselector ON
Preselector OFF Preselector ON Preselector OFF Preselector ON

HF+ Results

For the HF+ we tested by injecting a strong signal into two HF+ SDRs, one with the filter installed and the other without. The HF+ with the filter was routinely able to withstand much higher signal powers without any signs of overload occurring, and no degradation due to insertion loss was observed.

The screenshots below show an experiment with a weak desired signal injected at 14.2 MHz, and a strong unwanted signal being injected at 1.5 MHz. With the unwanted signal at 5 dBm, the filtered HF+ showed no signs of overload, whilst the unfiltered HF+ had the AGC kick in to increase the front end attenuation, reducing the signal strength by about 20 dB and raising the noise floor.

Filtered HF+
Unfiltered HF+
Filtered HF+ Unfiltered HF+

Other Reviews

Other reviewers have also received the preselector and have been testing it. Fenu radio has uploaded a short review, and plans to write more in the future. He's also made his HF+ with preselector available for public use via SpyServer (details in his post). In the video below Leif SM5BSZ reviews the preselector and runs through several tests while comparing it against the Perseus. His results seem to show that the Persues gets a +25 dBm IP3, whilst the HF+ with the latest firmware and preselector is able to obtain a respectable +10 dBm IP3. 

Conclusion

For most people, the dynamic range of the HF+ is probably already more than enough, but if you are receiving very strong signals, the preselector can help get you get more performance out of the HF+. Of course the preselector cannot help if you have strong signals within the filter bands.

If you're looking to get the most out of your HF+ then the filter at only $49 is a pretty good deal. Just take note that you'll need to open the HF+ and be comfortable with soldering onto the PCB.