Over on YouTube user kwon lee has uploaded a video demonstrating a replay attack against a parking barrier arm. The tools he uses are a HackRF and Portapack running the Havok firmware. A replay attack involves recording a control signal with the HackRF+Portapack, and then replaying it later with the transmit function of the HackRF. If no wireless security mechanism like rolling-codes are used, simply replaying the signal will result in the transmission being accepted by the controller receiver.
As he has access to the remote control he records the transmission that is sent when the open button is pressed on the remote. Later once outside he shows how transmitting with the HackRF+Portapack results in the barrier arm opening.
This reminds us of a previous post where we noted how a HackRF was used to jam a garage door keyfob to prevent people from leaving in the TV show "Mr. Robot".
RF Replay Attack _ Parking-Breaker via HackRFone+Portapack+havoc
Over on YouTube channel Tech Minds has uploaded a short tutorial video that shows how to perform a replay attack with a HackRF and the Universal Radio Hacker software. A replay attack is when you record a control signal from a keyfob or other transmitter, and replay that signal using your recording and a TX capable radio. This allows you to take control of a wireless device without the original keyfob/transmitter. This is easy to do with simple wireless devices like doorbells, but not so easy with any system with rolling codes or more advanced security like most car key fobs.
In the video Tech Minds uses the Universal Radio Hacker software to record a signal from a wireless doorbell, save the recording, replay it with the HackRF, and also analyze it.
Universal Radio Hacker - Replay Attack With HackRF
Thank you to Shreyas Ubale for submitting his blog post about reverse engineering a wireless doorbell, and then performing a replay attack. Shreyas had purchased a wireless doorbell set containing one button transmitter and two bell receivers. However, his situation required two transmitters, one for visitors at the door, and one to be used by family within his house.
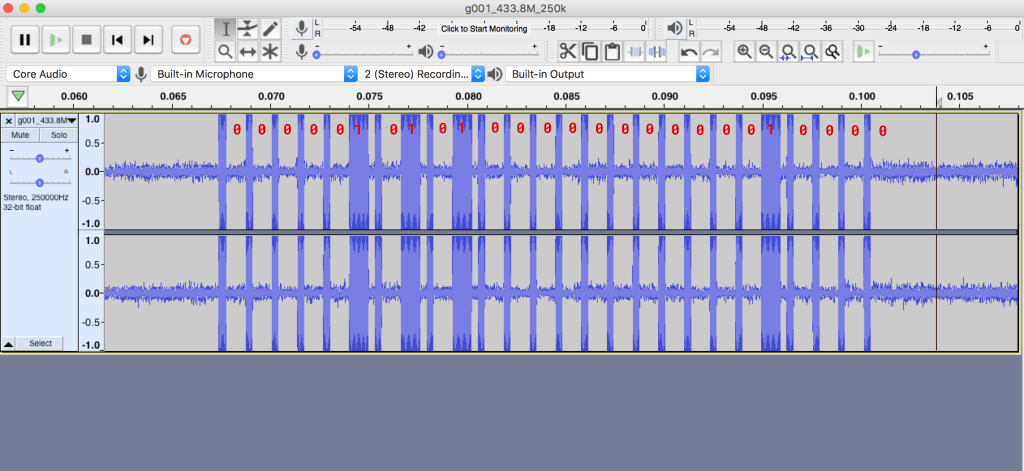
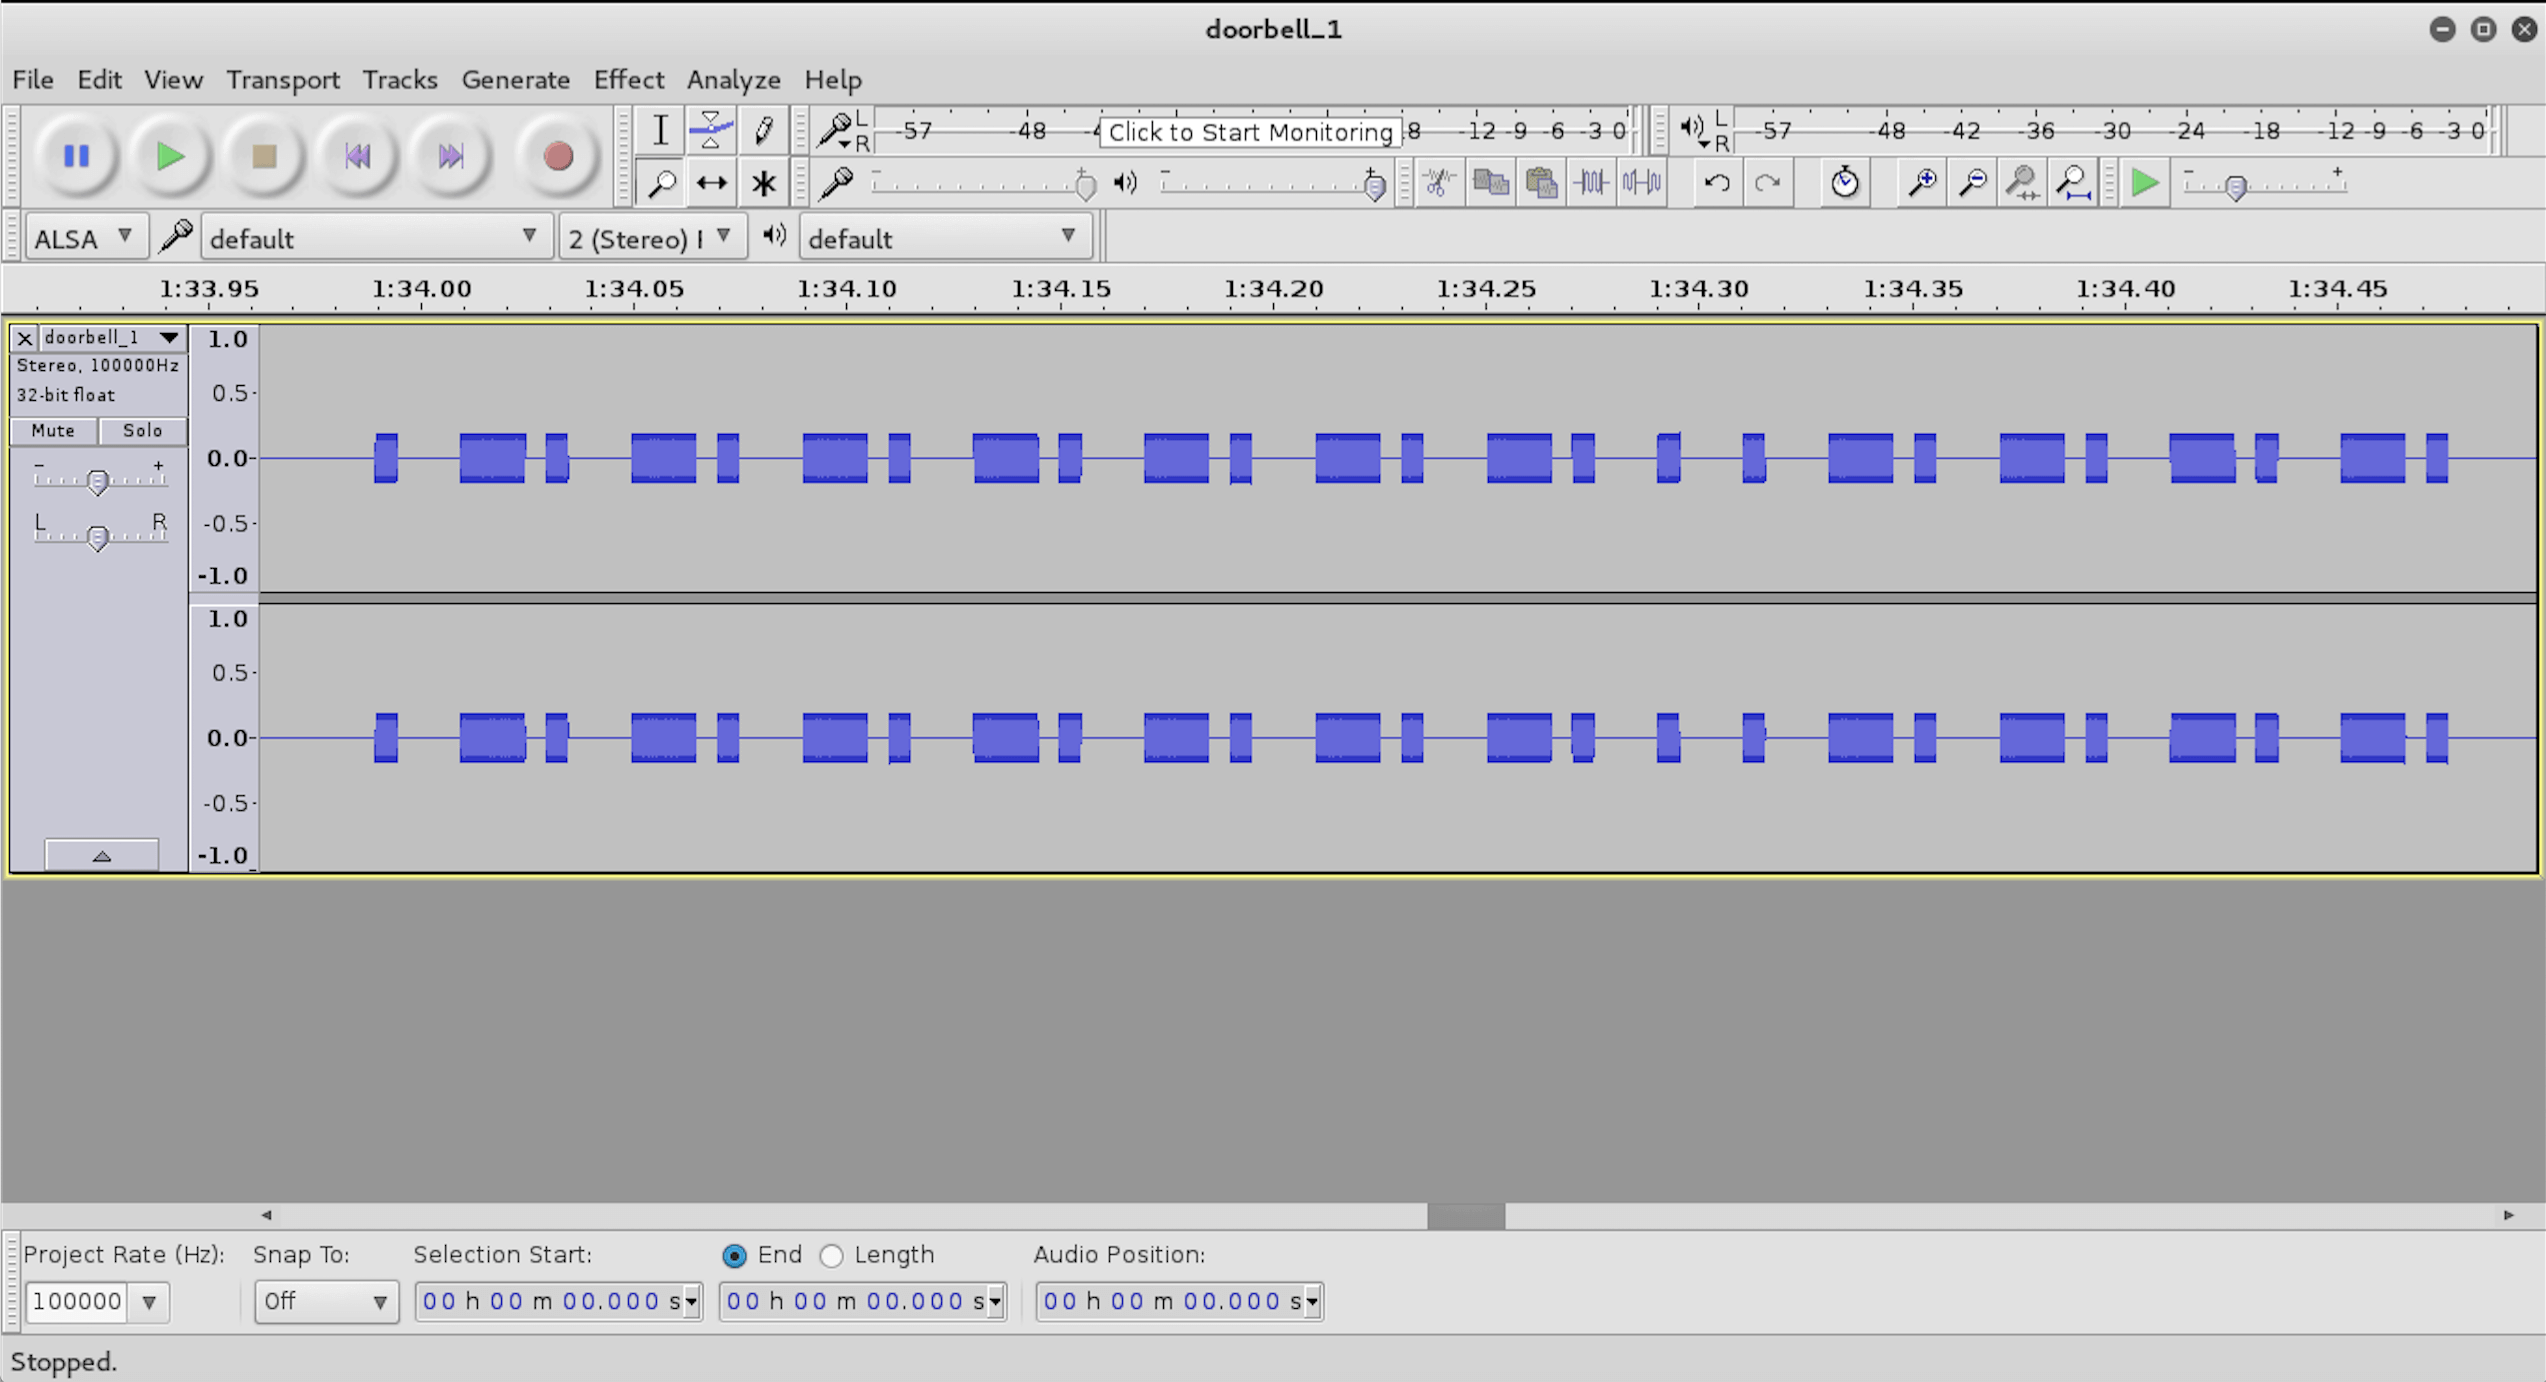
In order to create a second transmitter he decided to reverse engineer the doorbells wireless signal, and use that information to create an Arduino based transmitter. His process involves first using an RTL-SDR to determine the transmission frequency, then using the rtl_433 software to capture the raw waveform which he then analyzes manually using Audacity. Once the binary string, length and pulse width is known he is able to program an Arduino connected to a 433 MHz transmitter to replicate the signal.
In future posts Shreyas hopes to explore other ways to transmit the signal, and eventually design a simple but configurable 433 MHz push button that supports RF, WiFi, and can support the IFTTT web service.
If you're interested, check out some of our previous posts that highlight many other successful reverse engineering experiments with RF devices and SDR.
Doorbell Signal Analysis in Audacity. Captured with an RTL-SDR.
RPiTX is software for the Raspberry Pi which can turn it into a 5 kHz to 1500 MHz transmitter which can transmit any arbitrary signal. In order to transmit the software does not require any additional hardware apart from a wire plugged into a GPIO pin on the expansion header. It works by modulating the GPIO pin with square waves in such a way that the desired signal is generated. However, although additional hardware isn't required, if RPiTX is to be used in any actual application a band-pass filter is highly recommended in order to remove any harmonics which could interfere and jam other radio systems.
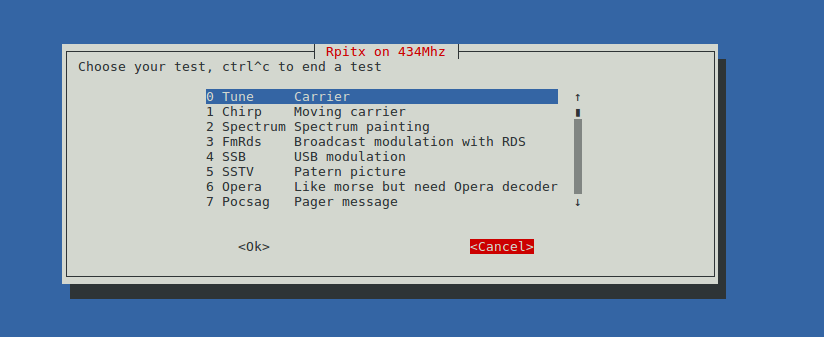
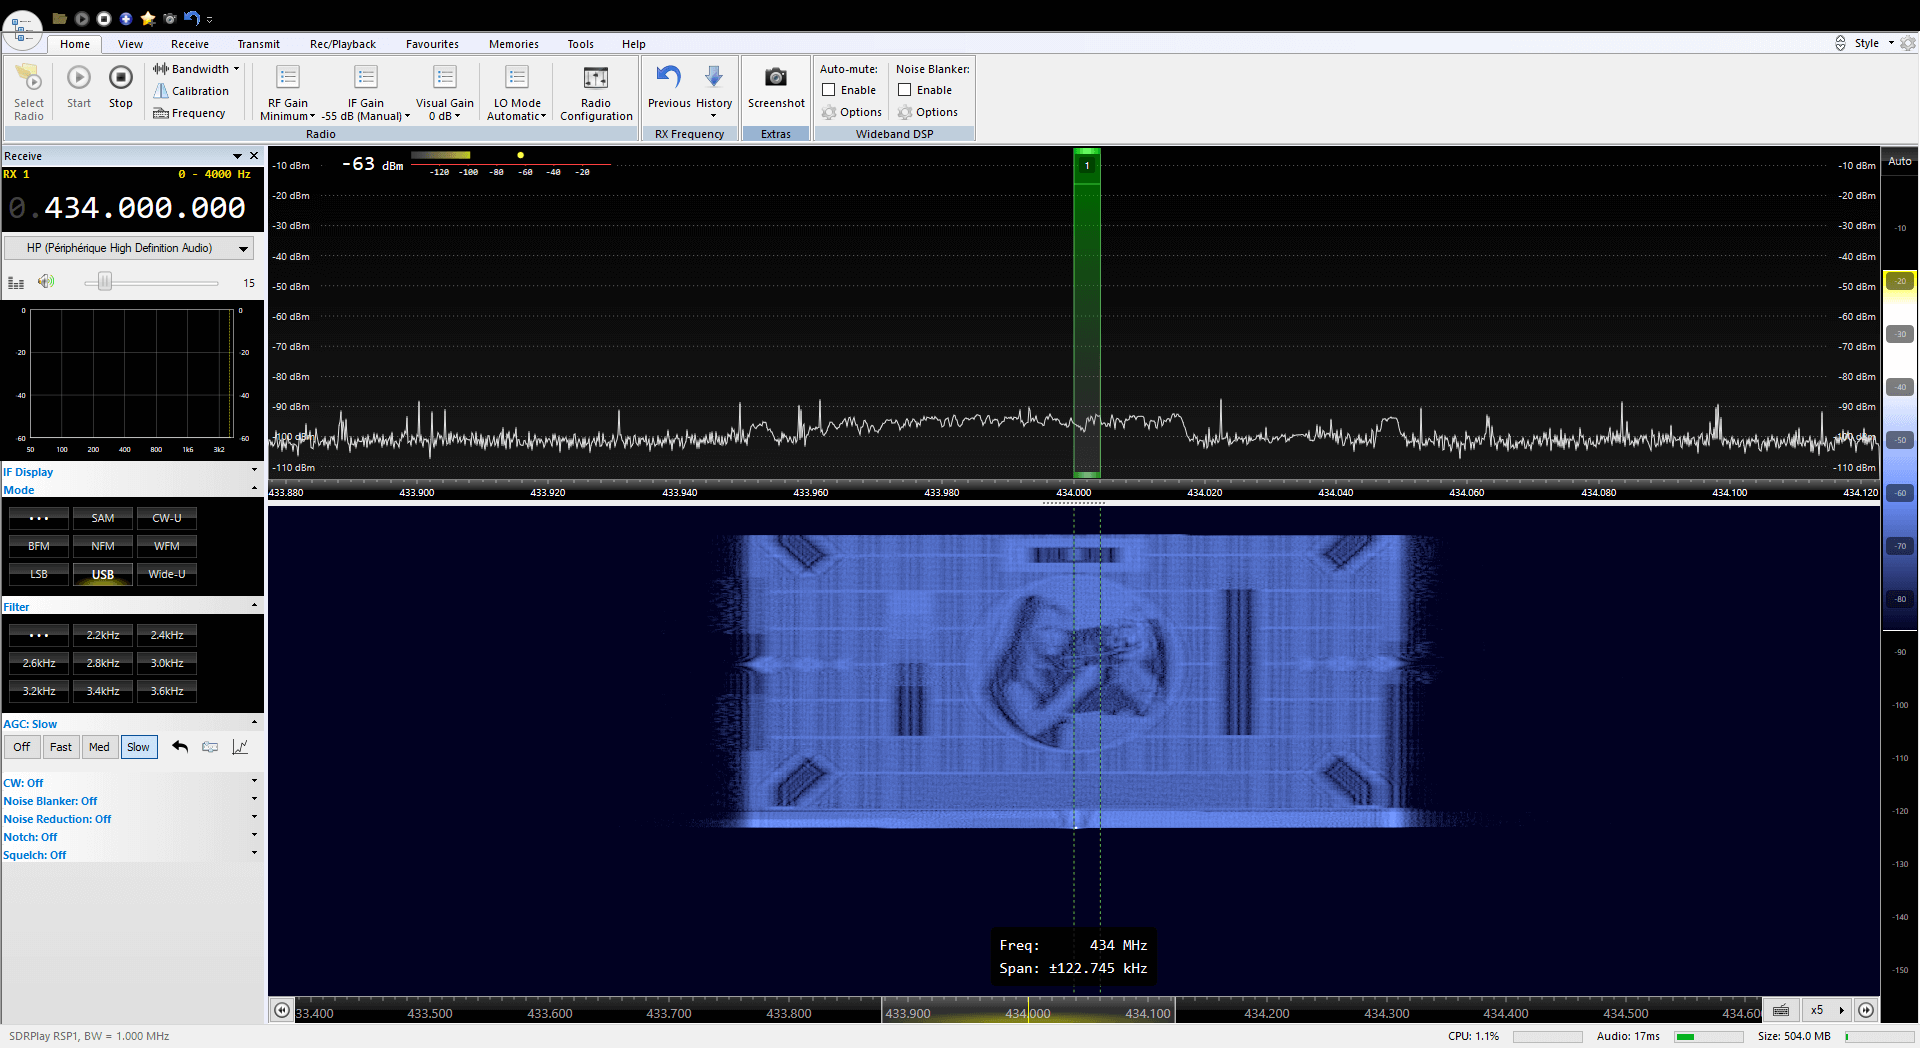
Earlier this month RPiTX was upgraded to version 2. One of the changes is a new GUI for testing the various transmission modes. Currently it is possible to transmit a chirp, FM with RDS, USB, SSTV, Opera, Pocsag, SSTV, Freedv. There is also a spectrum painter which allows you to display an image on a SDR's waterfall.
The RPiTX V2 GUIPainting an Image on a SDR Waterfall Display with RPiTX v2
The RPiTX v2 update also makes recording a signal with an RTL-SDR, and replaying that signal with RPiTX significantly easier. Previously it was necessary to go through a bunch of preprocessing steps (as described in our previous tutorial) in order to get a transmittable file, but now RPiTX is capable of transmitting a recorded IQ file directly. This makes copying things like 433 MHz ISM band remotes significantly easier. One application might be to use RPiTX as an internet connected home automation tool which could control all your wireless devices.
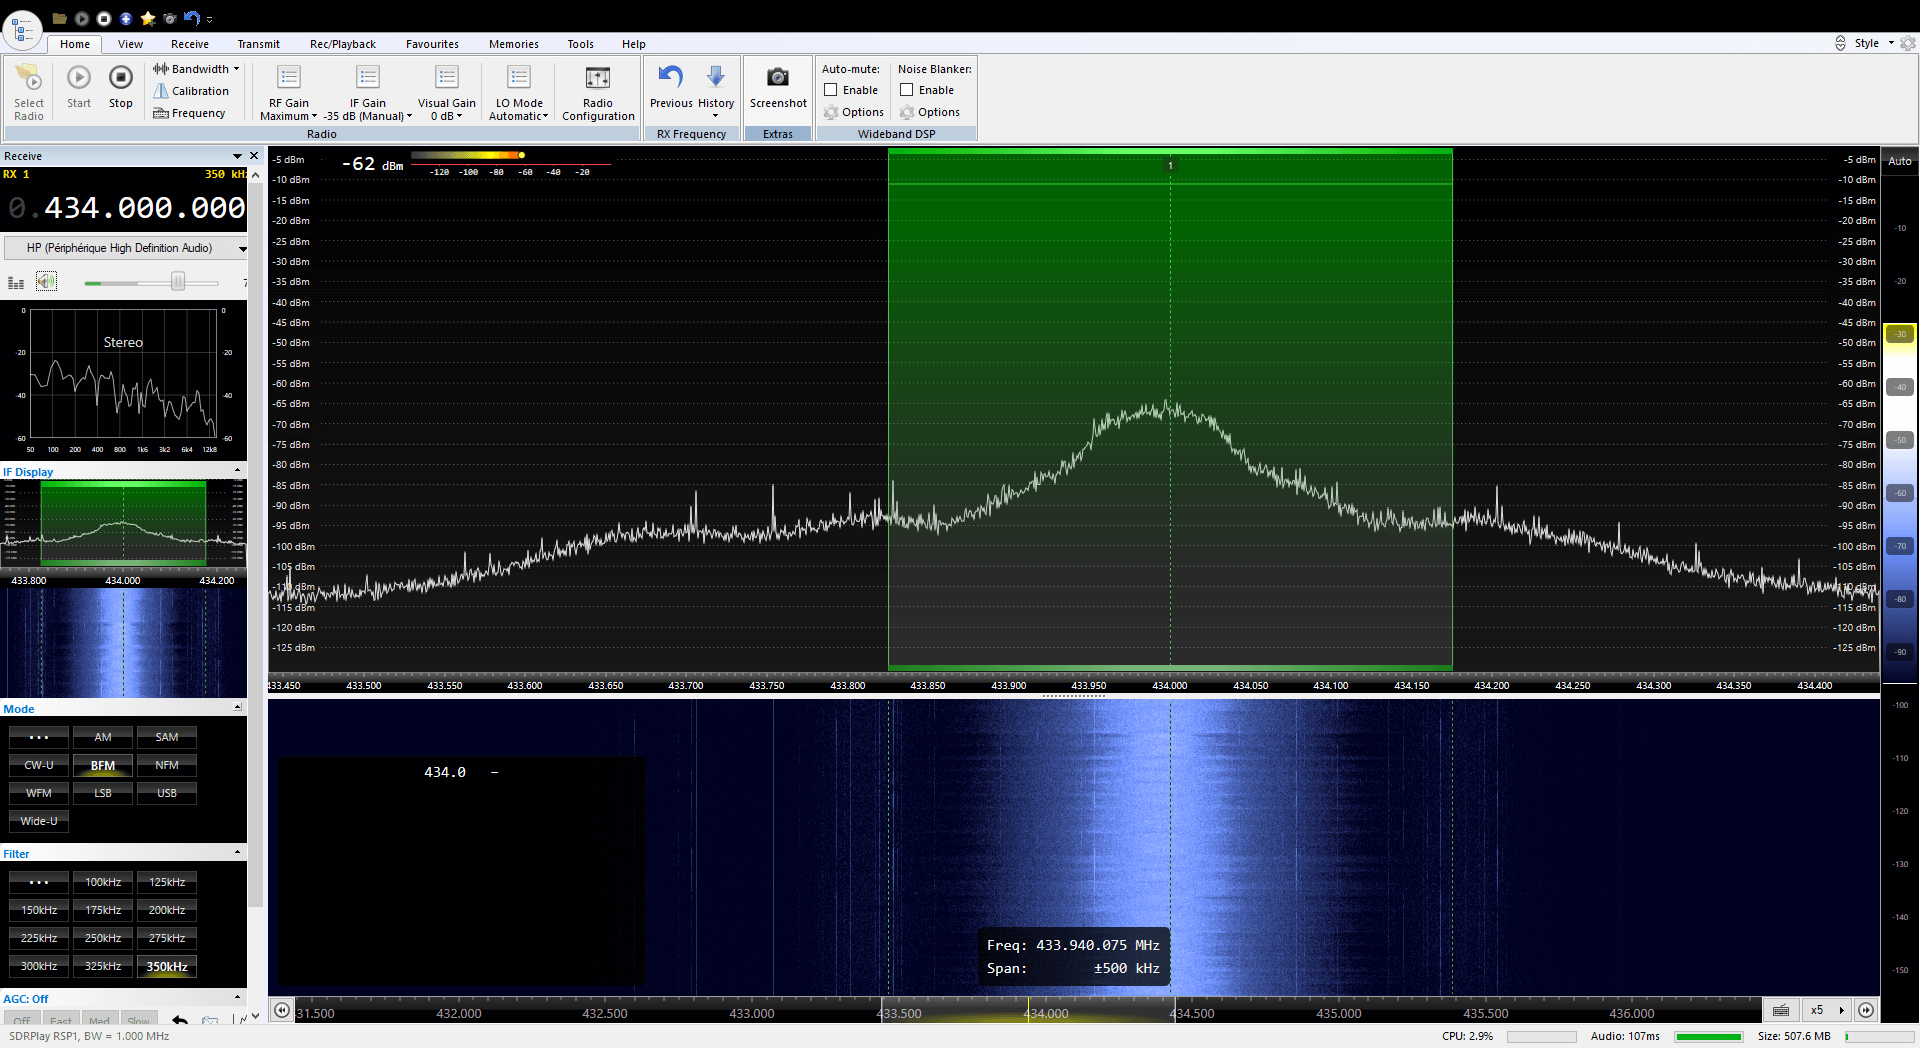
Finally, another application of the RPiTX and RTL-SDR combination is a live RF relay. The software is able to receive a signal at one frequency from the RTL-SDR, and then re-transmit it at another frequency in real time. Additionally, it is also capable of live transmodulation, where it receives an FM radio station, demodulates and then remodulates it as SSB to transmit on another frequency.
The RPiTX V2 RTL-SDR MenuRPiTX v2 re-transmitting a broadcast FM signal live at 434 MHz.
The PortaPack is a US$220 add-on for the HackRF software defined radio (HackRF + PortaPack + Accessory Amazon bundle) which allows you to go portable with the HackRF and a battery pack. It features a small touchscreen LCD and an iPod like control wheel that is used to control custom HackRF firmware which includes an audio receiver, several built in digital decoders and transmitters too. With the PortaPack no PC is required to receive or transmit with the HackRF.
Of course as you are fixed to custom firmware, it's not possible to run any software that has already been developed for Windows or Linux systems in the past. The official firmware created by the PortaPack developer Jared Boone has several decoders and transmitters built into it, but the third party 'Havoc' firmware by 'furrtek' is really what you'll want to use with it since it contains many more decoders and transmit options.
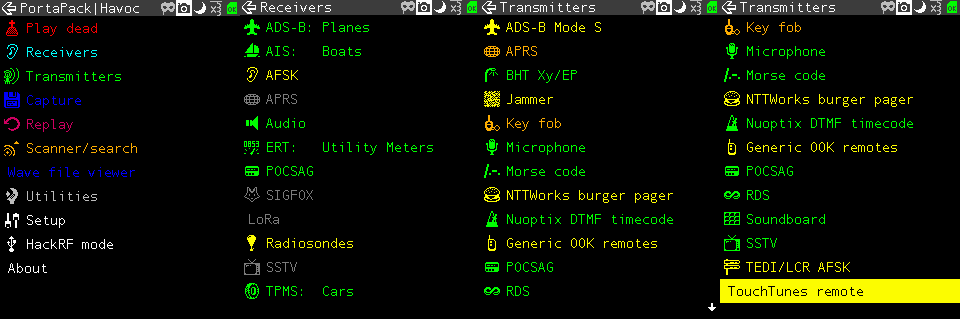
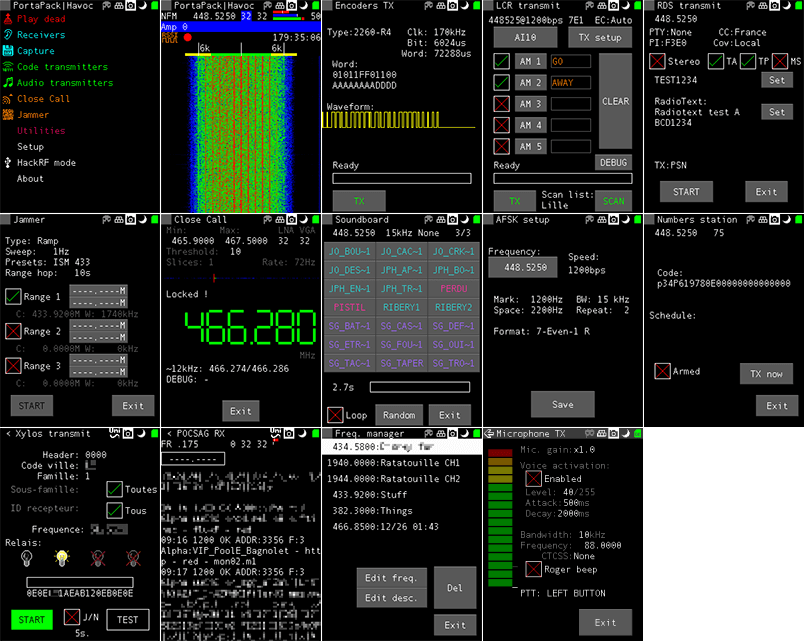
As of the time of this post the currently available decoders and transmit options can be seen in the screenshots below. The ones in green are almost fully implemented, the ones in yellow are working with some features missing, and the ones in grey are planned to be implemented in the future. Note that for the transmitter options, there are some there that could really land you in trouble with the law so be very careful to exercise caution and only transmit what you are legally allowed to.
Some screenshots from the HackRF Portapack Havoc FirmwareMore Havoc firmware screenshots from the GitHub page.
Although the PortaPack was released several years ago we never did a review on it as the firmware was not developed very far beyond listening to audio and implementing a few transmitters. But over time the Havok firmware, as well as the official firmware has been developed further, opening up many new interesting applications for the PortaPack.
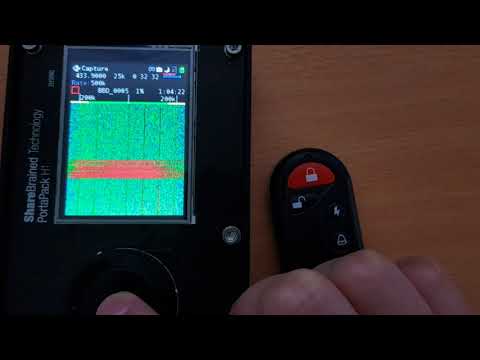
Doing a replay attack on a wireless keyfob using the PortaPack.
Testing the PortaPack with the Havoc Firmware
Capture and Replay
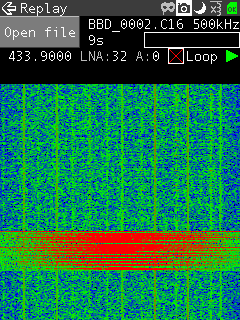
One of the best things about the PortaPack is that it makes capture and replay of wireless signals like those from ISM band remote controls extremely easy. To create a capture we just need to enter the "Capture" menu, set the frequency of the remote key, press the red 'R' Record button and then press the key on the remote. Then stop the recording to save it to the SD Card.
Now you can go into the Replay menu, select the file that you just recorded and hit play. The exact same signal will be transmitted over the air, effectively replacing your remote key.
We tested this using a simple remote alarm system and it worked flawlessly first time. The video below shows how easy the whole process is.
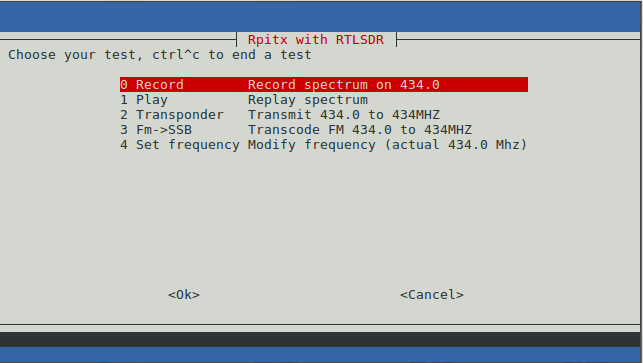
UPDATE: Version 2 of RPiTX renders this tutorial obsolete, as it is now very easy to copy and replay signals using the RPiTX GUI (or the "sendiq" command) and an RTL-SDR. This tutorial is still valid for the overall concept.
With an RTL-SDR dongle, Raspberry Pi, piece of wire and literally no other hardware it is possible to perform replay attacks on simple digital signals like those used in 433 MHz ISM band devices. This can be used for example to control wireless home automation devices like alarms and switches.
In this tutorial we will show you how to perform a simple capture and replay using an RTL-SDR and RPiTX. With this method there is no need to analyze the signal, extract the data and replay using a 433 MHz transmitter. RPiTX can replay the recorded signal directly without further reverse engineering just like if you were using a TX capable SDR like a HackRF to record and TX an IQ file.
Note that we've only tested this replay attack with simple OOK 433 MHz devices. Devices with more complex modulation schemes may not work with this method. But the vast majority of 433 MHz ISM band devices are using simple modulation schemes that will work. Also replay attacks will not work on things like car keys, and most garage door openers as those have rolling code security.
A video demo is shown below:
Replay Attacks at 433 MHz with RTL-SDR and a Raspberry Pi running RPiTX
Hardware used and wireless ISM band devices tested with RPiTX
RpiTX
RPiTX is open source software which allows you to turn your Raspberry Pi into a general purpose transmitter for any frequency between 5 kHz to 500 MHz. It works by using square waves to modulate a signal on the GPIO pins of the Pi. If controlled in just the right way, FM/AM/SSB or other modulations can be created. By attaching a simple wire antenna to the GPIO pin these signals become RF signals transmitted into the air.
Of course this creates an extremely noisy output which has a significant number of harmonics. So to be legal and safe you must always use bandpass filtering. Harmonics could interfere with important life critical systems (e.g. police/EMS radio, aircraft transponders etc).
For testing, a short wire antenna shouldn't radiate much further than a few meters past the room you're in, so in this case you should be fine without a filter. But if you ever connect up to an outdoor antenna or amplify the signal then you absolutely must use adequate filtering, or you could find yourself in huge trouble with the law. Currently there are no commercially made 433 MHz filters for RPiTX available that we know of, so you would need to make your own. Also remember that you are still only allowed to transmit in bands that you are licensed to which for most people will be the ISM bands.
A replay attack consists of recording a signal, and then simply replaying it back at the same frequency at a later time. To do this a receive and transmit capable software defined radio like a USRP/HackRF/bladeRF can be used.
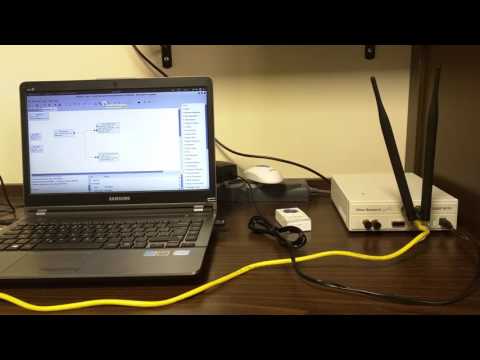
Over on his blog, the admin of the dxwxr group has posted a tutorial showing how he performs a replay attack on a simple wireless doorbell using a USRP, GNURadio and the audio editor Audacity. This is a very simple process and is a great tutorial for those looking to get started in reverse engineering signals. First he determines the frequency of the doorbell which turned out be be around 315 MHz. Then using GNURadio he records the signal emitted by the doorbell remote and opens up the audio file in Audacity. He then isolates a section of the signal and saves it as a raw aiff file. Finally, he uses GNURadio to transmit the isolated signal via the USRP.
Over on his blog Caleb Madrigal has written a short article that describes how he was able to perform a simple relay attack against a Jeep Patriot vehicle which allowed him to unlock and lock his car via his HackRF. The replay attack is a very simple attack that can easily be performed with a TX capable SDR, like the HackRF. Essentially, all that is done is that a signal is recorded, and then rebroadcast (replayed) again. Normally, wireless car locks have rolling code security measures that prevent such an attack, but it appears that the 2006 Jeep Patriot has no such measures.
Caleb first recorded the unlock and lock signals using his HackRF with GNU Radio. He then took the step of opening the recorded file up in Audacity and isolating the unlock and lock audio signals, and then saving each signal to a separate file. Finally, after doing this he was able to transmit the unlock and lock waveforms which successfully locked and unlocked the Jeep.