Setting up and Testing Osmo-FL2K

A few days ago we posted about Osmo-FL2K, which is a newly released piece of software by Steve M from Osmocom that turns a common $5-$15 USB to VGA adapter into a transmit only capable SDR. It is very complimentary to the RTL-SDR.

Any USB to VGA adapter that contains a FL2K chip appears to be compatible and yesterday we received one and have been playing with it. This post is a demonstration of some of the results.

Hardware Used

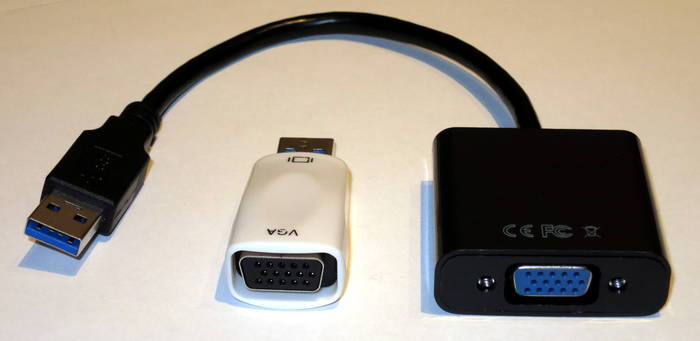
  1. The cheapest USB to VGA adapter found on the market. It seems all of the low cost $5 - $15 adapters that indicate "USB 3.0 to VGA", and max resolutions of 1920 x 1080 are compatible as they use the FL2K chip. More expensive units are not compatible. Compatible units all have a similar design (box at the end of a short USB cable, although there are other types too). The brand does not matter. (Amazon) (Aliexpress)
  2. A VGA to BNC breakout cable to connect the FL2K SDR directly to an RTL-SDR  (via a BNC to SMA adapter) without illegally transmitting over the air. The Red color breakout is the one connected to the TX pin. (Amazon) (Aliexpress)
  3. A low cost 20dB or more attenuator to avoid overloading the dongle. (Amazon)  (Aliexpress)
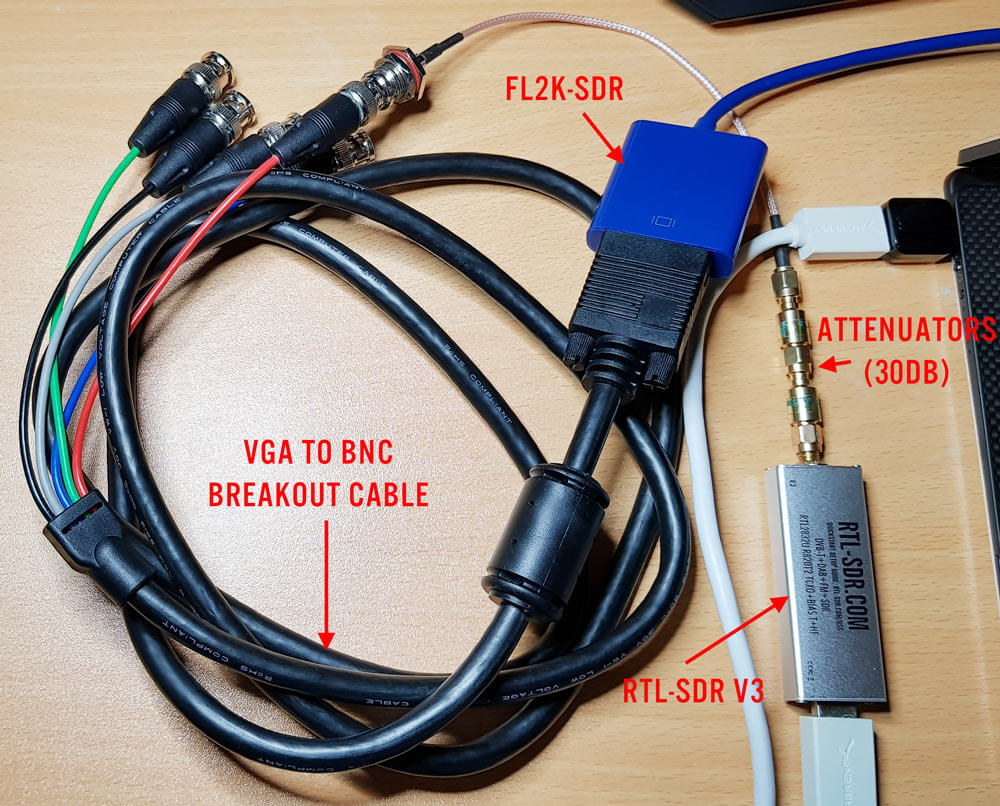
FL2K Test Hardware
FL2K Test Hardware

Setup

Note that you must have a USB 3.0 port to use Osmo-FL2K, although a USB 2.0 might work although at significantly reduced bandwidths.

Osmo-FL2K is Linux only at the moment, but it may be possible for someone to compile a Windows version, just like with RTL-SDR. Instructions for downloading and compiling the software are available on the official wiki. It is a standard git clone, cmake, make type procedure which can be done in 2 minutes. You'll also need to probably do an 'sudo apt-get install sox pv' if you want to run the WBFM example. 

First we tried to boot into the GNU Radio Live Linux bootable image on a tablet like laptop that only has USB C 3.0 ports. Unfortunately while the FL2K-SDR was recognized, and Osmo-FL2K detected it, there was no signal coming out during test transmissions. It seems that there may be issues when a USB C to USB Type A converter is used. 

Next we tried the GNU Radio Live Linux bootable image on a desktop PC and this time Osmo-FL2K worked fine when plugged into a USB 3.0 port. However, plugging it into extended ports seemed to cause it to not be detected.  So if you're having trouble getting Osmo-FL2K to work, try other USB 3.0 ports on your PC, and avoid USB C adapters if possible.

We also tried Virtual Box, however the FL2K-SDR wouldn't connect to the Linux guest system, even though USB 3.0 was enabled and the extensions were installed. For VMWare it appears only that the paid versions support USB 3.0.

Testing

WBFM

Following the instructions on the official Osmo-FL2K page we were able to get an WBFM transmission up and running almost instantly. The provided example routes audio from your soundcard into the FL2K-SDR, causing it to transmit WBFM audio at 95 MHz. With this we were easily able to broadcast audio from YouTube to another PC via the FL2K-SDR although there is about two seconds of delay.

To choose the frequency you choose the carrier frequency and the sample rate, and then the transmit frequencies will be the sample rate +/- carrier frequency + harmonics.

FL2K broadcasting WFM with fl2k_fm.
fl2k_fm help screen
fl2k_fm help screen

Harmonics

Speaking of the harmonics we had a look at them using an Airspy and the SpectrumSpy software. The image below shows that the harmonics of a signal transmitted at 95 MHz extend all the way up to the maximum range of the Airspy at 1.8 GHz, and probably further. So filtering is very necessary if you ever want to transmit over the air.

Note that when broadcasting at 95 MHz (sample rate 130 MHz, carrier 35 MHz), there is also a strong signal at the carrier frequency. So band pass filtering would be required. 
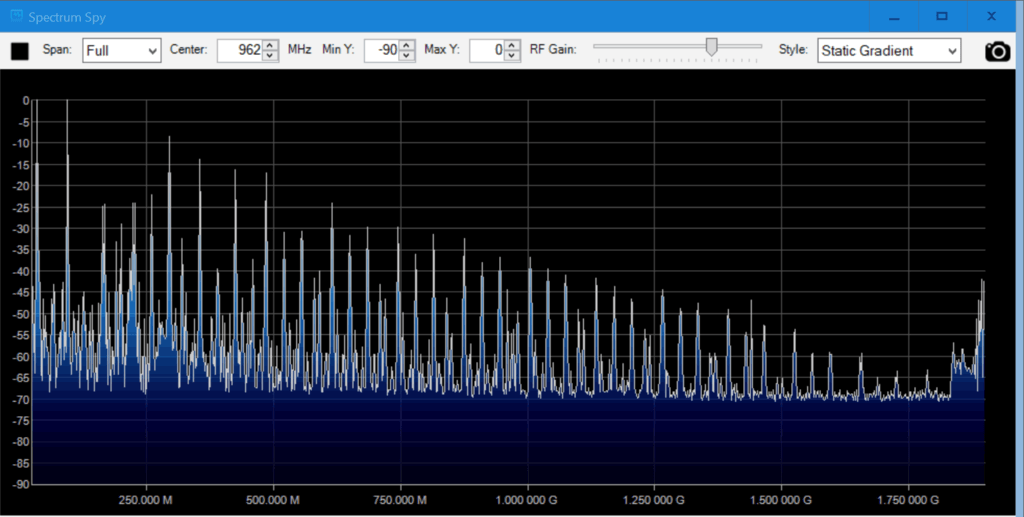
Harmonics when transmitting at 95 MHz

DVB-T

We also tested the DVB-T example found at https://github.com/steve-m/fl2k-examples, which worked flawlessly. By using the connected RTL-SDR dongle with the original DVB-T drivers we were able to receive a transmitted stream at 490 MHz using the ProgDVB software.

To do this follow the instructions in the fl2k-examples/DVB-T readme file to generate samples which Osmo-FL2K can transmit. Then on another PC install the DVB-T drivers for the RTL-SDR, and use ProgDVB to scan 490 MHz by manually editing the multiplexes options.
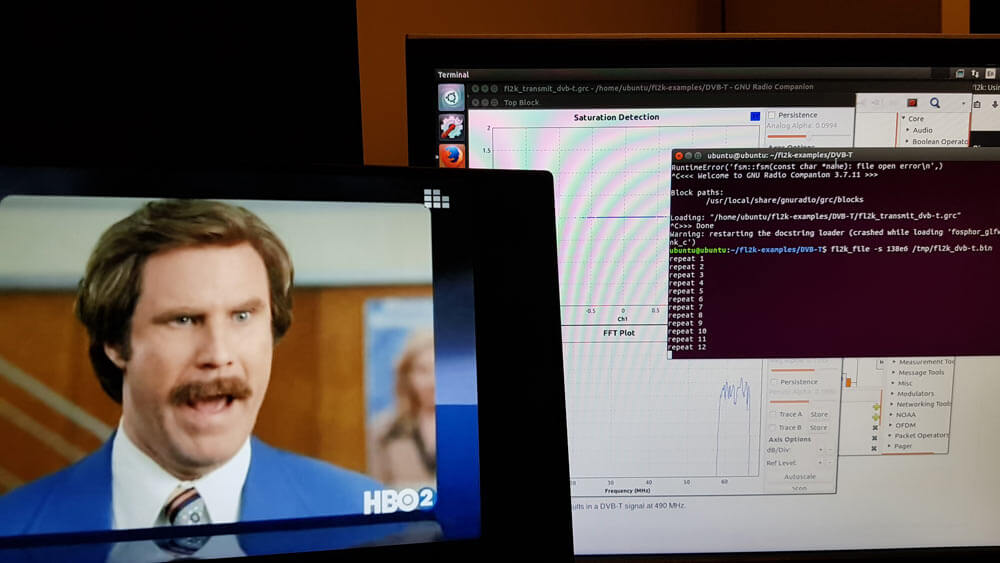
Osmo-FL2K transmitting DVB-T.
Osmo-FL2K transmitting DVB-T to a Laptop running an RTL-SDR.

CPU Usage

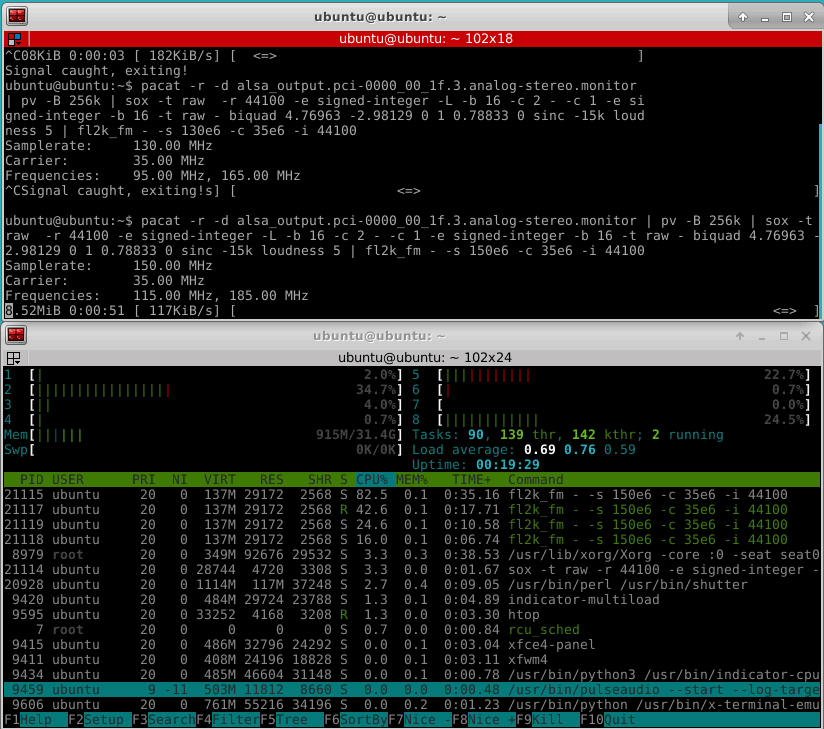
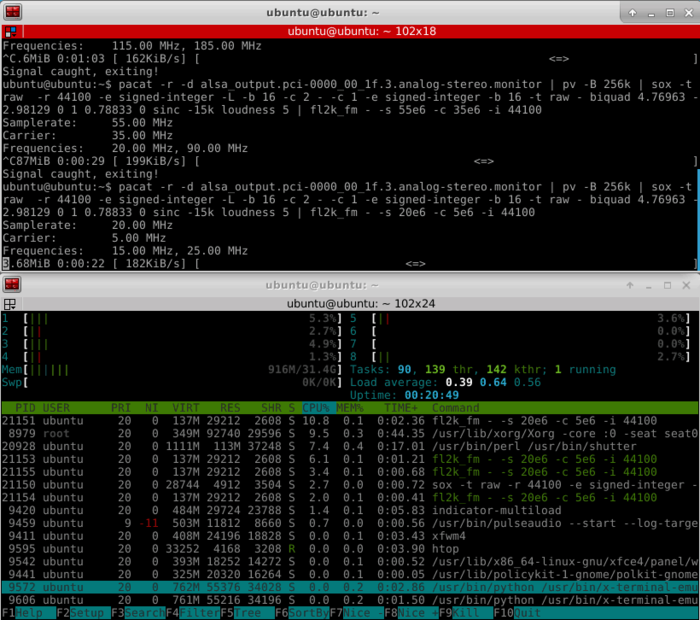
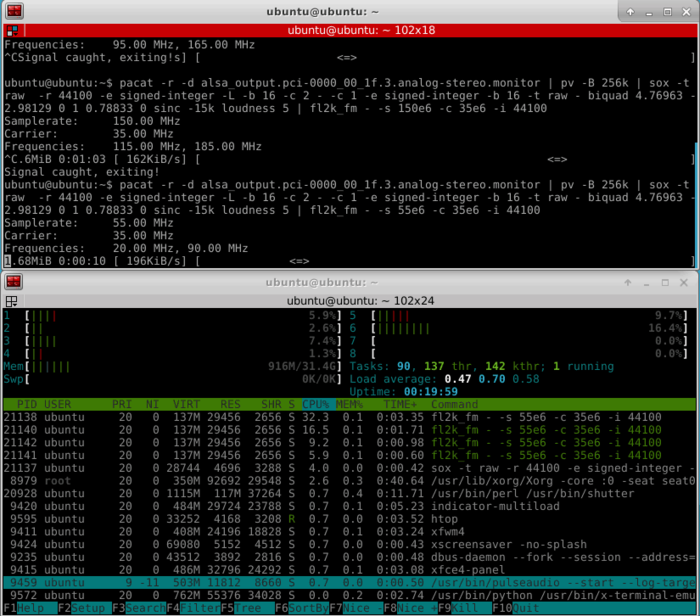
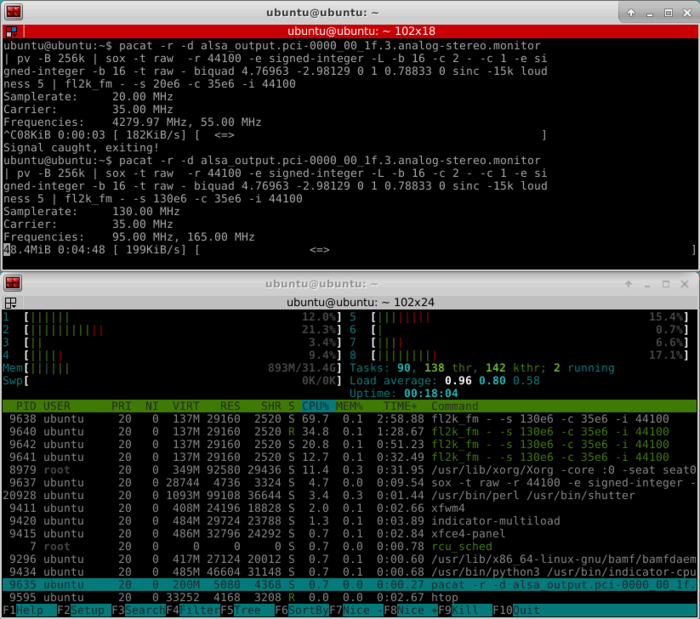
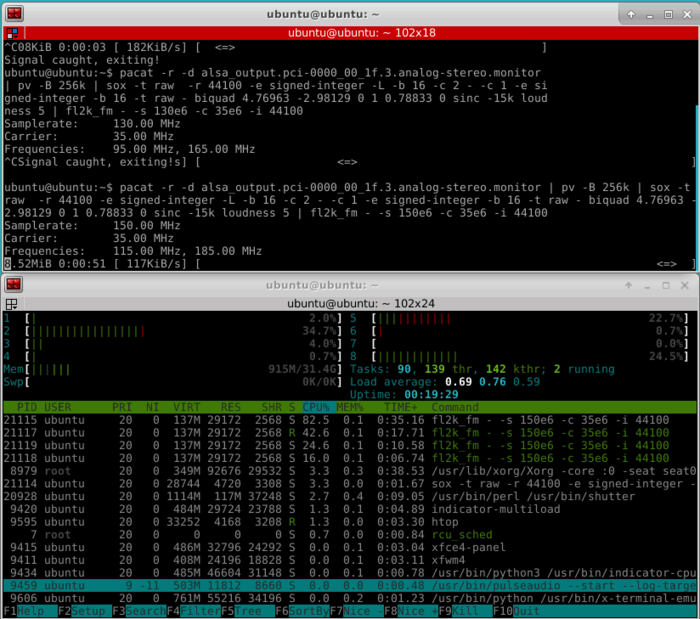
Osmo-FL2K is quite CPU intensive, especially if higher sample rates are used. For this reason it might struggle on singe board computers that support USB 3.0. The images below show some CPU usage examples for sample rates of 20, 55, 130 and 155 MS/S. The test PC uses a fairly powerful i7-6700 CPU.
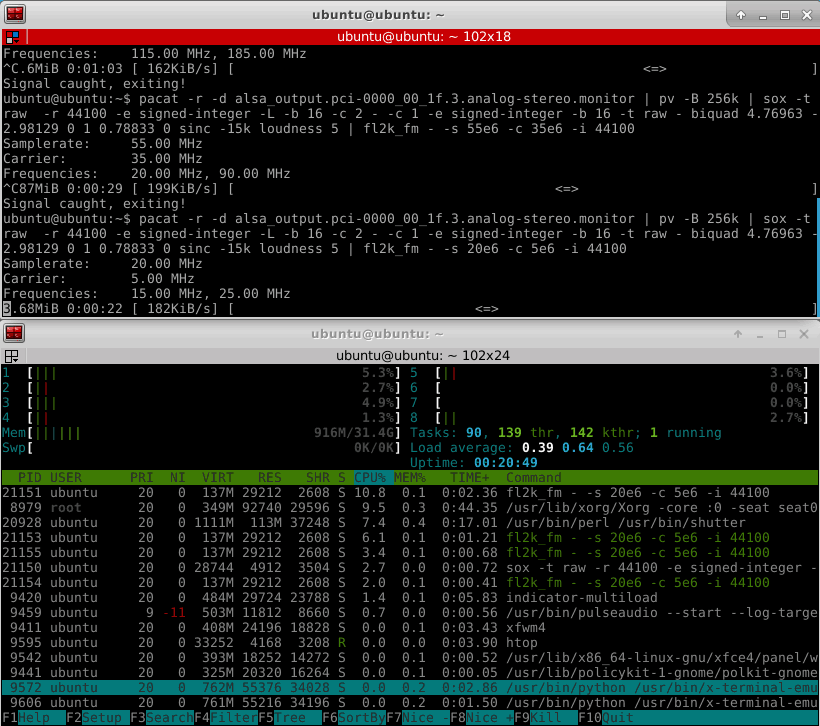
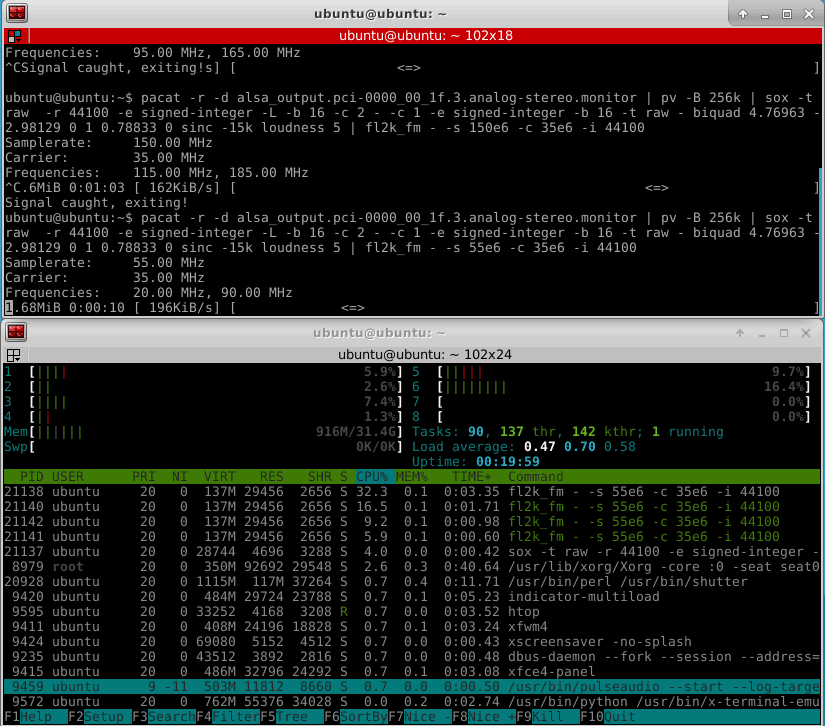
20 MS/S
55 MS/S
130 MS/S
150 MS/S
20 MS/S 55 MS/S 130 MS/S 150 MS/S

Another GUI for Outernet’s Wideband Signal Generator moRFeus

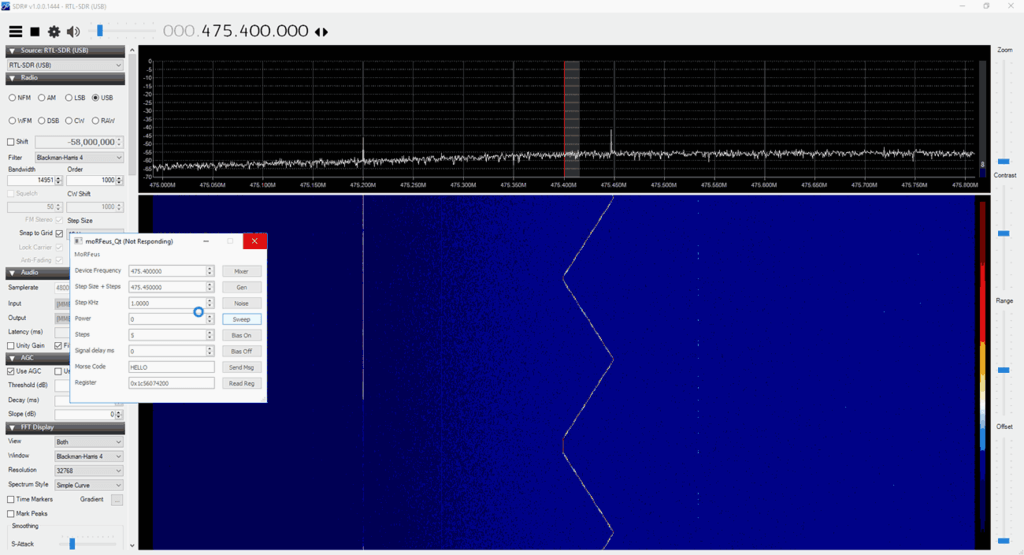
Thanks to Ohan Smit for submitting news of his newly released GUI for Outernet's moRFeus wideband signal generator. Ohan's GUI works in both Linux and Windows. The Windows release can be downloaded from the GitHub Releases page. With the GUI you can change the mode between Mixer/Generator, generate noise, run a sweep, turn the bias tee on/off and generate a CW message.

A few days ago we also posted about about a moRFeus GUI by "Lama Bleu" which has similar functions. Although it only appears to run in Linux, Lama Bleu's GUI can interface directly with GQRX.

moRFeus is still currently on sale at CrowdSupply for $149 for the next 19 hours from the time of this post. The price is expected to rise after.

moRFeus GUI Generating a Sweep

Video Demonstrating the iBiquity HD Radio Decoder

Over on YouTube user Rob Fissel has uploaded a nice video that demonstrates the iBiquity HD Radio decoder working with an RTL-SDR. HD Radio is a terrestrial digital broadcast signal that is only used in North America. It is easily recognized by the two rectangular blocks on either side of a broadcast FM station signal on a spectrum analyzer/waterfall display.

For a long time it was thought impossible to decode due to the closed and proprietary nature of the signal format. But thanks to Theori who was able to reverse engineer and create an HD Radio decoder it has now become possible to decode this into actual audio that you can listen to. In some areas it is even possible to extract the weather and traffic data encoded into some broadcasts from iHeartRadio.

Rob's YouTube video demonstrates him downloading and setting up the HD Radio decoder, then receiving, decoding and listening to some HD Radio stations in his area.

iBiquity HD Radio - RTL-SDR

Getting the V3 Bias Tee to Activate on PiAware ADS-B Images

A few owners of our RTL-SDR V3 and/or our Triple Filtered ADS-B LNA (or other bias tee powered LNAs) have been having trouble getting the V3 bias tee to activate on the FlightAware PiAware Raspberry Pi image. The core stumbling point is that the PiAware image activates the dump1090 ADS-B decoder immediately upon boot. To activate the bias tee, the bias tee software requires access to the dongle which it cannot get since dump1090 is blocking it. So to get around this the bias tee must be activated first before dump1090 runs.

PiAware is FlightAware's Raspberry Pi image which feeds their flightaware.com flight tracking service using RTL-SDR dongles. By using our Triple Filtered ADS-B LNA, users can expect increased range and decoded messages, especially when using long runs of coax cable, and/or in environments with strong interfering signals.

In the instructions below we'll explain how to set up a PiAware image that automatically enables the Bias Tee upon boot.

Downloading the V3 Bias Tee Software onto PiAware

First we assume that you're starting fresh from a new PiAware image, so we need to enable WiFi and SSH connections which is part of the standard set up for PiAware. See the following links for instructions.

Enable WiFi via config file https://flightaware.com/adsb/piaware/build

Enable SSH by adding ssh file to boot https://flightaware.com/adsb/piaware/build/optional#password

 
Now log in to your PiAware machine using SSH and PuTTY (or any other terminal software) using username "pi" and password "flightaware".

Run the following commands to update and install some dependencies. 

sudo apt-get update
sudo apt-get install git cmake build-essential libusb-1.0-0-dev

 
Download and install the RTL-SDR V3 Bias Tee software.

cd ~
git clone https://github.com/rtlsdrblog/rtl_biast
cd rtl_biast
mkdir build
cd build
cmake .. -DDETACH_KERNEL_DRIVER=ON
make

Testing the Bias Tee

Over on his blog Akos has created a short guide to activating the bias tee manually, by first stopping dump1090, activating the bias tee, then restarting dump1090. It's a simple one line copy and paste job.

So after installing the rtl_biast software above you can use the following line to test the bias tee. After running this line the FlightAware service should be up and running again, with the bias tee and LNA activated.

sudo service dump1090-fa stop && cd ~/rtl_biast/build/src && ./rtl_biast -b 1 && sudo service dump1090-fa start

Automatically Starting the Bias Tee on Boot

Ideally we don't want to have to reactivate the bias tee manually every time the Raspberry Pi reboots. To make it automatic use the following instructions:

First create a service directory and configuration file

sudo mkdir /etc/systemd/system/dump1090-fa.service.d
sudo nano /etc/systemd/system/dump1090-fa.service.d/bias-t.conf

 
Then paste in the following

[Service]
ExecStartPre=/home/pi/rtl_biast/build/src/rtl_biast -b 1

 
Finally press Ctrl+X then Y to close and save. Now whenever PiAware reboots the bias tee should be automatically activated as this service runs before dump1090 is activated.

Credits:

Thanks to the discussion on the FlightAware forums and in particular user 'obj' for originally finding this automatic solution.

Creating a High Altitude Balloon Telemetry System with Raspberry Pi, RPiTX and RTL-SDR

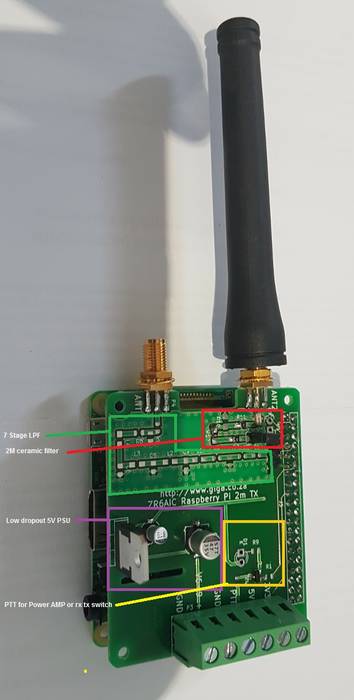
The 2M TX Filter by ZR6AIC

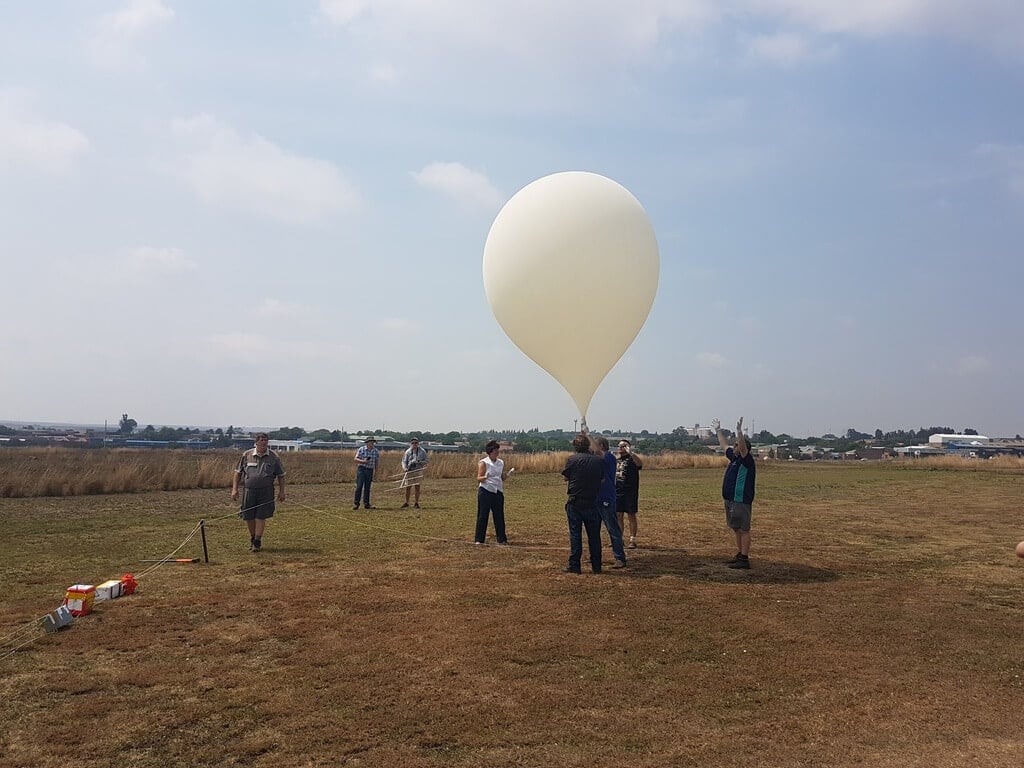
Over on his blog ZR6AIC explains how he's created a full HAB (high altitude balloon) telemetry transmit and receive system using RPiTX and an RTL-SDR dongle running on a Raspberry Pi 3.

RPiTX is software that enables the Raspberry Pi to transmit any modulated signal over a wide range of frequencies using just a single GPIO pin. However, the transmission contains multiple harmonics and thus requires sufficient filtering in order to transmit legally within the 2M ham band. To solve this ZR6AIC uses a 2M Raspberry Pi Hat kit which he designed and created that contains two low pass filters as well at the option for an additional power amplifier.

The rest of ZR5AIC's post explains how his HAB telemetry system combines the Raspberry Pi 3, RPiTX 2M Hat, RTL-SDR, a GPS unit, battery, temperature sensor and optional camera into a full HAB transmitting system. He also explains the software and terminal commands that he uses which allows him to transmit via RPiTX a CW beacon and GPS and temperature sensor APRS telemetry data with the Direwolf software. Full instructions on setting up the alsa-loopback audio routing is also provided.

Launching the High Altitude Balloon.

GUI for Controlling the R820T2 Filters and Registers

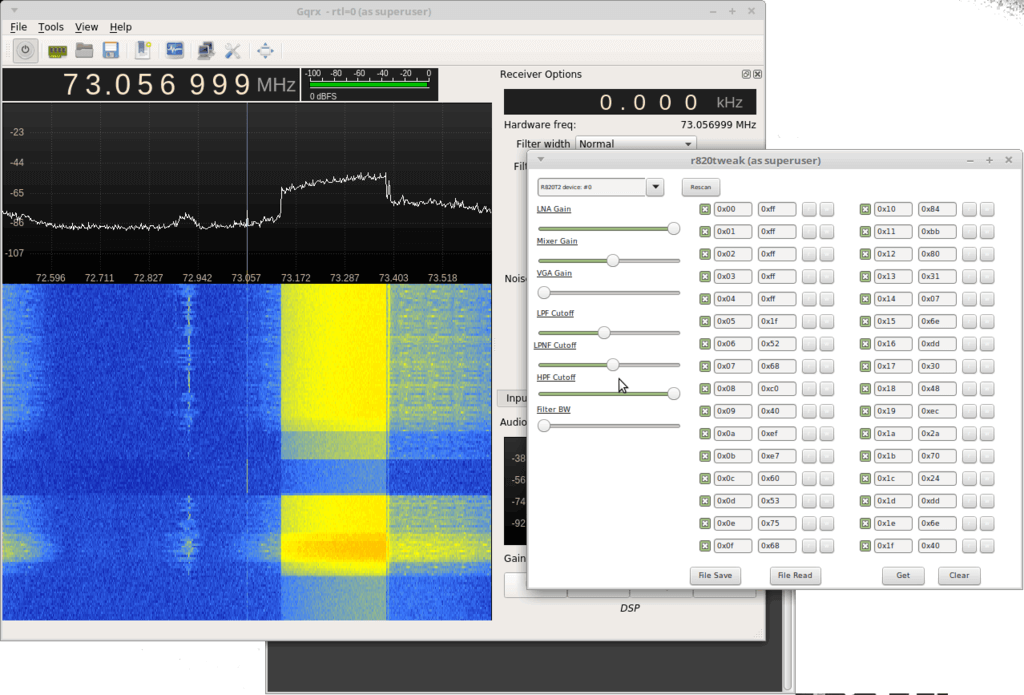
Recently a program called R820T2Tweak_Patched was released which is a GUI for GQRX that allows you to manually control not only the three RF gain settings on R820T2 RTL-SDRs, but also the four filter settings as well as the registers directly. The R820T2 is the most commonly found tuner chip on RTL-SDR dongles, and is generally considered the best for most applications. 

The GUI could be useful for advanced users wanting to experiment with the various lower level R820T2 register settings, or for anyone that wants ultimate control over the filters in the RTL-SDR. 

The software is based on the original R820Tweak which has the same features except the ability to control the registers directly.

R820Tweak_Patched GUI. Control Gain, Filters and Registers.

Thomas N1SPY Demonstrates Receiving SSTV Images from the ISS

Earlier in the month the International Space Station (ISS) was transmitting SSTV images down to the earth for anyone to receive an decode. The ISS does this several times a year to commemorate special space related events, such as the day Yuri Gagarin (first man in space) was launched.

In the video Thomas explains why the ISS does this, how to track the ISS, and then he demonstrates actually receiving and decoding the signal. Thomas uses an Airspy HF+ to receive the signal on 145.8 MHz, however an RTL-SDR could do the same job. For decoding he uses the MMSSTV software.

For new on when the ISS might transmit SSTV again, keep at eye on the ARISS Blog, and the ISS Ham Twitter page.

2018: Thomas N1SPY receives SSTV signals from the ISS

Osmo-FL2K: A TX-Only SDR Hacked From Commodity $5 USB to VGA Adapters – Demos Available for Transmitting WBFM, GSM, UMTS, GPS

Osmocom are some of the people behind the original discovery and development of the RTL-SDR (in particular Steve M), and today it looks like they have done it again by releasing exciting news of a way to turn a commodity $5 USB to VGA adapter into a TX-only capable SDR. They call their discovery 'osmo-fl2k', as the magic chip that makes it all happen is a Fresco Logic FL2000.

Examples of compatible Osmo-FL2K USB to VGA Adapters.

The discovery is based on the fact that the VGA specific HYSYC/VSYNC synchronizations on the FL2000 chip can be disabled, allowing for a continuous stream of samples to be sent to the VGA digital to analog converter (DAC). The FL2000 also implements a cheaper method of streaming data compared to other devices which allows these to be $5 devices.

The supported hardware appears to be any USB to VGA adapter that uses the FL2000 chip. They note that these are often advertised as "USB 3.0 to VGA" adapters with a maximum resolution of 1920 x 1080 for USB 3.0 and 800 x 600 for USB 2.0. Over on Amazon the cheapest one we've found (note not yet confirmed to be compatible) that meets the Osmocom description appears to be going for $7.49 and is fulfilled by Amazon.  We've seen prices of $5.11 on Aliexpress and $5.99 on eBay too. There appears to be no difference between the brands of these units, as the 'brands' are just private labelled from the same factory, as anyone can add a brand to a generic product.

Once sellers catch on to the fact that these devices are going to be popular we expect them to most likely start raising prices.

The Fresco Logic FL2000 Chip

In terms of TX performance and functionality, osmo-fl2k should be better than RPiTX as it uses an actual DAC, instead of just PWMing a pin. It appears that the device can transmit on a fundamental frequency anywhere from HF up to about 157 MHz, and then signal harmonics can be used to extend the range all the way up to around 1.7 GHz or maybe even higher. Having harmonics does mean that like other cheap TX methods, the signal is not clean and so proper filtering would be required before any sort of higher power transmission would be legal.

The highest fundamental frequency available also appears to be related to the performance of your PC's USB 3.0 controller. The worst USB 3.0 controller that they tested maxed out at 115 MS/s, whereas the best was 157 MS/s (theoretical max should be 160 MS/s). A USB 2.0 controller only gets a maximum sample rate of 14 MS/s.

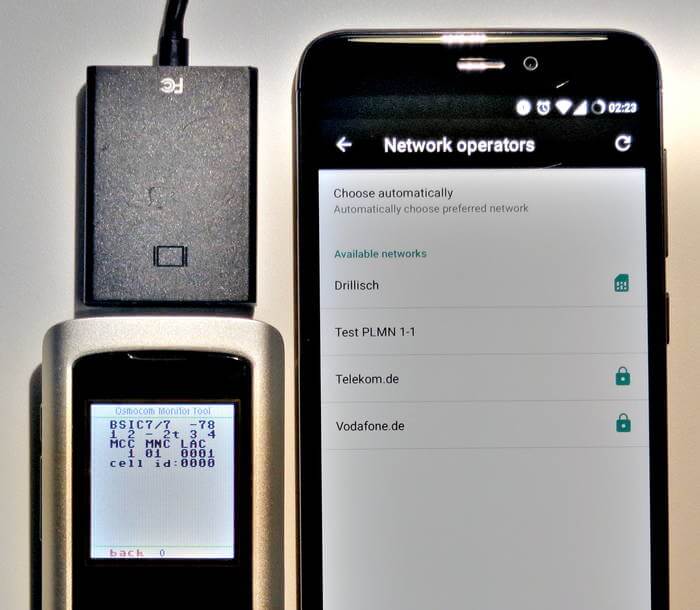
So far the team have released software examples for transmitting DVB-T, GSM, UMTS (3G) and GPS, and have mentioned that they have also successfully transmitted LTE and DAB too. There is also an example for transmitting WBFM audio with RDS via the pacat Linux command and sox. The image below shows the FL2K-SDR working as a GSM base station. 

Osmo-FL2K being used as a GSM Basestation

If you're interested in more information, Osmocom have released the slides from a presentation that they made at a OsmoDevCon presentation on April 22. The video presentation is also expected to be released soon at media.ccc.de.