GRCon17 is the yearly convention all about GNU Radio and the talks are generally all about technical cutting edge developments in the software area of the SDR world. If you didn't already know, GNU Radio is an open source tool that makes implementing digital signal processing code significantly easier by providing a framework and several ready to use DSP blocks. It is an advanced tool used a lot in industry and research, but the visual nature of the blocks means that the basics can be easily learned in a few days. See Micheal Ossmans video tutorials for an excellent introduction.
This year at GRCon17 there were multiple interesting talks, and over the last few days videos of them have been released on YouTube. Slides for each presentation are also available in the YouTube description boxes. The full list of presentations can also be found on the Technical Processing page at GNURadio. A selection of our favorites videos are presented below, with several talks utilizing low cost RTL-SDRs as the core radio in the research.
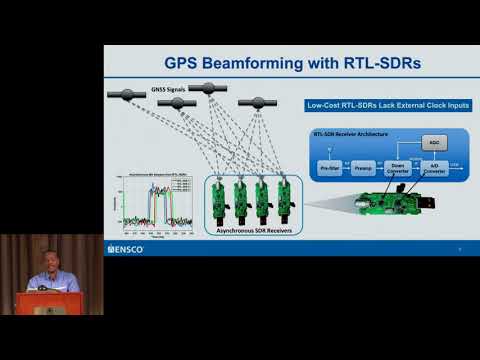
GPS Beamforming with Low-Cost RTL-SDRs - Wil Myrick
In this talk Wil Myrick discusses how he's been using low cost RTL-SDR dongles to perform beamforming experiments with GPS signals.
GRCon17 - GPS Beamforming with Low-Cost RTL-SDRs - Wil Myrick
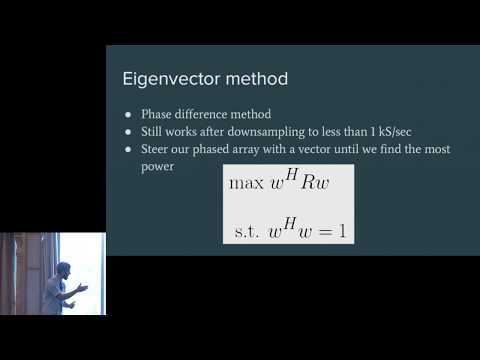
Real-Time Direction Finding Using Two Antennas on an Android Phone - Sam Whiting
In this talk Sam Whiting shows how he used two coherent RTL-SDR dongles running on on an Android phone for direction finding. At the end of the video he demonstrates his results.
GRCon17 - Real-Time Direction Finding Using Two Antennas on an Android Phone - Sam Whiting
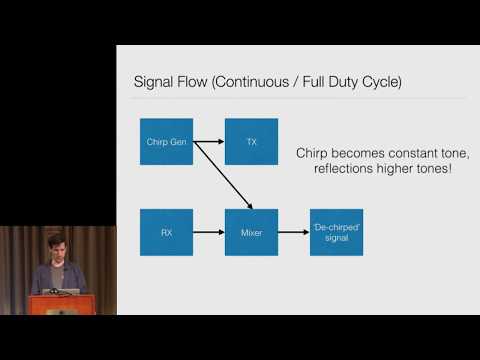
Hacking the Wireless World 4.0 - Balint Seeber
In this video Balint Seeber continues with his popular Hacking the Wireless World series of talks and this time talks about FMCW & Passive Radar and FPV decoding with SDRs.
GRCon17 - Hacking the Wireless World 4.0 - Balint Seeber
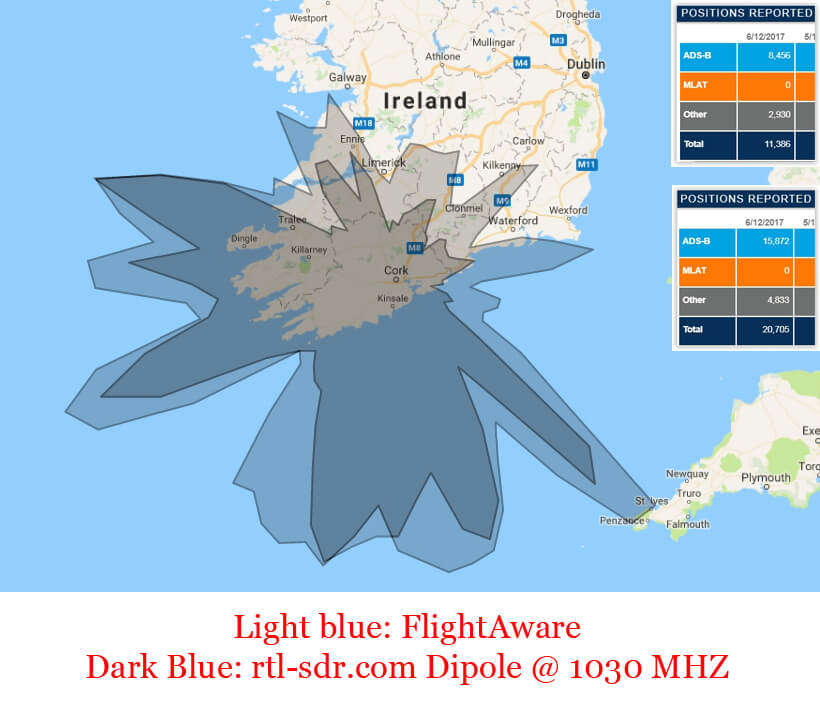
Over on his blog 'Radio For Everyone' Akos has been testing out our multipurpose dipole kit for ADS-B reception. He goes over each of the components in the kit and does some tests with the kit set up outside. His results show that the dipole kit when used with the smaller antennas can compete favorably with the more expensive FlightAware antenna. We note that the dipole antenna is not designed to be used outdoors for extended periods of time as Akos did as they are not weather proofed for rain. The antennas are designed to be used temporarily outside in good weather conditions. Waterproofing could potentially be achieved by oiling the metal, or potting with hot glue etc.
Akos also does a comparison of the dipole used in two configurations. In one configuration the antenna is used in the recommended vertical orientation, and in the other position in a bunny ears configuration. Antenna theory says that the vertical orientation will work best as ADS-B signals are vertically polarized, and the results confirm that that is true.
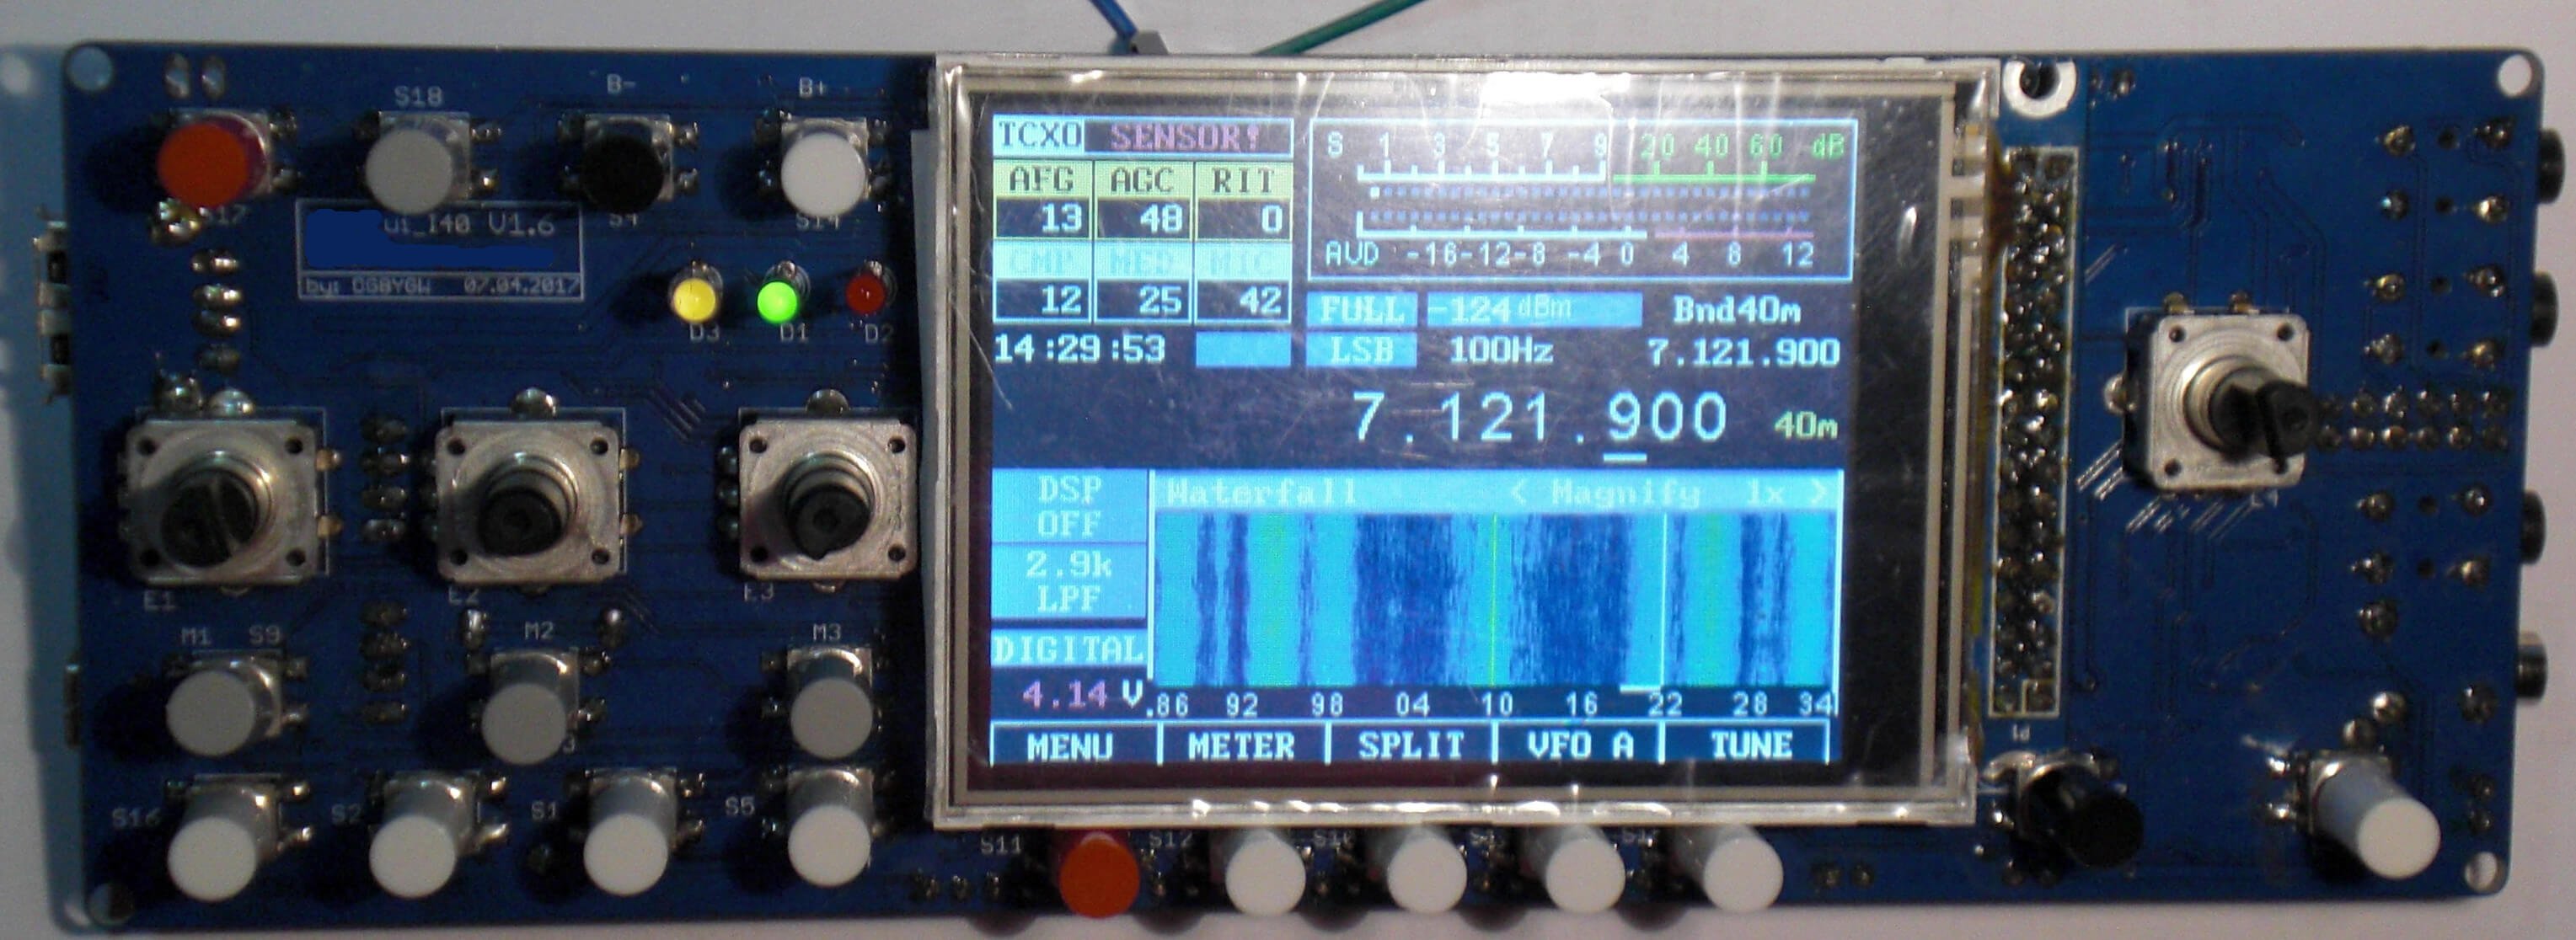
Thanks to various contributors for letting us know about the OVI-40, a new open source DIY SDR ham radio transceiver project that is now available for ordering. The OVI-40 appears to be a German project that is based on the mcHF transceiver. It is a standalone SDR transceiver (no PC required) with a frequency range of DC - 75 MHz. Most discussion appears to be happening in German on their forums, so it is a little difficult to get English information about it.
The kit has recently been released for preorder. The transceiver is a kit involving SMD soldering, but can be ordered fully soldered for 202 Euros (~$240 US) + taxes. The LCD screen is an additional 24 - 27 Euros. The kit without soldering done costs 112 Euros (~$132 US) + taxes.
The advertised details and specs are listed below:
OVI40-SDR is a transceiver which covers VLF...75MHz. It is mainly a DIY project - but all PCBs will also be available as soldered, aligned / programmed PCBs for all those, who do not have the skill to build a complex SMD project by themself or do not want it. OVI40-SDR will also be available as "only RX" and can be expanded with TX stages later.
Developer team takes inspirations from all existing commercial and DIY projects to get a SDR which combines possibly the best of all of them. But OVI40-SDR is not only a TRX - it is a philosophy. A community based working together, regardless of different countries, languages, religions, political systems - all are working together to get a very nice transceiver for themselfes and for others who are coming to the project later - wants to show, what people can reach if they are working together and do not struggle against each other. HAM radio always has connected the world - using the possibilities of the internet adds much more power for community working.
RX from VLF (~ a few KHz) ... 4m, possibly 2m Including
TX 160m ... 4m: 50W, 2200m, 630m and 4m (2m if Implemented): 10 ... 20mW SMA Out
continuosly tuned preselection
PA works using double LDMOSFET, independent BIAS adjusted. BIAS is internally Measured via A / D and can be set in menu Directly in [mA].
TX and RX mixer with very low capacity to minimize LO leakage
true RX QSD mixer using instrumental amplifiers
all internal Voltages (8V, 5V) are generated using well-shielded switching regulators. Additionally switching frequency is shifted via firmware so that never harmonics are present in the RX spectrum
included hardware for measuring antenna (sweep) using logarithmic amplifier
output of an independent selectable rf to SMA plug. I am experimenting to use this as a beacon WSPR Which can run parallel to radio
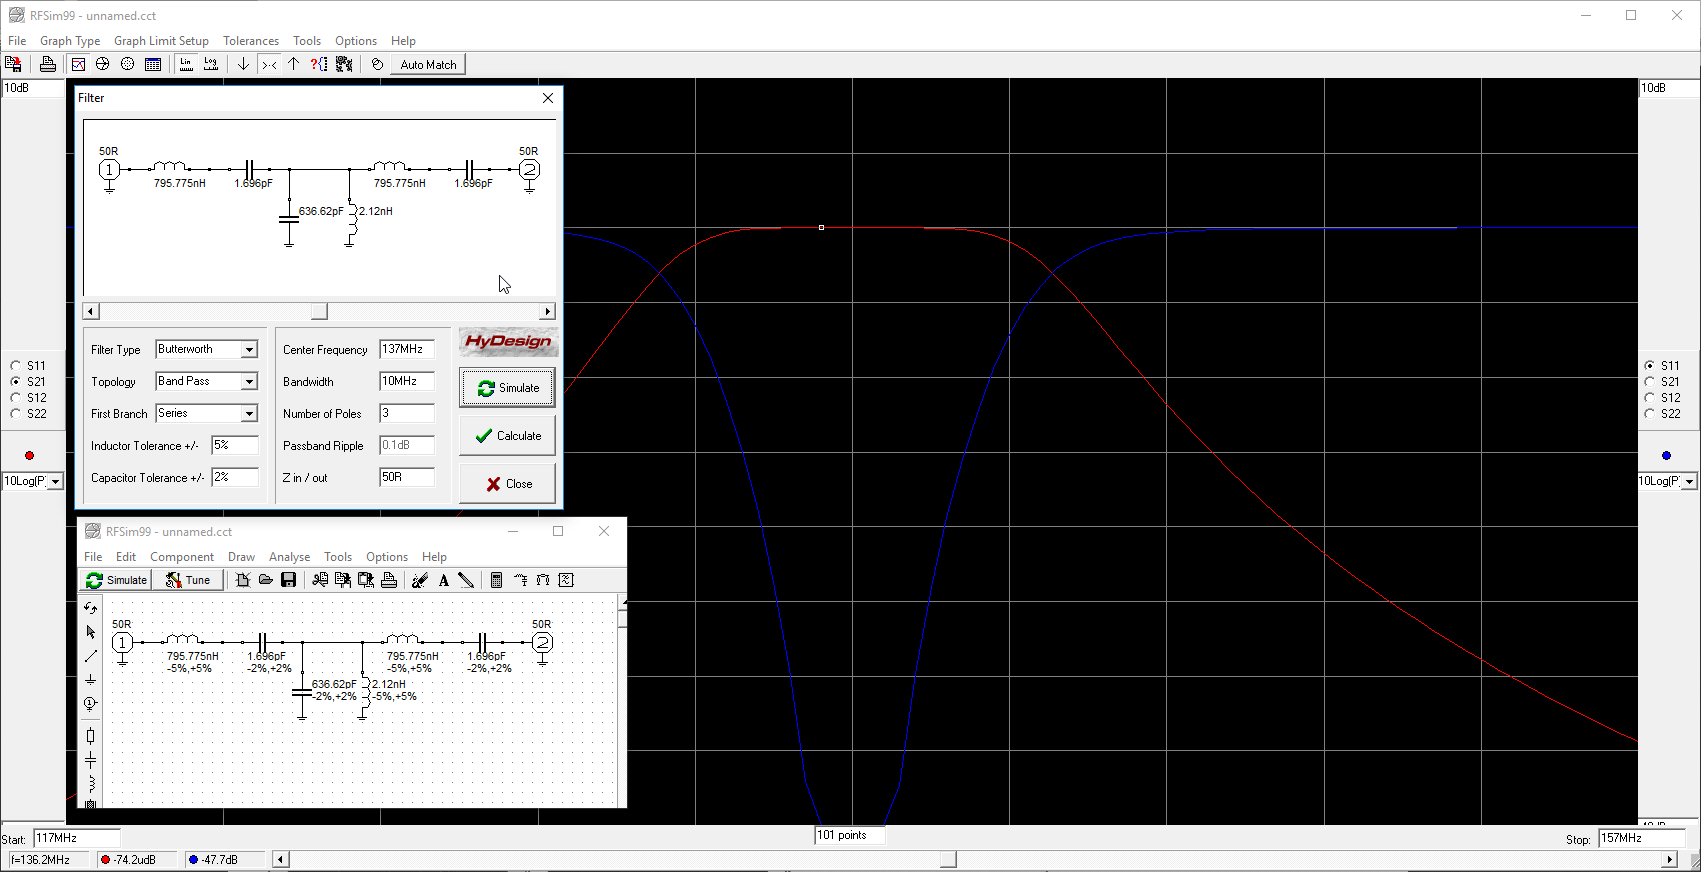
RFSim99 is an old but still very useful piece of free software for designing and simulating RF circuits such as filters, attenuators, matching circuits, RF components with S-parameters and so on. It is not a high end tool, but is more than good enough for hobbyist and ham level designs.
One issue up until recently with RFSim99 was that it was so old that it would only run on Windows XP computers. To run on a modern PC you needed to use a virtual machine, or the Windows built in XP emulation, which was only available on Professional/Ultimate Windows versions and has since been discontinued in Windows 10.
RFSim99 is fairly simple to learn. Just place down two measurement ports (in/out) and lay down your RF components on the grid. Then connect them up with a wire and place grounds. Click on the simulate button to see a graph of the response and return loss. There are even built in calculators in the Tools menu which can automatically design and simulate filters for you.
Back in early November we posted about the upcoming XTRX SDR, which is a small form factor 2 x 2 MIMO TX and RX capable SDR that is designed to fit into laptop Mini PCIE card slots. It is based on the LimeSDR RF chips, and has a tuning range of 10 MHz - 3.7 GHz, with a sample rate of up to 120 MSPS. It is also has some interesting additional features such as a built in GPSDO and an onboard FPGA which can be used to accelerate DSP tasks as well. The Mini PCIE interface was chosen for it's low latency transfer rates.
The card is designed for use cases such as creating LTE cellular networks, creating software defined 2G/3G/4G modems and using on board drones and in embedded systems. It can also be used for standard wideband monitoring and of course any other SDR applications compatible with Lime chips.
Today the crowdfunding campaign for the XTRX has begun. The early bird pricing is $179 USD (with 71 left at the time of this post - going down fast!), and the regular price is $199 USD. There are accessories available as well such as antenna and cable kits, a PCIe x2 adapter and a USB 3.0 adapter kit with enclosure. The XTRX team are hoping to raise 90k USD, with already 8k USD having been raised at the time of this post.
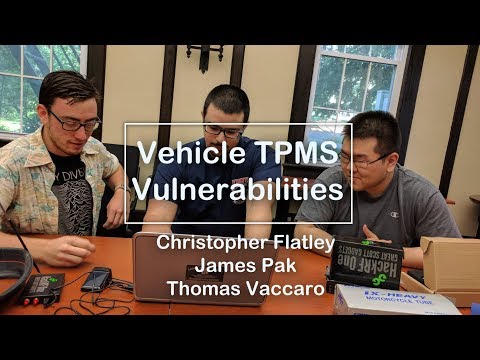
Over on YouTube the channel "Lead Cyber Solutions" has uploaded a video presentation for the Cyber Skills Competition. In the video Christopher Flatley, James Pak and Thomas Vaccaro discuss a man-in-the-middle attack that can be performed on vehicle Tire Pressure Monitoring Systems (TPMS) with a transmit capable SDR such as a HackRF.
A TPMS system consists of small battery powered wireless sensors placed on a vehicles wheels which automatically monitor tire pressure. An LCD basestation usually exists on the dashboard of the car indicating live tire pressure. Most modern cars come with this feature, and it is simple to retrofit an older car with an aftermarket TPMS system.
The idea behind the vulnerability is that a HackRF can be used to reverse engineer the TMPS signal, and then re-transmit a new fake signal that causes the base station to read the tire pressure as low. This can set off an alarm in the car and possibly cause someone to pull over. More alarmingly, they discuss how tractors have automatic tire inflation systems which work using similar sensors. A false low pressure reading could cause the tractor tires to over inflate and be damaged.
Vulnerabilities in Vehicle TPMS (Exploit & Hacking)
In the past we have also posted about Jared Boon's work on TPMS where he shows how privacy could be breached by monitoring and tracking TPMS identifiers.
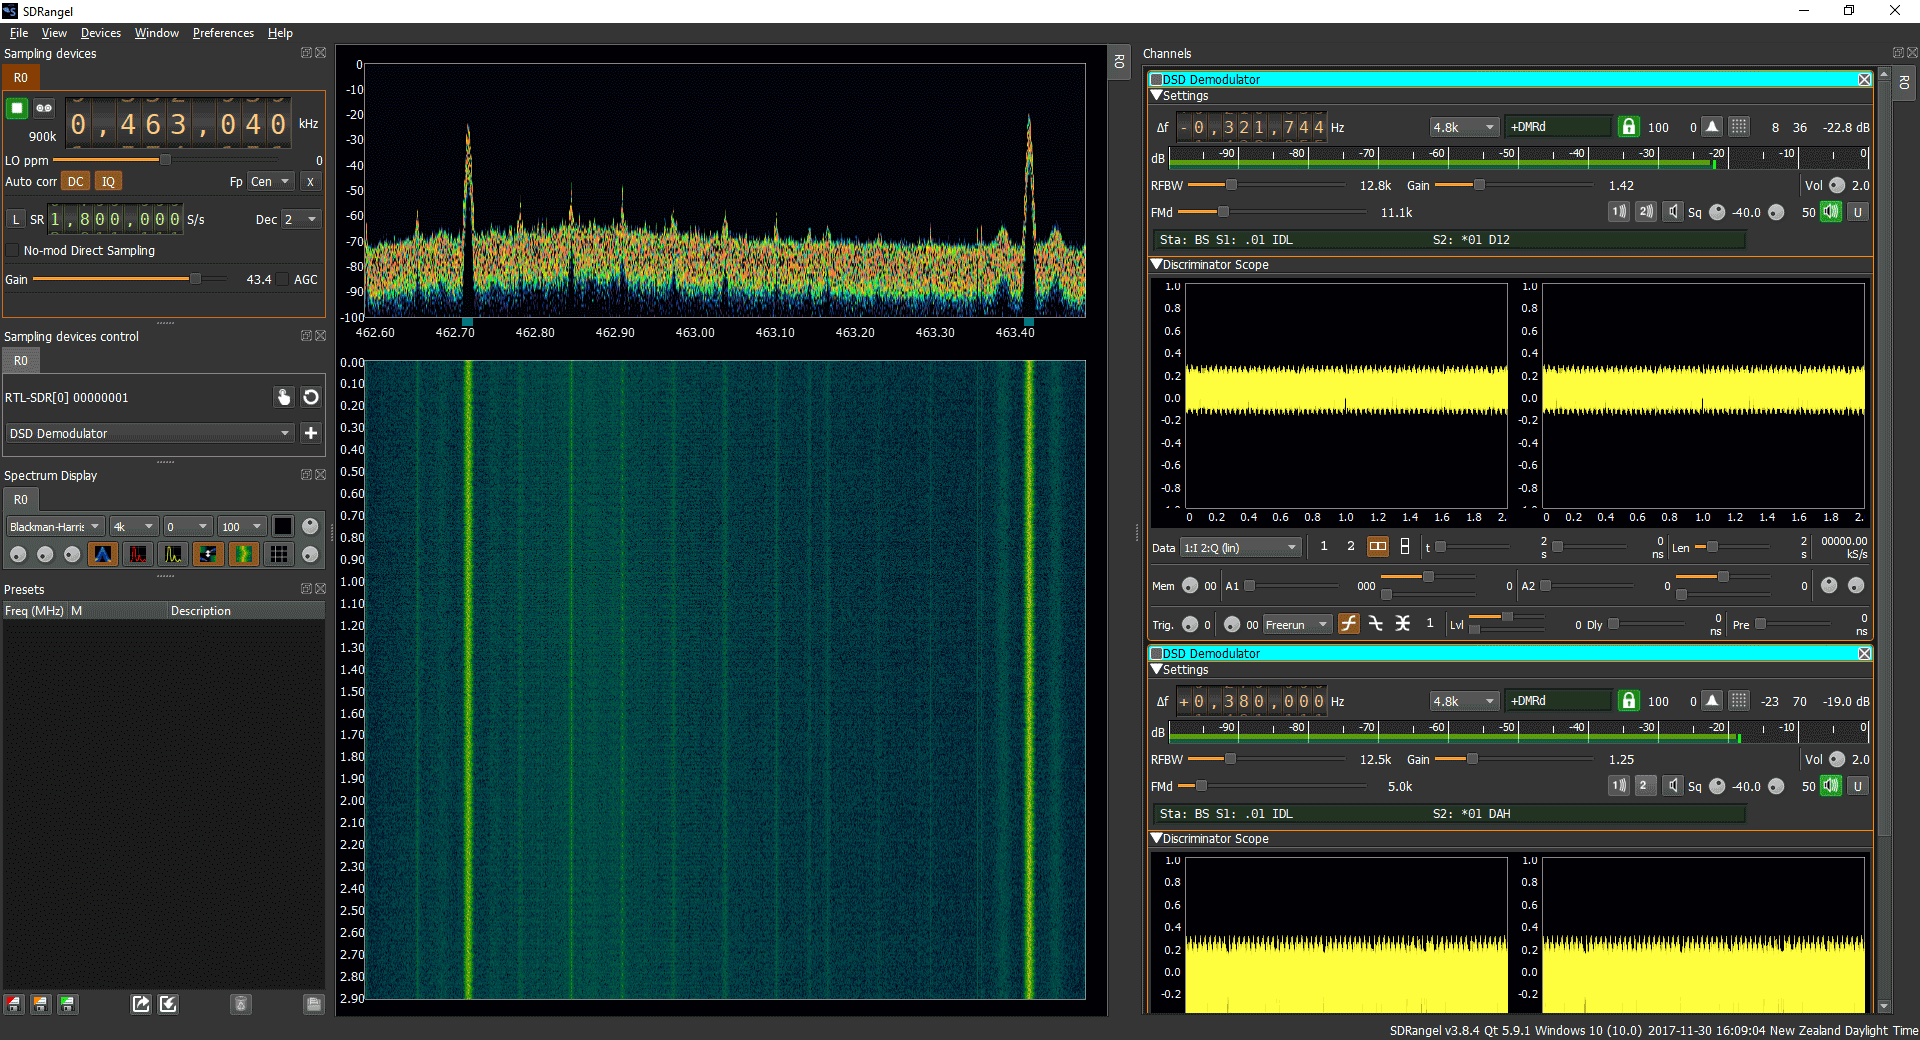
SDRAngel is a general purpose SDR program similar to other programs like SDR#, HDSDR and SDR-Console. It is compatible with Windows and Linux systems. However, SDRAngel has certain features that make it a good program to have in your SDR software arsenal.
One good feature is that if you have a TX capable SDR like a HackRF, PlutoSDR, BladeRF or LimeSDR then SDRAngel can also be used for TXing. Marty Wittrock has done a lot of previous work figuring out how to TX with LimeSDR and SDRAngel.
If you're only interested in RXing then SDRAngel also has some convenient features such as a built in DSD decoder which can be used to easily decode DMR/MOTOTRBO, dPMR, D-STAR and Yaesu System Fusion (YSF). The decoder is based on the DSDcc library which is a complete rewrite of the original open source DSD software. It is not quite as developed and feature rich as DSD+, but still does the job decently. SDRAngel also has LoRa and analogue TV (ATV) decoders built in as well, although the ATV decoder kept crashing the software for us.
SDRAngel also supports multiple VFO's on the same bandwidth, has built in decimation, a nice phosphor effect RF spectrum display and a frequency manager. There is also the ability to run multiple SDRs in the same software instance at the same time.
We gave SDRAngel a try on Windows and were able to easily get it up and running with an RTL-SDR. Regular WFM, FM, AM, SSB etc modes all work fine and so does the DSD decoder which we tested on a DMR signal. Getting it to decode was extremely simple, just add a DSD Demodulator channel, then click on the signal and you should be instantly decoding. It is probably the easiest way to get started on decoding a non-trunking digital voice channel, but for trunking channels and P25 signals you should probably still use Unitrunker and DSD+ or SDRTrunk.
SDRAngel Screenshot
Below is a brief tutorial on getting up an running with SDRAngel on Windows with an RTL-SDR:
Download the latest version of SDRAngel from the releases section of the GitHub. Only a build for Windows x64 is available and this has the filename sdrangel64_v3.8.4.7z (version number may change in the future). Linux .deb files are also available for various Ubuntu versions.
Using 7zip, extract the 7z file to a folder on your PC.
Plug in your RTL-SDR dongle, and run sdrangel.exe. We assume zadig has already been previously run to install the RTL-SDR drivers.
On the left under 'sampling devices control' click on the small hand icon. A drop down box will pop up, and from here you should be able to select the RTL-SDR. Press ok.
Now you can click the green play button on the top left to start the SDR.
By default the display bandwidth is zoomed in very closely with x16 decimation and a sample rate of 1 MSPS. So in the top left box change "Dec" to 1, and increase the sample rate to 2 or 2.4 MSPS if you like.
We suggest also clicking on the 'DC' button in the top left to remove the DC spike.
Now you can tune around just like in other software by using the frequency numbers in the top left.
If you want a spectrum analyzer display, go to the bottom left box, and click on the blue spectrum icon.
Unlike most other software you need to add a demodulator first before you can click on a signal and listen to it. The list of available demodulators can be found in the second box on the left, just below the hand icon which you used to add the RTL-SDR.
Select the correct demodulator for your signal of interest (e.g. WFM, NFM, AM, DSD, LoRa etc...), and then click the "+" icon. This will add the demodulator to the right of the SDRAngel window. You may want to drag the right window a little large if you cannot see all of the demodulator option as well.
Now you can click on the signal in the spectrum window to move the VFO and begin demodulating the signal. You can explore the demodulator options on the right.
Multiple demodulators can be added if desired, just repeat steps 8 - 10. If you add more than one demodulator, the VFO's will need to be dragged.
If you're having trouble getting a digital voice signal with DSD to be recognized, try zooming in with the decimation feature or reducing the sample rate. It doesn't seem to work too well with higher bandwidths.
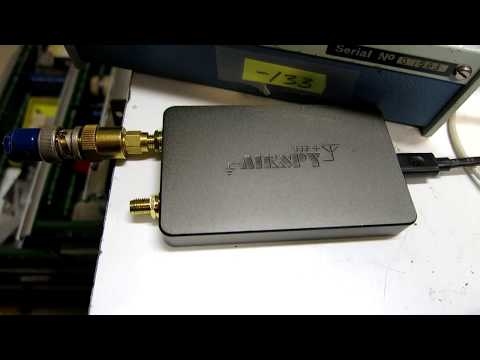
Over on YouTube Leif 'sm5bsz' has uploaded a video that does a lab comparison of various SDRs on the market now including the new Airspy HF+. Leif is known for providing excellent lab based technical reviews of various SDR products on his YouTube channel.
The first video compares the Airspy HF+ with the Perseus SDR. The Airspy HF+ is a new high performance yet low cost ($199 USD) HF/VHF specialty SDR. The Perseus is an older high performance direct sampling HF only SDR, although it comes at the high price of about $1000 USD.
In his tests Leif tests both units at 14 MHz and finds that the HF+ has about 15 dB better sensitivity compared to the Perseus (NF = 7dB vs 22dB). On the other hand the Perseus has about 23 dB better dynamic range compared to the HF+ (Dynamic Range = 127 dBc/Hz vs 150 dBc/Hz), although he notes that a blocking transmitter needs to have a very clean signal to be able to notice this difference which would be unlikely from Amateur transmitters.
hfplus vs perseus
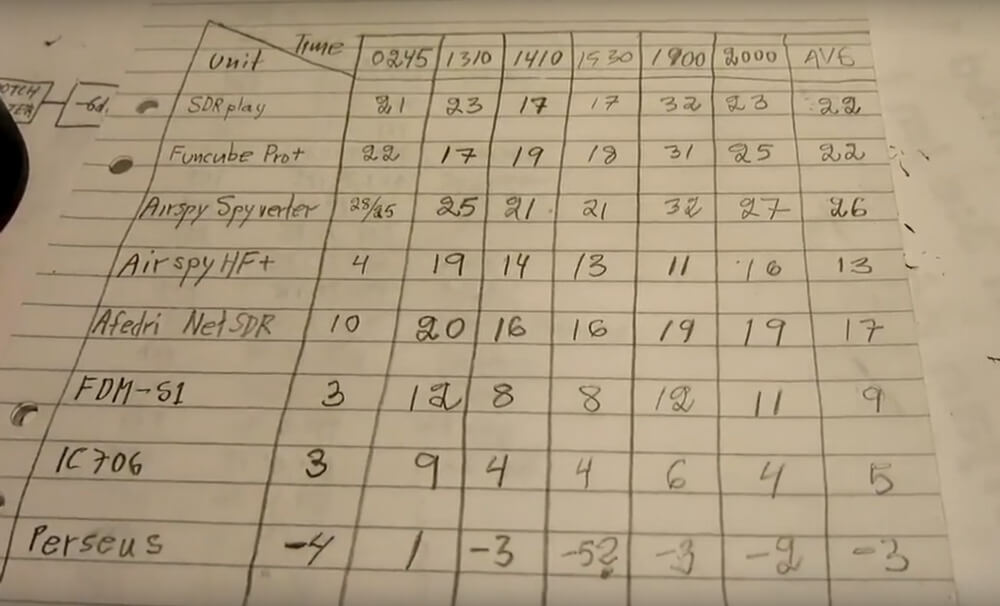
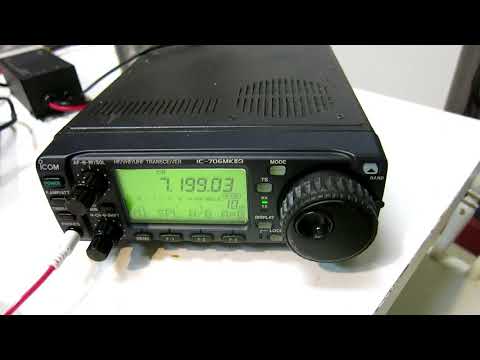
In the next two videos Leif compares multiple SDRs including the SDRplay RSP1, FUNcube Pro+, Airspy with Spyverter, Airspy HF+, Afedri SDR-Net, ELAD FDM-S1, ICOM IC-706MKIIG and Microtelecom Perseus at 7 MHz.
In the RX4 video Leif compares each SDR on dynamic range at 7 MHz. If you want to skip the testing parts, then the discussion of the results in the RX4 tests start at 1:03:00. A screenshot of the results is also shown below. The SDRs are ranked based on their average results over multiple measurements at different times which is shown in the last column. A lower value is better, and the value represents how much attenuation needed to be added to prevent the SDR from overloading and causing interference in his setup.
Dynamic Range Test Rankings
rx4compare
In the RX5 video the results start at 54:20:00. In this video he compares the SDRs with real signals coming in from his antenna at 7 MHz. He tests with the antenna signal wide open, with a 4.5 MHz LPF (to test out of band blocking performance), and with a bandpass filter at 7 MHz. Again lower values are better and the values indicate the amount of attenuation required to prevent overload. The Perseus is used as the reference benchmark. He also tests reciprocal mixing later in the video.