Most readers of this blog are probably familiar with the more commonly received APT images that are broadcast by the NOAA satellites at 137 MHz, or perhaps the LRPT images also broadcast at 137 MHz by the Russian Meteor M2 satellite. HRPT signals are a little different and more difficult to receive as they are broadcast in the L-band at about 1.7 GHz. Receiving them requires a dish antenna (or high gain Yagi antenna), L-band dish feed, LNA and a high bandwidth SDR such as an Airspy Mini. The result is a high resolution and uncompressed image with several more color channels compared to APT and LRPT images.
In his video Tysonpower shows how he receives the signal with his 3D printed L-band feed, a 80cm offset dish antenna (or 1.2m dish antenna), two SPF5189Z based LNAs and an Airspy Mini. As L-band signals are fairly directional Tysonpower points the dish antenna manually at the satellite as it passes over. He notes that a mechanised rotator would work a lot better though. For software he uses the commercial software available directly from USA-Satcom.com.
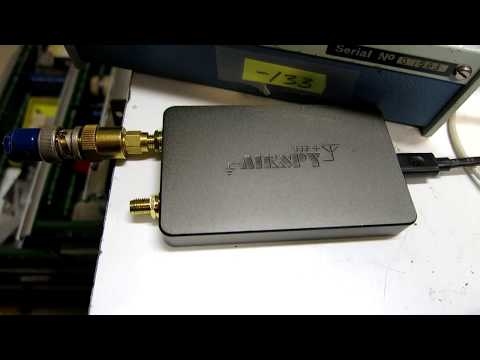
Over on YouTube Leif 'sm5bsz' has uploaded a video that does a lab comparison of various SDRs on the market now including the new Airspy HF+. Leif is known for providing excellent lab based technical reviews of various SDR products on his YouTube channel.
The first video compares the Airspy HF+ with the Perseus SDR. The Airspy HF+ is a new high performance yet low cost ($199 USD) HF/VHF specialty SDR. The Perseus is an older high performance direct sampling HF only SDR, although it comes at the high price of about $1000 USD.
In his tests Leif tests both units at 14 MHz and finds that the HF+ has about 15 dB better sensitivity compared to the Perseus (NF = 7dB vs 22dB). On the other hand the Perseus has about 23 dB better dynamic range compared to the HF+ (Dynamic Range = 127 dBc/Hz vs 150 dBc/Hz), although he notes that a blocking transmitter needs to have a very clean signal to be able to notice this difference which would be unlikely from Amateur transmitters.
hfplus vs perseus
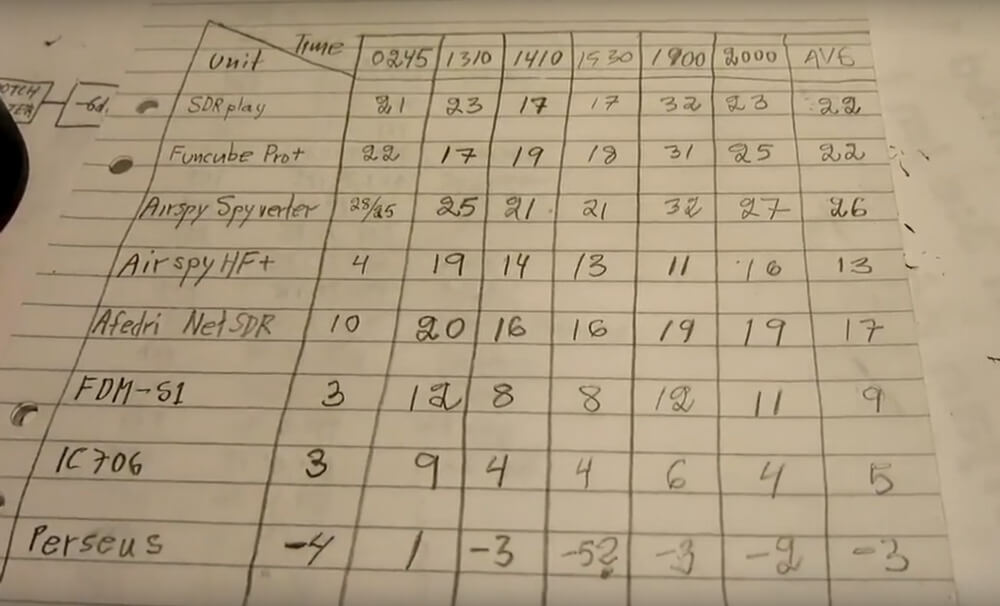
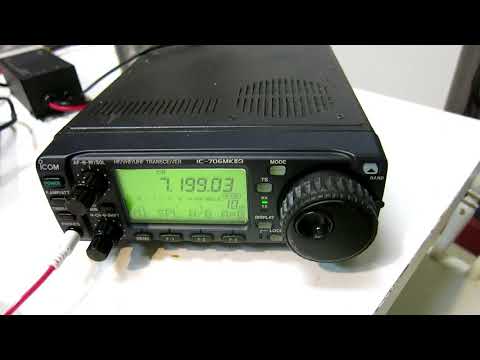
In the next two videos Leif compares multiple SDRs including the SDRplay RSP1, FUNcube Pro+, Airspy with Spyverter, Airspy HF+, Afedri SDR-Net, ELAD FDM-S1, ICOM IC-706MKIIG and Microtelecom Perseus at 7 MHz.
In the RX4 video Leif compares each SDR on dynamic range at 7 MHz. If you want to skip the testing parts, then the discussion of the results in the RX4 tests start at 1:03:00. A screenshot of the results is also shown below. The SDRs are ranked based on their average results over multiple measurements at different times which is shown in the last column. A lower value is better, and the value represents how much attenuation needed to be added to prevent the SDR from overloading and causing interference in his setup.
Dynamic Range Test Rankings
rx4compare
In the RX5 video the results start at 54:20:00. In this video he compares the SDRs with real signals coming in from his antenna at 7 MHz. He tests with the antenna signal wide open, with a 4.5 MHz LPF (to test out of band blocking performance), and with a bandpass filter at 7 MHz. Again lower values are better and the values indicate the amount of attenuation required to prevent overload. The Perseus is used as the reference benchmark. He also tests reciprocal mixing later in the video.
Thanks to RTL-SDR.com reader 'flatflyfish' for submitting information on how to get Martin Marinov's TempestSDR up and running on a Windows system. If you didn't already know by definition "TEMPEST" refers to techniques used by some spy agencies to eavesdrop on electronic equipment via their unintentional radio emissions (as well as via sounds and vibrations). All electronics emit some sort of unintentional RF signals, and by capturing and processing those signals some data can be recovered. For example the unintentional signals from a computer screen could be captured, and converted back into a live image of what the screen is displaying.
TempestSDR is an open source tool that allows you to use any SDR that has a supporting ExtIO (such as RTL-SDR, Airspy, SDRplay, HackRF) to receive the unintentional signal radiation from a screen, and turn that signal back into a live image. This can let you view what is on a screen without any physical connections. If a high gain directional antenna is used then it may be possible to receive images from several meters away as well.
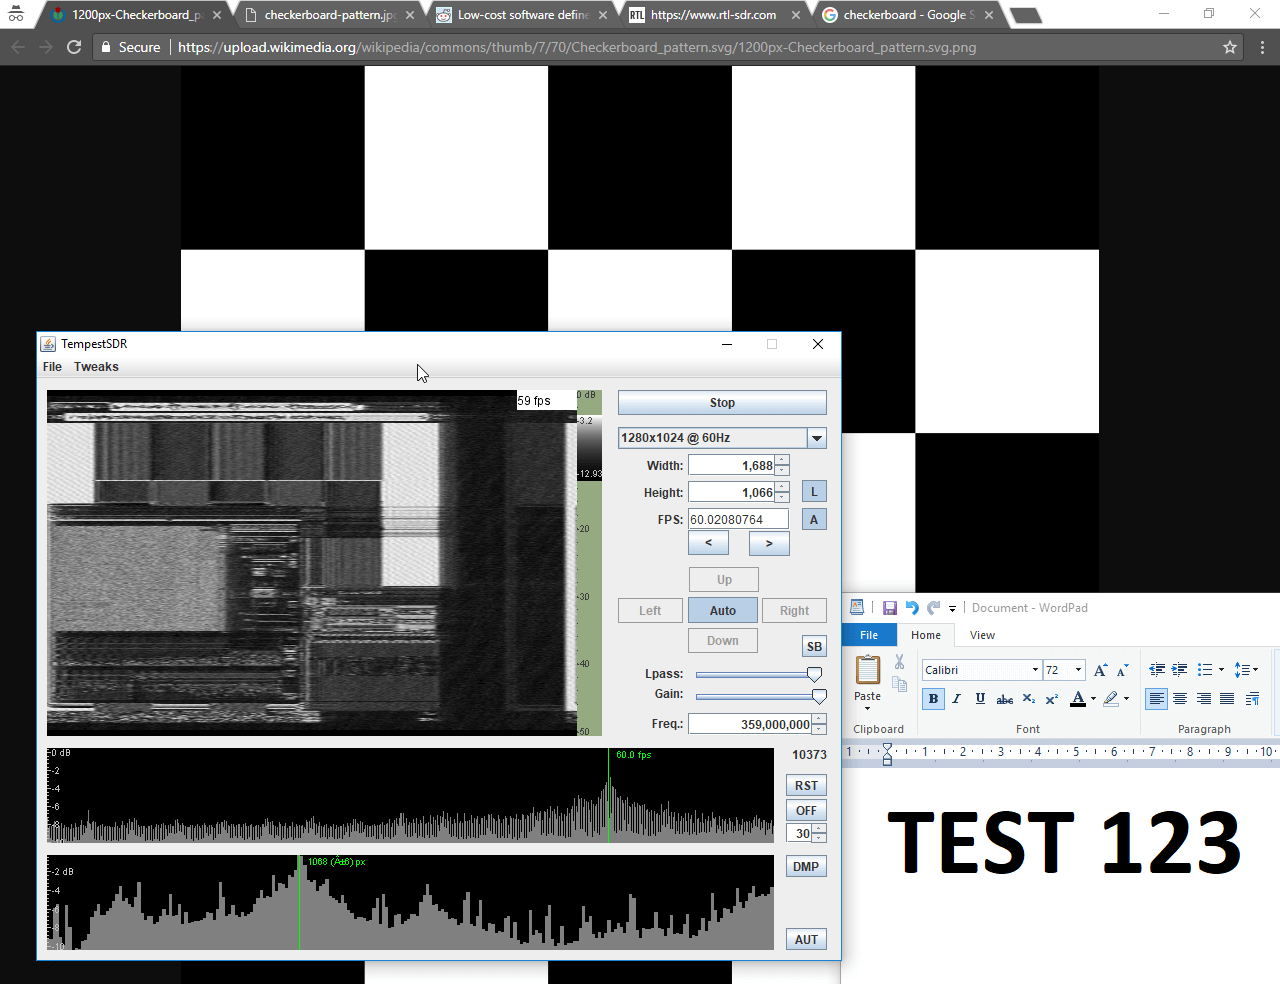
TempestSDR showing what's on the screen via unintentional RF radiation from the monitor.
Although TempestSDR has been released now for a number of years it hasn't worked properly in Windows with ExtIO interfaces. In his email flatflyfish showed us how to compile a new version that does work.
1. You need to install a 32-bit version of the Java runtime. The 64-bit version won't work with extio's possibly because they are all 32-bit. Also install the JDK.
2. You need to install MingW32 and MSYS and put their bin folders in your Windows PATH.
3. Then when compiling I was seeing a lot of CC command unknown errors. To fix that I just added CC=gcc to the top of all makefiles. I also removed the Mirics compilation line from the JavaGUI makefile to make things easier as we're not using that sdr.
4. Originally my JDK folder was in Program Files. The makefile didn't like the spaces in the folder, so I moved it to a folder without spaces and it fixed the errors.
5. Lastly to compile it you need to specify the ARCHNAME as x86 eg "make all JAVA_HOME=F:/Java/jdk1.7.0_45 ARCHNAME=X86"
After doing all that it compiled and I had a working JAR file. The extio's that are used normally with HDSDR work fine now and I get some images from my test monitor with an rtlsdr.
We tested compilation ourselves and were successful at getting a working program. To help others we've just uploaded a fork of the code with the makefile changes done, as well as a precompiled release ZIP available on the releases page so no compilation should be required to just use it. Note that to use the precompiled JAR you still need to install MingW32, and also don't forget to install the MingW /bin and msys /1.0/bin folders into the Windows PATH. You also do need to have the 32-bit Java runtime installed as the 64-bit version doesn't seem to work. On at least one Win 10 machine we also had to manually add a 'Prefs' folder to the Java path in the registry.
We've tested the software with the ExtIO for RTL-SDRs (available on the HDSDR downloads page) and confirmed that it works. Images from one of our older DELL monitors using DVI are received nicely, although they are a bit blurry. We also tried using an Airspy or SDRplay unit and this significantly improved the quality of the images a lot due to the larger bandwidth. The quality was good enough to make out large text on the screens. ExtIO's for the Airspy are available on this page, and for the SDRplay on the official SDRplay website. Note that for the SDRplay we were unable to go above 6 MHz, and on the RTL-SDR 2.8 MHz was the limit - anything higher on these SDRs did not produce an image possibly due to dropped samples.
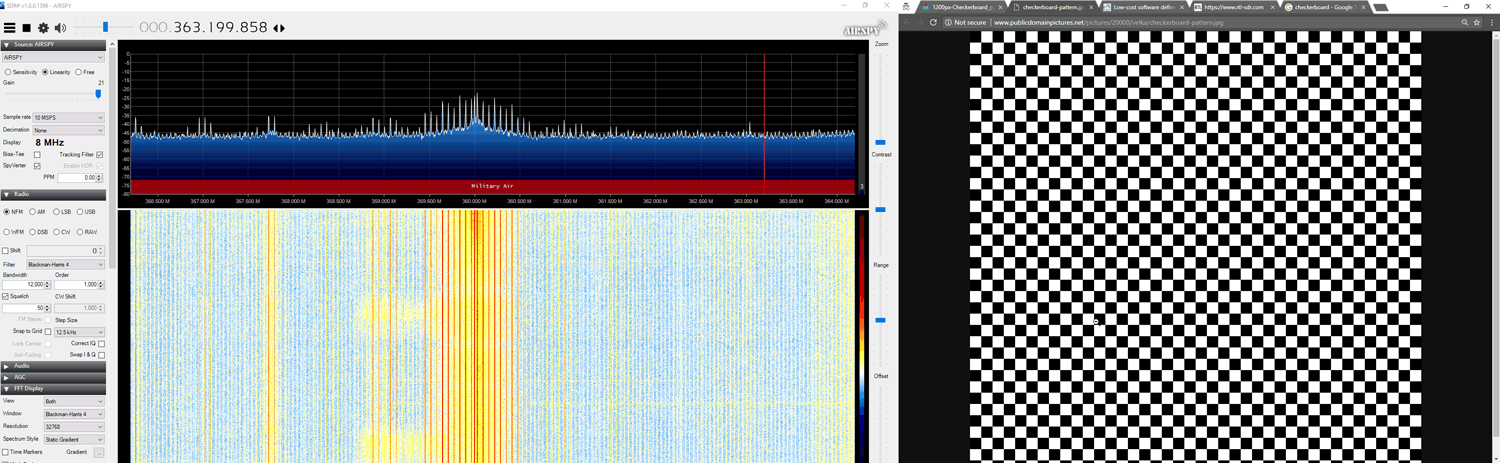
To use the software you should ideally know the resolution and refresh rate of your target monitor. But if you don't there are auto-correlation graphs which actually help to predict the detected resolution and frame rate. Just click on the peaks. Also, you will need to know the frequency that your monitor unintentionally emits at. If you don't know you can browse around in SDR# looking for interference peaks that change depending on what the image of the screen is showing. For example in the image below we show what the interference might look like. A tip to improving images is to increase the "Lpass" option and to watch that the auto FPS search doesn't deviate too far from your expected frame rate. If it goes too far, reset it by re-selecting your screen resolution.
Unintentionally radiated RF signal from computer screen shown in SDR#
The best results were had with the Airspy listening to an older 19" DELL monitor connected via DVI. A newer Phillips 1080p monitor connected via HDMI had much weaker unintentional signals but images were still able to be recovered. A third AOC 1080p monitor produced no emissions that we could find.
Clear images were obtained with an antenna used in the same room as the monitor. In a neighboring room the images on the DELL monitor could still be received, but they were too blurry to make anything out. Possibly a higher gain directional antenna could improve that.
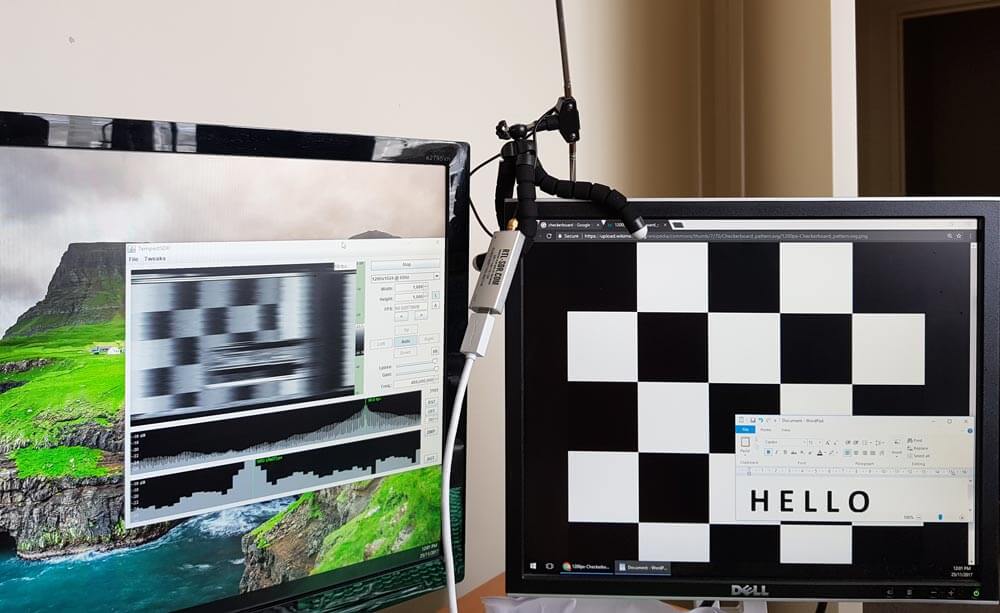
An example set up with RTL-SDR antenna and monitors
Below we've uploaded a video to YouTube showing our results with TempestSDR.
TempestSDR - Remotely Eavesdropping on Monitors via Unintentionally Radiated RF
Airspy have just tweeted a Black Friday deal for their products sold on iTead Studio. Simply use the coupon "AIRSPYBLACK" when checking out. It looks like the coupon is giving 15% off the Airspy Mini and Airspy R2. No discounts yet for the Airspy HF+ or SpyVerters.
SDR#'s SpyServer streaming server now supports the direct sampling mode on RTL-SDR dongles and it's probably the cheapest way to set up a HF streaming server. SpyServer is a streaming server for SDR# and Airspy products. Although it's designed for Airspy products it also works well with RTL-SDR dongles.
On RTL-SDR dongles the direct sampling mode allows you to receive HF frequencies by bypassing the tuner. The dynamic range is not quite as good as using an upconverter and there are Nyquist images from sampling at 28.8 MHz centered around 14.4 MHz, but in most cases it is good enough to give people decent HF results especially if filtering is used. Normally a hardware hack is required to enable direct sampling, but our RTL-SDR Blog V3 units have direct sampling built in and ready to go just by connecting an HF antenna to the SMA port, and enabling the Q-branch direct sampling mode.
There is a sample server set up at sdr://151.20.181.90:5555.
SpyServer Direct Sampling Mode
Direct Sampling for #RTLSDR was added to Spy Server. This must be the most affordable networked HF radio ever.
The servers that are currently online include some streaming from Airspy HF+ devices, which is the hotly anticipated but as of yet unreleased HF receiver from Airspy. Over the last few months and weeks a number of prototype devices went out to testers and programmers and some have now put them online with a SpyServer. There are also some Airspy One/Mini and RTL-SDR devices available for streaming too.
To connect to one of the servers simply download the latest version of SDR# from airspy.com, and then in SDR# select SpyServer from the Source menu. Enter the URL from the list into the box and press the play button up the top. Note that you must ensure that there are no spaces after entering the URL in SDR#.
Most servers are locked to a particular frequency band, but some allow for free tuning. But if more than one person is connected to the server free tuning will be locked until there is only one person connected again. Currently streaming from most servers seems smooth, but it's possible that some may struggle if many users are connected at once.
A number of people have asked how to use SDR#'s SpyServer with an RTL-SDR. In this tutorial we will show how to set up SpyServer on both Windows and Linux systems. We try to assume as little knowledge as possible, but we do assume that you have decent experience with computers. Also for the Linux/Raspberry Pi setup we need to assume that you have some basic experience with Linux and setting up Raspberry Pi's.
What is SpyServer?
SpyServer is a free RTL-SDR compatible SDR server that is designed to work with the popular SDR# software. It is actually designed for the Airspy range of products, but the author has also made it compatible with RTL-SDR dongles. Running a SpyServer allows you to connect to and use a remotely positioned RTL-SDR over a network connection (such as a local LAN/WiFi or the Internet). Once connected, using the dongle is the same as if the dongle was directly connected to the users PC.
An example SpyServer Overview (Can use an RTL-SDR instead of the Airspy HF+)
Remote servers are useful as you may want to set up an antenna in a remote location (such as up on your roof or shack), and don't want to run a long lossy coax cable down to the PC. Instead you could run Ethernet cable, or avoid cables by using WiFi. All you'd need is power for a remote computing device like a Raspberry Pi 3. Perhaps you also have a great antenna location at a friends house, or other property and want to access that antenna remotely. Or maybe you want to use your radio while travelling.
SpyServer is similar to another tool that you may already be familiar with called rtl_tcp. However, SpyServer is regarded as superior because it is signficantly more efficient at network usage. Instead of sending the entire raw data like rtl_tcp does, SpyServer only sends the IQ data of the currently tuned in signal. Waterfall data is processed on the server and sent in compressed form. There is one disadvantage to SpyServer in that it requires slightly more powerful computing hardware like a Pi 2 or Pi 3, whereas rtl_tcp can run on the lowest end hardware.
Network usage when streaming with SpyServer will be about 120 KB/s when listening to WFM and about 38 KB/s when listening to narrow band modes for one client being connected. Multiple clients can connect to the SpyServer and share the same currently tuned bandwidth.
Over the last month SDRSharp's SpyServer has been updated several times. SpyServer is a streaming server for SDR# which allows you to use Airspy and RTL-SDR radios remotely over a network connection.
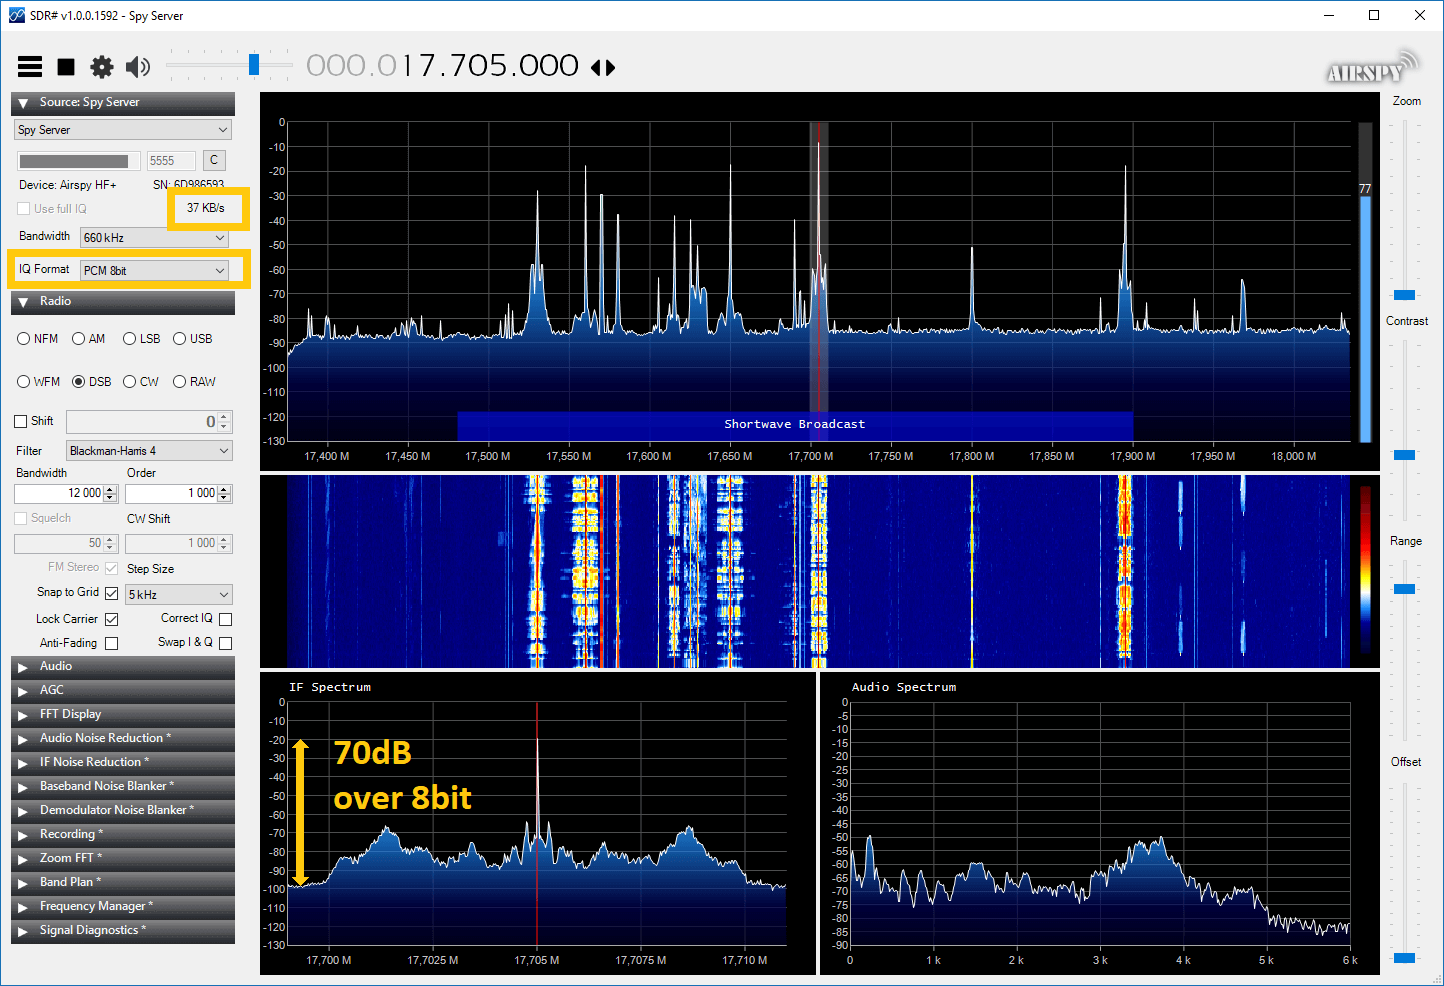
The updates brought improvements such as IQ PCM compression at various bit depths including an efficient 8-bit mode, removing the DC spike residual in the 8-bit streaming mode, and recently improving the 8-bit mode to work like lossy compression for strong signals.
We tested the new 8-bit PCM streaming mode and found it to be extremely efficient with network usage. When streaming at 2 MHz with an RTL-SDR a WFM signal on the older SpyServer versions used to use about 1.2 MB/s without any compression modes, and now with 8-bit compression active it only uses 322 KB/s. A NFM signal used to require 120 KB/s, now only requiring about 38 KB/s. No DC spike is present and no degradation in reception quality is noticeable unless the signal requires over 70 dB of dynamic range, which is unlikely for most signals.
If you've had trouble with SpyServer or rtl_tcp not working well on your slow network connection, then the new updated SpyServer may be the solution for you.
![[EN subs] HRPT - Erste Bilder! und mein Setup](https://www.rtl-sdr.com/wp-content/plugins/wp-youtube-lyte/lyteCache.php?origThumbUrl=https%3A%2F%2Fi.ytimg.com%2Fvi%2FxuqsLo48eWg%2F0.jpg)