The Airspy Mini is a recently released $99 USD software defined radio with a tuning range of 24 MHz to 1800 MHz, 12-bit ADC and up to 6 MHz of bandwidth. The Mini is the younger brother of the $199 USD Airspy R2, but despite the $100 USD price difference, both units are very similar, which makes the Mini a very attractive option. The idea is that the Mini is the cheaper version for those who do not need the more advanced features of the R2.
In a previous review we compared the Airspy R2 with the SDRplay RSP and the HackRF. In those tests we found that the Airspy had the best overall RX performance out of the three as it experienced the least amount of overload and had the most dynamic range. The SDRplay RSP was the main competitor in performance to the Airspy R2, and was found to be more sensitive due to its built in LNA. But the RSP experienced overloading and imaging problems much easier. With an external LNA powered by its bias tee, the Airspy gained a similar sensitivity and still had very good dynamic range. The main downside to the Airspy R2 was its higher cost compared to the $149 USD SDRplay RSP, and needing to fork even more for the $50 USD SpyVerter if you want to listen to HF signals.
In this review we'll compare the difference between the R2 and Mini, and also see if the cheaper Airspy Mini ($99 USD), or Airspy Mini + SpyVerter combo ($149 USD) can compete in this lower price range.
Difference Between the Mini and R2
Airspy Mini
Airspy R2
Price
$99 USD
$199 USD
Tuning Range
24 - 1800 MHz
24 - 1800 MHz
ADC Bits
12
12
Maximum Bandwidth (Alias Free Usable)
6 MHz (5 MHz)
10 MHz (9 MHz)
Extras
Bias Tee
Bias Tee, External clock input, Multiple expansion headers
Dimensions (Including USB and SMA ports)
7.7 x 2.6 x 1 cm
6.4 x 2.5 x 3.9 cm
Weight
21 g
65 g
Right now the "early bird" price of the Mini is $99 USD. We are unsure if this price will go up in the future.
The external design between the two units is different. The Mini comes in a USB dongle form factor which is very similar to a standard RTL-SDR, whilst the R2 comes in a larger box with a female Micro USB input. In our tests this metal enclosure appears to provide good shielding from strong signals. One thing that was missing on the unit was a nut and washer on the SMA connector. Adding a nut helps the PCB ground make good contact with the aluminum enclosure. The Airspy team have said that future units will come with this nut provided.
Airspy R2 (top), Airspy Mini (Middle), RTL-SDR (bottom) for size comparison.
Apart from the price and enclosure, the most noticeable feature difference between the two is the smaller bandwidth of the Airspy Mini. Unlike the Airspy R2, the Airspy Mini does not use a Si5351 clock generator chip. The lack of this chip limits the Mini's maximum bandwidth to 6 MHz and eliminates any ability to use an external clock. The main applications that you miss out on from the lack of an external clock input include: coherent clock, passive radar and direction finding experiments.
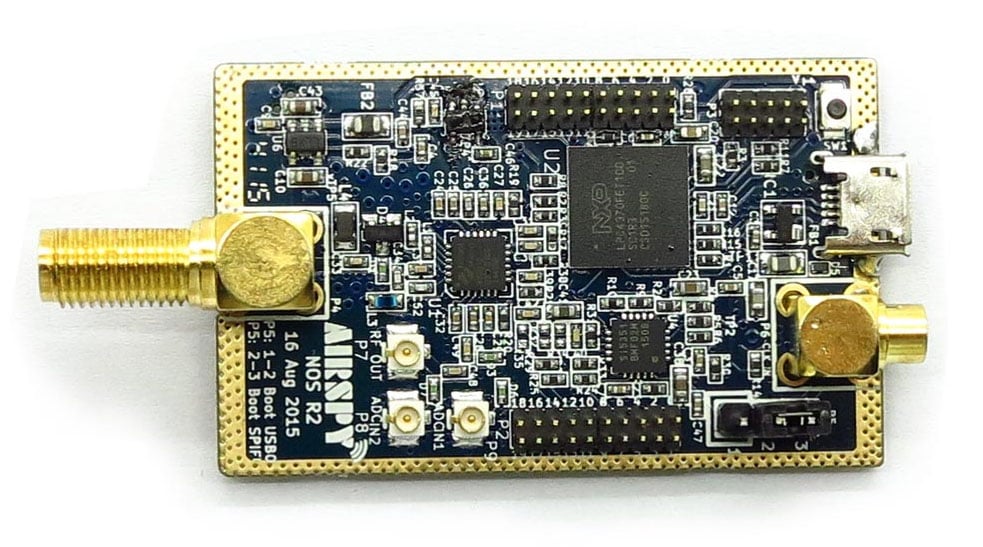
From the circuit photos below we can see that the Mini consists of mostly the same parts used in the Airspy R2. Missing is the Si5351 clock controller, expansion headers and the external clock input.
The Airspy Mini Circuit BoardThe Airspy R2 Circuit Board
Akos of the rtlsdr4everyone blog has recently written up a comparison of the RTL-SDR and SDRplay. The SDRplay is a $149 USD software defined radio with a 100 kHz to 2 GHz frequency range, a 12-bit ADC, and up to 8 MHz of bandwidth. It now competes heavily with the $99 Airspy Mini which is a similarly specced SDR.
Akos compares the two units and comes to the conclusion that the RTL-SDR is still the best choice for beginners, but that the SDRplay is definitely a good choice if you have good antennas in place and if the receiver is the major bottleneck in your setup.
In his review he goes over several points covering the costs involved, aesthetics, customer support, PC hardware requirements, setup, operation and finally reviews the performance of the SDRplay. His results show that the SDRplay generally receives much better than the RTL-SDR, but has some problems with broadcast FM imaging.
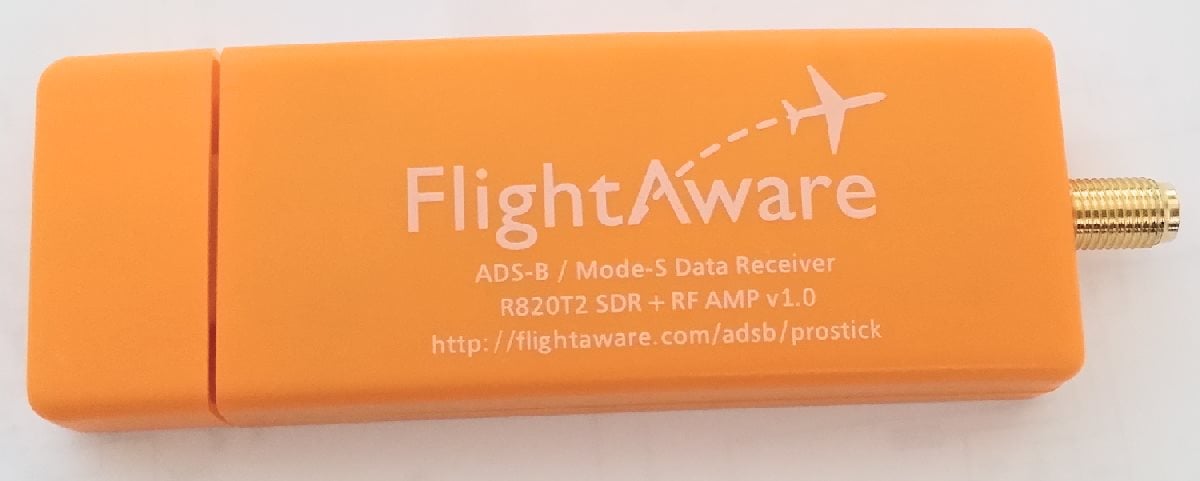
Recently FlightAware released a new RTL-SDR dongle sold at zero profit at $16.95 USD. It’s main feature is that it comes with an ADS-B optimized low noise amplifier (LNA) built directly into the dongle. FlightAware.com is a flight tracking service that aims to track aircraft via many volunteer ADS-B contributors around the world who use low cost receivers such as the RTL-SDR. In this post we will review their new dongle and hopefully at the same time provide some basic insights to LNA positioning theory to show in what situations this dongle will work well.
FlightAware Dongle Outside
A good LNA has a low noise figure and a high IIP3 value. Here is what these things mean.
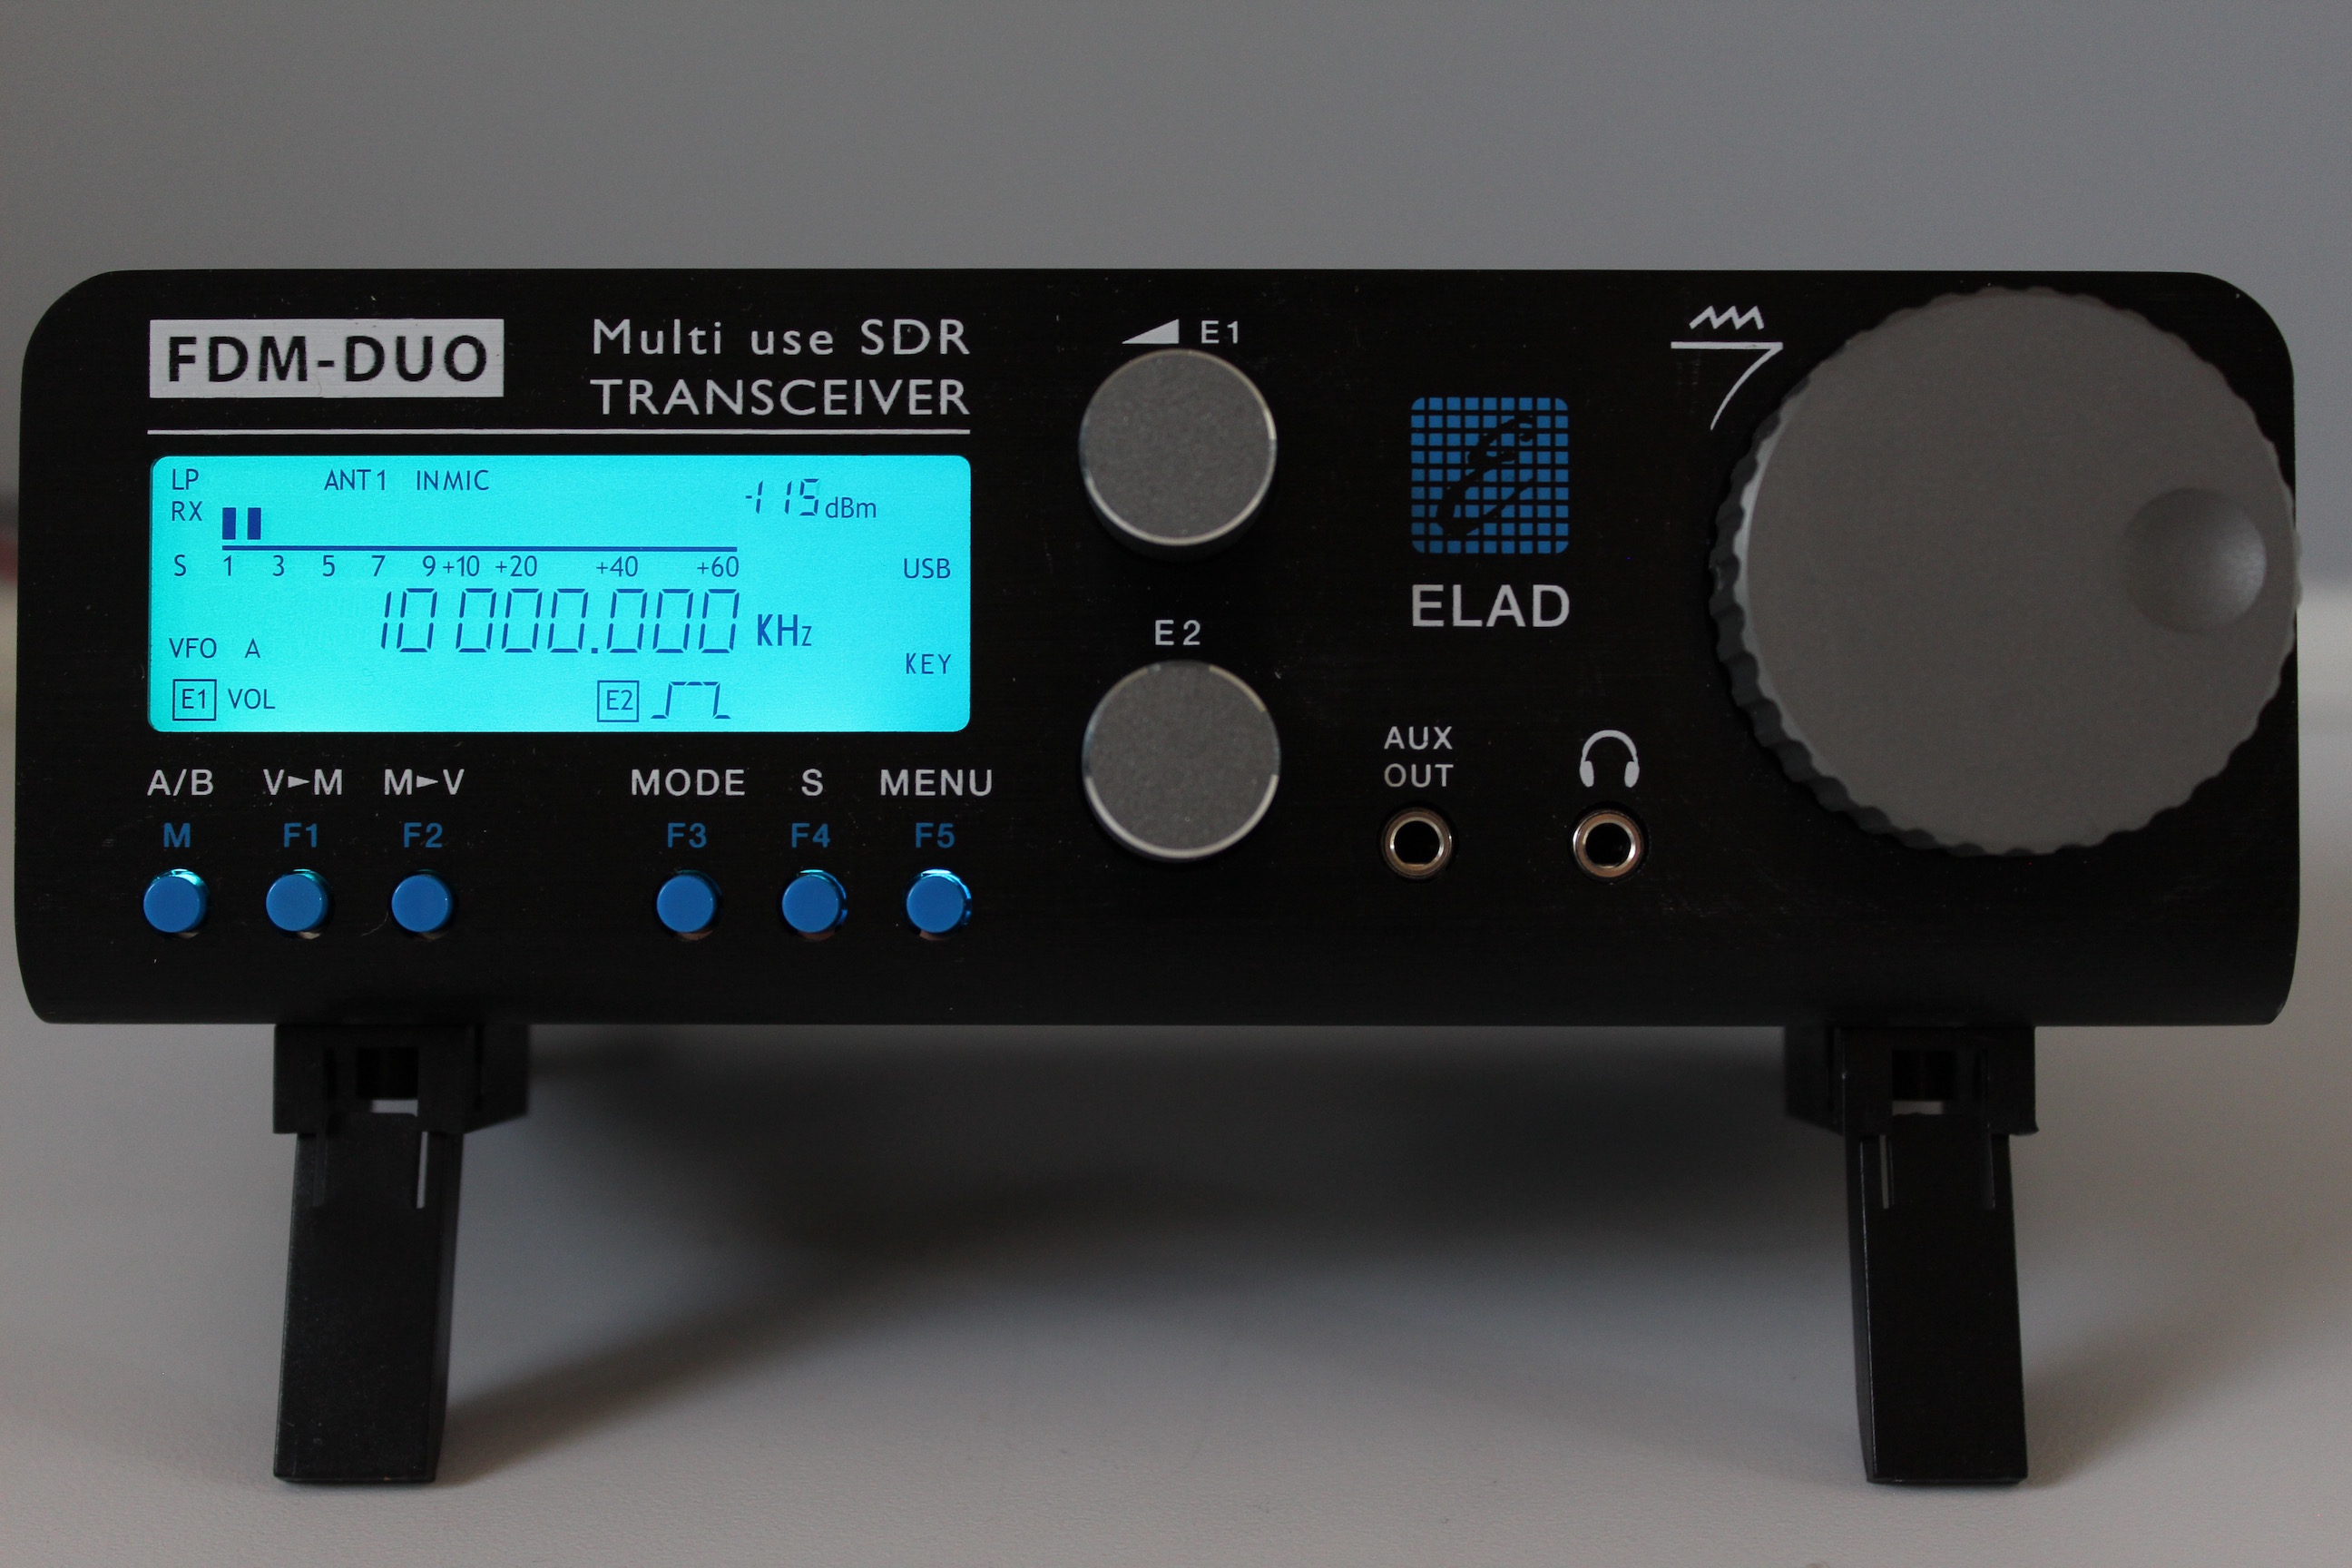
The Elad FDM-DUO is a high end $1149 USD Italian made software defined radio transceiver (transmit and receiver) with a frequency range of 10 kHz – 54 MHz, a 16-bit ADC, a bandwidth of up to 6 MHz and can transmit with up to 5 – 8 watts. It is a product targeted at ham radio enthusiasts who want a gradual transition into software defined radios. It can work in two modes: either as a standalone computer-less radio just like a regular hardware radio, or as a fully functional computer based SDR.
The Italian made FDM-DUO has to be the most versatile, well designed, and well thought out SDR system currently on the market.
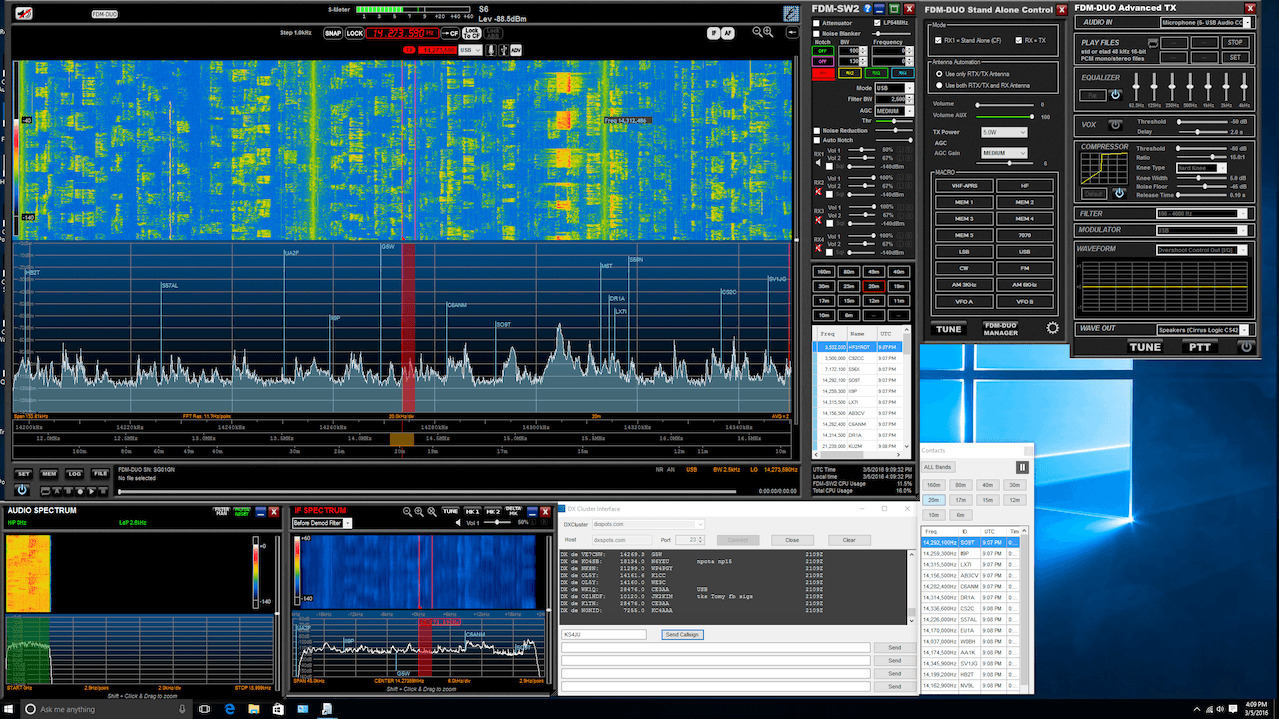
The review by hamradioscience goes over several points such as explaining what all the connectors on the radio are for, reviewing the ergonomics, reviewing the radio in standalone mode and in PC based SDR mode and he also reviews the companion software package. The reviewer is especially impressed with the included software, basically making the point that this system is a full SDR transceiver package (all you need in terms of hardware AND software).
Generally we recommend more general purpose and lower cost wideband VHF/UHF SDR’s like the Airspy, SDRplay RSP or HackRF (see our review on those SDRs here), but if you are not limited by budget and want to use an SDR mostly for HF amateur radio purposes then the Elad FDM-DUO looks like a winner. The author concludes with the following comment.
Elad got so many things right with the FDM-DUO that it is hard find much to criticize. Unlike so many SDR systems available today, the FDM-DUO SDR system feels like less of a “science project” and more of a finished consumer product. For those who wants a SDR radio system that “just works” and easy to use, the FDM-DUO is a great choice. Also, kudos to Elad for providing such a well done SDR program. The program was very stable over the review period. No, crashing at just the wrong time say during a contest. Heck even if it did, it wouldn’t matter much since you could just continue on using the FDM-DUO as a standalone rig. With some of the larger radio manufacturers dipping their toes in the SDR area, they should take note of what Elad has done with the FDM-DUO. Elad has truly created a very flexible multi-use system with the FDM-DUO and a darn fine SDR radio system at a very good value.
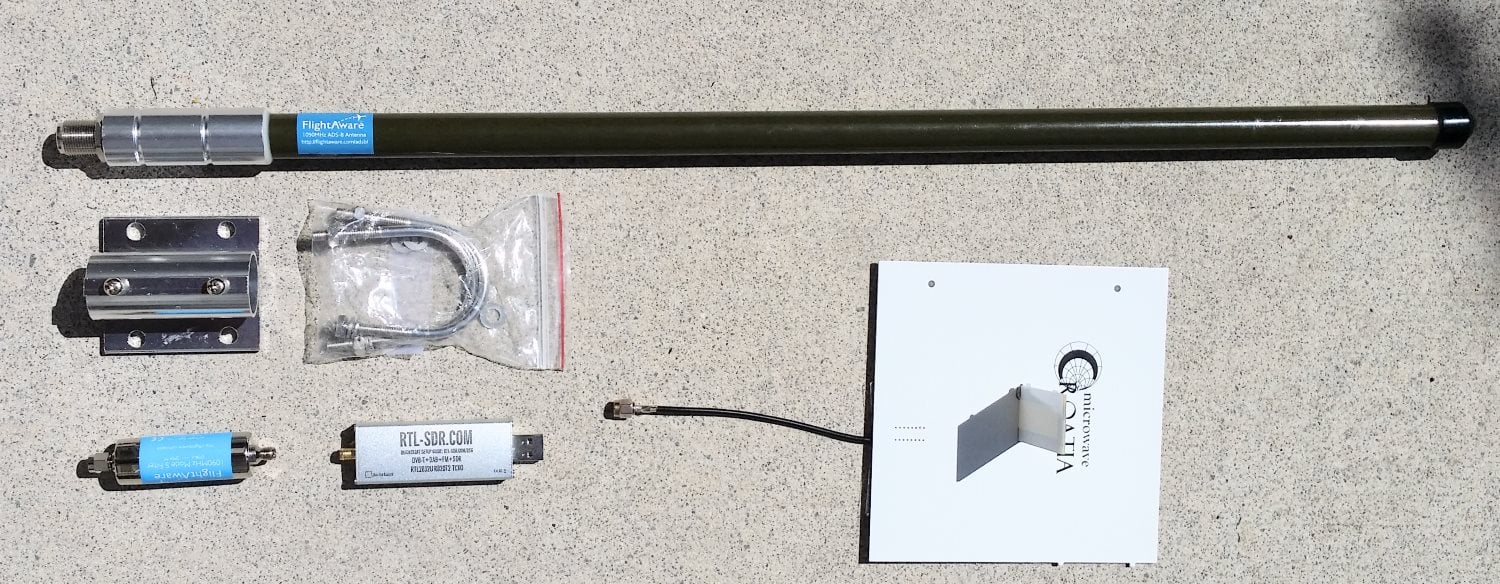
In this post we will review the FlightAware ADS-B Antenna and their 1090 MHz band pass filter. The FlightAware ADS-B antenna is claimed to have 5.5 dBi of gain, a rugged weatherproof radome and N-type female connector. It costs $44.95 USD on Amazon for US customers and $54.95 USD on eBay for international customers (plus shipping). They write that they are selling this antenna at cost in order to improve FlightAware coverage.
The FlightAware ADS-B filter is a bandpass filter with a pass range of 980MHz - 1150MHz, ~1.5dB insertion loss and more than 40dB attenuation of unwanted frequencies. It costs $19.95 USD on Amazon for US customers and $24.99 USD on eBay for international customers (plus shipping). Generally it is much cheaper than other ADS-B filter options on the market.
FlightAware.com is a company that specializes in aggregating ADS-B data from contributors around the world. People can contribute by using the FlightAware official hardware, or with a simple SDR, like an RTL-SDR dongle. They display the data on their website as it can be used to help track flight arrival times. A similar company is flightradar24.com.
If you are interested in getting started with ADS-B reception with your RTL-SDR then we have a tutorial here.
FlightAware ADS-B Antenna
The FlightAware antenna is about 64cm in length and about 2cm in diameter. It uses an N female connector and comes included with mounting brackets and U-bolts. It is painted olive green.
In the photo below we compare the size of the antenna against a reference monopole antenna, an RTL-SDR dongle and the FlightAware ADS-B filter. The antenna appears to be very solidly built and of a high quality finish. The antenna is wareproofed with some silicon caulking used around the seams of the endcaps.
Size comparison
The FlightAware ADS-B antenna is a collinear type antenna. Collinear antennas are omnidirectional (receives equally from all directions) and have a higher gain compared to most other omnidirectional antennas, but their radiation pattern is flattened and directed more towards the horizon. This is a good thing for receiving planes that are far away as they will be at lower elevations, but aircraft at higher elevations relative to your antenna may be received poorer. Although, it is likely that any aircraft at high elevations to your position will be closer to you anyway, and thus have a stronger signal making the reduced gain at higher elevations less important. Judging by it's ~60cm length and it's specified gain of 5.5dBi, the FlightAware antenna is likely to be a 4 element collinear.
A 4 element collinear generally has positive gain from 0 - 20 degrees of elevation, whereas a simple dipole or ground plane may have positive gain from between 0 - 40 degrees of elevation. A typical commercial jet flys at about 10km. At a distance of 100km this jet would be at a 5.7 degree elevation, and at 10km 45 degrees. Smaller aircraft fly at about 3km maximum, and at 100km would have an elevation of 1.7 degrees, and at 10km 16.7 degrees, so the collinear covers most cases.
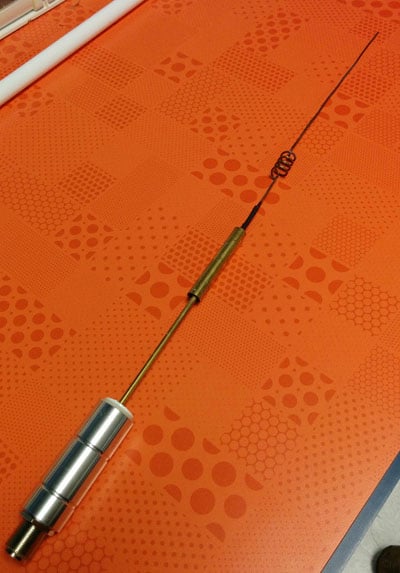
A reader wrote in to us to let us know that the internals of the FlightAware antenna had actually previously been posted in an old thread on their forums. From the image it looks like the antenna may be a sleeved dipole + whip + impedance matching design, or something similar. This design is somewhat of a collinear design thanks to the additional whip which also gives a flatter radiation pattern with more gain direction out towards the horizon. These antennas are omnidirectional (they receive equally from all directions) and have a higher gain compared to most other omnidirectional antennas, but their radiation pattern is flattened and directed more towards the horizon. This is a good thing for receiving planes that are far away as they will be at lower elevations, but aircraft at higher elevations relative to your antenna may be received poorer. Although, it is likely that any aircraft at high elevations to your position will be closer to you anyway, and thus have a stronger signal making the reduced gain at higher elevations less important.
The internals of the FlightAware antenna.
If you live in a valley, or have multiple obstacles such as trees or buildings blocking your view of the horizon then the higher gain design may work worse than a dipole/quarter wave ground plane/folded monopole type antenna. In this situation you'd mainly only be able to receive ADS-B signals from higher elevations, so an antenna with a less flat radiation pattern would work better. See the end of this post for some example radiation pattern diagrams.
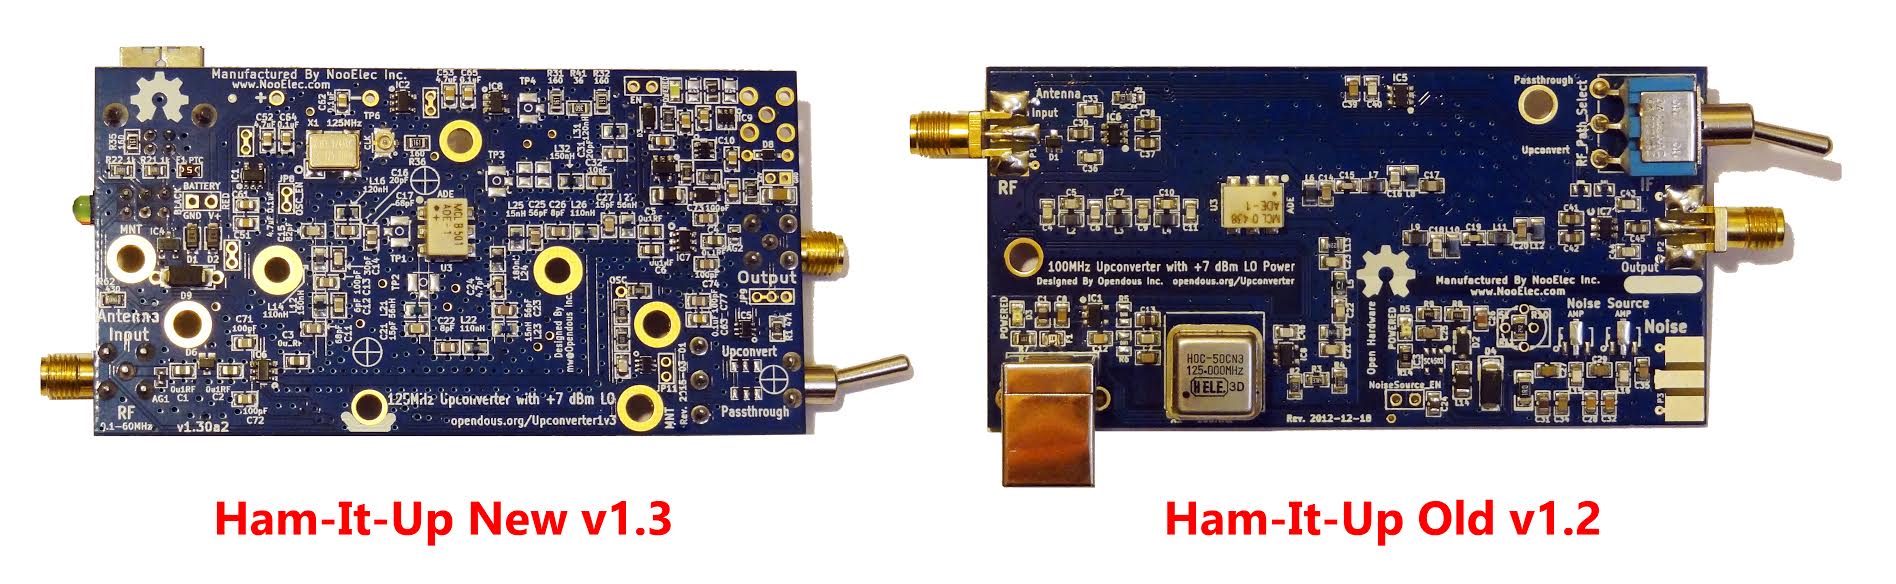
An upconverter allows you to receive HF frequencies (0-30 MHz) with an RTL-SDR which has a lower frequency limit of 24 MHz. The ham-it-up upconverter was one of the first upconverters to go on the market that targeted users of the popular RTL-SDR dongle. Over the years the ham-it-up has slowly been revised and now it is up at version 1.3. The biggest changes in the latest version are a revised design that uses the ADE-1 in reverse (better VLF operation), a presoldered oscillator and it also now includes the previously optional noise source by default.
In his review Akos compares the ham-it-up v1.3 to the older v1.2 model. His results show that the revised design seems to have better immunity to noise and better FM broadcast filtering. He also tests out the new battery power via connection and shows that using battery power is less noisy.
Previously we posted a review comparing the ham-it-up v1.0, SpyVerter and Nobu’s Japanese upconverter. Although the ham-it-up v1.3 is much improved and we have not tested it, we still believe the SpyVerter is the better upconverter choice at the moment due to its better architectural design and included metal case, though Akos does point out that the ham-it-up is currently about $15 USD cheaper and has a passthrough switch.
Ham-it-up v1.3 vs ham-it-up v1.2
In his second post Akos reviews the Balun 1:9 which is a $10 balun that is designed for attaching a long wire antenna to the ham-it-up. The goal of the balun 1:9 is to transform the high impedance long wire antenna down to around 50/75 Ohms for the receiver. In Akos’ results he writes that he mostly see’s identical or better performance with the balun connected.
The Nooelec balun 1:9
To add to Akos’ review, we want to note that we think that there might be some confusion over baluns and ununs. We wonder if a 9:1 unun (instead of a balun) should be used for a long wire antenna, since a long wire is an unbalanced antenna. We think a balun should be used for a balanced antenna such as a dipole. In his review Akos also found that connecting two longwire antennas to the spring terminals improved reception. This may have possibly been because adding two longwires essentially created a balanced dipole antenna. To implement a longwire antenna unun with a balun, we think that the second terminal and coax shield should be connected to a good ground source like a cold water pipe. If you have knowledge on this topic please comment to confirm or expand on our theory.
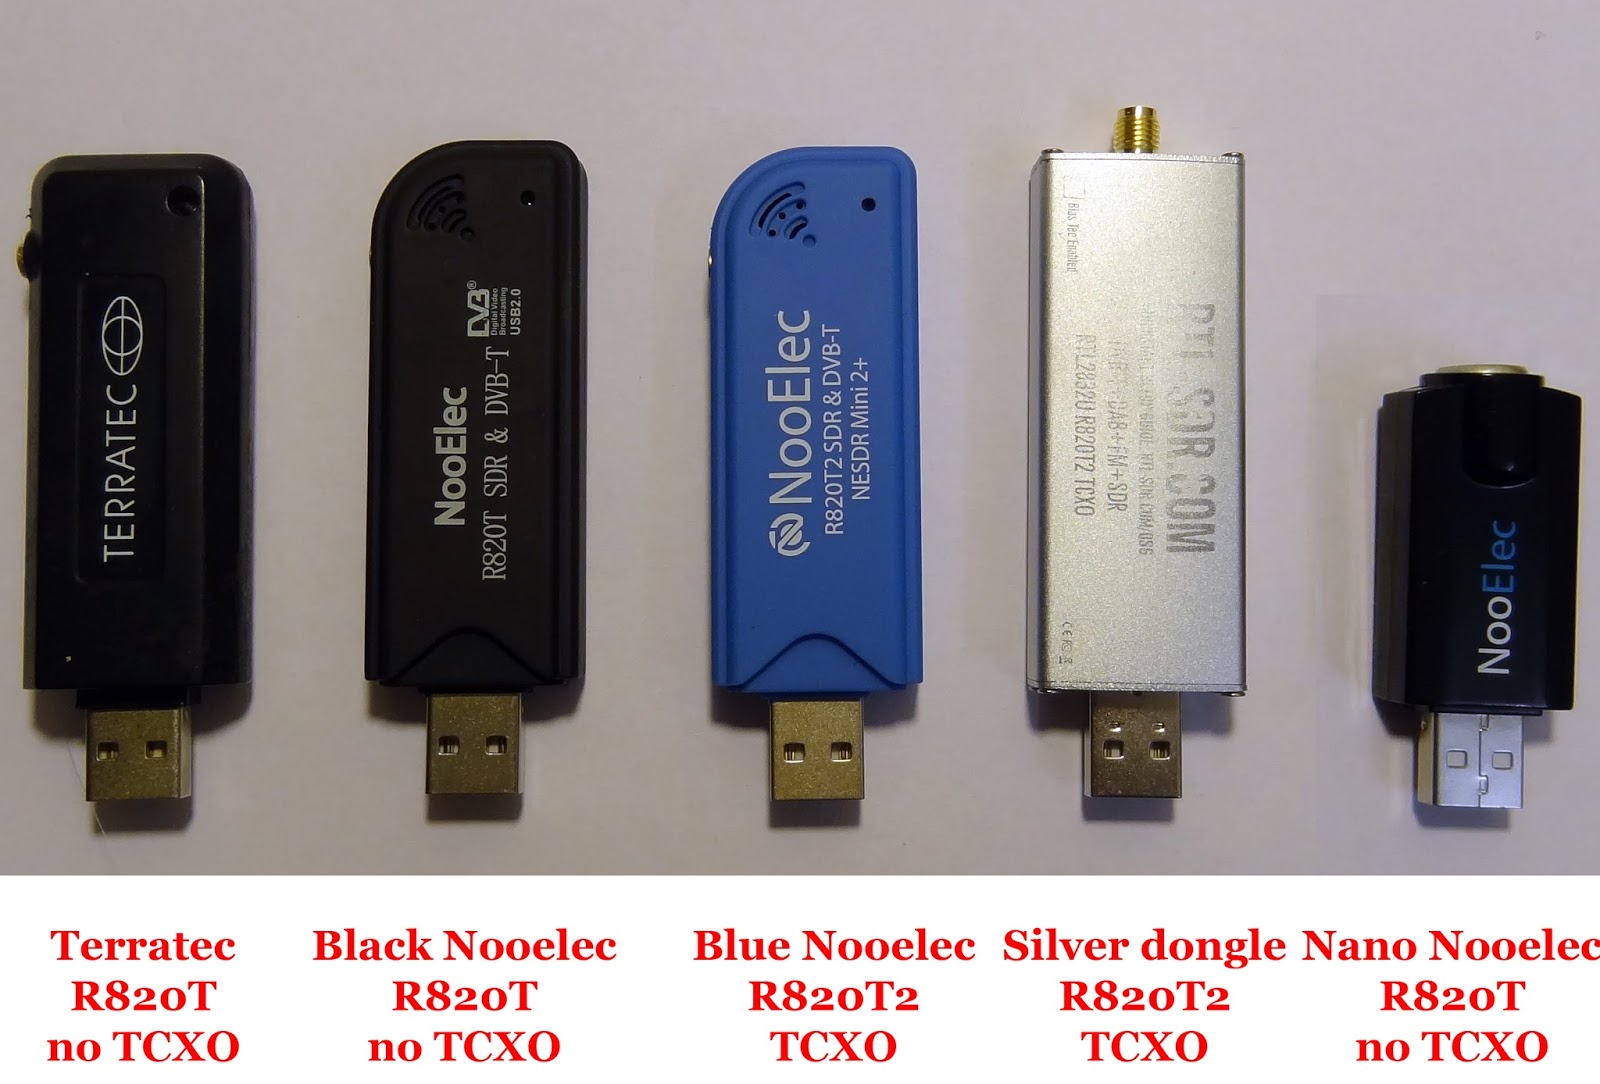
In the post Akos gives an overview of the features of each dongle, and runs tests on things like frequency drift and broadcast FM interference. He also runs SNR tests on Airband, low UHF, high UHF signals and shortwave frequencies. His tests show that the dongles with the R820T2 chip outperform the dongles with the R820T chip by about 4-5 dBs in SNR, and that the overall best dongle is our RTL-SDR Blog dongle.
IMPORTANT NOTE: Please note that this review is now out of date as the SDRplay RSP line has received significant improvements to their hardware and Airspy have brought out a new SDR that is much better at HF.
Overall it is now difficult to pick a winner between Airspy and SDRplay products. However, our preference is the Airspy HF+ Discovery for HF signals, and the SDRplay RSP1A for generic wideband wide frequency range receiving.
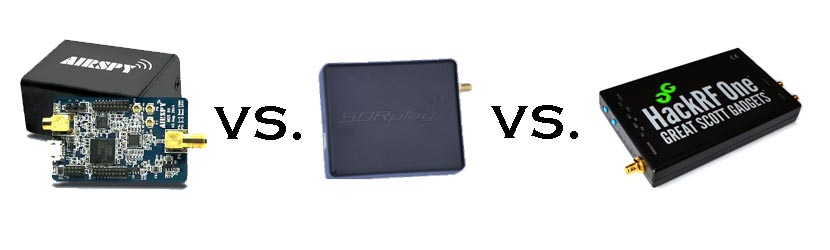
When people consider upgrading from the RTL-SDR, there are three mid priced software defined radios that come to most peoples minds: The Airspy (store), the SDRplay RSP (store) and the HackRF (store). These three are all in the price range of $150 to $300 USD. In this post we will review the Airspy, review the SDRplay RSP and review the HackRF and compare them against each other on various tests.
Note that this is a very long review. If you don't want to read all of this very long post then just scroll down to the conclusions at the end.
What makes a good SDR?
In this review we will only consider RX performance. So first we will review some terminology, features and specifications that are required for a good RX SDR.
SNR - When receiving a signal the main metric we want to measure is the "Signal to Noise" (SNR) ratio. This is the peak signal strength minus the noise floor strength.
Bandwidth - A larger bandwidth means more signals on the screen at once, and more software decimation (better SNR). The downside is that greater CPU power is needed for higher bandwidths.
Alias Free Bandwidth - The bandwidth on SDR displays tends to roll off at the edges, and also display aliased or images of other signals. The alias free bandwidth is the actual usable bandwidth and is usually smaller than the advertised bandwidth.
Sensitivity - More sensitive radios will be able to hear weaker stations easier, and produce high SNR values.
ADC - Analogue to digital converter. The main component in an SDR. It samples an analogue signal and turns it into digital bits. The higher the bit size of the ADC the more accurate it can be when sampling.
Overloading - Overloading occurs when a signal is too strong and saturates the ADC, leaving no space for weak signals to be measured. When overloading occurs you'll see effects like severely reduced sensitivity and signal images.
Dynamic Range - This is directly related to ADC bit size, but is also affected by DSP software processing. Dynamic range is the ability of an SDR to receive weak signals when strong signals are nearby. The need for high dynamic range can be alleviated by using RF filtering. Overloading occurs when a strong signal starts to saturate the ADC because the dynamic range was not high enough.
Images/Aliasing - Bad SDRs are more likely to overload and show images of strong signals at frequencies that they should not be at. This can be fixed with filtering or by using a higher dynamic range/higher bit receiver.
Noise/Interference - Good SDRs should not receive anything without an antenna attached. If they receive signals without an antenna, then interfering signals may be entering directly through the circuit board, making it impossible to filter them out. Good SDRs will also cope well with things like USB interference.
RF Filtering/Preselection - A high performance SDR will have multiple preselector filters that switch in depending on the frequency you are listening to.
Center DC Spike - A good SDR should have the I/Q parts balanced so that there is no DC spike in the center.
Phase Noise - Phase noise performance is determined by the quality of the crystal oscillators used. Lower phase noise oscillators means better SNR for narrowband signals and less reciprocal mixing. Reciprocal mixing is when high phase noise causes a weak signal to be lost in the phase noise of a nearby strong signal.
Frequency Stability - We should expect the receiver to stay on frequency and not drift when the temperature changes. To achieve this a TCXO or similar stable oscillator should be used.
RF Design - The overall design of the system. For example, how many lossy components such as switches are used in the RF path. As the design complexity increases usually more components are added to the RF path which can reduce RX performance.
Software - The hardware is only half of an SDR. The software the unit is compatible with can make or break an SDRs usefulness.
Next we will introduce each device and its advertised specifications and features:
Device Introduction and Advertised Specifications & Features
As of April 2016, the Airspy Mini is now also for sale at $99 USD.
$149 USD + shipping ($20-$30 world, free shipping in the USA)
£99 + VAT + ~£10 shipping for EU.
$299 USD + shipping
Freq. Range (MHz)
24 - 1800
0 - 1800 (with Spyverter addon)
0.1 - 2000
0.1 - 6000
ADC Bits
12 (10.4 ENOB)
12 (10.4 ENOB)
8
Bandwidth (MHz)
10 (9 MHz usable)
6 MHz (5 MHz usable) (AS Mini)
8 (7 MHz usable) (10 MHz in SDRuno/~9 MHz usable)
20
TX
No
No
Yes (half duplex)
Dynamic Range (Claimed)(dB)
80
67
~48
Clock Precision (PPM)
0.5 PPM low phase noise TCXO
10 PPM XO
30 PPM XO
Frontend Filters
Front end tracking IF filter on the R820T2 chip.
8 switched preselection filters + switchable IF filter on MSI001 chip
Two very wide preselection filters - 2.3 GHz LPF, 2.7 GHz HPF
ADC, Frontend Chips
LPC4370 ARM, R820T2
MSi2500, MSi001
MAX5864, RFFC5071
Additional Features
4.5v bias tee, external clock input, expansion headers.
LNA on the front end
5v bias tee, LNA on front end, external clock input, expansion headers.
Notes
The Airspy is designed by Benjamin Vernoux & Youssef Touil who is also the author of the popular SDR# software.
Of note is that there has been a misconception going around that the Airspy is an RTL-SDR/RTL2832U device. This is not true; there are no RTL2832U chips in the Airspy. The confusion may come from the fact that they both use the R820T2 tuner. The RTL2832U chip is the main bottleneck in RTL-SDR devices, not the R820T2. When coupled with a better ADC, the R820T2 works well and can be used to its full potential.
The Airspy team write that they sell units mostly to universities, governments and professional RF users. However, they also have a sizable number of amateur users.
Update: As of April 2016 the Airspy Mini is now for sale for $99 USD. The main difference is a 6 MHz bandwidth and fewer expansion headers, but all other specs appear to be the same.
The SDR Play Radio Spectrum Processor (RSP) is designed by UK based engineers who appear to be affiliated with Mirics, a UK based producer of SDR RF microchips.
The chips used in the SDRplay RSP are dedicated SDR chips which were designed for a wide variety of applications such as DVB-T tuners. The RSP uses these chips and improves on their front end capabilities by adding an LNA and filters in order to create a device capable of general SDR use.
Initially when writing this review we had deep problems with the imaging of strong signals on the RSP. However, a recent Dec 22 update to the drivers has fixed this imaging problem tremendously.
The HackRF is designed by Micheal Ossmann a computer security researcher who was given a development grant from DARPA. His company is called "Great Scott Gadgets".
The HackRF's most unique feature when compared to the other two SDR's is that it is capable of both receiving and transmitting.
There is also a clone called the HackRF Blue out on the market which is about $100 cheaper, but they don't seem to have stock or be producing these any more.
From the specs it is clear from the ADC sizes that both the Airspy and SDRplay RSP are in a different class of RX performance when compared to the HackRF. However, people always compare the Airspy and SDRplay with the HackRF due to their similar price range, so we will continue to compare the three here in our review, but with more of a focus on comparing the Airspy and SDRplay RSP.
In order to use the Airspy on HF (0 - 30 MHz) frequencies a $50 add on called the Spyverter is required. This is an upconverter that is designed for use with the Airspy's high dynamic range and bias tee power port. However, one hassle is that the Spyverter must be connected/disconnected each time you want to switch between HF and VHF/UHF reception as it does not have VHF/UHF passthrough. The RSP and HackRF on the other hand can receive HF to UHF without the need of an upconverter or the need to change ports. A single port for HF to UHF can be very useful if you have a remote antenna switcher.
Post continues. Note that this is a long post with many images.