YouTube Video: A Tutorial on Receiving and Decoding NOAA and METEOR Satellites

Back in March we posted about The Thought Emporium’s YouTube video that explained weather satellites and demonstrated that images could be downloaded from them using an SDR like a HackRF or RTL-SDR. Now The Thought Emporium have uploaded part two of the video series, which is a tutorial that shows exactly how to use the free software to receive, demodulate and decode NOAA and Meteor satellites.

The first part of the video shows how to use SDR#, Audacity and WXtoIMG to receive NOAA APT weather images. The second part of the video shows how to use SDR#, Audacity, LRPTrx, LRPTofflinedecoder, SmoothMeteor and LRPT processor to receive Meteor M2 LRPT images.

Receiving Images From Satellites Part 2: Decoding and Demodulating NOAA and METEOR Transmissions

Signal Reverse Engineering Tool DSpectrum Upgraded to DSpectrumGUI

DSpectrum is a reverse engineering tool that aims to make it trivial to demodulate digital RF transmissions. It is built on top of the Inspectrum tool which makes it easy to visualize and manually turn a captured digital RF waveform into a string of bits for later analysis by providing a draggable visual overlay that helps with determining various digital signal properties. DSpectrum added features to Inspectrum like automatically converting the waveform into a binary string with thresholding. RF .wav files for these tools can be captured by any capable radio, such as an RTL-SDR or HackRF.

DSpectrum has recently been depreciated in favor of the new DSpectrumGUI which builds on the success of DSpectrum by providing a full interactive GUI that helps with the reverse engineering workflow. Some interesting new features include things like automatic analysis of the binary to determine the modulation and encoding types, the ability to submit/download reverse engineering worksheet templates to/from the community and binary generation for transmitting with a RFCat.

A similar tool is Universal Radio Hacker.

DSpectrumGUI
DSpectrumGUI

Detecting Pulsars with a Circularly Polarized Yagi and an RTL-SDR

Steve Olney VK2XV is the creator and administrator of the Neutron Star Group website which collects a listing of confirmed amateur attempts at pulsar detection, many of which have been made with a humble RTL-SDR dongle. A pulsar is a rotating neutron star that emits a beam of electromagnetic radiation. If this beam points towards the earth, it can then be observed with a large dish antenna and a radio, like the RTL-SDR.

Now after more than four years of trying, Steve has finally been able make his own confirmed pulsar detection by using a 42-elment circularly polarized Yagi antenna tuned for 436 MHz and an RTL-SDR. Typically a large dish antenna is used to receive a pulsar, but Steve has instead used a fixed position circularly polarized Yagi antenna, which he writes has an equivalent aperture to a 2.8 meter diameter dish. His antenna can point directly upwards as his target is the Vela pulsar which happens to pass almost directly overhead at his location.

Detection of a pulsar involves determining its rotational period from the regular wideband noise pulses that they produce. Pulsar detections with large aperture dish antennas can easily be confirmed due to high SNR, but smaller weaker detectors require some use of some mathematical techniques to confirm a positive detection. This is especially important as it’s possible for terrestrial signals to mimic a pulsar. 

In order to detect and confirm the pulsar detection from a weak signal, Steve uses a technique called epoch folding, which makes use of the fact that the period of pulsar pulses are extremely regular. To verify the results he also makes use of techniques such as folding at the predicted period, de-dispersion and plotting daily results against the predicted results. These techniques are explained in more depth in his results post.

Steve's Results showing the detected pulsar period and his CP Yagi Antenna
Steve’s Results showing the detected pulsar period and his CP Yagi Antenna

Decoding the LilacSat-1 FM to Digital Voice Transponder

LilacSat-1 is an educational CubeSat built by students from the Harbin Institute of Technology (HIT) in China. It was recently launched from the ISS on 25 May 2017 as part of the QB50 science experiment to explore the lower thermosphere, and it is expected to stay in orbit for about 3 months. Apart from BPSK telemetry at 145.935 MHz, LilacSat-1 is interesting because it contains on board an FM to Codec2-BPSK digital voice amateur radio transponder at 145/436 MHz (uplink/downlink). It is probably the first amateur radio satellite to contain an FM to digital voice transponder.

To decode LilacSat-1 digital voice and telemetry you can use a Linux live CD provided by HIT, or download the GNU Radio decoder directly from the LilacSat-1 information page on the HIT website. The GNU Radio program can be used with any GNU Radio compatible SDR, such as an RTL-SDR.

Over on his blog, destevez has also created a lower latency digital voice decoder for LilacSat-1 that can found in the gr-satellites GNU Radio package, which contains decoders for multiple satellites as well. Destevez has also written about the Codec2 implementation used in LilacSat-1 in one of his previous posts.

An example of LilacSat-1 being decoded has also been uploaded by YouTube by Scott Chapman. In his test he used an RTL-SDR to work the pass live, but in the video shows an offline decoding received by his SDRplay which was also monitoring the same pass.

26 May 2017 LilacSat-1 First Try at Digital Repeater

Comprehensive Video Guide to Trunking and Digital Voice with the RTL-SDR

Over on YouTube user AVT Marketing has uploaded a five part video series that very clearly and slowly shows how to use an RTL-SDR to set up trunking and digital voice monitoring. In the videos he uses SDR#, Unitrunker, DSD+ and VBCable for the monitoring.

The first video in the series shows a brief overview of the digital trunking voice set up, and explains a bit about digital voice communications. The second video shows how to install an RTL-SDR, and walks you through downloading Unitrunker and DSD+. The third video is a tutorial about SDR# and also explains how trunking radio systems works. The fourth video shows how to install Unitrunker, DSD+, VBCable, and how to configure each program. Finally the fifth and last video in the series shows the final steps in using Unitrunker and DSD+.

This looks like a very good video series, especially for those that like to see every step in the process played out in full.

Cheap Digital Trunked Scanning Using SDR for the Absolute Beginner

Nigun Downconverter PCB Completed

We last posted about Nigun back in January 2017, and at that point the schematic design had just been completed. Nigun is a downconverter which can be used to allow the RTL-SDR and other SDRs to receive frequencies above their typical maximum tuning range, which for the RTL-SDR is about 1.8 GHz. A downconverter works by taking those high frequencies and converting them down into a frequency which the SDR can actually tune to.

Recently “raziele”, the designer of Nigun has completed the PCB design and he aims to order the first batch of units during June. The main specifications of Nigun are pasted below:

  • Dynamic LO – LO will be determined by the user and programmed by the MCU
  • Almost no filtering – will leave this challenge outside of this project scope
  • Power up and programming via micro-usb connector. Should be able to power up from a USB power-pack (but probably not from a computer port)
  • Highest RF frequency will be 3GHz
  • Product also features a VCO for signal-generation purposes. VCO support should be 200-2700MHz

Previously Outernet had been working on a downconverter design for their 1.5 GHz satellite service, but they decided that it was not economical. So it is good to see an alternative downconverter in the works. More details about Nigun are available on the GitHub page.

The Nigun Downconverter PCB Design

A Review of the SpyVerter R2

The SpyVerter is a high performance upconverter that enables HF reception on SDR’s that aren’t able to tune directly to HF frequencies. Like any upconverter it works by converting those lower HF frequencies ‘up’ into a higher frequency range that is actually receivable by the SDR.

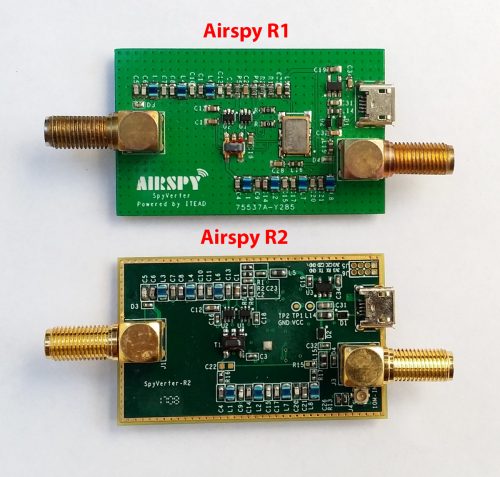
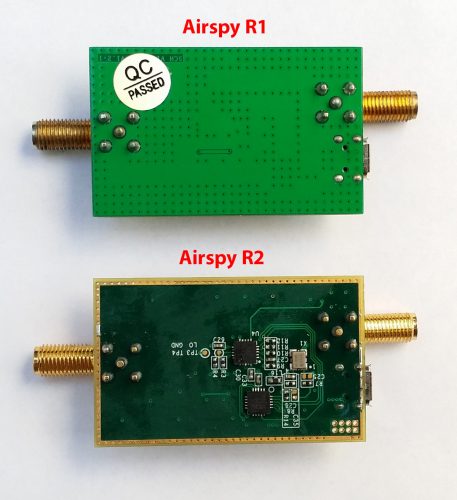
Back in December 2015 when the SpyVerter first came out we reviewed the unit and found that it was probably the best and highest value upconverter on the market. It was priced at a similar or cheaper price to competitors, came in a metal enclosure and had excellent performance. The main reason for its high performance is due to the architecture. While most upconverters on the market like the ham-it-up use an ADE-1 double balanced mixer component, the SpyVerter instead uses an H-mode mixer design. This design is harder to engineer, but it provides better dynamic range meaning that strong signals are less likely to overload the upconverter.

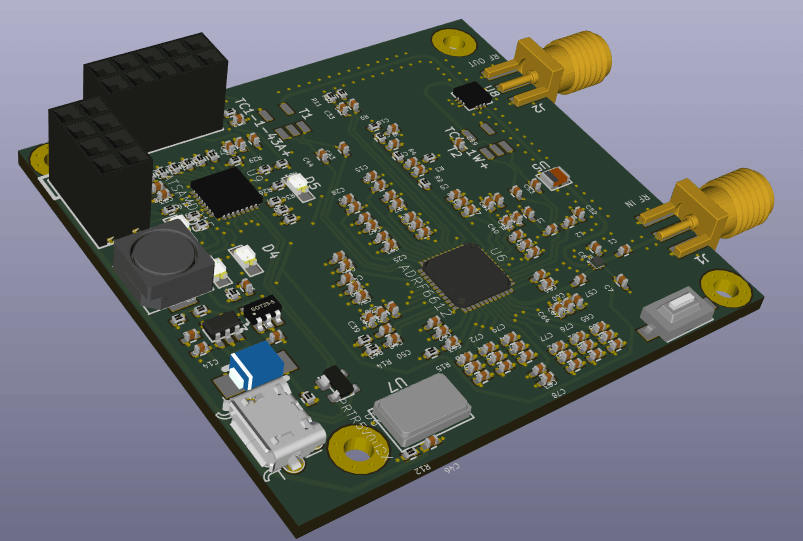
The SpyVerter was recently given a refresh, and the SpyVerter R2 is now available. The changes are small and are mostly centered around the clock. The oscillator is now a 24 MHz 0.5 PPM TCXO, run through a SI5351 clock generator to produce the 120 MHz upconversion frequency. A new onboard microcontroller programs the SI5351 on power up.

This change in clock design also now allows you to connect a 10 MHz reference frequency if ultra stable, or phase coherent frequency operation is required. A u.FL connector is provided next to the output SMA connector on the PCB for connecting a 10 MHz reference. Unfortunately there is no breakout hole in the metal enclosure, meaning that you’ll need to drill your own hole in the enclosure to get the u.FL clock cable out. Few people will need this feature however, as thanks to the 0.5 PPM TCXO stock frequency stability is now excellent.

The new design also uses less power, only drawing 10 mA of current compared to 47 mA in the SpyVerter R1. It also has 12 dB lower local oscillator leakage meaning that the gains might be able to be pushed slightly higher without overload. Once again, just like with the SpyVerter R1 the R2 is also powered via the bias tee on the Airspy, and so is compatible with the bias tee on our RTL-SDR V3 dongles.

There’s also an interesting mod that can be performed with the SpyVerter R2. The LO frequency can be modded to run at 58 MHz instead of 120 MHz. 58 MHz is just low enough to avoid the broadcast FM band, and the lower frequency allows the switches used in the H-mode design to run at a lower frequency. This results in an insertion loss better by about 3 dB’s and less LO leakage meaning that the RF gains can be pushed higher. The main disadvantage to this mod is that the lowest input frequency will only be 28 MHz.  The mod details don’t seem to be published yet, but we’ll update this post once they are.

The cost of the SpyVerter R2 remains the same as before at $49 USD. Compared to the Ham-It-Up v1.3 which costs $41.95 USD and does not come with an enclosure or TCXO, the SpyVerter still seems to be the best value. Currently you can buy one internationally from iTead who ship from China, at Airspy.us for US customers, and there are several European distributors linked on the Airspy website.

Disclaimer: The SpyVerter R2 was sent by the Airspy team to us for free in exchange for an honest review.

DAB/DAB+ Decoder Software “Welle.io” Now Available on Android

Back in March of this year we posted about “Welle.io”, a DAB/DAB+ decoder that supports the RTL-SDR and other SDRs like the Airspy. It was available for Windows, Linux and Raspberry Pi 2/3.

Albrecht Lohöfener, the author of Welle.io has recently written in to announce that Welle.io is now available for Android as well. The app appears to be free, but is currently marked as beta, so there may still be a few bugs.

The only other app that we’ve seen which is capable of decoding DAB/DAB+ on Android is Wavesink. Wavesink costs $14.90 USD on the Google Play store, but there is a free trial version available with runtime limitations and no DAB+ support.

Albrecht notes that the app is fairly computationally intensive and will require an Android device with at least 4 cores and a clock speed of 1.3 GHz to run the app. He also mentions that they are also looking for any interested developers and translators to help with development of the app.

Welle.io on Android
Welle.io on Android
welle.io on Android (DAB+/DAB software radio, RTL-SDR , RTL2832U)