Category: Antennas

Comparing Four Wideband Magnetic Loop Antennas on HF with an SDRplay RSPduo

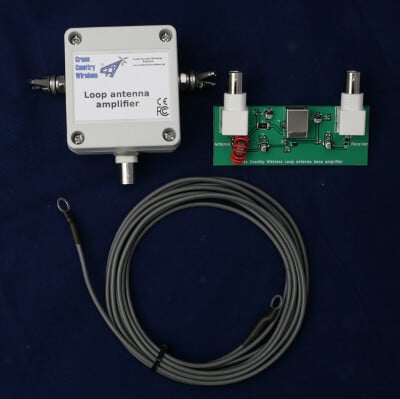
Over on YouTube the Scanner and Sdr Radio channel has uploaded a video comparing four different brands of HF wideband loop antennas using an SDRplay RSPduo. The loops he tested include the cheap Chinese MLA-30 (~$40), the Cross Country Wireless (CCW) loop ($70), Bonito ML200 (~$442) and the Wellbrook 1530LN (~$305).

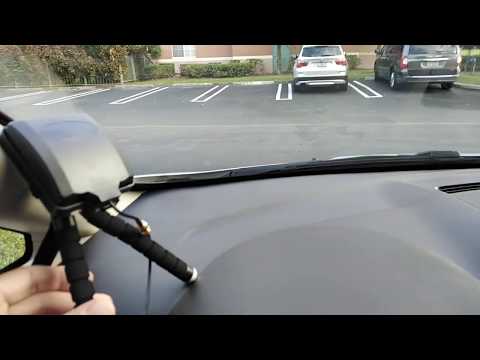
The MLA-30 was slightly modified with the cheap coax removed and a BNC connector added. Each of the antennas used a wire loop with diameter of approximately 1.6m, except for the Wellbrook which has a fixed size solid loop of 1m.

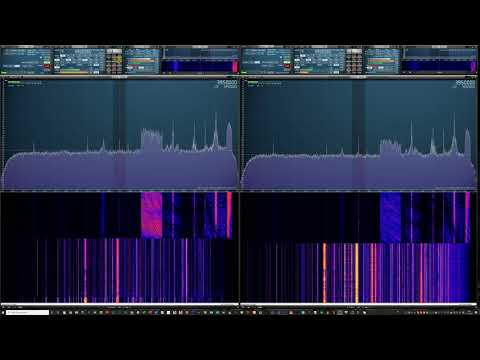
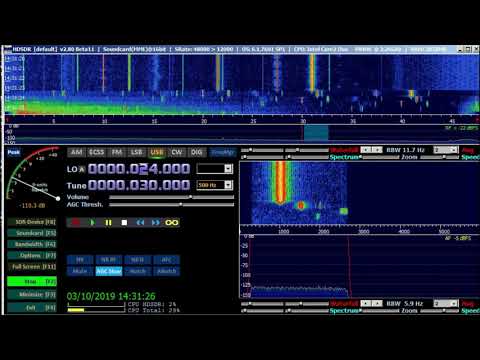
The tests compare each loop against the Wellbrook which is used as the reference antenna. In each test he checks each HF band with real signals on the RSPduo and compares SNR between the two antennas.

The results show that the two expensive antennas, the Bonito and Wellbrook, do generally perform the best with the lowest noise floors, but surprisingly the MLA-30 actually performs very well for it's price point, even outperforming the Wellbrook reference on SNR in some bands. We note that some of the improvement may be due to the larger 1.6m loop size used on the MLA-30, compared to the 1m loop on the Wellbrook.

Also we note that it can be hard to compare antennas in single tests, because the differences in antenna radiation patterns could be favorable for some signals, and less so for others, depending on the location.

Comparing 4 magnetic loops for hf

TechMinds Reviews our RTL-SDR Blog L-Band Patch Antenna + Horn & Dish Mod

Over on YouTube the TechMinds YouTube channel has uploaded a review of our RTL-SDR Blog L-Band patch antenna which we recently released. TechMinds tests the antenna on a STD-C Inmarsat channel with the Scytale-C decoder, and on various AERO ACARS transmissions with JAERO. Later in the video he also tests the patch antenna on Iridium reception using the Iridium Toolkit software. In all tests the patch is able to suitably receive the signal with either an RTL-SDR or Airspy SDR.

We also wanted to make a note about an additional tip regarding polarization that many people using the antenna seem to have missed. As Inmarsat signals are LHCP polarized, it is important to not only point the antenna towards the satellite, but also to rotate the antenna to match the polarization until maximum SNR is achieved. The rotation can make the difference between strong signals and nothing received at all.

RTL-SDR Active L-Band Patch Antenna For Inmarsat / Iridium / GPS

We've also recently seen a user 'Bert' who has needed to boost the signal strength as he was running the patch inside and at a location in northern Europe with poor reception of Inmarsat. To boost it he simply added a metal horn over the patch made from an old aluminum box, and also a back plate reflector. He notes that this improved his SNR on AERO 10500 from 8 - 9 dB, up to 12 - 14 dB. He also tested using the patch on a dish antenna, and found very good results too.

Aluminum Horn Added to L-Band Patch
L-Band Patch Antenna on Dish

Mike Tests our RTL-SDR Blog L-Band Active Patch Antenna on an SDRplay RSP1a

Over on YouTube Mike Ladd (KD2KOG) from the SDRplay technical support team has uploaded a YouTube video showing him running our recently released RTL-SDR Blog L-Band Active Patch antenna on an SDRplay RSP1a. In the video he receives and decodes AERO signals from his car with his RSP1a powering the active patch antenna via the built in bias tee.

If you didn't already hear, we recently released an active (amplified + filtered) high performance patch antenna designed for receiving L-Band satellites such as Inmarsat, Iridium and GPS. The patch is designed to be easily mountable outside on a window, surface, stick, tree branch etc as it comes with easy to use mounting solutions and extension coax, and is enclosed in a fully weather proof plastic cover. If you're interested the product is available over on our store for US$39.95 with free shipping.

You also might want to keep an eye on Mike's YouTube channel, as he notes that in the yet to be released part 2 video he will be giving away the antenna in a competition.

RTL-SDR Blog L-band patch antenna part 1

SignalsEverywhere: Testing Wideband PCB Antennas from Hex and Flex

In the past we've posted twice about Hex and Flex who has been designing and selling various types of wideband PCB antennas. Previously we saw his wide band vivaldi antenna, and his wideband 400/800 MHz+ spiral antennas.

Now on the latest episode of SignalsEverywhere host Corrosive gives us a brief review of the Hex and Flex antennas, and goes on to demonstrate the spiral antenna in action. In his tests he was able to receive Inmarsat AERO, 433 MHz tire pressure monitors (TPMS), 300 MHz APRS signals, 300 MHz SATCOM, 800 MHz P25 and 1090 MHz ADS-B aircraft tracking signals with the spiral antenna and our RTL-SDR Blog Wideband LNA.

The video also comes with a 20% off promotion code for the Hex and Flex Tindie store. Simply enter the code "signalseverywhere" at checkout.

Creating a 21cm Galactic Sky Map with an Airspy and 1.8m Dish

Marcus Leech from ccera.ca is a pioneer in using low cost software defined radios for observing the sky with amateur radio telescopes.  In the past he's shown us how to receive things like the hydrogen line,  detect meteors and observe solar transits using an RTL-SDR. He's also given a good overview and introduction to amateur radio astronomy in this slide show.

His recent project has managed to create a full Hydrogen sky map of the northern Canadian sky. In his project memo PDF document Marcus explains what a sky map shows:

A [sky map] shows the brightness distribution over the sky for a given set of observing wavelengths. In the case of the 21cm hydrogen line wavelength, maps show the distribution of hydrogen over the sky. For amateur observers, such maps generally show the distribution within our own galaxy, since extra-galactic hydrogen is considerably more faint, and significantly red/blue shifted relative to the rest frequency of 1420.40575 MHz, due to relative motion between the observer and the target extra-galactic hydrogen.

He was able to make this observation using his radio telescope made from a 1.8m dish antenna, a NooElec 1420 MHz SAWBird LNA + Filter, a 15dB line amplifier, another filter and two Airspy R2 software defined radios locked to an external GPSDO. The system runs his custom odroid_ra software on an Odroid XU4 single board computer, which provides spectral data to an x86 host PC over an Ethernet connection. 

Over 5 months of observations have resulted in the Hydrogen sky map shown at the end of this post. Be sure to check out his project memo PDF file for more information on the project and how the image was produced. Marcus' blog post over on ccera.ca also notes that more data and different maps will be produced soon too.

Hydrogen Sky Map
Hydrogen Sky Map

A Motorized Backyard Radio Astronomy Telescope made with an RTL-SDR

A Geostationary Satellite Imaged with the RTL-SDR Based Mini Radio Telescope

Just a few days we posted an update on the PICTOR open source radio telescope project. That project makes use of an RTL-SDR and a small dish antenna to receive the Hydrogen line, and is able to measure properties of our galaxy such as determining the shape of our galaxy.

Now over on Hackaday another amateur radio telescope project has been posted, this one called the "Mini Radio Telescope" (MRT) which was made by Professor James Aguirre of the University of Pennsylvania. This project makes use of a spare Direct TV satellite dish and an RTL-SDR to make radio astronomy observations. What makes this project interesting in particular is the automatic pan and tilt rotor that is part of the design. Unlike other amateur radio telescopes, this motorized design can track the sky, and map it over time. This allows you to create actual radio images of the sky. The image on the right shows a geostationary satellite imaged with the dish.

In the past we saw a similar project by the Thought Emporium YouTube channel which used a tracking mount and a HackRF to generate images of the WiFi spectrum. This was to be a precursor to a motorized tracking mount for radio astronomy but it doesn't seem that they completed that project yet.

Professor James Aguirre 's project including designs for the rotor is fully open source and can be found over on GitHub.

The Miniature Radio Telescope Setup

An Active Low Cost HF Loop Antenna Made in the UK

Cross Country Wireless is a UK based company that has created an active HF loop antenna for only $70 USD including international shipping. The loop appears to have already been for sale for a while now, but recently they've created a new version that can be easily powered by a 5V bias tee with at least a 67 mA current capacity. This makes it very easy to use with radios that have built in bias tee's such as our RTL-SDR Blog V3 and SDRplay and Airspy units. The page reads:

The Loop Antenna Amplifier contains all the electronics needed for home DIY construction of an active loop (magnetic loop) low noise receiving antenna.

The amplifier consists of two units, a weatherproofed outdoor unit for connection to a suitable loop and a base unit to further amplify the signal and to provide DC power up the coaxial cable to the outdoor unit.

The outdoor unit is housed in a polycarbonate box with stainless steel antenna connections and a BNC socket. The indoor unit is a PCB with two BNC connectors and a USB socket to take 5V from a USB socket on a PC or phone charger.

Like our other active antenna products it has RF overload protection to allow it to be used very close to transmit antennas without damaging the amplifier or the attached receiver.

The loop depends on what the user has available. We have tested it with simple wire loops or deltas, coax loops and an alloy loop made from a bicycle wheel rim. We supply a 3m (10 ft) length of wire as a simple loop to make a first loop for testing.

The photograph on the right shows the prototype with a 1m diameter loop of LDF4-50 coax cable as a test loop.

With a simple wire loop or delta and a small USB powerbank it makes a very compact and portable receiving antenna for holiday listening or covert use.

The latest version can now have the head unit powered directly from receivers with a 5V bias-tee such as the SDRplay receivers or some RTL-SDR dongle receivers with a bias-tee option.

Specifications:

  • Frequency range: 10 kHz to 30 MHz
  • Loop amplifier input impedance: 0.3 ohms
  • Output impedance: 50 ohms
  • Supply voltage: 5 V from USB socket or charger
  • Supply current (head and base unit): 112 mA
  • Supply current (head unit fed with 5V bias-tee): 67 mA
  • Loop antenna outdoor unit connectors: Two M6 stainless steel threaded studs and BNC female (RF out 50 ohms)

There is no comparison yet that we've seen on how this loop compares against the cheaper US$45 Chinese made MLA-30 loop. In a previous post Martin (G8JNJ) reviewed the MLA-30 and noted several design flaws after reverse engineering the circuit. He has let us know that he will also be reviewing the Cross Country Wireless Active Loop and will let us know his thoughts in the future.

Cross Country Wireless Loop
Cross Country Wireless Loop Antenna Amplifier VLF test with 1m diameter coax loop

Updates on the PICTOR Low Cost Open Source Radio Telescope Based on RTL-SDR

Back in July we posted about PICTOR, an open source and RTL-SDR based radio telescope project. The owner of the project recently wrote in and wanted to share some updates. His text is below:

A few months ago, PICTOR was launched. PICTOR is a free to use open source radio telescope that allows anyone to observe the sky in the 1300~1700 MHz range at any time via the easy-to-use online platform.

The goal of this effort is to introduce students, educators, astronomers and others to the majesty of the radio sky, promoting radio astronomy education, without the need of building a large and expensive radio telescope. 

Since the initial launch, PICTOR has gotten lots of updates and improvements, particularly in the software backend, providing more data to the users, using advanced techniques to increase the signal-to-noise ratio by calibrating spectra and mitigating radio frequency interference (RFI) (if present).

Here is an example observation with PICTOR, clearly showing the detection of 3 hydrogen-dense regions corresponding to 3 unique spiral arms in the Milky Way!

Graphs from the PICTOR RTL-SDR Radio Telescope showing the 3 unique spiral arms in the Milky Way.

If you’re new to radio-astronomy, the developer of PICTOR has provided a PDF including some introductory radio astronomy information and instructions on how to observe the radio sky with PICTOR: https://www.pictortelescope.com/Observing_the_radio_sky_with_PICTOR.pdf