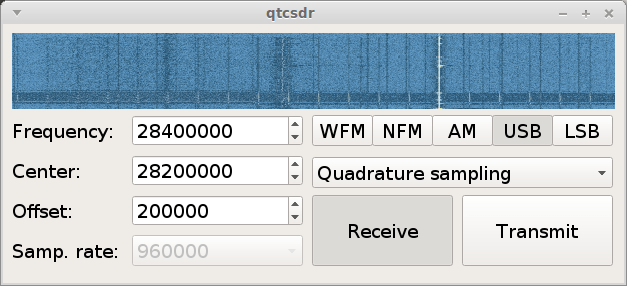
The author writes that Skywave Linux is currently compatible with the RTL-SDR and HPSDR hardware. At the moment it seems that the first version has only very few preinstalled software programs. These include: QT Radio, CubicSDR, Fldigi, and Dump1090. The authors write about Skywave:
Welcome to the first release of Skywave Linux! This is an operating system designed to provide access to a growing network of software defined radios all over the world. With global SDR access, shortwave listeners can access broadcast, utility, amateur radio, military, and other signals from almost anywhere in the world – from state-of-the art radio servers. All you need to do is boot Skywave Linux on a computer with internet access.
Why was Skywave Linux created? The developer of this system was plagued by a lack of access to quality radio broadcasts due to his residence in a country practising tight media control and censorship. In addition, software defined radio is an exciting way to experience the hobby of shortwave listening. By connecting to remote radio servers on the internet, it is possible to enjoy bleeding edge radio operation without large antennas or setting up a station on-site. Installing SDR software can be difficult for many computer users, and Skywave Linux eliminates the hassle of downloading, compiling, and configuring apps for the SDR servers on the internet.
The RTL-SDR software defined radio is often used to receive signals from NOAA APT weather satellites. Once decoded these signals produce a freshly captured image of the earth over your current location. We have a simple tutorial on setting this up here.
However, recently Marco Johansson wrote into RTL-SDR.com to explain an alternative method to the one described in our tutorial. His method uses rtl_fm as the receiver instead of the GUI based software SDR# and uses several other pieces of software to automate the whole process. Marco believes that his method may be useful for some people and his tutorial is presented below. Also, if you are interested Marco has a WxtoImg generated webpage which shows all his recently received images here wxsat.haastaja.net.
A composited weather satellite image made up of several images received from NOAA satellites by Marco Johansson
Note that the following tutorial is written by Marco Johansson.
Marco’s NOAA APT Decoding Tutorial
As a Windows user I had some serious problems using an RTL-Dongle as a receiver for WxtoImg. Signal drops, CPU load, and no receiver control. I had to use 5 different pieces of software to get automatic reception to work and every day one of the programs had some weird problems causing the whole system to stop working. I read several forum posts about similar problems. A huge bit of help came from WxtoImg’s own forum where a user told how he was able to use rtl_fm as a receiver. His system was Linux based, so I was not able to use his scripts, but it gave me enough information to find a Windows based solution.
I stumbled on to a software program that solves my problem totally. It is originally made to control Windows MCE (Media Center), but since it’s release it has been enhanced to work as a universal remote control for the Windows system.
In WxtoImg I selected “Baykal” receiver, port COM1 and 2400baud. The protocol for remote control is very easy to understand and after every command WxtoImg sends CR/LF to receiver, which is mandatory to get commands to work.
Control commands are handled with MCE controller. It listens to COM2 (bridged with COM1) and when it hears a valid command string (A Magic ‘word’) it activates a task. Tasks are .bat files, one for every satellite and a “kill” to stop receiver after the satellite pass.
When satellite is coming (one minute before it is over head) WxtoImg sends a command “MUA” that triggers “kill.bat”. Then WxtoImg sends a command “RF0xxxxxxx” where xxxxxxx is the frequency of the satellite, “1371000” for NOAA19 – this triggers “rec-noaa19.bat”. When the pass is over, Wxtoimg sends again “MUA” to kill the receiver program.
Now I can control recordings directly from WxtoImg without any other software (Orbitron, SDR#, DDE client etc).
.bat files and other configurations are provided below for others to use. I ended up to have separate .bat to start the tasks as in that way I can set the system start and stop recording in the background without a command prompt popping around my desktop every 90 mins 🙂
My system is Windows 8.1, I have not tested this in 7, 8 or 10 but I believe it should work without any modification. The HW ID of the RTL-Dongle I use for wx_rtl_fm.exe is “3” (‘-d 3’ in script). If you have only one RTL-Dongle, then this should be set to “0”. I use the bandwidth of 55 kHz that seems to be enough for good APT reception including doppler error as in this method the doppler error is not corrected in the receiver at all (no AFC).
NOTE! I have copied the original ‘rtl_fm.exe’ to ‘wx_rtl_fm.exe’ to be able to start other rtl_fm.exe instances without the risk that WxtoImg kills my other receiver accidentaly. And of course, remember that these are from my system and the correct path used in scripts will be different for you 🙂 Also, the original ‘sox.exe’ is copied to ‘play.exe’ as instructed in the SoX’s manual for Windows user. And because I’m lazy, I copied rtl_fm and SoX binaries to same directory so that I do not have to put so long path strings into my .bat scripts 🙂
Final words:
.bat’s used in this are very dirty hacks and there are lot’s of improvement available for sure – but it works! Also, the remote protocol for Baykal receiver actually sends two more commands, one is used for telling the modulation of the transmission (RM NFM) and second to do something I do not know (MUF).
The whole communication in my system goes like this:
1) “MUA” => Kill all wx_rtl_fm.exe processes currently running (if any). This happens one minute before satellite pass starts.
2) “RF0xxxxxxx” => Start wx_rtl_fm & SoX, xxxxxxx=frequency of the satellite and is used to select correct .bat for different satellites (see MCE Control XML-file for details). This happes when satellite pass starts.
3) “RM NFM” => Not used in my system. Could trigger something fun if needed :). This happens right after ‘RF0xxxxxxx’ command.
4) “MUF” => Not used in my system. Could trigger something fun if needed :). This happens right after ‘RM NFM’ command.
5) “MUA” => Kill all wx_rtl_fm.exe processes currently running. This happes right after satellite pass.
SoX is a very powerfull tool for audio manipulation. There are options that could greatly improve the audio quality of the received signal – denoice, better dynamics etc. I am not that keen to try everything SoX could do as the results are already very good in my system, but if there are someone who knows better ways to handle SoX then please do not hesitate to comment!
Used .bat Files
“Kill the receiver”:
kill.bat is triggered by MCE control and calls kill-wx_rtl_fm.bat to do the actual killing.
kill.bat
cd C:\Users\Mac Radio\ownCloud\SDR\rtl_fm_sox
start /min kill-wx_rtl_fm.bat ^& exit
This triggers;
kill-wx_rtl_fm.bat
taskkill /IM wx_rtl_fm.exe /F
“Start recording”:
Recording is started after MCE Control gets the correct ‘word’ from WxtoImg. For every satellite there are separate ‘words’ and separate .bat files.
rec-noaa15.bat
cd C:\Users\Mac Radio\ownCloud\SDR\rtl_fm_sox
start /min noaa15.bat ^& exit
This triggers;
noaa15.bat
cd C:\Users\Mac Radio\ownCloud\SDR\rtl_fm_sox
play -r 55k -t raw -e s -b 16 -c 1 "|wx_rtl_fm -d 3 -M fm -f 137.62M -s 55k -l 0" -t waveaudio
rec-noaa18.bat
cd C:\Users\Mac Radio\ownCloud\SDR\rtl_fm_sox
start /min noaa18.bat ^& exit
This triggers;
noaa18.bat
cd C:\Users\Mac Radio\ownCloud\SDR\rtl_fm_sox
play -r 55k -t raw -e s -b 16 -c 1 "|wx_rtl_fm -d 3 -M fm -f 137.9125M -s 55k -l 0" -t waveaudio
rec-noaa19.bat
cd C:\Users\Mac Radio\ownCloud\SDR\rtl_fm_sox
start /min noaa19.bat ^& exit
This triggers;
noaa19.bat
cd C:\Users\Mac Radio\ownCloud\SDR\rtl_fm_sox
play -r 55k -t raw -e s -b 16 -c 1 "|wx_rtl_fm -d 3 -M fm -f 137.1M -s 55k -l 0" -t waveaudio
And finally, the MCE Control magic ‘words’. By default, MCE Control understands over 200 separate commands originally meant to remote control Windows MCE (Media Center). Fortunately, one can create their own commands and get MCE Control to do much more – control Wx-system!
MCE Control uses an XML configuration file for these extra commands. The file is located in the same directory where the main executable is located. My system uses following XML file to be able to control ‘wx_rtl_fm.exe’:
<?xml version="1.0" encoding="utf-8"?>
<MCEController xmlns:xsd="http://www.w3.org/2001/XMLSchema" xmlns:xsi="http://www.w3.org/2001/XMLSchema-instance">
<Commands xmlns="http://www.kindel.com/products/mcecontroller">
<!-- Place command definitions here -->
<!--
==================================================================
StartProcess Commands
File: The full path to the executable you want to start.
==================================================================
-->
<StartProcess Cmd="RF01376200" File="C:\Users\Mac Radio\ownCloud\SDR\rtl_fm_sox\rec-noaa15.bat"/>
<StartProcess Cmd="RF01379125" File="C:\Users\Mac Radio\ownCloud\SDR\rtl_fm_sox\rec-noaa18.bat"/>
<StartProcess Cmd="RF01371000" File="C:\Users\Mac Radio\ownCloud\SDR\rtl_fm_sox\rec-noaa19.bat"/>
<StartProcess Cmd="MUA" File="C:\Users\Mac Radio\ownCloud\SDR\rtl_fm_sox\kill.bat"/>
</Commands>
</MCEController>
A new piece of software called ham2mon by programmer Louis Brown (KD4HSO) has been released. This is a GNU Radio Linux based program that can be used with an RTL-SDR or other SDR that is compatible with GrOsmoSDR to demodulate and record narrow band FM audio from N channels (as many channels as your CPU can handle) within the current bandwidth. Although it is command line based, it comes with a simple Curses command line based GUI.
He writes that in future versions he hopes to incorporate gr-dsd to be able to demodulate and record P25 digital audio as well.
The ham2mon Curses GUI.
Louis has also uploaded a video to YouTube showing the software in action.
Parabolic microphones allow listeners to clearly hear sounds from far away. They are often used by bird call enthusiasts and also probably by spies. A parabolic microphone works by using a dish to concentrate distant sound onto an amplified microphone and they have been commercially available since the 60’s as demonstrated by this old Radioshack ad.
An old parabolic micrphone advertised in a radioshack catalogue from the ’60’s
Usually, the listener uses a pair of headphones directly tethered to the parabolic microphone and walks around with the dish in hand. However, this week electronics hobbyist Mario Fillipi wrote in to RTL-SDR.com to let us know about his project in which he created a wirelessly operated parabolic microphone.
To do this Mario connected a wireless FM transmitter to the headphone output of his home made parabolic mic, mounted the dish on a tripod, and then used his RTL-SDR to receive the FM transmission and demodulate the remote sounds. Of course reception can be done with any suitable radio, but the RTL-SDR provides the advantage of being able to easily manage, record and analyze the received audio.
The parabolic microphone with FM transmitter
Mario used his wireless parabolic microphone to record the sounds of finches in a bird house that was about 70 feet (21 meters) away. Then he writes that in HDSDR he was able to analyze the finches calls in the audio spectrum waterfall. He noticed that the calls were in the 2300 – 6000 Hz audio range and that each call’s “imprint” or audio signature was very similar and could be easily recognized. You can listen to the finches calls that were recorded by the RTL-SDR in the audio file below.
Looking at the Finch calls’ “imprints” in the audio spectrum waterfall in HDSDR
Mario writes that this can be done with any commercially available parabolic microphone, but if you want to know how to build your own wireless parabolic microphone then check out Make magazine’s article on Mario’s work. The article shows in detail how to build a parabolic microphone out of a squirrel baffle (a bowl shaped piece of plastic that prevents squirrels from eating bird feed), a Velleman Super Stereo Ear kit (microphone + amplifier kitset) and a standard wireless FM transmitter. Mario writes that the audio range of his home made parabolic mic is about 100 feet (30 meters). A video from Make magazine showing Mario’s home made parabolic mic is shown below.
Over on YouTube a talk about decoding water and electricity usage meters with an RTL-SDR has been uploaded from the 2015 Camp++ conference in Hungary. The presenter, Stef writes:
Budapest public utilities started to roll out some new metering devices for water and heating (at least in my block). The plumbers who should install these could not tell me about the privacy protections considered, as I was a bit worried about the things leaking information over radio-waves, so I built a radio and reversed the messages.
The talk shows how the presenter was able to reverse engineer the FSK wireless protocol of his heating meter with help from some patent information that he found on the web. Using a GNU Radio flow graph that he created he was able to extract information such as total energy consumption and temperature readings.
Being a security themed conference, the presenter also discusses some of the security risks associated with wireless meters such as whether or not the meter can be used to detect if someone is currently at home.
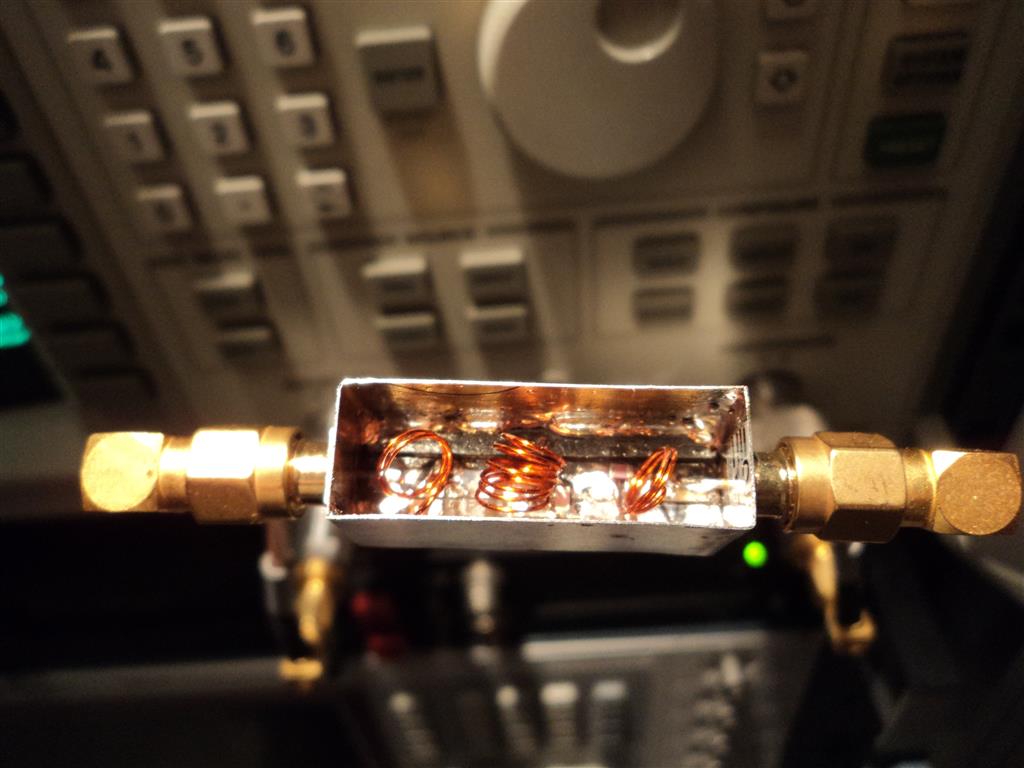
The BA5SBA direct sampling kit is a kitset PCB that combines with a standard (included) RTL-SDR dongle in order to enable the direct sampling mod. The direct sampling mod is a hardware modification that can be applied to any RTL-SDR dongle in order to enable HF reception capabilities. The BA5SBA kit improves upon some of the problems with the direct sampling mod by adding additional features such as a low pass filter to block broadcast FM interference, a matching transformer to better match the RTL2832U’s input impedance, extra power supply filtering, SMA connectors for HF and VHF/UHF (UV), an aluminium case and a bias tee.
The BA5SBA direct sampling RTL-SDR can be bought as a kit that requires hand assembly for about $30 USD or as a fully assembled product for about $50 USD. It is usually listed on Amazon and eBay as a “100KHz-1.7GHz full band UV HF RTL-SDR USB Tuner Receiver/ R820T+8232 Ham Radio”
Recently, RTL-SDR.com reader Simon (MW0SGD) bought one of these kits and discovered that the English instructions were very rare and hard to come by. We’ve decided to post these English instructions here for any future buyers who may search for them as this post should show up on Google. Simon also notes that “most of the instructions on the internet wind the inductors on a 5mm former. This says to use a 3mm one, which I did and it works ok.”
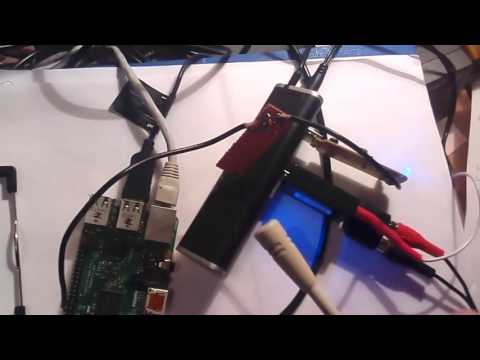
Recently RTL-SDR.com reader Slaven Krilic wrote in to use to announce his project called MNM4SDR which stands for Monitoring Network Manager for RTL-SDR. The software allows you to set up a remote Raspberry PI embedded computer with an RTL-SDR dongle attached and access it remotely through a Windows PC GUI.
Unlike other server software such as rtl_tcp, raw IQ data is not sent over the network. Instead audio is first compressed in lossless FLAC or OGG formats. This allows you to use much slower network or internet connections. The software also allows you to collected RF scans over a large bandwidth in a similar way to rtl_power.
The software works over an SSH connection and requires that you have RTL-SDR and VLC set up on your Rasperry Pi first.
Rtl_power is a tool that allows you to create wide band signal strength heat maps over a long length of time. It works by very quickly hopping across the spectrum, capturing the RTL-SDR bandwidth of about 2 MHz at a time, and then displaying it on a heat map. This is useful for seeing what frequencies are active and at what times.