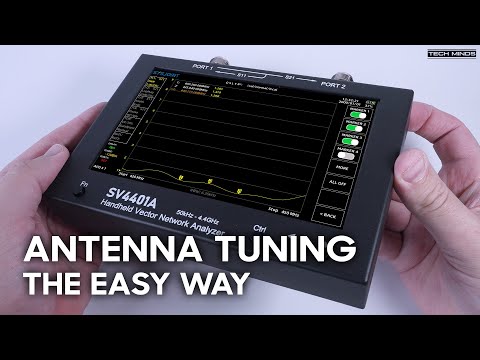
In one of his recent videos, Matt from the Tech Minds YouTube channel reviews the SV4401A Vector Network Analyzer (VNA). A VNA is a powerful tool that can be used for analyzing and tuning antennas, as well as other RF components such as filters and cables.
Typically we recommend the NanoVNA V2 and Nano V2 Plus 4 as low-cost VNA's that most hobbyist users will be happy with. However, the SV4401A comes with a much larger 7-inch touch screen, a nicer UI, built-in signal generator, and large frequency range spanning from 50 kHz - 4400 MHz. The price is similar to that of the Nano V2 Plus4, coming in at US$322, versus $299 for the NanoVNA V2 Plus4.
The ONLY Vector Network Analyzer I Will EVER Need - SV4401A
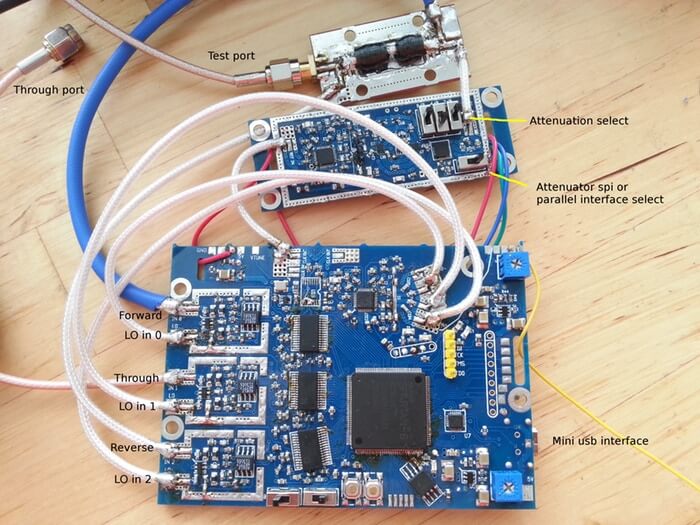
Over the course of 2020 Tomaž Šolc from Avian's Blog has been slowly working on an RTL-SDR based vector network analyzer system. The system currently consists of an ERASync Micro signal generator, a custom time multiplexing board, an RF bridge, an RTL-SDR with E4000 tuner and some custom software.
A vector network analyzer allows the measurement of antenna or coax parameters such as SWR, impedance, phase and loss. It can also be used to characterize and tune filters. In his last post Tomaž copmares his RTL-SDR based system with a NanoVNA-H and shows similar results, confirming that the system is working.
Recently he's also swapped out the RTL-SDR for a HackRF which allows him to make measurements up to 6 GHz. Although he notes that the dynamic range quickly degrades after 3.5 GHz presumably due to connector and phase noise issues.
The entire post chain is a good read to see how he ended up designing the system, and we link to each post below for easier reading:
Over on his channel popular electronics YouTuber Andrea Spiess has uploaded a tutorial video showing how to properly use a NanoVNA V2. The NanoVNA V2 is a vector network analyzer which can be used to measure and tune things like antennas, filters and cables. In the video Andreas aims to explain the differences between the VNA, Spectrum Analyzer and VSWR meter, what you can measure with a VNA, how to read the VNA results, the limitations of cheap VNAs, why and how to calibrate, and a review of the overall quality.
Andreas explains these concepts in a very easy to understand way, so this video is a great start if you've ordered a NanoVNA.
#359 How to properly use a NanoVNA V2 Vector Network Analyzer & Smith Chart (Tutorial)
Over on his channel Tech Minds has uploaded a new video where he tests the N1201SA / PS100 vector impedance analyzer. This is a US$160 antenna analyzer from China that allows you to measure the VSWR of your antennas. In the video Tech Minds explains a bit about VSWR, and goes on to show the unit in action on several of his antennas.
Compared to the NanoVNA V2 these units seems less useful with a smaller frequency range, and are also more expensive. The unit is also only 1-port, meaning that it can only do S11 measurements and cannot analyze devices like filters. But on the other hand it does come in a metal case with a battery and has a fairly easy to understand and use interface.
Easily Check Your Antennas Tuning - VNA N1201SA / PS100
As Outernet is currently having a sale and selling their their moRFeus product at only US $99 (see next post for details - or simply use coupon code "rtlsdrblog" on their checkout - valid until Saturday 09 May 18), we thought that we'd show an interesting use for the moRFeus when combined with an RTL-SDR.
Outernet's moRFeus is a signal generator and frequency mixer that can be controlled either by it's built in LCD screen, or via software on a Windows or Linux PC. It can generate a clean low phase noise tone anywhere between 85 to 5400 MHz. Because it can be computer controlled it is possible to use moRFeus as a tracking generator for characterizing filters and measuring antenna SWR. A tracking generator is just a signal generator that can be set to output at the same frequency that the measurement receiver is tuned to.
In the past we've posted a tutorial showing how to use a wideband noise source for measuring filters and antenna SWR. However, if available, a tracking generator is usually preferred over a noise source. A wideband noise source outputs high power at all frequencies, and so can easily overload an RTL-SDR causing reduced dynamic range and accuracy in measurements. This is especially the case when measuring bandstop filters as they pass all frequencies, apart from a small blocking band. Since so much noise gets through to the dongle, dynamic range is reduced.
This post shows how to use the moRFeus as a tracking generator together with an RTL-SDR for making RF measurements. This could be called a scalar network analyzer. The set up uses GQRX and a Python script, but in the future it is possible that someone may develop a standalone app.
Since the output of the moRFeus is quite strong, an attenuator is required to keep signal levels low enough to not overload the RTL-SDR.
The cheapest RF bridge we've found is available on eBay for about $7. With an RF Bridge you'll need a 50 Ohm dummy load as well to connect to the 'REF' port. Directional couplers seem to work more accurately however, and second hand minicircuits ones can often be found on eBay. A $2 TV 'tap' is also a directional coupler, and may also work, although we have not tested this.
Software Setup
In this tutorial we're using the method first described by 'LamaBleu' in his post to the Outernet forums. The method uses Linux and involves reading power levels from the RTL-SDR by using GQRX and it's remote telnet connection capabilities. The telnet command "F freq" can be used to change frequency in GQRX, and the command "l" can be used to read out the current power level in dbFS.
To control moRFeus we use Outernet's official "morfeus_tool", which is a command line based tool.
A basic Python script was written to set the frequency in moRFeus and GQRX at the same time. After a 500 ms settling time the power level is measured and recorded in a CSV file, then the script iterates to the next frequency. We iterate at 1 MHz intervals.
If you have a moRFeus and want to try this project out, copy and paste the script from pastebin, and name the file morfeus_scalar.py. Place the morfeus_scalar.py file and the morfeus_tool_linux_x32 tool into the home folder.
To get the software started:
Open GQRX and connect the dongle and required RF components for the test (shown below).
Set the RTL-SDR gain to zero or just low enough so that the signal doesn't cause overload (moRFeus signal levels are fairly high).
In the GQRX GUI ensure that the "Remote control via TCP" button is pressed in. (Looks like two computer screens).
Edit the Python script and choose the frequency range that you'd like to scan by setting variable FREQ_MIN and FREQ_MAX.
In a terminal run "sudo python morfeus_scalar.py".
When the script completes you'll have a file "out.txt" which is a CSV file of frequency and signal power levels.
Characterizing Filters
To characterize a filter (find the response of a filter) simply connect the system like so:
moRFeus Filter Test
But first connect just the moRFeus, attenuator and RTL-SDR together.
In GQRX increase the gain until just a few dB before the RTL-SDR overloads and starts showing signal images. This will maximize the available dynamic range.
Run an initial calibration scan with morfeus_scalar.py. Save the results in out.txt into a spreadsheet.
Connect the filter in the RF chain, and then run a second scan with morfeus_scalar.py. Save the results into another column in the spreadsheet.
Subtract the calibration scan results from the filtered results. Plot the resulting values using the spreadsheet software. This will show the response of the filter.
Thanks to Cary Wang for submitting news about his new Kickstarter for a $200 open hardware VNA called the xaVNA. The xaVNA is PC USB based, has a guaranteed frequency range of 140 MHz to 2.5 GHz (typical 137 MHz - 3.5 GHz), and is supposed to be a lower cost alternative to other low end PC based VNAs such as the PocketVNA and miniVNA Tiny. In addition to the lower cost, the xaVNA is advertised as being superior to its competitors as it has less trace noise and no warm up time is required, as well as the hardware and software being open source.
A VNA (Vector Network Analyzer) is a tool that can allow you to easily measure things like the SWR curve of an antenna, the characteristics of a filter, or the loss of a coax cable for example. So it is a very useful tool to have around if you are building home brew antennas or filters for your SDRs. Compared to a standard antenna analyzer, a VNA gives you complex impedance/phase information as well, making it possible to design better circuits and antennas.
Currently the closest competitors on the market are other PC based VNA's like the PocketVNA ($430) and the miniVNA Tiny ($580). The main advantage of the competitors so far is that they go down to the HF frequencies, but a stretch goal of the Kickstarter is to create an xaVNA that goes down to 10 MHz.
At the moment they only have a functional prototype with the second iteration soon to be ready. The delivery date of a completed unit is expected to be around April 2018. But as with any crowdfunded project remember to only back the project if you are willing to lose your money as there is no guarantee that a product will actually be delivered on time, or even delivered at all.
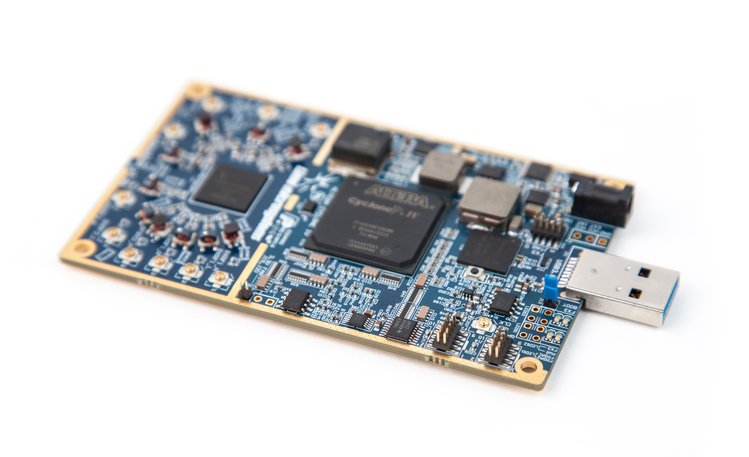
The LimeSDR is a new transmit capable software defined radio with a 100 kHz – 3.8 GHz frequency range, 12-bit ADC and 61.44 MHz bandwidth which is currently seeking crowdfunding. At the time of this post there is about four days left to reach the $500k goal, and it is only 80% funded. To try and reach their funding goal they have released another batch of discounted units which cost only $249 USD. After the crowd funding campaign the price will rise to $289/$299 USD. If the LimeSDR is not funded in time, they write that the project will unfortunately be put on hold and it’s future may be uncertain. We believe that this product is shaping up to be a very good TX/RX capable SDR, like the HackRF and bladeRF, but much better overall and for the same or even lower price.
Recently they also released some new updates that show off some LimeSDR features. In a post previously featured on our blog beta tester Alexandru showed how he was able to get the LimeSDR to transmit DVB-S2 HDTV. In later updates they showed how the LimeSDR can be used to:
Control LoRa based IoT devices. In this post they used the LimeSDR to demonstrate how it can be used to transmit to, receive and simulate IoT devices running the popular LoRa wireless protocol
Create a 10 MHz LTE cellular site. In this post they also show a mobile phone connecting to the cell site and using LTE mobile internet at 20MSPS.
Create a Vector Network Analyzer. With the help of a directional coupler the LimeSDR can also be turned into a Vector Network Analyzer to measure parameters such as gain, insertion loss, return loss and VSWR.
Build a remote radio head. By mounting the LimeSDR near the antenna and streaming the data back over an IP link, coax feed losses can be eliminated.