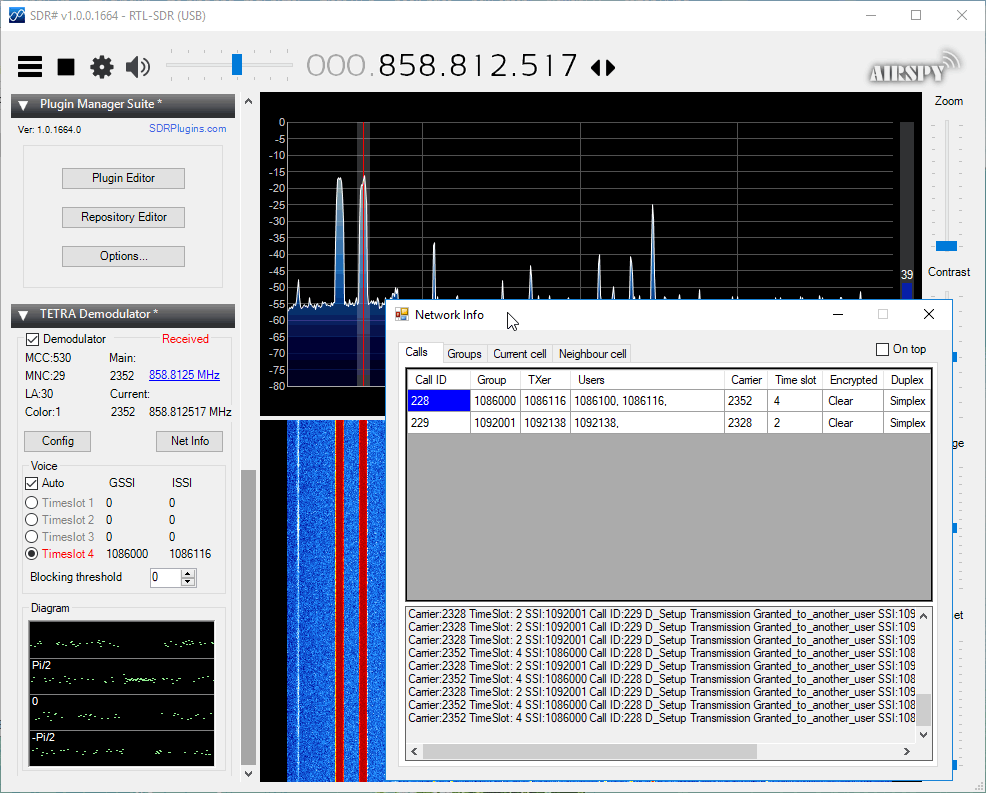
Eddie Mac has just released another useful plugin for SDR# called "Toolbar Plugin". This is an accessibility improvement plugin that simply puts many of the plugin controls on the SDR# toolbar. This eliminates the need to constantly open and close plugin panels on the left.
The plugin includes controls for setting the demodulation mode, changing the FFT display settings, a direct frequency entry text box, frequency stepper buttons, an SNR level meter, squelch controls, analog/digital preset buttons, screen grabber controls, and time slot selectors for the TETRA decoder plugin. The analog/digital preset buttons are quite interesting as they allow you to set presets for either analog or digital signals. For example for a digital signal you could set the preset to use NFM demodulation, and to launch the DSD+ application automatically.
More information about this and Eddie's other plugins can be found on his site, and on this forum post.
Some toolbar plugin selections.Analog/Digital Preset Settings
PiAware Radar is a Python script that connects to your PiAware server and uses the received ADS-B data to display a familiar radar-like display (green circle with rotating radius, and aircraft displayed as blips). PiAware is the software used to take ADS-B data from an RTL-SDR dongle running on a Raspberry Pi and feed flightaware.com. A radar-like display is probably not very useful, but it could be used to set up an interesting display that might impress friends. Over on his blog IT9YBG has uploaded a tutorial that shows how to set PiAware Radar up on a Raspberry Pi.
Also on his blog IT9YBG has uploaded another tutorial that shows how to set up 1090XHSI, which is a program that displays an 737 aircraft cockpit simulation using live ADS-B data. The ADS-B data updates the instrument displays in real time, giving you a view of exactly what the pilots might be seeing on their dashboard of their aircraft. We posted about this software in the past, but IT9YBG's tutorial helps make it much easier to set up.
PiAware Radar1090 XHSI 737 Cockpit Simulation from ADS-B Data
In early February we posted news about the release of a program called GridTracker. GridTracker is a live mapping program for WSJT-X which is a software decoder for low power weak signal ham communications modes such as FT8, JT4, JT9, JT65, QRA64, ISCAT, MSK144 and WSPR. Although these are low power modes, the protocols are designed such that even weak signals can potentially be received from across the world. Mapping the received signals can be interesting as it may give you an idea of current HF propagation conditions.
Over on YouTube radio content creator Techminds has recently started a series that shows how to decode various signals using an SDR such as the SDRplay RSP1A. The first video explains what FT-8 is and shows how to decode it using the WSJT-X software. FT-8 is a modern digital HF ham mode that is designed to be receivable even in weak signal reception. However, the amount of information sent in a FT-8 message is small, so it is not possible to have a full conversation, and you can only make contacts.
In his second video Tech Minds explains RTTY and also shows how to decode it. RTTY is another much older mode that is used by the military as well as hams. To decode it he uses Digital Master 780 which is a program included in the Ham Radio Deluxe software.
Decoding FT-8 With WSJT-X And A SDRplay RSP1A SDR Receiver
Decoding RTTY With Digital Master And A SDRplay RSP1A SDR Receiver
Akos, author of his blog 'Radio for Everyone' has recently reviewed our new RTL-SDR.com Triple Filtered ADS-B LNA. In the review he compares our ADS-B LNA against another external ADS-B LNA by Uputronics and against the FlightAware Prostick and Prostick+. The tests use the external LNA's plugged directly into the dongle in order to more fairly compare against the FlightAware dongles which have LNA's built in to the dongles themselves. From his results the RTL-SDR.com ADS-B LNA appears to have near identical results with the Uputronics LNA, and slightly better results compared to the FlightAware dongles. Akos has not yet tested the main use-case of the LNA, which is to use it at the end of a run of coax cable, however he plans to do this in a future test. Also in his second post Akos shows how to build a simple amplified Coketenna using our ADS-B LNA.
On the subject of ADS-B performance we note that there are two ways to set up a system for optimal reception (apart from the antenna). The first is to place the computing and radio devices (such as a Raspberry Pi and RTL-SDR) as close to the antenna as possible (leaving a ~1m coax run to avoid local interference from the Pi). For this type of setup it is cheaper to use a FlightAware Prostick Plus RTL-SDR dongle since this has an ADS-B LNA built into it. However, the disadvantage is that you may need to set up a Power over Ethernet system, or find a remote power source, and possibly place the Pi in a difficult to service location such as in an attic or up a mast.
The second option is to use an external ADS-B LNA close to the antenna, and run coax down to the computing device which is positioned in a more accessible location. The LNA will negate any losses in the coax cable, and with high enough gain on the LNA, using quality coax is not such a high requirement since those losses are negated by sufficient LNA gain. Both methods will yield similar excellent performance.
Thanks to Alex for submitting news about his new SDR# plugin called "SDRSharp.GpredictConnector". This plugin allows SDR# to interface with GPredict which is a tool used for tracking the orbit of satellites. Just like with the DDE Tracking plugin and the Orbitron satellite tracking program this plugin could be used to automatically tune SDR# to the frequency of a passing satellite using GPredict. It should also be able to compensate for any doppler shift frequency offset.
To use with SDR# simply download the zip file and move the .dll file into the SDR# folder. Then add the 'magicline' to the plugins.xml file using a text editor. In GPredict you can then add a radio interface from the preferences, and then use the 'Radio Connect' interface to connect to the plugin.
Connecting to GPredict using the GPredictConnector SDR# Plugin
Welle.io is a Windows/Linux/MacOS/Android/Raspberry Pi compatible DAB and DAB+ broadcast radio decoder which supports RTL-SDR dongles, as well as the Airspy and any dongle supported by SoapySDR. It is a touch screen friendly piece of software which is excellent for use on tablets, phones and perhaps on vehicle radio touch screens.
DAB stands for Digital Audio Broadcast and is a digital signal that is available in many countries outside of the USA. The signal contains digital broadcast radio stations, and is an alternative/replacement for standard broadcast FM.
Early last year we posted about Welle.io a couple of times, but now the software has reached maturity as version 1.0 has just been released. Author Albrech writes to us:
We fixed a lot of bugs again and added the translation to Hungarian, Norwegian, Italian and French.
Binary packages are available for Windows, Linux and Android (APK and Play store). The macOS support is possible via Homebrew and we now that welle.io runs also on a Rapsberry Pi 2 and newer.
For questions and support please feel free to use the new forum (https://forum.welle.io).
A Discone is a type of antenna that is designed to be resonant over a wide range of frequencies. Most antenna designs only really receive well on a few resonant frequencies, but a Discone is resonant over a much wider frequency range. This makes it a good partner for RTL-SDR and other SDR units as many SDRs tend to have wide tunable frequency ranges. With a wideband antenna like a Discone connected to an RTL-SDR one can scan over the almost entire tunable frequency range without needing to change antennas for each band. The drawbacks to a Discone however is that the antenna gain is not very high, and that it makes the SDR more susceptible to out of band interference. They also tend to be fairly expensive and difficult to build.
The Discone antenna is remarkable in that it is capable of receiving and transmitting over a wide range of frequencies with good matching. Because of this, it is a good match for SDR receivers such as the popular RTL-SDR sticks.
The only really tricking thing about making a discone is that the disc has to be balanced at the very top of the cone, which is mechanically awkward.
The two parts here allow the cone to be solidly clamped and provide an adequate base for the disk. There also two holes for bring the coax centre and braid out to the disc and cone. The base part has a socket at the bottom for 25mm (1 inch) plastic conduit for mounting
This antenna illustrated is designed for 400MHz and up, and as such transmits well on the 70cms amateur band, US and UK PMR channels and 23cms. It also receives aircraft ADS-B signals very well. I used .3mm plastic sheet for the cone and 2mm plastic for the disc, and then covered them with aluminium weatherproof tape. Be sure to check for continuity across the tape stripes.
The screenshot is of a calculator by VE3SQB which can be downloaded from http://www.ve3sqb.com/ if you want to make attenna's for other ranges.
A 3D Printed Discone
If you're interested in building wideband antenna there is also the planar disk antenna (pdf) which can be built out of pizza pans.