Online 101 Course on RTL-SDR, DSP and MATLAB 2nd Edition Starting Soon

Back in September 2017 we posted about the start of a MOOC (massive open online course) run by Juan Moreno and some collegues from the Technical University of Madrid that aims to introduce students to DSP techniques and MATLAB using an RTL-SDR. The original course has already finished, but Juan has written in noting that the second run of the course is scheduled to start on March 12 2018. The course if free and if you are interested be sure to register on their website. Note that while the registration forms are in Spanish & Portuguese, the course itself is presented in English.

One useful improvement from the first course is that Mathworks, the company behind MATLAB have agreed to provide a free MATLAB licence to all students for the duration of the course. This should significantly lower the cost barriers to learning.

The course blurb reads:

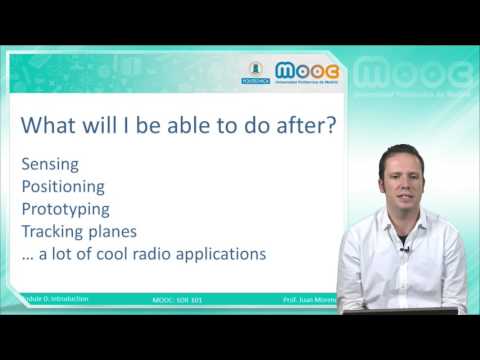
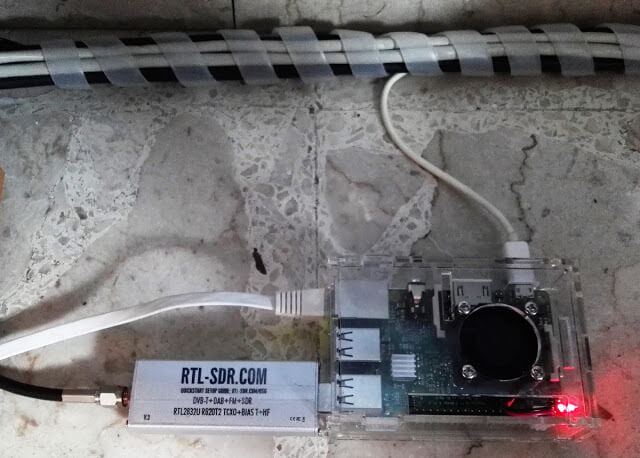
SDR is a reality around us. It is present in a lot of systems everywhere and is a versatile technology which can be used for many things (not only academics and industrial). The purpose of this course is to introduce students into general-purpose SDR tools. The SDR hardware platform chosen for this course is the RTL-SDR. It is worldwide available, it’s cheap ($15) and there is a lot of help in the Internet. But, as far as we know, there is no other MOOC focused on an introduction to SDR as this MOOC. Here we will not only learn about SDR but also a lot of related areas like antennas, digital signal processing, radio frequency and communication electronics.

Receiving WSPR with an RTL-SDR V3 and with Automatic Band Changing

RTL-SDR V3 + Raspberry Pi WSPR Receiver

WSPR (pronounced "Whisper") is short for Weak Signal Propagation Reporting, and is a HF ham mode typically run on very low power levels such as 1W. The data from WSPR reception can be used to determine how good or bad HF propagation is currently around the world as each WSPR message contains a callsign, 6-digit locator and the transmit power level used. Received messages are all reported to the internet and can be viewed on an online map at http://wsprnet.org/drupal/wsprnet/map.

With an RTL-SDR V3 running in direct sampling mode it is possible to receive and decode these messages on a Raspberry Pi 3 using the WSPRD software.

Over on his website IT9YBG has uploaded a tutorial for a method that allows the WSPRD software to automatically change bands depending on the time of day. The method simply uses the crontab in Linux to automatically run a script that stops and then restarts WSPRD on a new frequency at certain times of the day. This is useful because different WSPR bands tend to become active at different times of the day due to changing HF propagation conditions.

WSPR messages received from all over the world.
WSPR messages received by IT9YBG from all over the world.

A Guide to Using SDR-Console V3 for Accessing and Creating Remote Servers

Jon Hudson, head of marketing at SDRplay has recently released a helpful tutorial that shows how to access remote servers in SDR-Console V3, and also how to set up your own server too. As you may already know, SDR-Console V3 provides a remote server platform which allows you to access all sorts of SDR hardware remotely over a network connection or over the internet. Some SDR hardware owners even opt to share their radio hardware publicly over the internet for anyone to access. The video description reads:

This video is a screen-by-screen guide to both accessing, and setting up your own, remote SDR radio using the new (Feb 2018) SDR Console V3 software from SDR-Radio. Although the guide uses an RSP2 from SDRplay, this will work with all the popular SDRs

Please note - you need to have a good internet connection since (unlike in V2), the entire I/Q data is being sent over the internet. This also limits how much visual bandwidth you are can see at any one time.

Links referenced in this video:
www.sdr-radio.com
http://www.sdr-radio.com/Software/Version3/Server
www.sdrplay.com
More videos on https://www.youtube.com/c/SDRplayRSP

SOME IMPORTANT WARNINGS IF YOU ARE ADDING YOUR OWN SDR!
Be careful not to plug multiple SDRs into a single USB2 socket - for multiple SDRs, you may need a powered hub ( like this: https://www.amazon.co.uk/UGREEN-Adapt... )

Once you are up and running - please go to http://www.sdr-radio.com/Software/Ver... and view your listing - if there is a yellow triangle, then you are not accessible outside your own firewall - attention is needed! Just because you can access it on your own LAN doesn't mean it's accessible via the internet!!!

The RSP family of SDRs from SDRplay cover 1kHz to 2 GHz with no gaps and give up to 10MHz spectrum visibility.

Jon's video first shows how to use SDR-Console V3 to access those publicly shared SDR radios over the internet. The second part of the video demonstrates how to set up your own server that you can use remotely for personal use, or to share over the internet.

The SDR-Console V3 server accepts various kinds of SDR hardware including RTL-SDR, Airspy, SDRplay, HackRF, Elad, LimeSDR and many more SDR units so this is a good way to explore various types of hardware, or simply to explore signals from different areas around the world.

SDR-Console remote access for SDR Radios

Decoding Morse Code and Weather Faxes with an RTL-SDR

Over on the YouTube channel Tech Minds the presenter has uploaded two new RTL-SDR based tutorial videos. The first video gives a bit of background and shows how to decode Morse code with an RTL-SDR. He uses SDR-Console V3 and the Morse code decoder CwGet. With this he's able to decode a few calls from some ham radio operators.

In the second video Tech Minds shows how to decode Weather Fax with the RTL-SDR. Weather faxes are images of weather charts sent over HF frequencies. In the video he uses SDR-Console and SeaTTY to do the decoding and demonstrates reception of an example fax.

The Real Matrix - Decoding Morse Code Using An RTL SDR Receiver

Receiving HF Weather FAX Using An RTL SDR Receiver

The GNU Radio Signals Challenge is now Live

GNU Radio have today released their latest 'Signal Challenge'. This is an online competition that contains three digital signal processing related problems. They write:

At 1222 EST on 21 Feb 2018, we posted a new signals challenge! There are *three* different challenges hidden in this signal capture, and the solution to each is a text message. One is on the easier side, and the two others are more advanced. If you believe you have found a solution, DM the answer to @gnuradio on Twitter or e-mail [email protected]!

The first THREE people to solve each of the three challenges will be declared winners. There will be nine winners in total. One person can only win one challenge; if correct solutions are submitted for multiple challenges, the first will count as the win.

The winners will receive honor and glory, plus some awesome GNU Radio stickers!

Good luck, and Happy Hacking!

https://drive.google.com/file/d/1-bAdy_egdyb6xPA8rrvf32WgnDTSI29P/view?usp=sharing

More information and any updates can be found on their Twitter @gnuradio. Good luck to anyone participating!

LimeSDR Mini Unboxing and Initial Review

The LimeSDR Mini has now started shipping out to backers, and we received our unit just last week. The LimeSDR Mini is the smaller version of the full sized LimeSDR which was released early last year in 2017. The standard LimeSDR has a frequency range of 100 kHz – 3.8 GHz, bandwidth of up to 61.44 MHz, 12-bit ADC and 2 x 2 RX/TX channels. In comparison the new LimeSDR mini has a slightly restricted frequency range of 10 MHz – 3.5 GHz, and half the maximum bandwidth at 30.72 MHz. The mini also only has 1 x 1 TX/RX channels. The price is however much less coming in at US$139 for the mini and US$299 for the standard LimeSDR.
 
In this post we’ll give a brief unboxing and review of the LimeSDR Mini. If you’re interested take a look at our previous unboxing and initial review of the standard LimeSDR as well.

Unboxing

The LimeSDR Mini came in a small black box inside an anti-static bag. No accessories like antennas are included in the package. The PCB comes without any enclosure, but an enclosure can be ordered as an additional extra. The size of the PCB is similar to an RTL-SDR, but a little wider. The RF sensitive components are covered with a shielding can. Removing the can reveals the main Lime System RF chip, the LMS7002M, as well as several RF transformer matching circuits.
 
One end of the PCB has a standard USB-A connector, whilst the other end has two SMA ports, one for receiving and the other for transmitting.
The LimeSDR Mini
The LimeSDR Mini


Continue reading

SDR# Plugin: FFT Window Screen Grabber

Recently Eddie MacDonald has been pumping out simple but useful plugins for SDR# including the SDR# Dark Mode and Visual Tuner Knob plugins. Recently he released a new plugin called "FFT Window Screen Grabber". This plugin simply helps you to easily take a screenshot of the FFT and waterfall displays in SDR#. It could be a useful plugin if you are constantly finding interesting signals that you want to document, or upload to sigidwiki.com.

The plugin can be downloaded from his thread in our forums. Note: Updated plugins now available at https://sdrplugins.com.

FFT Window Screen Grabber example screenshot

Outernet 3.0: Implementation Details and a 71,572km LoRa World Record

Outernet Dreamcatcher Board running with an LNB
Outernet Dreamcatcher Board running with a cheap satellite TV LNB

Outernet 3.0 is gearing up for launch soon, and just today they've released a blog post introducing us to the RF protocol technology behind the new service. If you weren't already aware, Outernet is a free satellite based information service that aims to be a sort of 'library in the sky'. Their aim to to have satellites constantly broadcasting down weather, news, books, radio, web pages, and files to everyone in the world. As it's satellite based this is censorship resistant, and useful for remote/marine areas without or with slow/capped internet access.

Originally a few years ago they started with a 12 GHz DVB-S satellites service that gave 1GB of content a day, but that service required a large dish antenna which severely hampered user adoption. Their second attempt was with an L-band service that only needed a small patch antenna. This service used RTL-SDR dongles as the receiver, so it was very cheap to set up. Unfortunately the L-band service had a very slow data rates (less than 20MB of content a day), and leasing an L-band transmitter on a satellite proved to be far too expensive for Outernet to continue with. Both these services have now been discontinued.

Outernet 3.0 aims to fix their previous issues, giving us a service that provides over 300MB of data a day, with a relatively cheap US$99 receiver that is small and easy to set up. The new receiver uses a standard Ku-Band LNB as the antenna, which is very cheaply available as they are often used for satellite TV reception. The receiver itself is a custom PCB containing a hardware (non-SDR based) receiver with a LoRa decoder.

LoRa is an RF protocol that is most often associated with small Internet of Things (IoT) devices, but Outernet have chosen it as their satellite protocol for Outernet 3.0 because it is very tolerant to interference. In Outernet 3.0 the LNB is pointed directly at the satellite without any directive satellite dish, meaning that interference from other satellites can be a problem. But LoRa solves that by being tolerant to interference. From the uplink facility to the satellite and back to their base in Chicago the LoRa signal travels 71,572 km, making it the longest LoRa signal ever transmitted.

According to notes in their forums Outernet 3.0 is going to be first available only in North America. Europe should follow shortly after, and then eventually other regions too. When ready, their 'Dreamcatcher 3.0' receiver and computing hardware is expected to be released for US$99 on their store. You can sign up for their email list on that page to be notified upon release.

Also as a bonus, for those interested in just LoRa, the Dreamcatcher 3.0 is also going to be able to transmit LoRa at frequencies anywhere between 1 MHz to 6 GHz, making it great for setting up long range LoRa links. This might be an interesting idea for hams to play with.

The Outernet 3.0 'Dreamcatcher' Receiver.