Radio Related News Occurring in the Russia-Ukraine Conflict
In the current Russia-Ukraine conflict we've seen several noteworthy radio related events occurring over the last few days, mostly throughout Twitter.
Russian HF Bomber Communications
As mentioned in the previous post it has been found that since the start of the invasion, Russian Strategic bombers have been very active on USB voice at 8131 kHz. We've even seen a security firm predict air raid siren activations based on increased bomber HF activity.
Russian Military HF Frequencies Jammed by Activists
It has been observed that several Russian military HF stations including the famous UVB-76 Buzzer have been jammed with either the Ukrainian national anthem, or various meme-type songs. It is likely that these stations are being jammed mostly by civilian activists, or members of the activist hacker collective known as Anonymous, rather than any military organization.
The UVB-76 Buzzer is a famous and mysterious numbers station that plays a buzzing sound and sometimes voice. It can be received from all over the world. Via civilian investigations, and through the use of the KiwiSDR TDoA direction finding functionality, it has been found to be transmitted from a location just north of St. Petersburg, and is assumed to be a military signal of some sort.
Russian Military's radio station UVB-76, also known as "the buzzer", has been Neutralised. We are Legion ! We do not Forgive ! We do not Forget#UkraineWar #ukraine #Russia 🇺🇦. Mr Putin are you listening ? pic.twitter.com/8oNOAg5phB
— Anonymous (@AnonymousUK2022) February 27, 2022
Russian Military Comms Buzzer on 4625USB getting jammed by #JamesBond Music #kiwisdr #SDRHungar #ukraine @NewsKlw @MilcomMP @#UkraineRussiaWar pic.twitter.com/3uJtKYiupg
— aerobatmike (@aerobatmike) February 27, 2022
The World has gone MAD, someone playing Blondie's 'Atomic' song over the top of Russian Military Western District 4.625 MHz USB HF frequency aka S28 The Buzzer https://t.co/8odXoXLlsa pic.twitter.com/nsBKZUbQL1
— SOE Spirit of Resistance 🇺🇦🌻🇬🇧🇳🇴🇺🇸🇵🇱 (@SOE_Spirit) February 27, 2022
Radio pirates continue their nightly jamming of Russian army communications in #Ukraine with the latest hits , a new version of pig sounds. #СлаваУкраїні! #ГероямСлава ! pic.twitter.com/nAcmC5R3An
— Tom Creedon (@n300trg) February 28, 2022
We've also seen waterfall text based jamming:
暗号放送じゃないかといわれている、ロシアのブザー放送UVB-76。ふと、どうなってるか気になって聴いてみたところが、第三者にジャミングされまくってる模様。
— よねすけ西日本 (@yonesukesuke) March 1, 2022
ソナーにメッセージ残したり音楽流したり。 pic.twitter.com/FUprhBZjea
Using KiwiSDRs you can listen to these jammed stations yourself remotely through public internet connected SDRs in Europe. Some known frequencies are listed here and here.
We note that there have also been reports about fake Russian frequencies being posted on the internet.
It has come to my attention that false Russian Military radio frequency channels are being posted around the internet. I would suspect Russia did this to try to confuse those who would want to intercept their movements.
— Anon 🏴 (@DeepNetAnon) February 27, 2022
These KHz are fake (and most are China controlled): pic.twitter.com/oPCXS11VBm
We assume most jamming is happening from outside the warring countries, and it is unknown how far the jamming signals extend onto Russian or Ukrainian territory, or how much of an impact they are having on Russian operations.
Russian State TV Hacked
Twitter account Anonymous TV has reported hacking Russian state TV to show citizens what is actually happening in Ukraine. It's unknown if this was a hack via TV transmissions being overpowered by another signal, or a computer hack.
JUST IN: #Russian state TV channels have been hacked by #Anonymous to broadcast the truth about what happens in #Ukraine. #OpRussia #OpKremlin #FckPutin #StandWithUkriane pic.twitter.com/vBq8pQnjPc
— Anonymous TV 🇺🇦 (@YourAnonTV) February 26, 2022
Starlink Activated in Ukraine
A few days ago Elon Musk and SpaceX activated their Starlink wireless satellite internet system in Ukraine, and have sent over a shipment of ground terminals. This is useful as even if the local wired internet were to be destroyed, or be censored by Russia, the Starlink system will be able to connect to uncensored internet as long as there is power.
Starlink — here. Thanks, @elonmusk pic.twitter.com/dZbaYqWYCf
— Mykhailo Fedorov (@FedorovMykhailo) February 28, 2022
An account of a Ukrainian engineer and RF hobbyist recently Tweeted his success at getting his Starlink system up and running from his home in Ukraine. We decided not to link to his Twitter account in this post, just in case he needs to delete his account for safety in the future as he appears to be very close to the bombing.

Viasat Satellite Service Experiences Cyberattack and Outages
Viasat, another provider of satellite internet services in Ukraine region appears to have been subject to a DDOS cyberattack, causing outages to it's satellite internet service in the European region.
SSTV Activism Seen On Russian Meridian Satellites
Meridian satellites are a "family of telecommunications satellites for civil and military use developed by Russia in the 2000s placed in a Molniya Orbit" (Wikipedia). A tweet by Scott Tilley @coastal8049 has noted that they have seen reports of SSTV activist activity occurring on the 484 MHz Meridian transponders.
I received an anonymous report today of SSTV activity on the Russian MERIDIAN satellite's ~484MHz transponders. Uplink for these transponders is in the amateur 70cm band. This thread will discuss the legality and how to avoid interference. 1. pic.twitter.com/j3gUWAZXJ1
— Scott Tilley 🇺🇦 (@coastal8049) March 1, 2022
Scott Tilleys Twitter feed also shows some interesting other pieces of news and information, including frequencies and orbits of Meridian satellites, images of a destroyed Russian command and control satellite communications vehicle, and links to now deleted, but Google cached pages with information about Russian satellite communication systems.
APRS Activism against Russia causes APRS-IS DDOS
Amateur radio operators can use a system called APRS to communicate with text and packet data globally through internet connected radio repeaters. A few days ago it appears that anti-Russia activists flooded the APRS-IS (Automatic Packet Reporting System-Internet Service) system with bogus packets targeting Russian coordinates, which unintentionally resulted in a denial of service (DOS) event on APRS trackers like aprs.fi.
Badly targeted DOS attack against APRS breaks https://t.co/vP56igBLRM and other global APRS services last night and today. Likely someone in Poland attacking Russian hams, many of whom likely oppose this crazy war and invasion. The packet flood affects APRS globally. Stop it. pic.twitter.com/Zwd8HyyWX3
— aprs.fi (@aprsfi) February 26, 2022
DARC Urges Safety First for Ukraine and Foreign Amateur Radio Hobbyists
The German ham-radio association known as DARC has issued a warning to Ukrainian hams, and to foreign hams who may receive from them. Amateur radio operations are currently banned in Ukraine due to wartime laws.
Any radio amateur currently transmitting from Ukraine is risking his or her life. If you hear a Ukrainian station, do not broadcast its callsign, location or frequency — whether on the band, in a cluster or on social media. You may be putting lives at risk. #hamradio #hamr pic.twitter.com/onFh1gL6P6
— DARC HF-Referat (Dept. Space Weather Monitoring) (@DARC_HF_Referat) February 27, 2022
Poland Amateur Radio Society Provides WinLink HF Email Service
In response to geopolitical threats, the Poland Amateur Radio Society has set up a HF WinLink email system, aimed at provided email services to amateur radio operators that could be cutoff from internet email services. It appears this may be aimed at helping Ukrainians communicate, however in these modern days of electronic warfare, it is important to take into account the warning from DARC above too as transmitting stations could easily be located by Russian electronic warfare forces.
Dear HAM operators, in the face of the latest threats in our region and a possibility of an incoming wave of refugees, with over 2 mln already living in Poland, we would like to remind you that we are at your disposal.
If you are a licensed amateur radio operator, you can send information by e-mail to your relatives in Poland or Emergency Services with via the Winlink system, which works on HF bands, independently of access to the local ICT infrastructure https://winlink.org/WinlinkExpress.
We advise you to download the software, install it and check its operation.
Polish WinLink nodes are QRV on 160,80,20m
SR5WLK dial frequency 3595,5 kHz USB
SR3WLK dial requency 14111 kHz USB
SP3IEW dial frequency 1865 kHz USBIf we receive information about the cut-off of the Internet in the region in danger, we will be QRV daily as SP0MASR @ 18-20 UTC on the frequencies 3770 kHz +/- QRM, 7110 kHz +/- QRM. In such a situation, please communicate in Polish or English.
We are here to serve you.
Shortwave Listening Updates
The excellent SWLing.com blog has also provided some updates on shortwave, including news that WRMI have resumed broadcasts of Radio Ukraine International, Ukrainian state radio resumes broadcasting at 549 kHz, and that the BBC adds to new broadcasts to Ukraine.
Russian Oligarch Jets Tracked with ADS-B
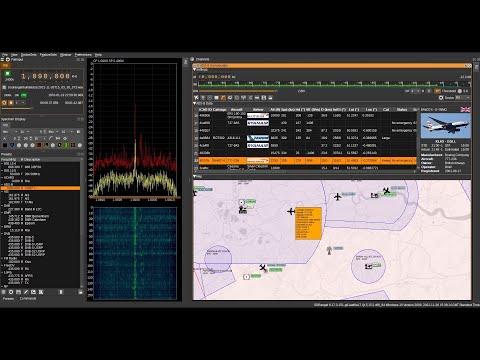
An activist has set up a Twitter account to track the private jets of Russian Oligarch's via ADS-B. ADS-B aircraft data can be used to track aircraft locations, and these signals are typically received with low cost SDRs like RTL-SDRs. The project appears to use data sourced from adsbexchange.com which is known to be one of the only ADS-B aggrators that does not censor data.
The 7055 kHz 'Radio War' Frequency Sees Increase in Activity
In has been reported that the 7055 kHz LSB amateur radio frequency has been used by Ukrainian and Russian amateur radio operators for some time now to insult each other in a 'radio war', and recently activity has significantly increased. Other frequencies involved include 7050 kHz LSB and 3731 kHz.
People playing peace music on 7055 KHz LSB, the infamous #radiowar frequency.#Ukraine #Russia #shortwave #swl #OSINT pic.twitter.com/cpK0CsYEUb
— Johan Boonstra (@JMB_NL) February 28, 2022
Captured Equipment Shows Russian Radio Hardware In Use
A recent tweet shows a photo of hardware supposedly captured from Russian forces. Of interested is a Russian R-187PI Azart, a handheld digital software defined radio.
Back to the radio thing for a second here. This equipment was captured outside of Kyiv.
— OSINTtechnical (@Osinttechnical) February 28, 2022
R-187P1 Azart- Short range handheld, digital software-defined radio (SDR), encrypted.
R-168-5UN-2- Another tactical radio, also encrypted. pic.twitter.com/wJmdnzAx71
At the same time unconfirmed reports suggest that some parts of the Russian army may be relying on civilian Baofeng radios.
More and more evidence is emerging that the Russian forces rely on civilian radios and mobile phones for their communications. Our source in one invading unit confirms this.
— CIT (en) (@CITeam_en) February 28, 2022
This photograph is said to show a civilian radio captured by Ukrainians.https://t.co/ppwYktFsaD