Thank you to Happysat for submitting the following information about the updated LRPT decoder for Meteor M-N2-2. He has also provided a link to his very useful Meteor Satellite reception tutorial.
Today the official LRPT-Decoder V42 ready for release :)
Before we did use a older internal debug version from 2014, because this one was still in development.
This version 42 of LRPTDecoder will work with both Meteor M-N2 and Meteor M-N2-2.
Example ini configuration files for other modes are attached in the archive.
[Max-Felix Müller] wanted to develop his own SDR application with the goal of learning python and a bit about signals processing. To accomplish this goal he’s using [pyrtlsdr] a library which wraps many of the functions from the [rtlsdr-dev] library into a Pythonic set of functions that you can use to develop SDR applications for an RTL based SDR in python. Over on Hackaday.io Max-Felix has been writing about his Python RTL-SDR experiments and has been uploading sample code for anyone to take a look at and learn from.
Using the library is pretty simple as it handles the basics of setting up the frequency and PPM settings as well as gain and proceeds to tunnel samples into your application. Max-Felix’s examples take us from the very first steps of setting up the dongle and gathering samples, to plotting the spectrum and creating a waterfall. This generally entails the use of another python library known as [matplotlib] and [numpy], which together you can use to create your own FFT.
It is nearly limitless what you can do with a little bit of Python and a few libraries given enough development time and you don’t need to be a software developing master to get started. You may be interested in taking a look at [PLSDR] which we covered in a previous article where [P. Lutus] developed his own SDR application completely in Python. It’s open-source so feel free to take a look and learn more about how you can implement amazing things with just a little bit of code.
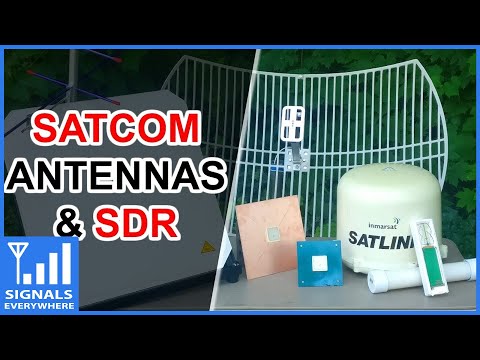
On this episode of SignalsEverywhere on YouTube Corrosive shows off several antennas that can be used for Inmarsat and Iridium satcom reception. His video shows off a commercial Inmarsat branded satlink antenna which is designed to be used on moving ships, a grid dish antenna, a custom QFH iridium antenna made from a repurposed Vaisala radiosonde, a commercial Iridium patch, an older Outernet/Othernet Iridium patch and a custom Iridium patch that Corrosive built himself.
Satcom Antennas for L-Band Reception via RTL SDR
A few days prior Corrosive also released a new episode of his podcast. In this episode he interviewed Derek a student from The University of Michigan who is working on the MiTee CubeSat. The MiTee cubesat is a small experimental satellite that will explore the use of miniaturized electrodynamic tethers for satellite propulsion.
Over on the LimeSDR CrowdSupply blog, Ogün Levent has submitted a short article about his "Dronesense" project. Dronsense is a spectrum-scanning and jamming system based on the LimeSDR. The LimeSDR is a US$299 12-bit TX/RX capable SDR that can tune between 100 kHz – 3.8 GHz, with a maximum bandwidth of up to 61.44 MHz.
Drone defense is a problem that is plaguing airports, cities, sensitive buildings and the military. These days anyone with a low cost off the shelf drone can cause havoc. Solutions so far have included net guns, drone deployed nets, wideband jammers, GPS spoofers, traditional and passive radar systems, visual camera detection, propeller noise detection, microwave lasers and SDR based point and shoot drone jamming guns like the IXI Dronekiller.
Both the expensive made for military IXI Dronekiller SDR gun, and the LimeSDR Dronesense work in a similar way. They begin by initially using their scanning feature to detect and find potential drone signals. If a drone signal is detected, it will emit a jamming signal on that particular frequency, resulting in the drone entering a fail-safe mode and either returning to base or immediately landing. Specifically targeting the drone's frequency should help make the jammers compliant with radio regulations as they won't jam other legitimate users at the same time. We note that this method might not stop drones using custom RF communications, or fully autonomous drones.
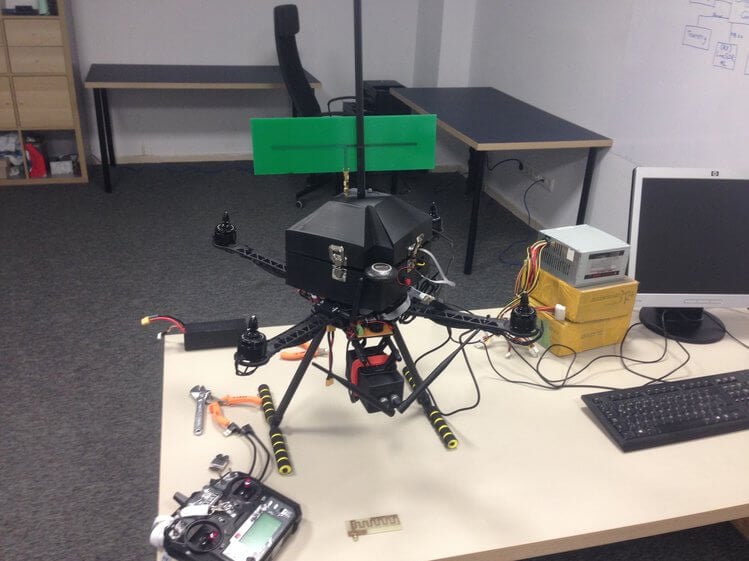
Dronesense: Drone Detection and Jammer Mounted on another Drone, running on a LimeSDR.
However, unlike the IXI Dronekiller gun, Dronesense requires no pointing and aiming of a gun like device. Instead it appears to be mounted on another drone, with an omnidirectional jamming antenna. It runs with a GNU Radio based flowgraph which decides if a detected signal is from a drone, and if so activates the jammer. Unfortunately the software and further details don't appear to be available due to non-disclosure agreements.
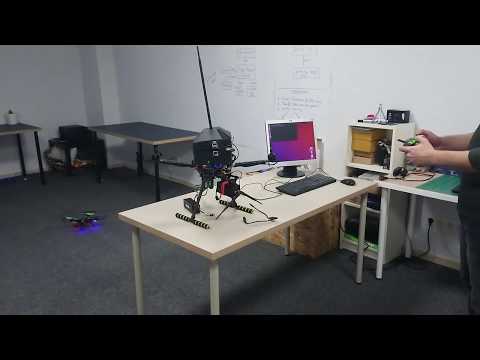
DroneSense Second Jamming Test (Software Defined Aerial Platform)
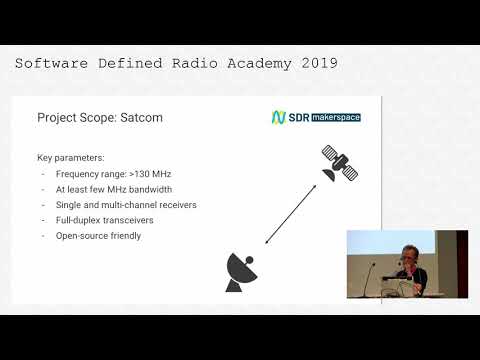
The Software Defined Radio Academy YouTube channel recently uploaded an interesting talk by Alex Csete (creator of the popular GQRX and GPredict applications), and Sheila Christiansen. Their presentation discusses their work with the European Space Agency (ESA), Libre Space Foundation and how they are running SDR Makerspace's that are helping students create and track cubesats. During the talk Alex and Sheila also describe various SDR hardware, and how they test them for their purposes.
SDR Makerspace (https://sdrmaker.space) is a collaboration between the European Space Agency and Libre Space Foundation, with the objective of bringing innovative open-source SDR technologies to space communications.
Space is a complex environment. Attempting to incorporate SDRs into complex subsystems of space missions without sufficient understanding of the technology can add unnecessary risks and uncertainties to the mission. SDR Makerspace aims to bring open-source SDR technology to the space industry, focusing on the practical aspects of satellite communications, so as to reduce such risks.
Makers, open-source hackers, SDR enthusiasts, and researchers are collaborating on SDR hardware and software activities, focusing on rapid prototyping and development of reusable, open-source SDR components for future CubeSat missions.
The collaboration consists of many activities, which are organized into three main elements: development of reusable GNU Radio components, research and development in cutting edge technologies like AI/ML, and testing of SDR hardware and software.
Current activities are presented with a focus on the testing of the hardware and software. An overview of the investigation into the characteristics, such as, performance under realistic conditions, damage by radiation to essential parts, functionality of FPGA toolchains, the SDR-system’s complexity, and accessibility to the open-source community will also be covered.
Alex Csete, OZ9AEC: SDR-Makerspace: Evaluation of SDR boards and toolchains
SDRPlay have recently published a video demonstrating how the new RSPduo diversity feature in SDRUno can be used to cancel local interference. The SDRplay RSPDuo is a 14-bit dual tuner software defined radio capable of tuning between 1 kHz - 2 GHz. It's defining feature is that it has two receivers in one radio, which should allow for interesting phase coherent applications such as diversity. The RSPDuo's diversity feature allows us to either combine two antenna signals together for an up to 3 dB increase, or for removal of an unwanted noise source via subtraction of signals.
In the video they show a broadcast AM signal that has it's SNR reduced by being on top of a local electrical noise source. The use a Bonito Mega-dipole on tuner 1, and a Bonito Mini-whip on tuner 2. The Mini-whip appears to receive the local interference stronger, so can be subtracted away from the Mega-dipole's signal with the diversity function. The result is improved SNR, and the noise is almost entirely cancelled.
There are 2 very practical applications for diversity software. The first is MRC (Maximum Ratio Combination) Diversity which, in order to be effective, needs two antennas presenting the same signal with some degree of diversity. Then there is this second impressive application which is becoming more and more useful due to the growing number of domestic sources of interference.
This is possible in an RSPduo, due to the coherent nature of the combined tuner streams being presented to the computer for processing.
Using Diversity in SDRplay's SDRuno to Cancel Local Interference
Reports from Reddit and Twitter are in that the recently launched Meteor M2-2 weather satellite is now functional and broadcasting images at 137.9 MHz. A few people have noted that the reception quality appears to be better than the older satellite.
My first LRPT reception at 137.9 MHz from the new Meteor M2-2 satellite, 14:16 UT pass today: pic.twitter.com/6OaOMOvoYh
— Dr Marco Langbroek (@Marco_Langbroek) July 18, 2019
Thank you to Happysat whose also provided the following information that can be used to receive the images. It appears that a slightly modified version of LRPTDecoder is required:
This version of LRPTDecoder was used to test/debug OQPSK with Meteor M-N2-1 in 2014, it will work on Meteor M-N2-2. The ini file attached in the archive is processed manually from s files. Buttons 72K and 80K respectively for the modes “without interleaving” and “with interleaving”. Also in the archive there are examples for other modes.
Transmissions on LRPT with a OQPSK Modulation are expected tomorrow on most probably 137.900MHz.
PICTOR is an open source and open hardware radio telescope that aims to promote radio astronomy on a budget. It consists of a 1.5 meter parabolic dish antenna, 1420 MHz feedhorn, a two stage low noise amplifier (LNA), high pass filter, and from what we gather, an RTL-SDR. Future designs may also use higher bandwidth SDRs. Currently there doesn't seem to be much information about the build and exact components used in their design, but we're hoping that those details will come in time.
The radio telescope allows a user to measure hydrogen line emissions from our galaxy. Hydrogen atoms randomly emit photons at a wavelength of 21cm (1420.4058 MHz). The emissions themselves are very rare, but since our galaxy is full of hydrogen atoms the aggregate effect is that a radio telescope can detect a power spike at 21cm. If the telescope points to within the plane of our galaxy (the milky way), the spike becomes significantly more powerful since our galaxy contains more hydrogen than the space between galaxies. Radio astronomers are able to use this information to determine the shape and rotational speed of our own galaxy.
PICTOR also has a very interesting web based interface which can be used to let users from anywhere in the world access the telescope and log an observation. The first PICTOR telescope is currently online and observations can be created simply by going to their website, and clicking on the "Observe" link. Users can then enter the frequency and other parameters for their observation, and the resulting graph will be emailed to you after the observation. The software source is available on their GitHub page, and is based on a GNU Radio flowgraph and Python plot script.
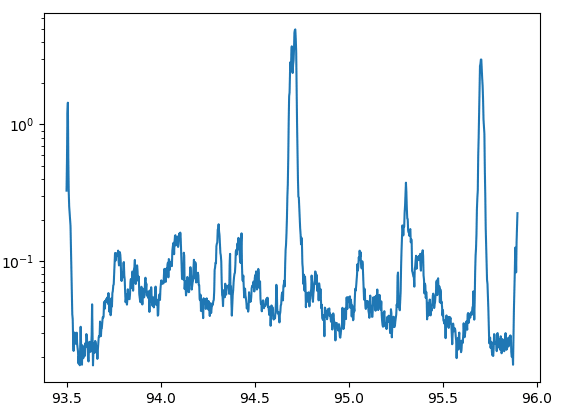
For more information about PICTOR, logging an observation, and radio astronomy in general, we recommend checking out their PDF guide. We test ran a short observation at the hydrogen line frequency, and we received a graph with the hydrogen line peak clearly visible (spliced in to the photo below). We note that the wavy shape is due the to shape of the filters they used.