Earlier this month we posted about The Thought Emporium who uploaded a video to YouTube where they documented the first steps of their construction of a tracking mount for a 2.4 GHz grid WiFi dish which they intend to use for HRPT weather satellite reception.
If you didn't already know, receiving HRPT weather satellite signals is a little different to the more commonly received NOAA APT or Meteor M2 LRPT images which most readers may already be familiar with. HRPT is broadcast by the same NOAA satellites that provide the APT signal at 137 MHz, but is found in the L-band at around 1.7 GHz. The signal is much weaker, so a high gain dish antenna with motorized tracking mount, LNA and high bandwidth SDR like an Airspy is required. The payoff is that HRPT images are much higher in resolution compared to APT.
In this video they document the steps required to finish the physical build and add the electronics and motors required to control and move the dish. The final product is a working tracking mount that should be able to track the NOAA satellites as they pass over. In the next video which is not yet released they plan to actually test reception.
Thanks to IU2EFA (William) for writing in and letting us know about his success in decoding telemetry from the moon orbiting satellite known as DSLWP-B / LONGJIANG-2. LONJIANG-2 is a Chinese lunar microsatellite (45kg) that was launched in May 2018. It is designed to perform ultra long-wave radio astronomy observations. It also has an on board camera and took some nice photos of the Earth back in June.
While the satellite is still being tested, William notes that it is transmitting telemetry data to Earth during it's scheduled days at 435.4 MHz and 436.4 MHz, and the signal can be received with an RTL-SDR and Yagi antenna. William writes:
[LONJIAN-2] transmits with a little linear antenna and a little power of just 2 Watts.
In other sessions, I used a professional radio to have the maximum performance.
But this morning I wanted to test the reception, just using my RTLSDR V3 and my antenna yagi 15 elements pointed to the Moon. No other options (as filters, pre aplifiers, or other stuffs. Zero of these)
Well, the result was great. I received the signals and also i could decode them!
So I think people can be happy to know, that with a very little setup, they can receive incredible little signals from great distances.
When I received these signals, the Moon distance was about 378500 km.
LONGJIAN-2 transmits telemetry with GMSK and JT4G, and JT4G can be decoded with WSJT-X or WSJT 10. There is also a GNU Radio program called gr-dslwp that can be used to decode the telemetry. JT4G is a weak signal coding that can be decoded with signal levels down to -17 dB. Therefore anyone with modest hardware can decode the satellite. More information about the coding can be found on this post by Daniel Estevez.
On the Lilacsat page for LONGJIANG-2 if you scroll down you can also see reports from several other amateur radio operators who have managed to receive the satellite with RTL-SDR dongles and other radios. Below is an image of an example for SP5ULN who was able to receive and decode the JT4G signal with an RTL-SDR, LNA, and 19-element Yagi.
Example of LONJIAN-2 being received with an RTL-SDR by SP5ULN as noted on the LilacSat website.
Ho Decodificato Segnali dalla LUNA! | Decoding a Satellite Orbiting the Moon (JT4G)
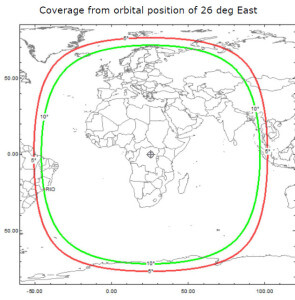
GOES 15/16/17 are geosynchronous weather satellites that beam back high resolution weather images and data. In particular they send beautiful high resolution 'full disk' images which show one side of the entire earth. As the satellites are in geosynchronous orbit, they are quite a bit further away from the earth. So compared to the more easily receivable low earth orbit satellites such as the NOAA APT and Meteor M2 LRPT satellites, a dish antenna, good LNA and possibly a filter is required to receive them. However fortunately, as they are in a geosynchronous orbit, the satellite is in the same position in the sky all the time, so no tracking hardware is required.
In the tutorial RSP2user notes that he's been using a $16 2.4 GHz WiFi grid dish antenna and the NooElec SAWbird LNA. In the past we've also seen GOES reception from Pieter Noordhuis who used a 1.9 GHz grid antenna from L-Com which seems to be a better match to the 1.7 GHz GOES frequency. However, 2.4 GHz WiFi grid antennas are much more common and therefore much cheaper. In the past there has been debate on whether or not these cheaper WiFi antennas would be good enough for GOES, so it's good to see that the cheaper option is confirmed to work, at least for the satellite elevations found in the RSP2user's part of the USA.
The SAWBird is a 1.7 GHz LNA which is required to improve SNR by reducing system noise figure, and to filter any interfering out of band signals. The SAWbird is currently not available for public sale, but NooElec have noted that it is due to be released soon. RSP2user also notes that the polarization of the dish is important, so the dish may need to be rotated, and also that flipping the secondary reflector significantly increases the gain at 1.69 GHz.
For software the XRIT demodulator from USA-Satcom for a small fee is used together with the SDRplay RSP2. As seen by Pieter Noordhuis' results, it's also possible to receive these signals with an RTL-SDR and Pieters free software. So it may be possible to reduce the costs of a GOES reception system by using an RTL-SDR, SAWBird and 2.4 GHZ WiFi grid antenna. With those components the total cost would be well under $100.
As a bonus, in later posts on his forum thread, RSP2user shows that the system can also be used to receive HRPT images from the low earth orbit NOAA 19 satellite by hand tracking the antenna as the satellite passes over.
Over on YouTube channel The Thought Emporium recently released a new video where they show the first steps they've taken towards building a home made satellite tracking mount for receiving HRIT and HRPT low earth orbit weather satellites. In their build they use a 2.4 GHz WiFi parabolic grid antenna, gears and mounts made from milled wood, and some metal supports. The build is not yet finished, but they intend to show their progress in future videos. Note that we're not confident that the 2.4 GHz grid antenna will actually work for them. In the past people have had success with 1.9 GHz Grid antennas however.
If you didn't already know, receiving HRPT weather satellite signals is a little different to the more commonly received NOAA APT or Meteor M2 LRPT images which most readers may already be familiar with. HRPT is broadcast by the same NOAA satellites that provide the APT signal at 137 MHz, but is found in the L-band at around 1.7 GHz. The signal is much weaker, so a high gain dish antenna with motorized tracking mount, LNA and high bandwidth SDR like an Airspy is required. The payoff is that HRPT images are much higher in resolution compared to APT.
Actually, it's not entirely true that a tracking mount is required, although it certainly makes things easier. We've seen in the past that 'Tysonpower' was able to receive HRPT by tracking his dish by hand.
The Thought Emporium also note that they hope to use their tracking mount in the future for other purposes like amateur radio astronomy. In one of their previous experiments they've build a smaller version which was able to create a heat map of WiFi signal strengths in their area.
Helium is a cryptocurrency being designed for internet of things (IoT) sensors which will be based on low cost software defined radio (SDR) technology - that's a lot of buzzwords!. The idea is to design a system that will pay people to run an internet connected gateway which will receive data from wireless sensors, and put that data onto the internet. A use case that Helium has already developed is providing services to track and monitor medicine and food supplies. The linked article gives a good example of this use case:
...let’s say you have a gateway in your house: if a vial of medicine were to enter your coverage zone, it would send its location and temperature data to your gateway, which would then send it to its proper destination in return for a previously agreed upon cryptocurrency fee. These steps would then be cryptographically verified and recorded in the distributed ledger.
In terms of IoT network competition, LoraWan and SigFox IoT networks are already popular and established in several places in the world, but wireless coverage isn't great because these networks rely on companies to build gateway infrastructure. Helium crowd sources this infrastructure instead, which could result in greater coverage.
Most cryptocurrencies base the security of their network on the 'proof of work' process, which is a way to ensure that the miners get rewarded for the heavy cryptographic computations that they do in order to secure the network. Instead of proof of work, Heliums idea is to use a 'proof of coverage' system, where other gateways will confirm if a gateway is providing coverage and is in the correct location. Helium cryptocurrency 'miners' will be the people running the internet connected gateways, and they will be paid for any devices that use their wireless coverage.
According to one of their latest blog posts, the wireless gateway radio system is to be based on a software defined radio architecture. The reasoning behind using SDR is that they need to support potentially thousands of wireless sensor channels, require the sensors to be able to be geolocated, and require the radio to be low cost and energy efficient. For geolocation of sensors they are considering the use of radio direction finding techniques that we assume will be based on pseudo-doppler, or alternatively they will use the time difference of arrival (TDoA) technique which requires the signal to be received by multiple gateways. The SDR will be developed on a dual core TI SoC, with four programmable realtime units (PRU), which they'll use to interface with the RF chips.
At the moment Helium is just a whitepaper, and we haven't seen any concrete evidence of a working SDR design yet, but according to their website they plan to launch gateway hardware in Q4 2018 for a cost of $495.
A radiosonde is a small weather sensor package that is typically attached to a weather balloon. As it rises into the atmosphere it measures parameters such as temperature, humidity, pressure, GPS location etc, and transmits this data back down to a receiver base station using a radio signal.
Zilog's RS is a free open source radiosonde decoder for Linux and it supports a wide range of radiosonde protocols. Together with an RTL-SDR it is possible to receive radiosonde signals, and decode them using RS.
Over on his website, happysat has recently uploaded a tutorial that shows how to use RS with an RTL-SDR, CubicSDR or GQRX, and FoxtrotGPS, a GPS plotting program for visualizing the location of the radiosonde. The tutorial covers some tricky points like setting up audio piping in Linux, and getting the GPS data into a virtual COM port to use with FoxtrotGPS.
Alternatively, there are also Windows GUI based sonde decoders that can be used with the RTL-SDR such as SondeMonitor which costs 25 Euros, but also covers a wide range of sonde protocols, and RS41 Decoder which is a GUI for the RS41 sonde protocol only. If you are interested we have a tutorial on setting up radiosonde decoding in Windows with SondeMonitor available here.
Plotting the Sonde Location with an RTL-SDR, GQRX, RS and FoxtrotGPS.
Earlier this month we posted about the KiwiSDR direction finding update, which now allows anyone with internet access to utilize public KiwiSDR's for the purpose of pinpointing the physical location of a transmitter that transmits at a frequency below 30 MHz.
A few people have had trouble understanding how to use the direction finding feature, so KiwiSDR fan Nils Schiffhauer (DK8OK) has written up a KiwiSDR direction finding usage guide. Nils' guide explains the basic technical ideas behind the TDoA (Time Difference of Arrival) direction finding technique used, and highlights some important considerations to take into account in order to get the best results. For example he discusses best practices on how to choose receiver locations, how many receivers to choose, and how to properly take into account the time delaying effects of ionospheric propagation with HF signals.
Finally at the end of the document he shows multiple case studies on HF signals that he's managed to locate using the discussed best practices. Looking through these examples should help make it clear on how receiver locations should be chosen.
GitHub user unixpunk has been working on a custom firmware image for the PlutoSDR called 'PlutoWeb' (more info available on their website as well). The firmware allows you to run a web interface on the PlutoSDR and this allows you to run server programs such as OpenWebRX, Dump1090 and streaming servers like SoapyRemote. Because the PlutoSDR has a built in processor, this firmware can turn the SDR into a fully standalone device.
The PlutoSDR is an Analog Devices $99 RX/TX capable SDR with 20 MHz of bandwidth and a 325 MHz to 3.8 GHz frequency range that is software hackable to 56 Mhz of bandwidth and a 70 MHz to 6000 MHz frequency. It has an on board Xilinx Zynq Z-7010 FPGA, which has a built in dual core ARM Cortex-A9 processor as well. It has been out of stock for a while, but was recently restocked and can be purchased directly from Analog Devices, or via Arrow, DigiKey or Mouser.