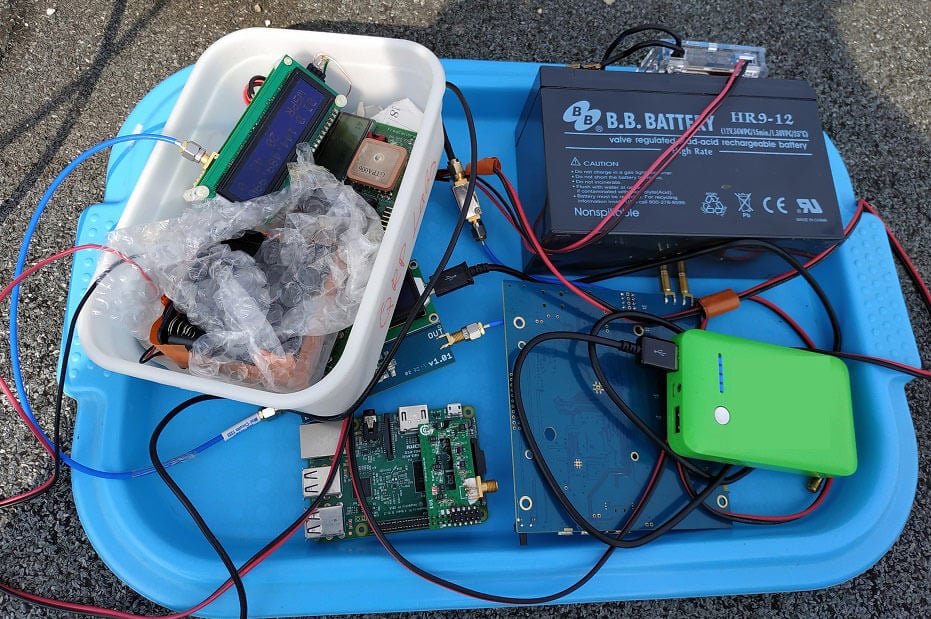
Testing for Spurious Signals on the Airspy HF+ Discovery

Thank you to Nils Schiffhauer (DK8OK) for submitting an article documenting his tests on the Airspy HF+ Discovery (pdf mirror). Spurred on by discussions on the SDR-Console mailing list, Nils went looking for issues with spurious signals generated by the HF+ itself. In the end he finds some minor spurious signals, but notes that they have absolutely no adverse effects once an antenna is connected.

Youssef Touil (developer of the Airspy HF+ line of products) has also noted that the minimum discernible signal (MDS) of the HF+ is so low that it's become normal for very weak spurs to now be visible without an antenna connected. However, once an antenna is connected the natural atmospheric noise floor which is much higher than the MDS hides these spurs, and so the spurs have no consequence on reception.

In Nils' first test he uses a very high end Winradio W65DDC SDR to detect the spurs coming from an Airspy HF+, Airspy HF+ with preselector retrofit, and the Airspy HF+ Discovery. The results are quoted below:

[With the Airspy HF+] you indeed see a very few spurious signals, all well below -140 dBm/Hz.

With the Airspy HF+ Preselector connected, the number of spurious signal is very much reduced, as is their maximum level.

This picture still further improves with the Airspy HF+ Discovery connected: all visible seven spurious signals are measured to well below -150 dBm/Hz.

The first result is clear:

  • Airspy has improved also the spurious signals from model to model, landing at a stunning
    reduction with their matchbox-like Discovery.
  • The spurious signals were significantly reduced in both numbers and level.
  • Together with sensitivity and dynamic range, the performance of these SDRs is exceptionally
    good. If you see their price tag, they are a real bargain.
  • Overall: they deliver professional performance in every important aspect at an incredible low
    price.

In the second test Nils tunes to the center of a spur, then tested with a dummy load and then antenna connected. His results showed that all spurs disappeared once an antenna was connected. He summarizes below:

Yes, there are a very few and low-level spurious signals at all Airspy’s receivers – as they are found [much] worse at some competing SDRs.

  • By development, even this has been significantly improved from model to model with the new Discovery leading the gang.
  • All spurious signals disappear with an antenna connected.
  • There has been found no case where, in practice, any spurious signal even remotely touched or even limited reception of the most miniscule signals.To complain about “spurious signals” simply is “Much Ado about Nothing” in an Ivory Tower, far away from any practical application.
Nils also tested 7300 kHz reception and the co-existance of weak amateur radio signals with strong broadcast signals.

Transmitting WSPR on QO-100 with a moRFeus and less than 4 mW Power

Thank you to Zoltan for submitting a short post about using a moRFeus to uplink WSPR to the Es'Hail-2 (QO-100) geostationary satellite with amateur radio repeater. moRFeus is a versatile US$99 signal generator and frequency mixer that can be controlled either by it's built in LCD screen, or via software on a Windows or Linux PC. It can generate a clean low phase noise tone anywhere between 85 to 5400 MHz, and can be used as a mixer for upconverting or downconverting signals. We have discussed moRFeus a few times before on this blog as we think it's a useful tool.

In his setup, Zoltan uses a QRP Labs U3S WSPR transmitter kit that was configured to transmit WSPR at 2m (144 MHz). It is not designed for transmitting the 2.4 GHz QO-100 uplink frequency. To get around that limitation, the moRFeus is used to upconvert the 144 MHz frequency into the QO-100 uplink band by mixing it with a 2,255,634.309 kHz signal. The resulting 2.4 GHz output signal from moRFeus is sent to an amplifier, 2.4 GHz band pass filter, and finally into a 5-turn LHCP helical feed mounted on a 1m parabolic dish.

Successful uplink was confirmed by a UK based WebSDR receiving the QO-100 downlink. Zoltan estimates that the total output power was only 4mW, and actually more like 1-2 mW due to losses in the coax feed.

WSPR uplink with moRFeus

Cleanly Embedding an RTL-SDR in an FT-991A With No Extra Cables

GPIO Pins Used on the RTL-SDR Blog V3

Thank you to Rodrigo Freire (PY2RAF) for submitting his project that has cleanly turned a standard Yaesu FT-991A ham radio into an RTL-SDR based software defined radio panadapter with no external wires, hubs or dongles.

Rodrigo's system consists of an IF tap amplifier+filter board that is connected to an internally mounted RTL-SDR. The RTL-SDR is internally connected to the FT-991A's USB hub which had to be upgraded from a 2-port hub to a 4-port hub as the 2-ports were already in use by the CAT and Audio features. This required the stock USB hub IC to be replaced with a hot air rework station.

Everything is mounted inside the radio chassis itself, and the end result is a neat solution with no external wires, hubs or dongles that has essentially turned the FT-991A into an SDR. Plugging in the single stock USB cable from the FT-991A results in the standard CAT and Audio interfaces showing up, as well as the RTL-SDR.

What's also interesting is that Rodrigo makes use of the GPIO pins on our RTL-SDR Blog V3 to enable the RX_EN, BPF and BYPASS switches on the IF tap board. This allows for a cleaner solution as no external switches need to be installed.

The entire project is open source with schematics and the BOM provided over on the GitHub, and excellent documentation is available on the project's Wiki.

FT991A Converted into an SDR.
Turning FT-991A to a REAL SDR: Embedding a SDR Panadapter INSIDE the radio, no extra wires!

SignalsEverywhere: Harold’s Mobile SDR Vehicle Load Out for Amateur Radio

This week on the SignalsEverywhere YouTube channel Harold shows us the mobile SDR and ham radio setup that he's installed on his car. On the roof of his car he's installed several antennas for various amateur radio bands including the 1.25m, 2m, 70cm, 33cm bands, a modified GPS puck antenna for Inmarsat and Iridium reception, and an antenna and GPS pick dedicated for APRS.

Inside the vehicle is a Windows tablet attached to the dashboard which is used for APRS, remotely controlling a scanner radio stored in the trunk and for running SDRSharp. There is also an Android unit installed in the center console which has an RTL-SDR connected. The Android unit runs RF Analyzer, and an ADS-B decoder. As well as SDRs, Harold also runs several standard ham radios within the vehicle.

Amateur Radio Mobile SDR Load Out | SDR Plus 33cm 70cm 2m 1.25m and more!

Calculating Coax Length by using a NanoVNA as a Time-Domain Reflectometer

Earlier in the month we posted about the NanoVNA, an open source VNA project by @edy555 and ttrftech that has recently become extremely affordable at US$50 for a fully assembled unit thanks to Chinese manufacturing.

The NanoVNA comes with preinstalled software for it's LCD GUI, as well as a Windows program. However, the software is currently basic and doesn't implement everything possible with a VNA. Over on his blog, nuclearrambo has put up a post showing how to use the NanoVNA as a Time-domain reflectometer (TDR). A TDR allows you to measure coax cable length, and that can be useful for finding exactly where a suspected cable or connector fault is.

Nucclearrambo provides a Python script which can be used with the NanoVNA's S1P output data to create a TDR graph. His tests with RG405 and LMR200 cable show that the length reported by the script comes remarkably close to the actual length.

In addition to the above, Ohan Smit has extended on nuclearrambo's work by modifying the C# NanoVNA Windows software (which was reverse engineered by Roger Clark) to automatically run the TDR script when S1P data is saved. Future work could see the Windows program support TDR by default.

Using the NanoVNA as a Time Domain Reflectometer.

Decoding PAL Video from a Nintendo with An Airspy SDR Part 2

Oona combines composite output for color images.

Last week we posted about Oona Räisänen's ([Windytan] and @windyoona) project to capture live video from her 1985 Nintendo Entertainment System (NES) using an Airspy SDR. In order to avoid expensive Video Capture cards which didn't work on her Mac, she used an Airspy SDR to decode the PAL composite video output of the NES. Last week she had black and white video working.

This week she has full color working, and has on her blog posted a write up about her project with the Airspy and her experiences with trying to find a suitable capture solution. She also goes into some detail about the CPU performance considerations of this solution, noting that there are some performance bottlenecks. She's also uploaded a video showing the results in action.

MacBook decodes PAL video via SDR

Airspy HF+ Discovery: Collection of Tests and Reviews

The Airspy HF+ Discovery is a new US$169 software defined radio that recently began shipping. On HF it can tune from 0.5 kHz to 31 MHz, and on VHF from 60 to 260 MHz.

It is advertised as having extremely high dynamic range and sensitivity, comparable to high end (and much more expensive) SDRs. High dynamic range means that extremely strong powerhouse stations will not block weaker stations from being received. On lower end SDRs strong stations can cause an SDR to overload, resulting in poor reception.

The HF+ Discovery is an improvement over the original HF+ (now known as the HF+ Dual Port). Back in 2017 we reviewed the original HF+ and found it's performance to be excellent. However, a number of people found that by using low loss preselectors the performance could improve the performance even further.

Originally Youssef (the developer of Airspy products) began designing a low cost preselector add on for the HF+ Dual Port, in order to increase the already great dynamic range. However, it was deemed too difficult for users to retrofit their devices. The result was the creation of the HF+ Discovery, which combines these preselectors with the already excellent HF+ SDR circuitry. Compared to the HF+ Dual, the Discovery is much smaller, and comes in a plastic case rather than a metal one. Instead of the split HF/VHF dual ports seen on the HF+ Dual, the Discovery only has one port that covers both bands. Overall performance with the preselectors is increased, and the price is even lower than the HF+ Dual Port.

Over the past few weeks a number of reviews and comparison videos have come out. Below we list a few that we found interesting.

In this video, the Techminds YouTube channel gives an overview on what the HF+ discovery is, and then gives a quick demo. If you haven't heard of the HF+ Discovery before then this is a good introduction.

Airspy HF+ Discovery - Overview & Brief Testing

The following video by Leif (sm5bsz) is the most technical, as he performs sensitivity and  dynamic range lab tests on multiple SDRs including the Microtelecom Perseus, Airspy HF+ Dual Port, Airspy HF+ Discovery, Airspy Spyverter plus Airspy, SDRplay RSP1 and AFEDRI SDR-Net.

If you want to skip the testing procedures, a summary of the results are presented at 16:20,  31:06, 38:19, and 53:55 video time. In most tests the HF+ Discovery is the second best, after the Perseus.

The first in a series of videos that compare the dynamic range of six receivers: Microtelecom Perseus, Airspy HF+ Dual Port,, Airspy HF+ Discovery, Airspy Spyverter plus Airspy, SDRplay RSP1 and AFEDRI SDR-Net. Here blocking and second order intermodulation is studied with signal generators. Attenuators are used to make the noise figure 26 dB of all radios at the output of the 6 port Wilkingson splitter. This video is for dynamic range on 7.2 MHz. The Discovery is a pre-production unit and the noise figure is a little higher than that of regular production units for unknown reasons.

In this article over on the SWLing Blog guest poster Guy Atkins submits a comparison video between the Airspy HF+ Discovery and an Elad FDM-DUOr ($899). Results appear to show that the HF+ has close to identical performance.

Over on YouTube icholakov has posted two comparison videos. In the first he compares the HF+ Discovery to the HF+ Original. In the second video he compares the HF+ Discovery against an SDRplay RSP1A.

Airspy HF+ Discovery SDR vs. HF+ Original SDR - Blind Test

Airspy HF+ Discovery vs. SDRPlay RSP-1A on Medum Wave and Short Wave

We've posted about this review before, but it's still one of the best. Here Fenu-Radio compares the HF+ Discovery against a very expensive Winradio G33DDC and posts multiple comparison audio files. He concludes that the HF+ Discovery compares favorably to the WinRadio.

In this post, Arctic DX measures the sensitivty of the HF+ Discovery, providing a very useful sensitivity comparison table against multiple other SDRs. The HF+ Discovery comes in with excellent numbers.

Over on Twitter there has been a lot of activity too. In the following Tweet, Simon Brown, author of the popular SDR-Console V3 application notes that the HF+ Discovery is virtually immune to strong signals.

We've also seen how the HF+ Discovery's LF performance is so good that it's possible to simply connect a photodiode and see the light spectrum produced by CFLs.

Automatically Photographing Passing Aircraft with an RTL-SDR, Pi 3, and IoT Software

Arun Venkataswamy has recently completed a write up about his system which automatically captures images of passing aircraft. It works by using a Raspberry Pi and RTL-SDR to listen to ADS-B broadcasts from aircraft. These broadcasts contain the live current location and altitude of all aircraft in his area. When a landing aircraft is detected to be passing near his house, the Raspberry Pi sends a signal to another Raspberry Pi connected to a camera on his balcony, and that snaps a photo of the passing aircraft.

In terms of software, Arun uses dump1090 as the ADS-B decoder. For communications between the two Raspberry Pi's he uses Node-RED and Mosquitto in order to communicate with MQTT. On the second Raspberry Pi, gPhoto2 captures images from the camera, and then ImageMagick is used to write some text about the aircraft and photo on the image. Arun's post goes in further detail about the code and conditions he uses to determine when a photo should be snapped.

In the past we've posted about a similar project where an RTL-SDR and Raspberry Pi based ADS-B tracker was used with a servo mounted video camera to track and record video of passing aircraft.

Automatically Taking Photos of Passing Aircraft with a Raspberry Pi and RTL-SDR