The Freqshow software is an RTL-SDR compatible tool for Raspberry Pi devices that can render live spectrum and waterfall displays. It is designed to run on portable touchscreens that plug into the Raspberry Pi. We've posted about freqshow a few times in the past.
The additional features are many. Additional features include: Full resolution zooming, I and Q Swap, 9 different pre FFT windowing functions to choose from. Center frequency offset or shift. PPM correction for the RTL2832. FFT averaging or FFT peaking. Easy frequency up and down from main screen. Easy Scale adjustment from main screen.
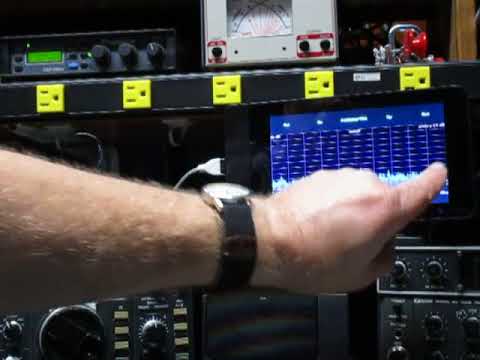
On YouTube he's also posted a video that demonstrates the software in action when running on an Adafruit 2.8" and Pi Foundation 7" TFT capacitive touch screen. Dan uses the software as a panadapter for his ham radio.
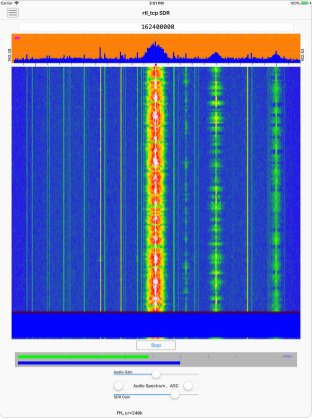
"RTL_TCP SDR" is a little different to "SDR Receiver" because it contains a full spectrum analyzer and waterfall display, whereas "SDR Receiver" only allows you to listen via presets or manual tuning. Both apps can not access the RTL-SDR directly on the iOS device due to Apple limitations. An external server on a Raspberry Pi or PC running rtl_tcp is required. Programmer HotPaw writes about his App:
An RTL-SDR Software Defined Radio receiver for iOS devices (requires an external rtl_tcp server). Listen to VHF AM and FM radio signals. View a waterfall of the RF spectrum. Connect, via the rtl_tcp network protocol, to a networked RTL-SDR USB peripheral.
iOS devices do not currently support the direct connection of USB devices such as an RTL-SDR. Thus, the use of this app requires network access to a server, such as a Raspberry Pi (or Mac), with an RTL-SDR unit plugged into its USB port, and running the rtl_tcp protocol at an TCP/IP network address accessible from your iOS device. The Raspberry Pi acts, essentially, as a USB port adapter for your iOS device.
No support is provided for installing any of the software needed to use this app with a Raspberry Pi. Please do not download this app unless you are already familiar with Software Defined Radio, have an RTL-SDR USB device, and have already installed and tested rtl_tcp on your Raspberry Pi, Mac, or other server.
Since Apple's iOS doesn't allow an RTL-SDR to be plugged directly into a Lightning port (even with a USB adapter), an rtl_tcp adapter, such as a Raspberry Pi (or Pi Zero) server is required.
This app is an experiment in real-time DSP and SDR coding using Apple's Swift and Metal GPU-shader programming languages. It includes a spectrum waterfall, and supports demodulating FM, AM, and SSB. Also, includes beta test support for the AirSpy HF+.
Programmer P. Lutus has recently released a new Python based software defined radio application that he calls "PLSDR". PLSDR is a full receiver, with spectrum and waterfall displays, a frequency manager, and support for multiple modes such as AM/FM/SSB/CW. Being Python based PLSDR supports both Linux and Windows. Compatible hardware includes the RTL-SDR, HackRF and SDRplay, however Lutus notes that he could only get the SDRplay working on Linux.
The PLSDR download page also contains various bits of information about the DSP math behind designing the SSB demodulator. Essentially he found that no online examples of GNU Radio based SSB demodulators were correctly implemented, so he decided to research and implement his own design. He also notes that PLSDR was designed by initially prototyping each function in GNU Radio first, before moving it over to Python. This approach allowed him to easily check his fundamental design before optimizing it for Python. If you are interested Lutus also has a very useful page dedicated to explaining the DSP basics behind SDRs.
PLSDR is fully open sourced and available on GitHub. Exploring the code may be a good way to learn about SDR concepts.
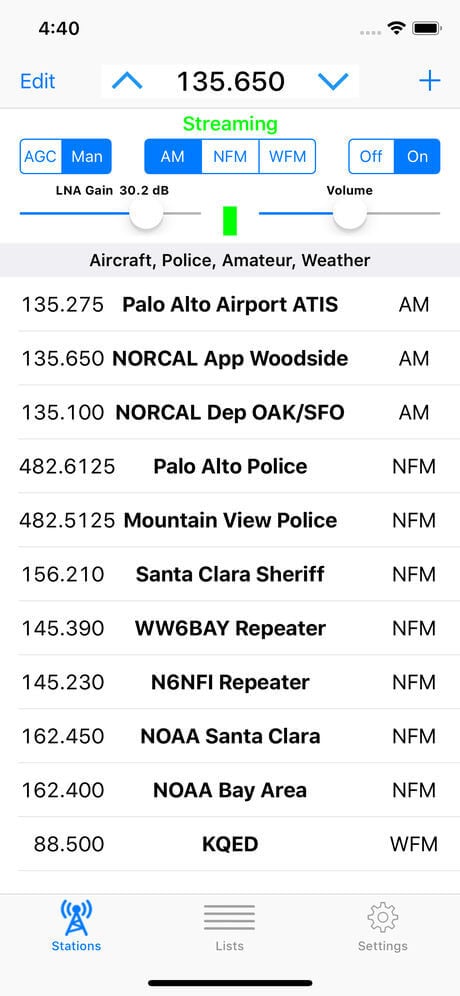
SDR Receiver, a new iOS app for RTL-SDR and Airspy HF+, is now available on the App Store. The app works with an RTL-SDR or Airspy HF+ that is attached to a host Mac, PC or Raspberry Pi running the rtl_tcp server or equivalent. The iOS device, which may be an iPhone or an iPad, communicates over the network with the host computer which may be anywhere on the network that is reachable by TCP/IP and that can sustain the required bandwidth.
SDR Receiver demodulates AM, narrowband FM and wideband FM signals. Key features include:
Easily entered and managed lists of stations to simplify station selection.
Adjustable squelch that works for both AM and FM signals.
Adjustable LNA gain for RTL-SDR.
Adjustable audio high pass and low pass filters.
Signal strength indicator that shows power level in the signal passband.
Multiple sampling rates down to 240Ksps for RTL-SDR.
Sampling rate of 768Ksps for Airspy HF+.
Streaming from an RTL-SDR requires installation of the librtlsdr package including the rtl_tcp utility on the host computer. Streaming from an Airspy HF+ requires installation of server software on the host computer that supports the Airspy HF+ and that streams data according to the protocol used by the rtl_tcp utility. One such server has been made available by Ron Nicholson in source code form on GitHub.
Requires an RTL-SDR or Airspy HF+, a host computer and server software which are not provided with the application.
Another RTL-SDR client for iOS is "RTL_TCP SDR" by Ron Nicholson which we posted about back in March when it was still in beta testing. RTL_TCP SDR includes a spectrum analyzer and FFT display. SDR Receiver appears to have no spectrum display, so is mostly useful for listening to preset frequencies, whilst RTL_TCP SDR appears to be more useful for spectrum exploring.
Radiosondes are light weight sensor packages that are attached to weather balloons. They transmit live RF weather telemetry down to earth as they rise. With an RTL-SDR and appropriate antenna it can be possible to decode this telemetry. One related hobby that a few people enjoy is radiosonde chasing, which is tracking and collecting radiosondes once they have fallen back to the earth. Some people collect them as trophies, and others like to repurpose them. For example in this previous post we've seen how some radiosondes can be repurposed into L-band antennas for RTL-SDR's.
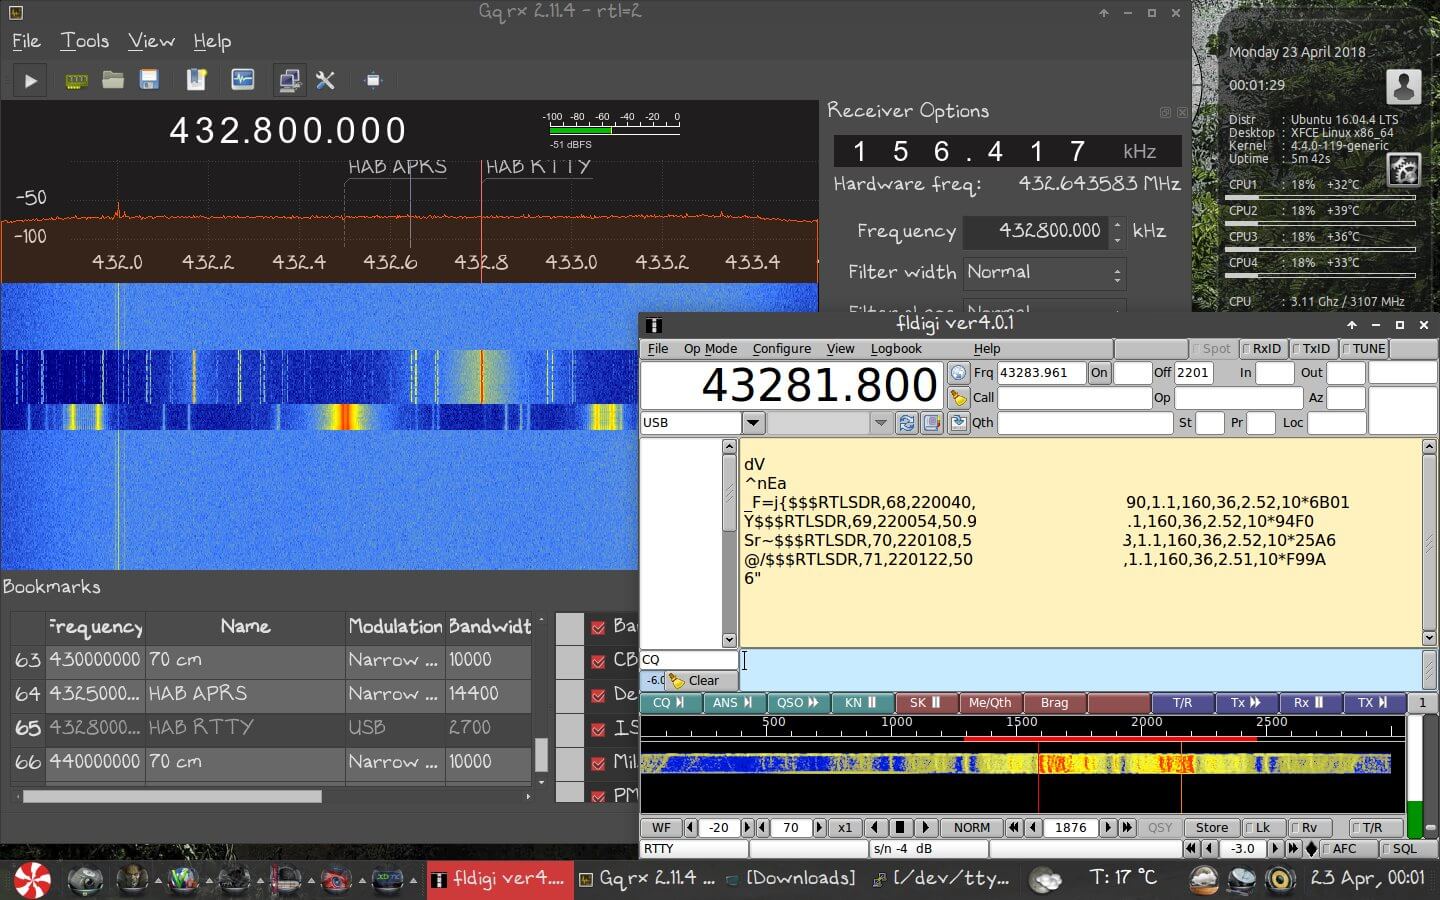
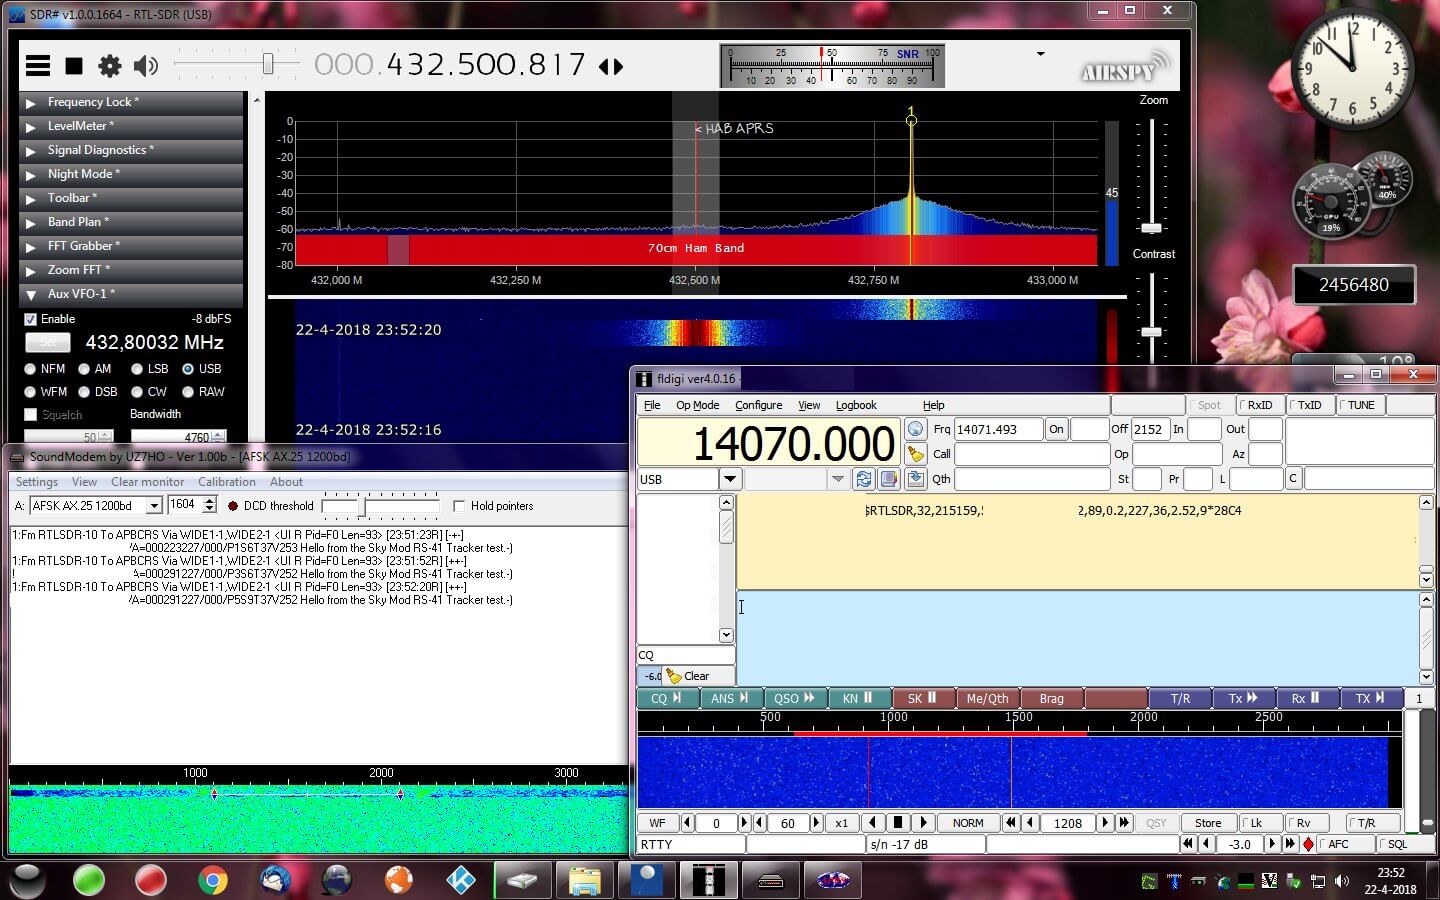
Another way to repurpose radiosondes has recently been submitted to us by regular contributor 'happysat' who wrote in and let us know that it is actually possible to reprogram the commonly used Vaisala RS-41 radiosondes into being able to transmit ham radio APRS, RTTY or CW mode signals in the ISM or ham bands. The initial hack was first performed by SQ5RWU, and then OM3BC who managed to create easier to use software that could reflash the radiosondes internal firmware via the serial port on the radiosonde. This hack could be useful for any ham requiring a cheap transmitter for their own high altitude balloon experiments.
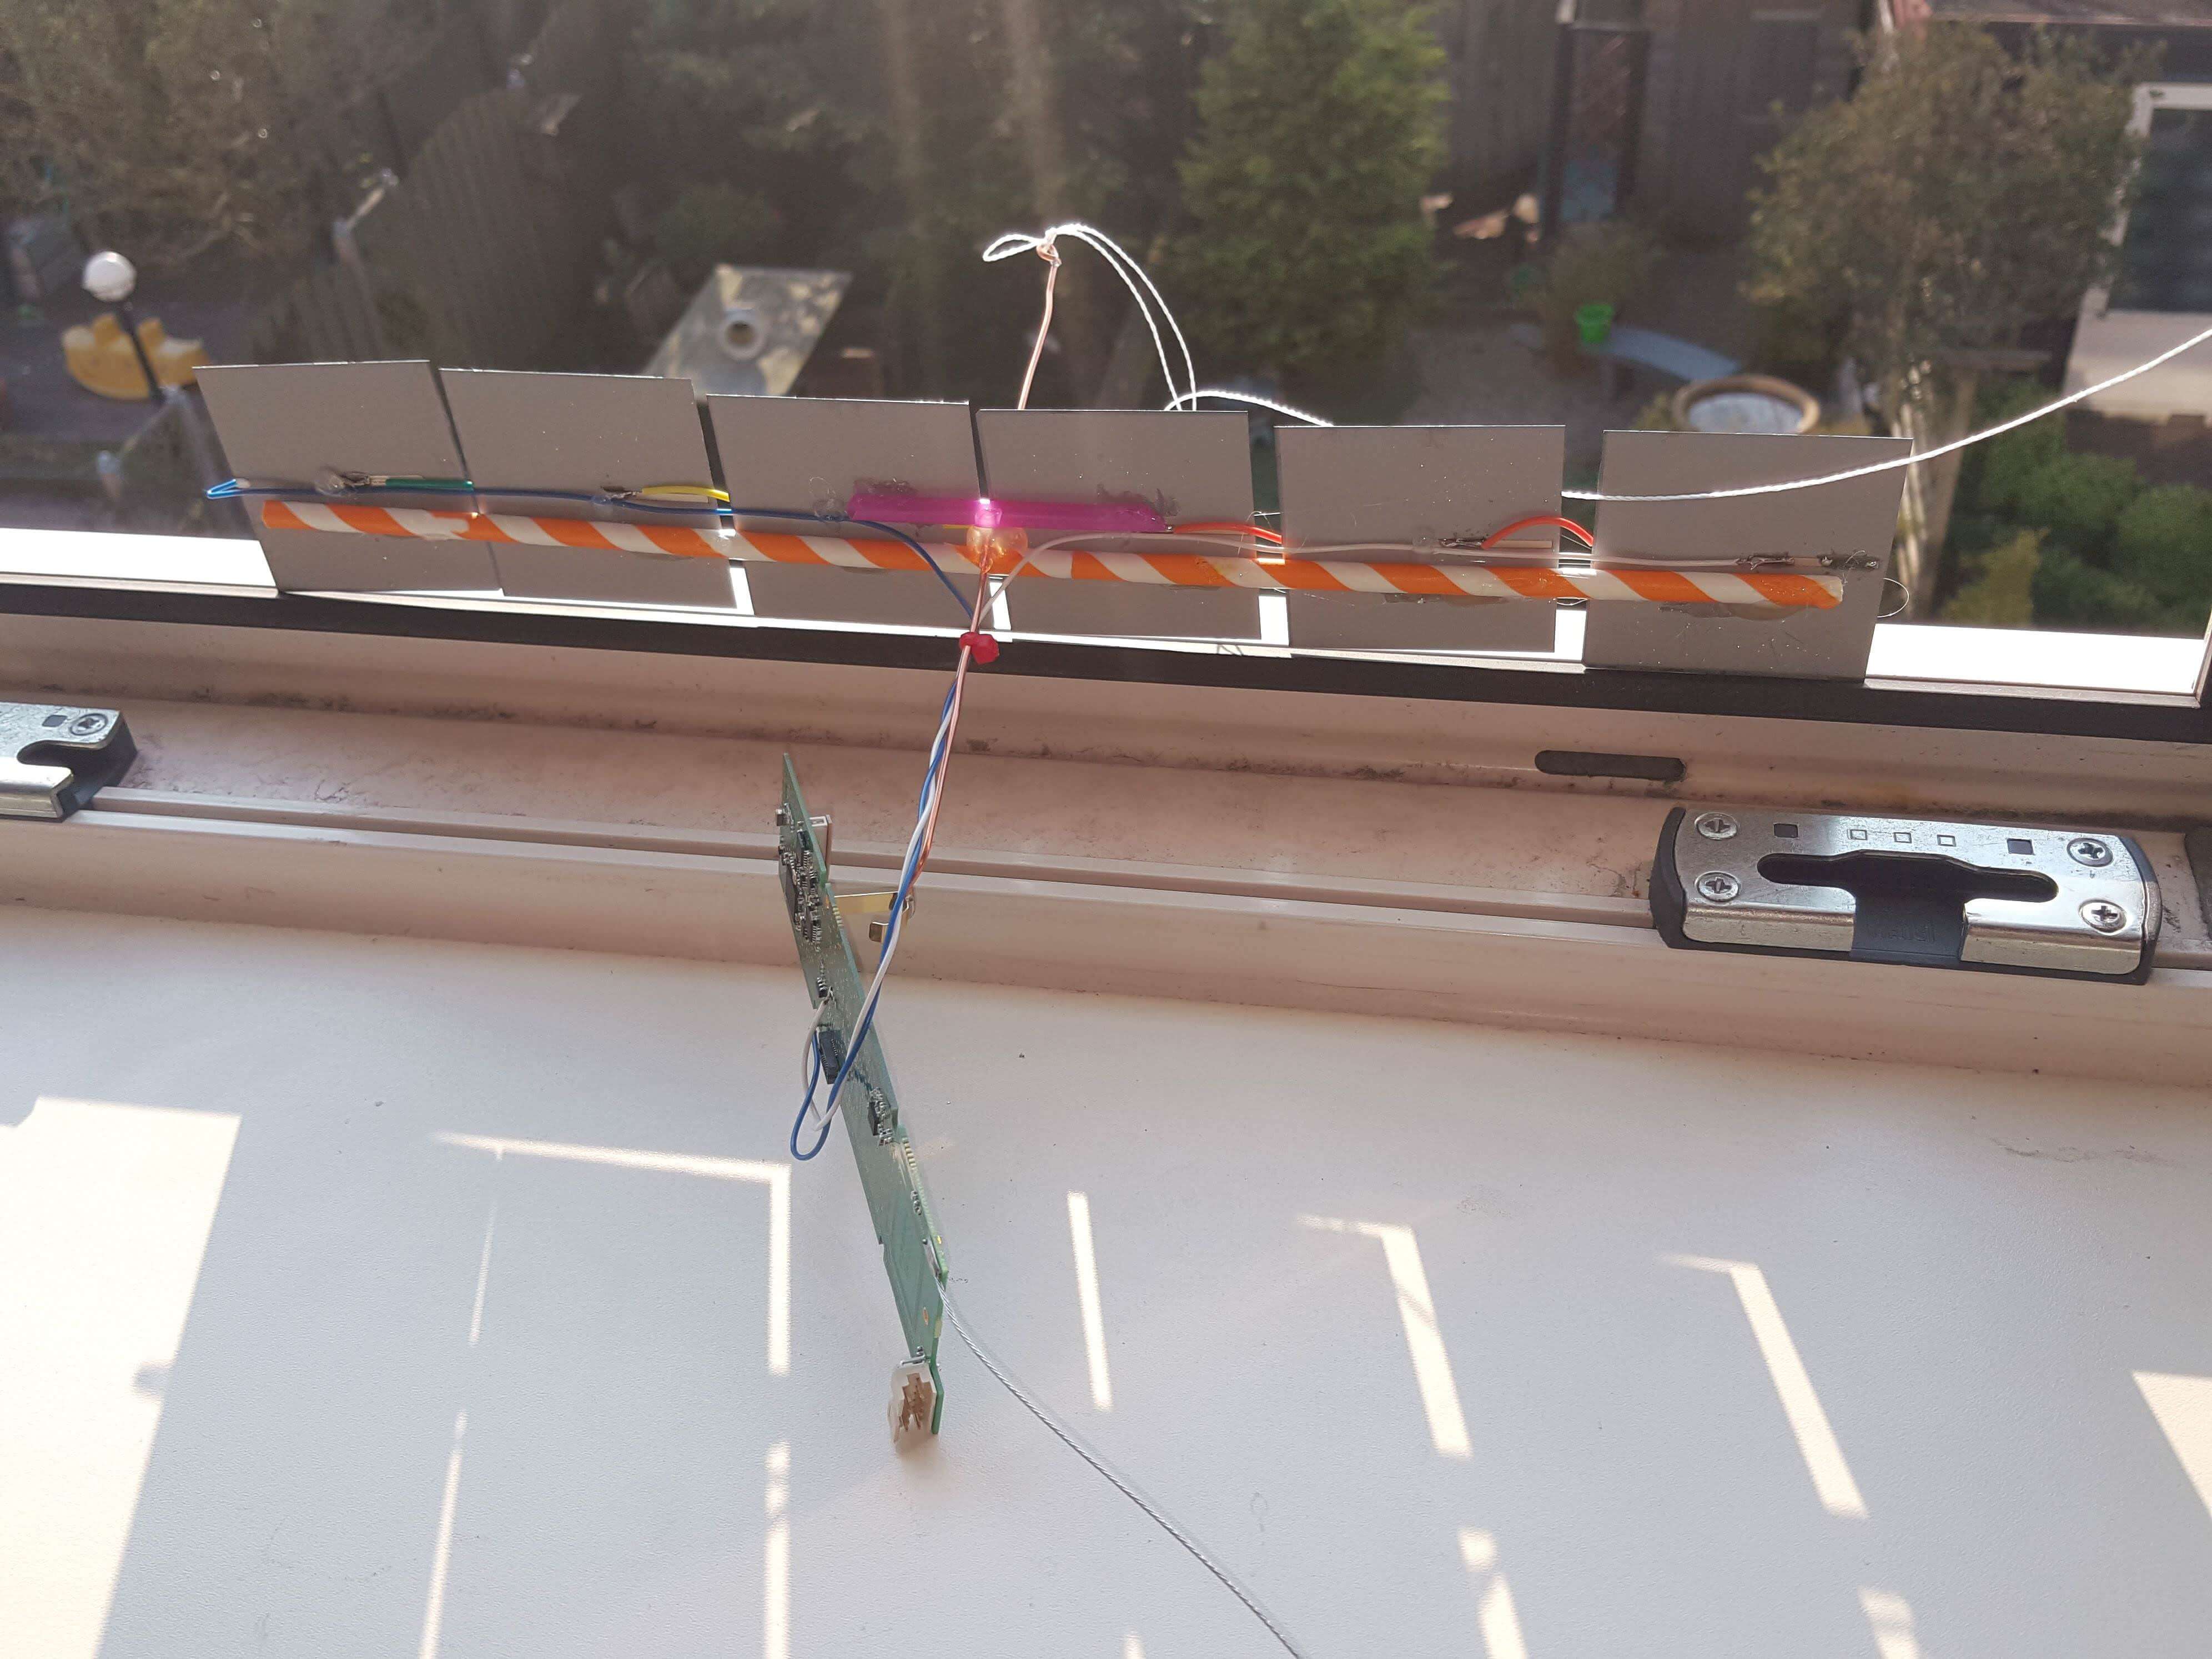
In addition to the above, happysat also wanted to mention his other radiosonde re-purposing project which was turning a DFM-06 and DFM-09 into a functional GPS unit that could be used for navigation when connected to a laptop, or to sync time on PCs.
The Freqshow software is an RTL-SDR compatible tool for Raspberry Pi devices that can render live spectrum and waterfall displays. It is designed to run on portable touchscreens that plug into the Raspberry Pi. We've posted about freqshow a few times in the past.
The additional features are many. Additional features include: Full resolution zooming, I and Q Swap, 9 different pre FFT windowing functions to choose from. Center frequency offset or shift. PPM correction for the RTL2832. FFT averaging or FFT peaking. Easy frequency up and down from main screen. Easy Scale adjustment from main screen.
On YouTube he's also posted a video that demonstrates the software in action when running on an Adafruit 2.8" and Pi Foundation 7" TFT capacitive touch screen. Dan uses the software as a panadapter for his ham radio.
"RTL_TCP SDR" is a little different to "SDR Receiver" because it contains a full spectrum analyzer and waterfall display, whereas "SDR Receiver" only allows you to listen via presets or manual tuning. Both apps can not access the RTL-SDR directly on the iOS device due to Apple limitations. An external server on a Raspberry Pi or PC running rtl_tcp is required. Programmer HotPaw writes about his App:
An RTL-SDR Software Defined Radio receiver for iOS devices (requires an external rtl_tcp server). Listen to VHF AM and FM radio signals. View a waterfall of the RF spectrum. Connect, via the rtl_tcp network protocol, to a networked RTL-SDR USB peripheral.
iOS devices do not currently support the direct connection of USB devices such as an RTL-SDR. Thus, the use of this app requires network access to a server, such as a Raspberry Pi (or Mac), with an RTL-SDR unit plugged into its USB port, and running the rtl_tcp protocol at an TCP/IP network address accessible from your iOS device. The Raspberry Pi acts, essentially, as a USB port adapter for your iOS device.
No support is provided for installing any of the software needed to use this app with a Raspberry Pi. Please do not download this app unless you are already familiar with Software Defined Radio, have an RTL-SDR USB device, and have already installed and tested rtl_tcp on your Raspberry Pi, Mac, or other server.
Since Apple's iOS doesn't allow an RTL-SDR to be plugged directly into a Lightning port (even with a USB adapter), an rtl_tcp adapter, such as a Raspberry Pi (or Pi Zero) server is required.
This app is an experiment in real-time DSP and SDR coding using Apple's Swift and Metal GPU-shader programming languages. It includes a spectrum waterfall, and supports demodulating FM, AM, and SSB. Also, includes beta test support for the AirSpy HF+.
Programmer P. Lutus has recently released a new Python based software defined radio application that he calls "PLSDR". PLSDR is a full receiver, with spectrum and waterfall displays, a frequency manager, and support for multiple modes such as AM/FM/SSB/CW. Being Python based PLSDR supports both Linux and Windows. Compatible hardware includes the RTL-SDR, HackRF and SDRplay, however Lutus notes that he could only get the SDRplay working on Linux.
The PLSDR download page also contains various bits of information about the DSP math behind designing the SSB demodulator. Essentially he found that no online examples of GNU Radio based SSB demodulators were correctly implemented, so he decided to research and implement his own design. He also notes that PLSDR was designed by initially prototyping each function in GNU Radio first, before moving it over to Python. This approach allowed him to easily check his fundamental design before optimizing it for Python. If you are interested Lutus also has a very useful page dedicated to explaining the DSP basics behind SDRs.
PLSDR is fully open sourced and available on GitHub. Exploring the code may be a good way to learn about SDR concepts.
SDR Receiver, a new iOS app for RTL-SDR and Airspy HF+, is now available on the App Store. The app works with an RTL-SDR or Airspy HF+ that is attached to a host Mac, PC or Raspberry Pi running the rtl_tcp server or equivalent. The iOS device, which may be an iPhone or an iPad, communicates over the network with the host computer which may be anywhere on the network that is reachable by TCP/IP and that can sustain the required bandwidth.
SDR Receiver demodulates AM, narrowband FM and wideband FM signals. Key features include:
Easily entered and managed lists of stations to simplify station selection.
Adjustable squelch that works for both AM and FM signals.
Adjustable LNA gain for RTL-SDR.
Adjustable audio high pass and low pass filters.
Signal strength indicator that shows power level in the signal passband.
Multiple sampling rates down to 240Ksps for RTL-SDR.
Sampling rate of 768Ksps for Airspy HF+.
Streaming from an RTL-SDR requires installation of the librtlsdr package including the rtl_tcp utility on the host computer. Streaming from an Airspy HF+ requires installation of server software on the host computer that supports the Airspy HF+ and that streams data according to the protocol used by the rtl_tcp utility. One such server has been made available by Ron Nicholson in source code form on GitHub.
Requires an RTL-SDR or Airspy HF+, a host computer and server software which are not provided with the application.
Another RTL-SDR client for iOS is "RTL_TCP SDR" by Ron Nicholson which we posted about back in March when it was still in beta testing. RTL_TCP SDR includes a spectrum analyzer and FFT display. SDR Receiver appears to have no spectrum display, so is mostly useful for listening to preset frequencies, whilst RTL_TCP SDR appears to be more useful for spectrum exploring.
Radiosondes are light weight sensor packages that are attached to weather balloons. They transmit live RF weather telemetry down to earth as they rise. With an RTL-SDR and appropriate antenna it can be possible to decode this telemetry. One related hobby that a few people enjoy is radiosonde chasing, which is tracking and collecting radiosondes once they have fallen back to the earth. Some people collect them as trophies, and others like to repurpose them. For example in this previous post we've seen how some radiosondes can be repurposed into L-band antennas for RTL-SDR's.
Another way to repurpose radiosondes has recently been submitted to us by regular contributor 'happysat' who wrote in and let us know that it is actually possible to reprogram the commonly used Vaisala RS-41 radiosondes into being able to transmit ham radio APRS, RTTY or CW mode signals in the ISM or ham bands. The initial hack was first performed by SQ5RWU, and then OM3BC who managed to create easier to use software that could reflash the radiosondes internal firmware via the serial port on the radiosonde. This hack could be useful for any ham requiring a cheap transmitter for their own high altitude balloon experiments.
In addition to the above, happysat also wanted to mention his other radiosonde re-purposing project which was turning a DFM-06 and DFM-09 into a functional GPS unit that could be used for navigation when connected to a laptop, or to sync time on PCs.
A few days ago we posted about Osmo-FL2K, which is a newly released piece of software by Steve M from Osmocom that turns a common $5-$15 USB to VGA adapter into a transmit only capable SDR. It is very complimentary to the RTL-SDR.
Any USB to VGA adapter that contains a FL2K chip appears to be compatible and yesterday we received one and have been playing with it. This post is a demonstration of some of the results.
Hardware Used
The cheapest USB to VGA adapter found on the market. It seems all of the low cost $5 - $15 adapters that indicate "USB 3.0 to VGA", and max resolutions of 1920 x 1080 are compatible as they use the FL2K chip. More expensive units are not compatible. Compatible units all have a similar design (box at the end of a short USB cable, although there are other types too). The brand does not matter. (Amazon) (Aliexpress)
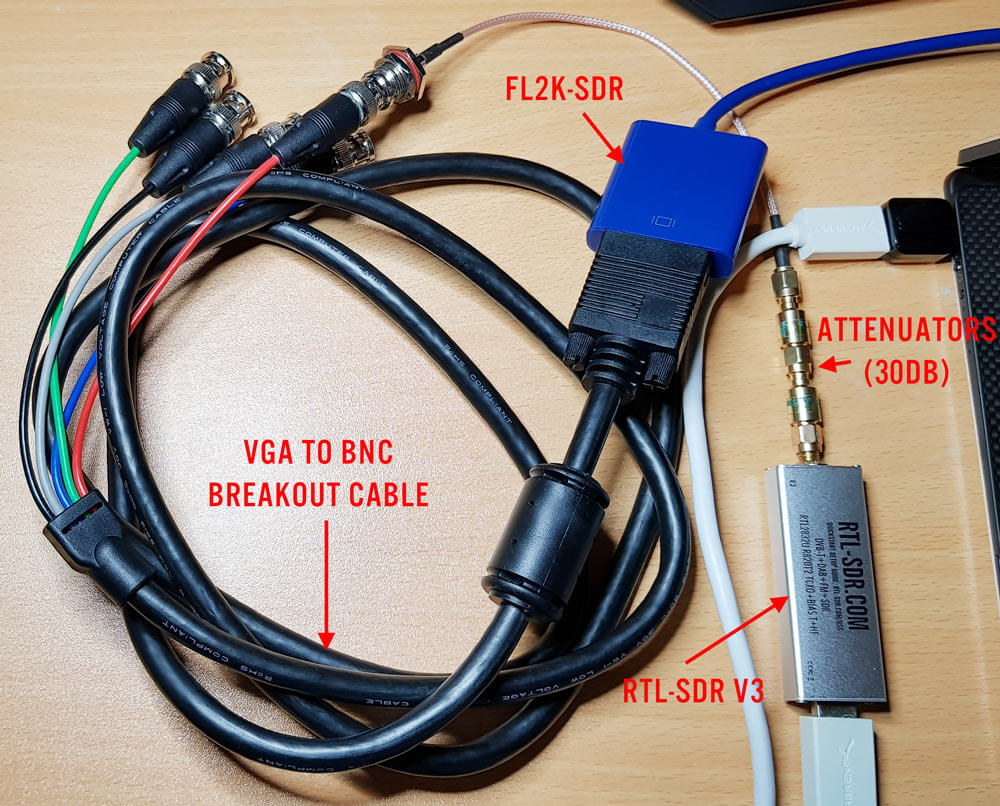
A VGA to BNC breakout cable to connect the FL2K SDR directly to an RTL-SDR (via a BNC to SMA adapter) without illegally transmitting over the air. The Red color breakout is the one connected to the TX pin. (Amazon) (Aliexpress)
A low cost 20dB or more attenuator to avoid overloading the dongle. (Amazon) (Aliexpress)
FL2K Test Hardware
Setup
Note that you must have a USB 3.0 port to use Osmo-FL2K, although a USB 2.0 might work although at significantly reduced bandwidths.
Osmo-FL2K is Linux only at the moment, but it may be possible for someone to compile a Windows version, just like with RTL-SDR. Instructions for downloading and compiling the software are available on the official wiki. It is a standard git clone, cmake, make type procedure which can be done in 2 minutes. You'll also need to probably do an 'sudo apt-get install sox pv' if you want to run the WBFM example.
First we tried to boot into the GNU Radio Live Linux bootable image on a tablet like laptop that only has USB C 3.0 ports. Unfortunately while the FL2K-SDR was recognized, and Osmo-FL2K detected it, there was no signal coming out during test transmissions. It seems that there may be issues when a USB C to USB Type A converter is used.
Next we tried the GNU Radio Live Linux bootable image on a desktop PC and this time Osmo-FL2K worked fine when plugged into a USB 3.0 port. However, plugging it into extended ports seemed to cause it to not be detected. So if you're having trouble getting Osmo-FL2K to work, try other USB 3.0 ports on your PC, and avoid USB C adapters if possible.
We also tried Virtual Box, however the FL2K-SDR wouldn't connect to the Linux guest system, even though USB 3.0 was enabled and the extensions were installed. For VMWare it appears only that the paid versions support USB 3.0.
Testing
WBFM
Following the instructions on the official Osmo-FL2K page we were able to get an WBFM transmission up and running almost instantly. The provided example routes audio from your soundcard into the FL2K-SDR, causing it to transmit WBFM audio at 95 MHz. With this we were easily able to broadcast audio from YouTube to another PC via the FL2K-SDR although there is about two seconds of delay.
To choose the frequency you choose the carrier frequency and the sample rate, and then the transmit frequencies will be the sample rate +/- carrier frequency + harmonics.
FL2K broadcasting WFM with fl2k_fm.fl2k_fm help screen
Harmonics
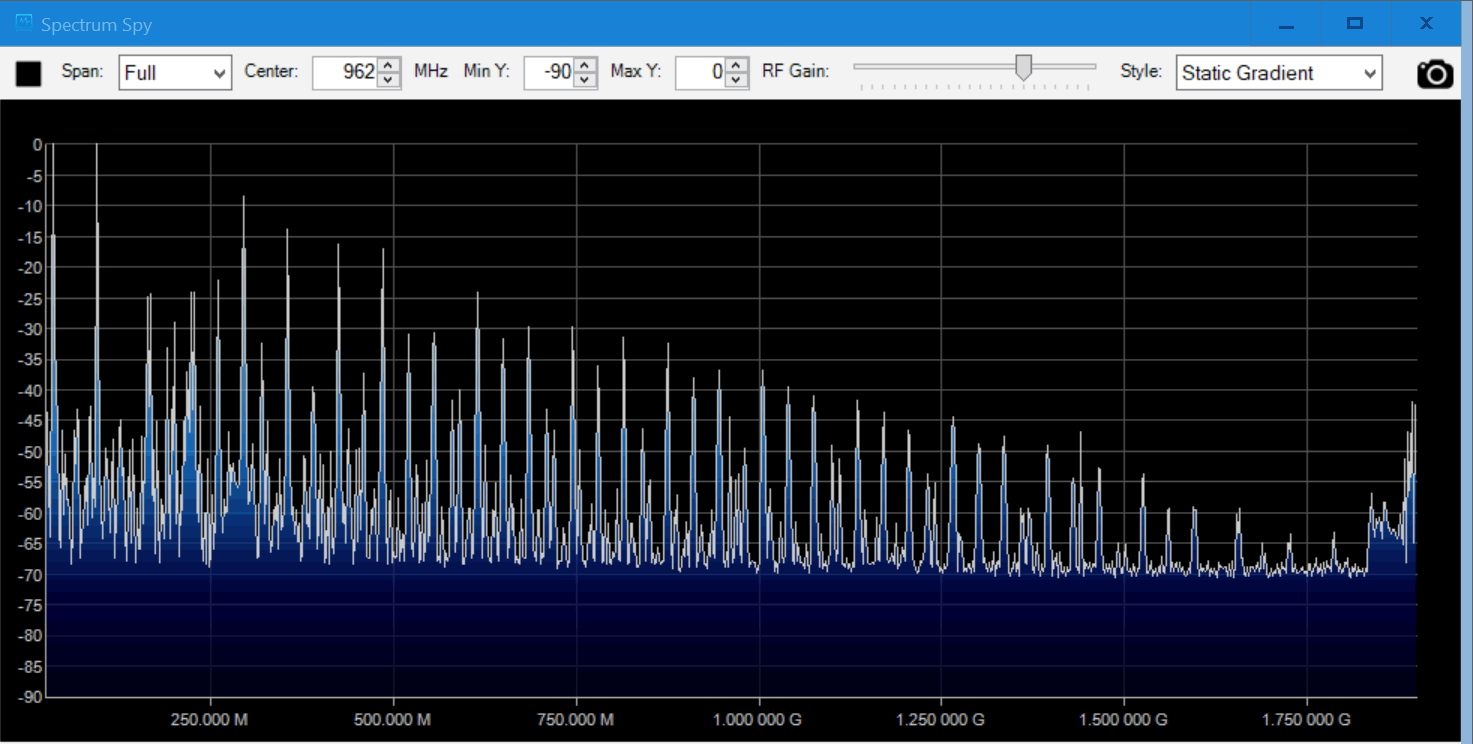
Speaking of the harmonics we had a look at them using an Airspy and the SpectrumSpy software. The image below shows that the harmonics of a signal transmitted at 95 MHz extend all the way up to the maximum range of the Airspy at 1.8 GHz, and probably further. So filtering is very necessary if you ever want to transmit over the air.
Note that when broadcasting at 95 MHz (sample rate 130 MHz, carrier 35 MHz), there is also a strong signal at the carrier frequency. So band pass filtering would be required.
Harmonics when transmitting at 95 MHz
DVB-T
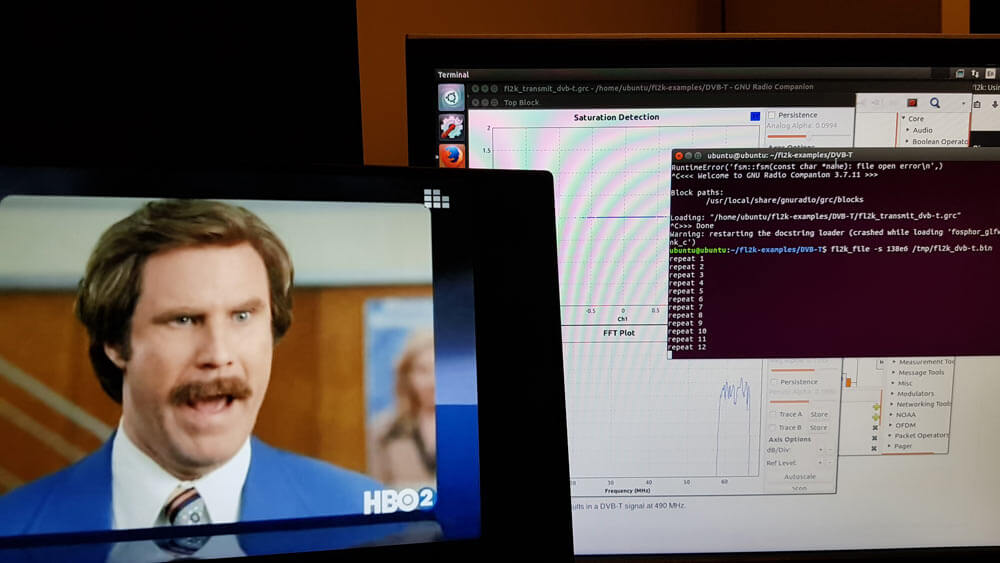
We also tested the DVB-T example found at https://github.com/steve-m/fl2k-examples, which worked flawlessly. By using the connected RTL-SDR dongle with the original DVB-T drivers we were able to receive a transmitted stream at 490 MHz using the ProgDVB software.
To do this follow the instructions in the fl2k-examples/DVB-T readme file to generate samples which Osmo-FL2K can transmit. Then on another PC install the DVB-T drivers for the RTL-SDR, and use ProgDVB to scan 490 MHz by manually editing the multiplexes options.
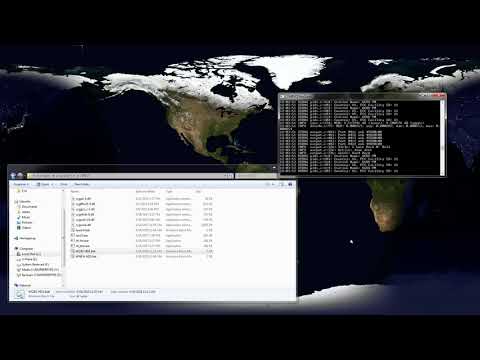
Osmo-FL2K transmitting DVB-T to a Laptop running an RTL-SDR.
CPU Usage
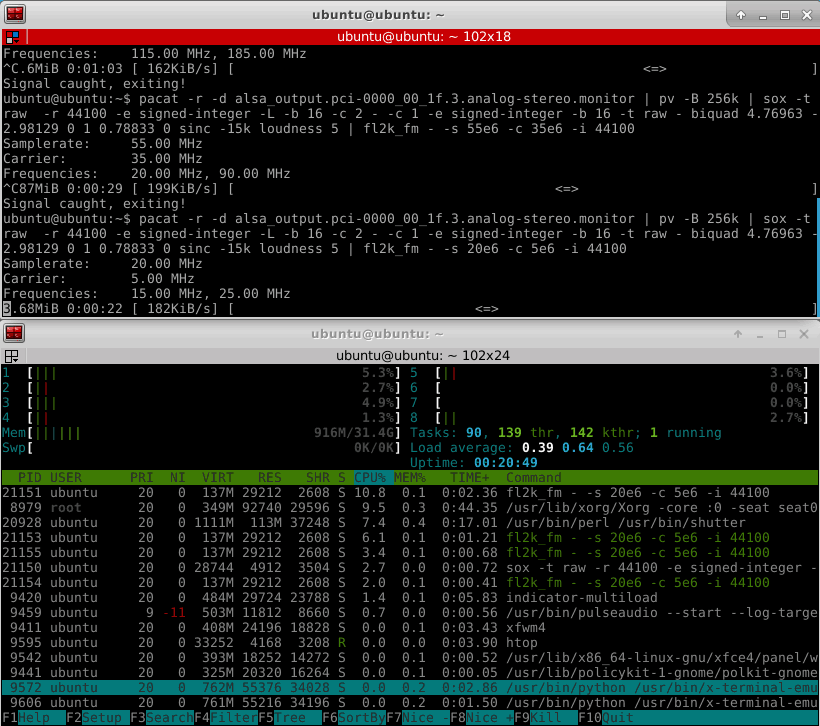
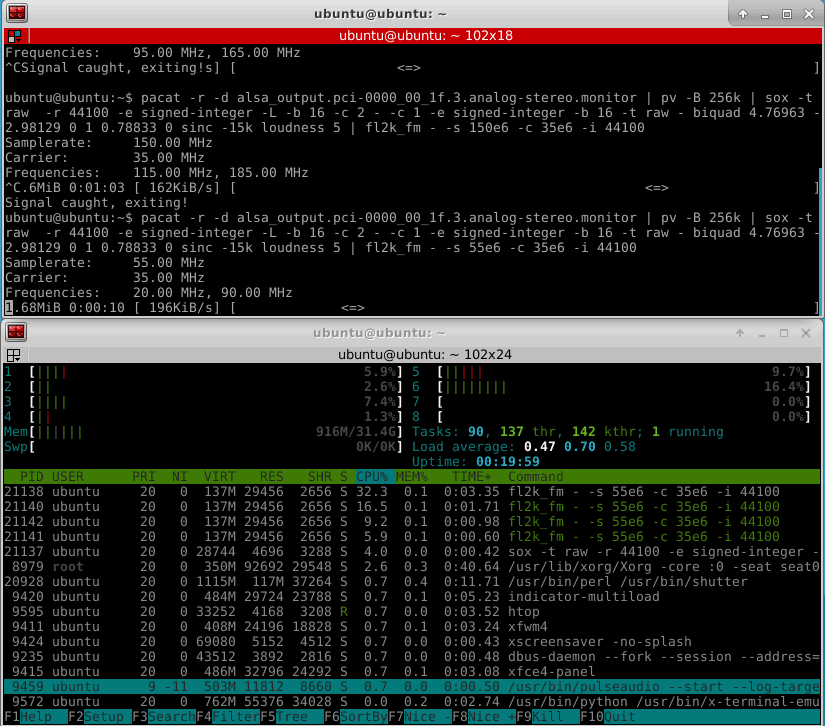
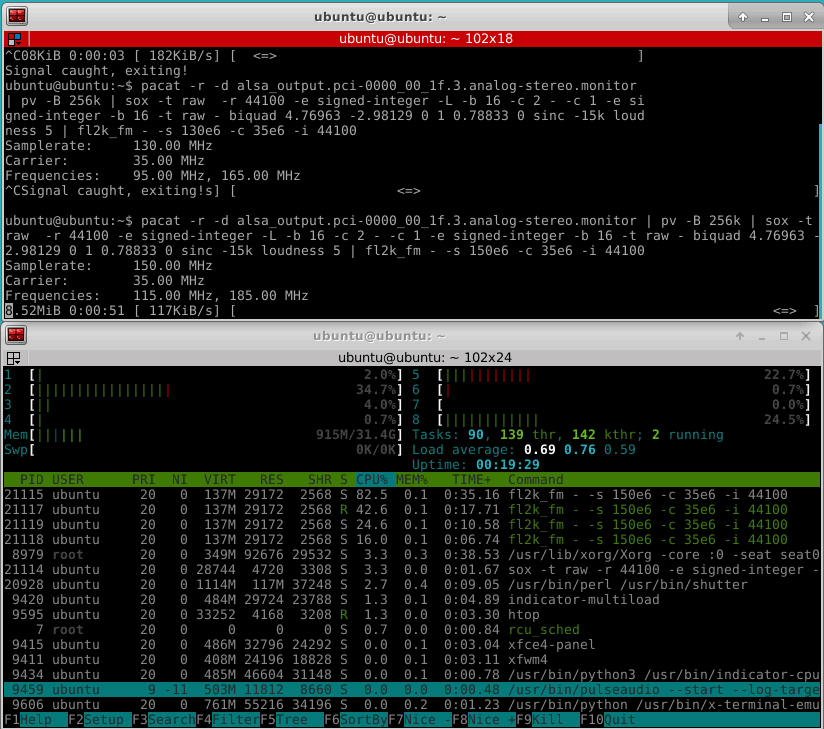
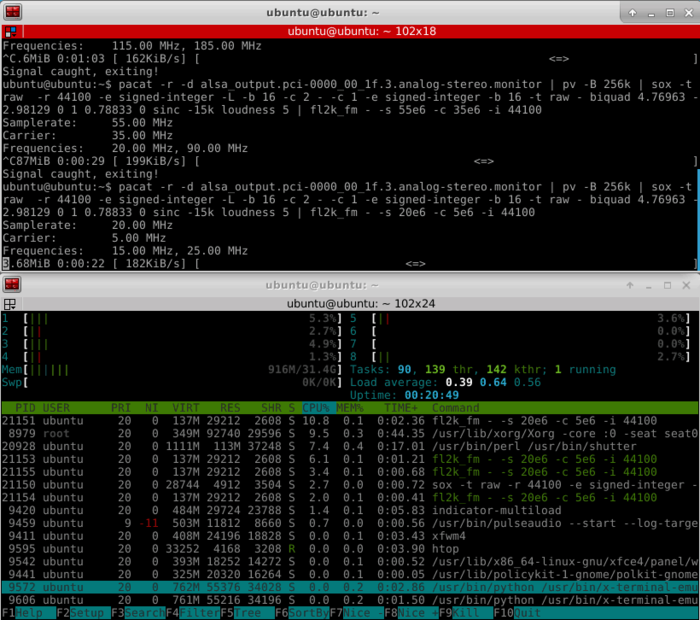
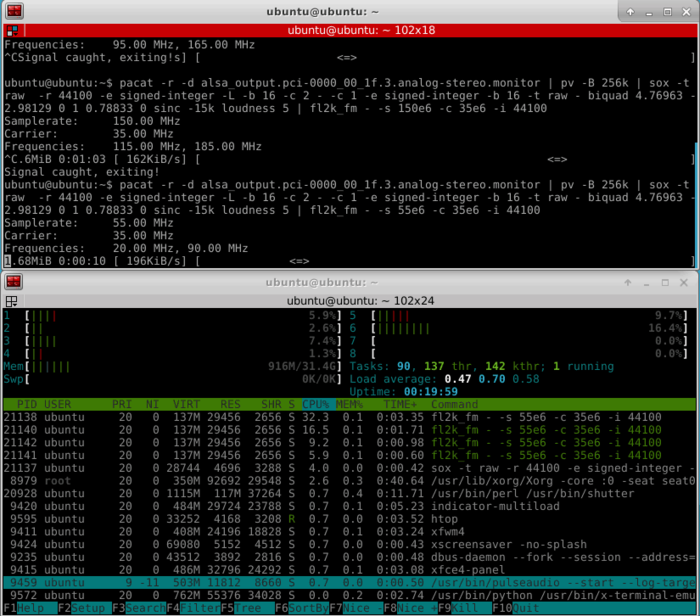
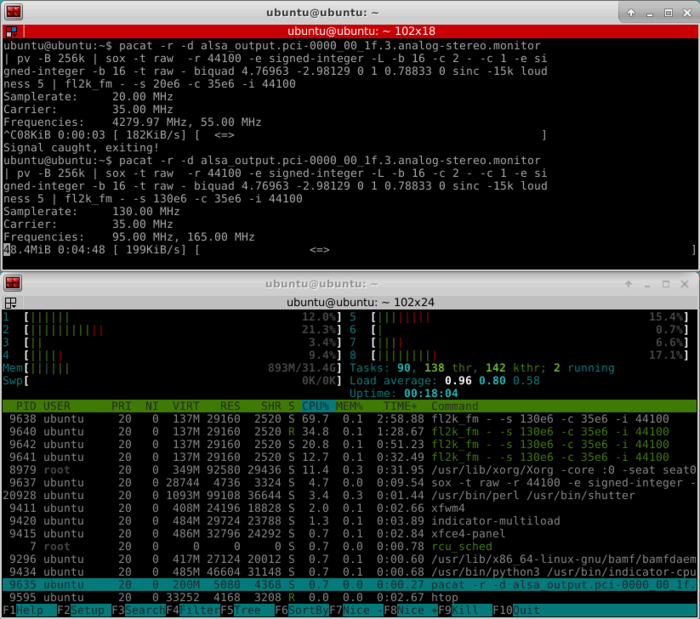
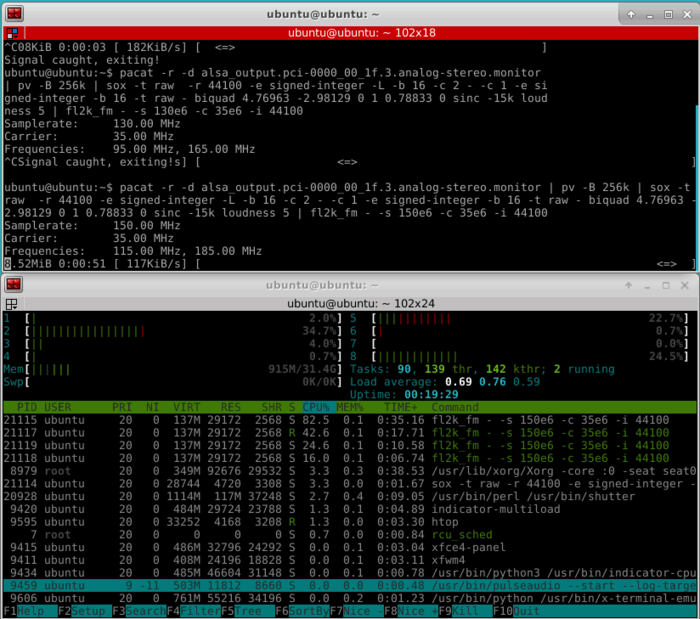
Osmo-FL2K is quite CPU intensive, especially if higher sample rates are used. For this reason it might struggle on singe board computers that support USB 3.0. The images below show some CPU usage examples for sample rates of 20, 55, 130 and 155 MS/S. The test PC uses a fairly powerful i7-6700 CPU.
Over on YouTube user Rob Fissel has uploaded a nice video that demonstrates the iBiquity HD Radio decoder working with an RTL-SDR. HD Radio is a terrestrial digital broadcast signal that is only used in North America. It is easily recognized by the two rectangular blocks on either side of a broadcast FM station signal on a spectrum analyzer/waterfall display.
For a long time it was thought impossible to decode due to the closed and proprietary nature of the signal format. But thanks to Theori who was able to reverse engineer and create an HD Radio decoder it has now become possible to decode this into actual audio that you can listen to. In some areas it is even possible to extract the weather and traffic data encoded into some broadcasts from iHeartRadio.
Rob's YouTube video demonstrates him downloading and setting up the HD Radio decoder, then receiving, decoding and listening to some HD Radio stations in his area.
A few owners of our RTL-SDR V3 and/or our Triple Filtered ADS-B LNA (or other bias tee powered LNAs) have been having trouble getting the V3 bias tee to activate on the FlightAware PiAware Raspberry Pi image. The core stumbling point is that the PiAware image activates the dump1090 ADS-B decoder immediately upon boot. To activate the bias tee, the bias tee software requires access to the dongle which it cannot get since dump1090 is blocking it. So to get around this the bias tee must be activated first before dump1090 runs.
PiAware is FlightAware's Raspberry Pi image which feeds their flightaware.com flight tracking service using RTL-SDR dongles. By using our Triple Filtered ADS-B LNA, users can expect increased range and decoded messages, especially when using long runs of coax cable, and/or in environments with strong interfering signals.
In the instructions below we'll explain how to set up a PiAware image that automatically enables the Bias Tee upon boot.
Downloading the V3 Bias Tee Software onto PiAware
First we assume that you're starting fresh from a new PiAware image, so we need to enable WiFi and SSH connections which is part of the standard set up for PiAware. See the following links for instructions.
Download and install the RTL-SDR V3 Bias Tee software.
cd ~
git clone https://github.com/rtlsdrblog/rtl_biast
cd rtl_biast
mkdir build
cd build
cmake .. -DDETACH_KERNEL_DRIVER=ON
make
Testing the Bias Tee
Over on his blog Akos has created a short guide to activating the bias tee manually, by first stopping dump1090, activating the bias tee, then restarting dump1090. It's a simple one line copy and paste job.
So after installing the rtl_biast software above you can use the following line to test the bias tee. After running this line the FlightAware service should be up and running again, with the bias tee and LNA activated.
sudo service dump1090-fa stop && cd ~/rtl_biast/build/src && ./rtl_biast -b 1 && sudo service dump1090-fa start
Automatically Starting the Bias Tee on Boot
Ideally we don't want to have to reactivate the bias tee manually every time the Raspberry Pi reboots. To make it automatic use the following instructions:
First create a service directory and configuration file
Finally press Ctrl+X then Y to close and save. Now whenever PiAware reboots the bias tee should be automatically activated as this service runs before dump1090 is activated.