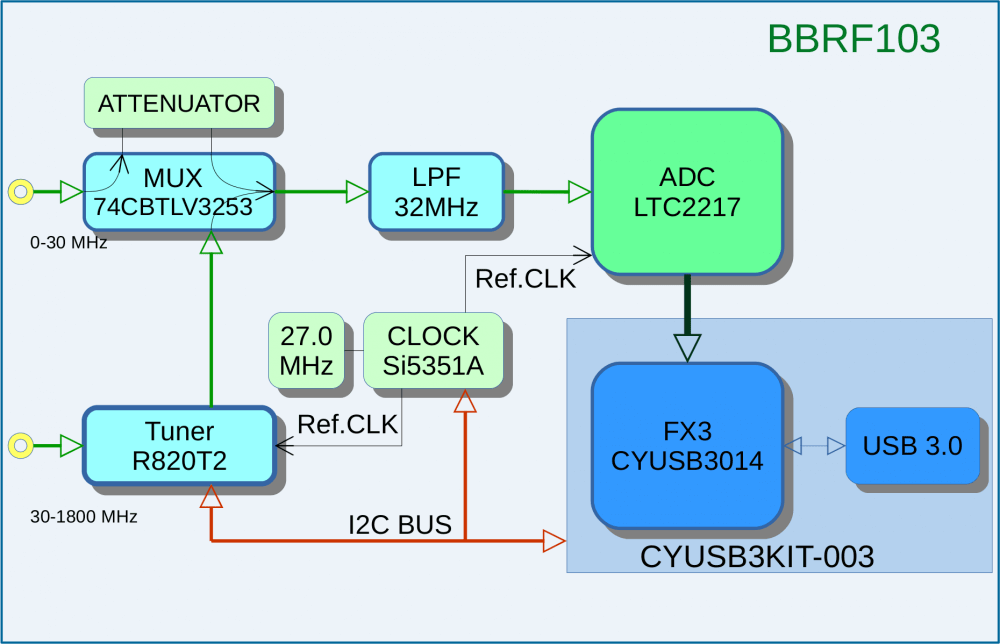
Over on his blog IK1XPV has been writing about his experiments in trying to create a new SDR which he calls the ‘BreadBoard RF103’. His SDR is based on a FX3 SuperSpeed Explorer Kit which is a development platform that has an ARM9 processor on board, USB 3.0 connectivity and various expansion headers. Connected to that board is an LTC2217 16-bit ADC which can sample at up to 105 Msps. An R820T2 is used as the tuning chip to enable reception from 30 – 1800 MHz, and reception from 0 – 30 MHz is handled in direct sampling mode. The R820T2 is the same chip used on most RTL-SDR dongles, as well as on the higher end Airspy. It is a very good tuning chip, but it is held back by the 8-bit ADC on the RTL2832U chip. So the 16-bit ADC on the LTC2217 should be able to really show it off.
BreadBoard RF103 Block Diagram
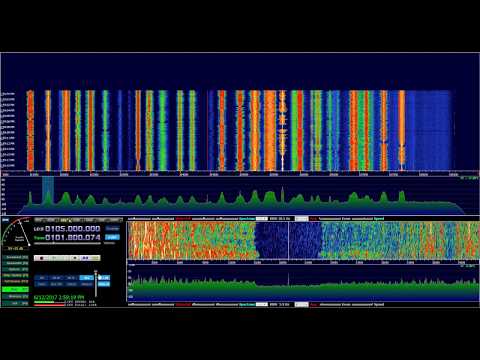
IK1XPV’s BreadBoard RF103 is currently running on HDSDR with 10 MHz of bandwidth. He writes that a modern and powerful PC with USB 3.0 is required to to handle all the data coming through. In the videos below he shows it receiving the FM band with what looks to be about 10 MHz of bandwidth.
HDSDR v2 76 ExtIO sddc dll SRate 8000000 OS 10 0 14393 CPU Intel Core i5 3350P @ 3 10G
BB103 VIDEOFM 012
So far the BreadBoard RF103 doesn’t seem planned to be a commercial device. The LTC2217 ADC is a $115 USD part, and the FX3 dev board is $49 USD. So while not a budget unit, it may still end up as as interesting SDR to home build and could contend with Airspy and SDRplay devices in the $100 – $300 USD range.
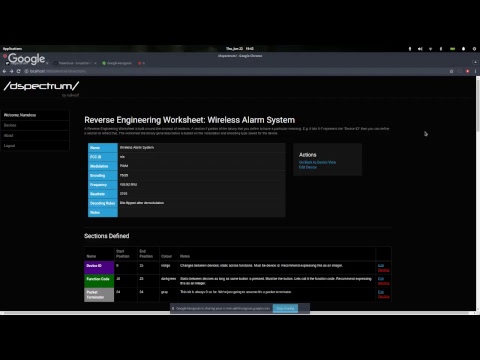
Over on YouTube a talk from the author of DSpectrum has been uploaded from his talk during the 13th Cyberspectrum Melbourne meetup. In his talk he goes through the full process of reverse engineering a wireless alarm system in DSpectrumGUI. DSpectrum is a reverse engineering tool that aims to make it trivial to demodulate digital RF transmissions using data captured from SDRs like an RTL-SDR or HackRF.
In the video he shows how to create a project, import a capture and create an overlay on Inspectrum and bring the waveform back into DSpectrum. DSpectrum was then able to automatically detect that the encoding used was PWM and convert it into a bit string. Then by importing multiple captures from various buttons on the alarm he shows how easy it is to see the differences in the bit strings from within DSpectrum. From these differences he uses DSpectrum to help identify what the function of each byte of the bitstring is. Finally he shows how to perform a replay attack with RFcat or similar hardware using the data gathered.
This is a really good talk to watch if you’re interested in getting started with reverse engineering simple digital signals, like those from ISM band devices.
Cyberspectrum Melbourne #13: Introduction to DSpectrum for reverse engineering signals
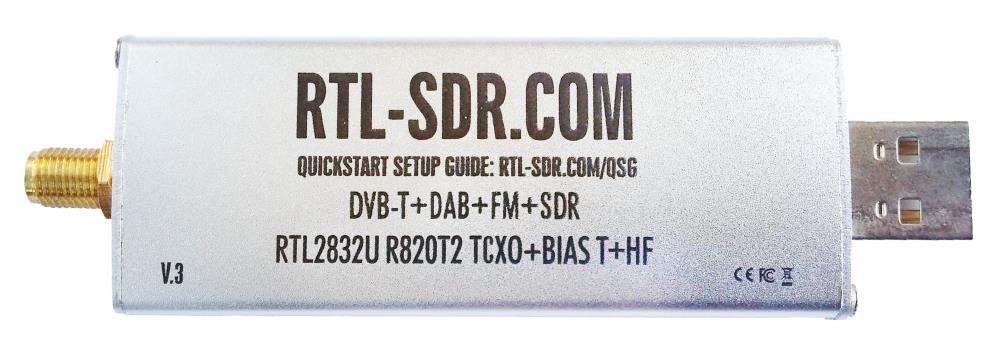
A few people have been asking for a RTL-SDR.com V3 data/info sheet, so we have written one up here (PDF). The datasheet explains the improvements made to the V3, and how to use some of the special features like the direct sampling mode and the bias tee.
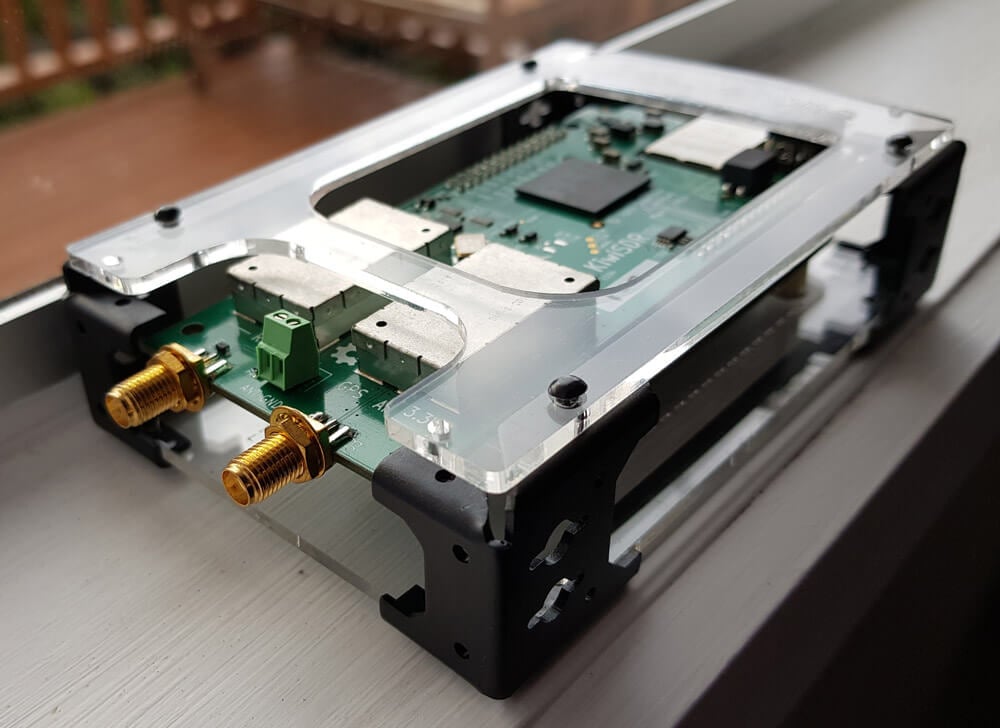
The KiwiSDR is a 14-bit wideband RX only HF software defined radio created by John Seamons (ZL/KF6VO) which has up to 32 MHz of bandwidth, so it can receive the entire 10 kHz – 30 MHz VLF/LF/MW/HF spectrum all at once. However, it is not a typical SDR as you do not connect the KiwiSDR directly to your PC. Instead the KiwiSDR is a cape (add on board) for the Beaglebone single board computing platform. If you’re unfamiliar with the Beaglebone, it is a small computing board that is similar to a Raspberry Pi. The KiwiSDR is designed to be a low cost standalone unit that runs 24/7, connects to your HF antenna and internet network, and shares your 10 kHz – 30 MHz reception over the internet with up to 4 simultaneous users.
The KiwiSDR
The KiwiSDR kit retails for $299 USD (Amazon) (Direct from Seeed Studio), and with that price you get the KiwiSDR cape, a Beaglebone Green board, an enclosure, microSD card and a GPS antenna. If you already have a Beaglebone lying around, then you can purchase the KiwiSDR board only for $199 USD.
Because the KiwiSDR is a network SDR, instead of connecting it to your PC it connects to your home internet network, allowing you to access it from any computing device via a web browser. Direct access to the SDR is not possible (actually it seems that it is, but it’s not easy to do), and all the computing is performed on the KiwiSDR’s on board FPGA and Beaglebone’s CPU before being sent to the network. Thus raw ADC or IQ data is never touched by your PC, your PC only sees the compressed audio and waterfall stream. So a powerful computer is not required to run the SDR. In fact, a mobile phone or tablet will do just fine.
In comparison, a $299 USD wideband non-networked SDR such as the LimeSDR uses a 12-bit ADC and can do up to 80 MHz of bandwidth over USB 3.0. But even on our relatively powerful PC (i7-6700 CPU, Geforce GTX 970 and 32 GB RAM) the LimeSDR can only get up to about 65 MHz on SDR-Console V3 before performance becomes too choppy.
But the real reason to purchase a KiwiSDR is that it is designed to be shared and accessed over the internet from anywhere in the world. You can connect to over 137 shared KiwiSDRs right now over at sdr.hu which is a site that indexes public KiwiSDRs. To achieve internet sharing, the KiwiSDR runs a modified version of András Retzler’s OpenWebRX software. OpenWebRX is similar to WebSDR, but is open source and freely available to download online. The standard OpenWebRX is also designed to support the RTL-SDR. Of course if you don’t want to share your receiver over the internet you don’t have to, and you could use it on your own local network only.
Some applications of the KiwiSDR might include things like: setting up a remote receiver in a good noise free location, helping hams give themselves propagation reports by accessing a remote KiwiSDR while they are TXing, listening to shortwave stations, monitoring WSPR or WEFAX channels, education, crowd sourced science experiments and more.
Over on YouTube user radiosification has uploaded a video tutorial that shows how to decode, follow and listen to NXDN/IDAS trunking radio signals. NXDN/IDAS is a narrowband digital voice protocol commonly used with handheld radio terminals.
In the tutorial radiosification explains how to set up DSDPlus and its frequencies text file to automatically listen to and track conversations using the control channel. SDR# is initially used to find the NXDN control and voice channels, which are then entered into the text file. Using this method only DSDPlus and its corresponding receiver FMP is used. Trunking software like Unitrunker is not needed.
Radiosification also notes that the method he presents can also be used for other digital trunking systems such as P25 as well.
All electronic devices emit some sort of unintentional RF signals which can be received by an eavesdropping radio. These unintentional signals are sometimes referred to as TEMPEST, after the NSA and NATO specification which aims to ensure that electronic devices containing sensitive information cannot be spied upon through unintentional radio emissions, sounds or vibrations. TEMPEST can also refers to the opposite, which is spying on unsecured electronic devices by these means.
In their experiments they set up an AES implementation on an FPGA, and used a simple wire loop antenna and RTL-SDR to measure and record the RF emissions. By then doing some analysis on the recorded signal they are able to fairly easily extract the AES encryption key, thus defeating the encryption.
Further testing in an anechoic chamber showed that with a discone antenna they were able to recover the keys from up to a meter away. A directional antenna could probably reach even further distances.
In the past we’ve seen a similar attack using a Funcube dongle, which is an SDR similar to the RTL-SDR. In that attack they were able to remotely recover encryption keys from a laptop running GnuPC. Also, somewhat related is Disney’s EM Sense which uses an RTL-SDR to identify electronic devices by their RF emissions.
Aerial TV is an Android app that allows you to watch DVB-T TV with an RTL-SDR on a mobile device. We posted about Aerial TV back in April and it was available on the Google Play store back then. Unfortunately Aerial TV has recently been banned from the Google Play store as apparently the app can be used to display copyrighted material from TV. The author writes the following on a Facebook post:
Google Play has suspended Aerial TV due to “[Aerial TV] claims to provide copyrighted contents from TV channels”. According to Google apps that display live TV are of “questionable nature”. I am trying to clarify what they mean. I would like to apologize to all affected users. If you have any concerns, feel free to get in touch with Google directly.
This is quite odd and probably a mistake. But if you are looking for Aerial TV it is now available on the Amazon app store with a current 35% discount. If you bought the app on the Google Play store then to get new updates you will need to uninstall it, contact the developer for a refund, and then purchase it again on the Amazon store. More info about that is available on the Facebook page. Updates about it’s availability will always be provided on the official website at aerialtv.eu.
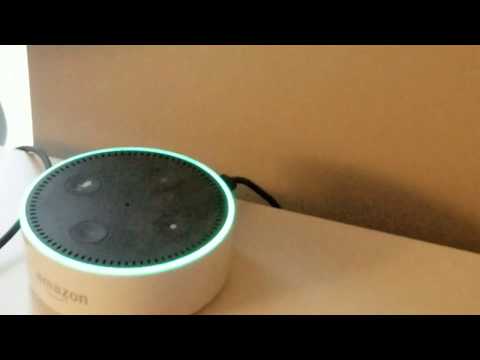
Amazon Echo is a smart home device which is essentially a hands free speaker that responds to voice commands in a similar way to ‘Okay Google’ and Siri does on your phone. With voice commands you can ask it to do things like play music, make a call or send a message, answer any question, control smart home devices like fans and locks and order items from Amazon.
The Echo skill gathers the live local ADS-B plane data via dump1090’s json output which runs on a networked Raspberry Pi with RTL-SDR dongle attached. The data is loaded into a database, which is then queried for the closest plane to the Echo’s location. Finally the program scrapes the closest flights departure and arrival data from FlightRadar24 before speaking it through the Echo’s speaker. Nicks code is freely available over on his GitHub page.
Alexa Plane Spotting Skill
This project reminds us of a previous post where we posted about Simon Aubury’s work in creating a Raspberry Pi and RTL-SDR based aircraft camera tracking system. Simon’s system used live ADS-B data to point a camera directly at aircraft as they passed over his house.
It also reminded us of this British Airways video billboard that was popular a few years ago. The ad featured a young boy who would point directly at passing aircraft with text displaying the flight information. They used a commercial networked ADS-B device to gather live ADS-B data (internet based ADS-B data from sites like flightradar24.com has a time lag, so it is not suitable for time sensitive applications like this), and whenever a passing British Airways aircraft was detected the ad would play.
Cannes Lions Grand Prix 2014 Direct Lion British Airways Magic of Flying Ogilvy One, London