Over on YouTube icholakov has uploaded an informative video that gives an overview of the main communication modes that aircraft use from HF to UHF. In the video he also gives examples of those modes being received and decoded with an SDR.
The modes that he explains and demonstrates are VHF voice, VHF ATIS automated weather, ACARS short data messages, HF voice, HF automatic weather, HF data selective calling (SELCAL), HF data link (HFDL) and UHF ADS-B aircraft positioning.
2018: Monitoring airplane communications (aviation radio signal monitoring via sdr)
Over on YouTube Fuzz The Pi Guy has uploaded a video tutorial showing how to set up a Broadcastify air traffic control audio feed with RTL-Airband and an RTL-SDR running on a Raspberry Pi. This allows you to publicly share your received air traffic control audio online via sites like Broadcastify.
The video is based on a comprehensive Radioreference text tutorial which takes you through the process from scratch. Setting it up involves installing the Raspbian OS, installing RTL-SDR, installing and setting up RTL-Airband, configuring ezstream and then ensuring that everything runs automatically on boot. It's a fairly involved setup process, but the video helps make things easier.
How To Setup Broadcastify On A Raspberry Pi Using RTL_AM For Aviation
RPiTX is software for the Raspberry Pi which can turn it into a 5 kHz to 1500 MHz transmitter which can transmit any arbitrary signal. In order to transmit the software does not require any additional hardware apart from a wire plugged into a GPIO pin on the expansion header. It works by modulating the GPIO pin with square waves in such a way that the desired signal is generated. However, although additional hardware isn't required, if RPiTX is to be used in any actual application a band-pass filter is highly recommended in order to remove any harmonics which could interfere and jam other radio systems.
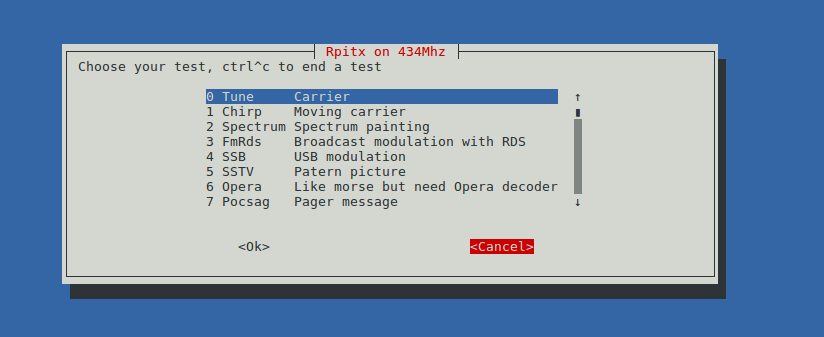
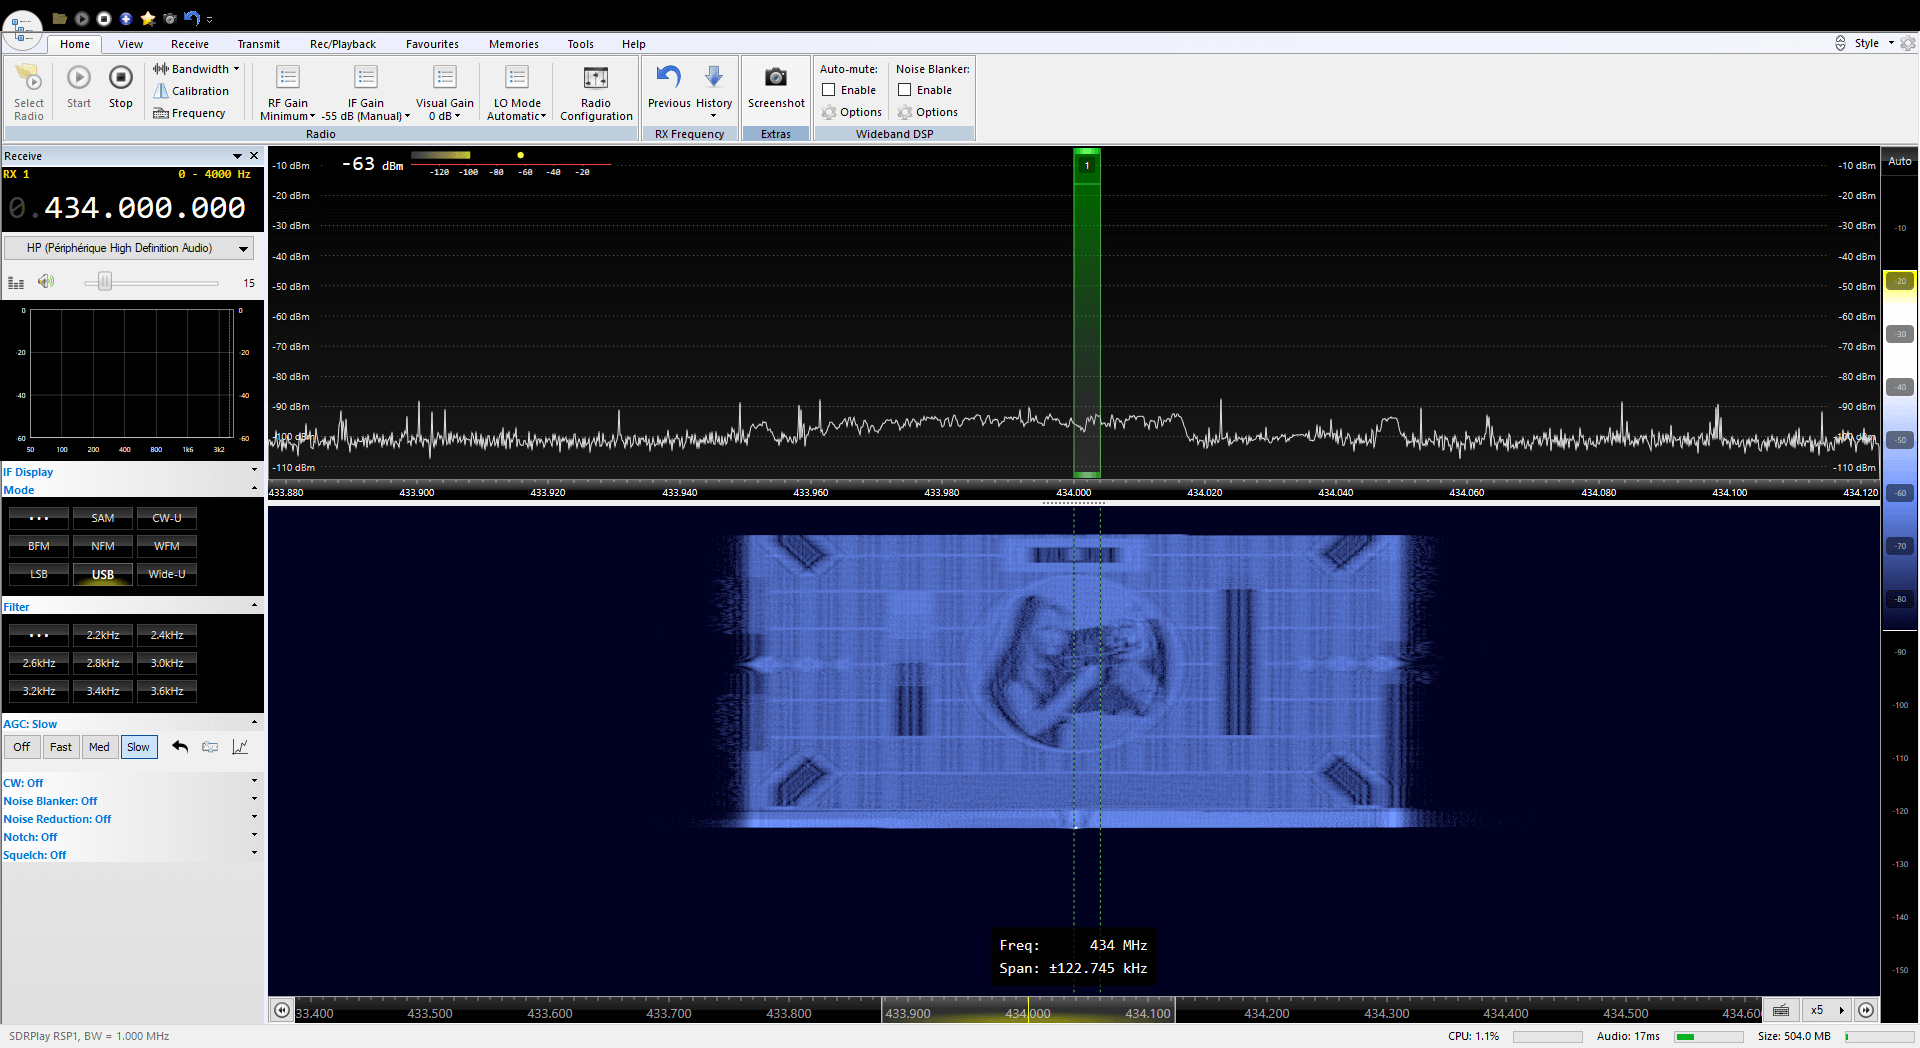
Earlier this month RPiTX was upgraded to version 2. One of the changes is a new GUI for testing the various transmission modes. Currently it is possible to transmit a chirp, FM with RDS, USB, SSTV, Opera, Pocsag, SSTV, Freedv. There is also a spectrum painter which allows you to display an image on a SDR's waterfall.
The RPiTX V2 GUIPainting an Image on a SDR Waterfall Display with RPiTX v2
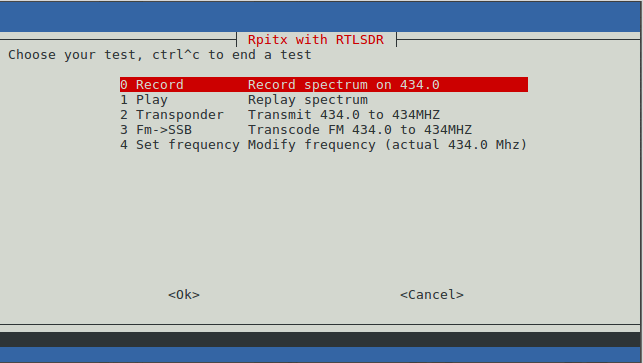
The RPiTX v2 update also makes recording a signal with an RTL-SDR, and replaying that signal with RPiTX significantly easier. Previously it was necessary to go through a bunch of preprocessing steps (as described in our previous tutorial) in order to get a transmittable file, but now RPiTX is capable of transmitting a recorded IQ file directly. This makes copying things like 433 MHz ISM band remotes significantly easier. One application might be to use RPiTX as an internet connected home automation tool which could control all your wireless devices.
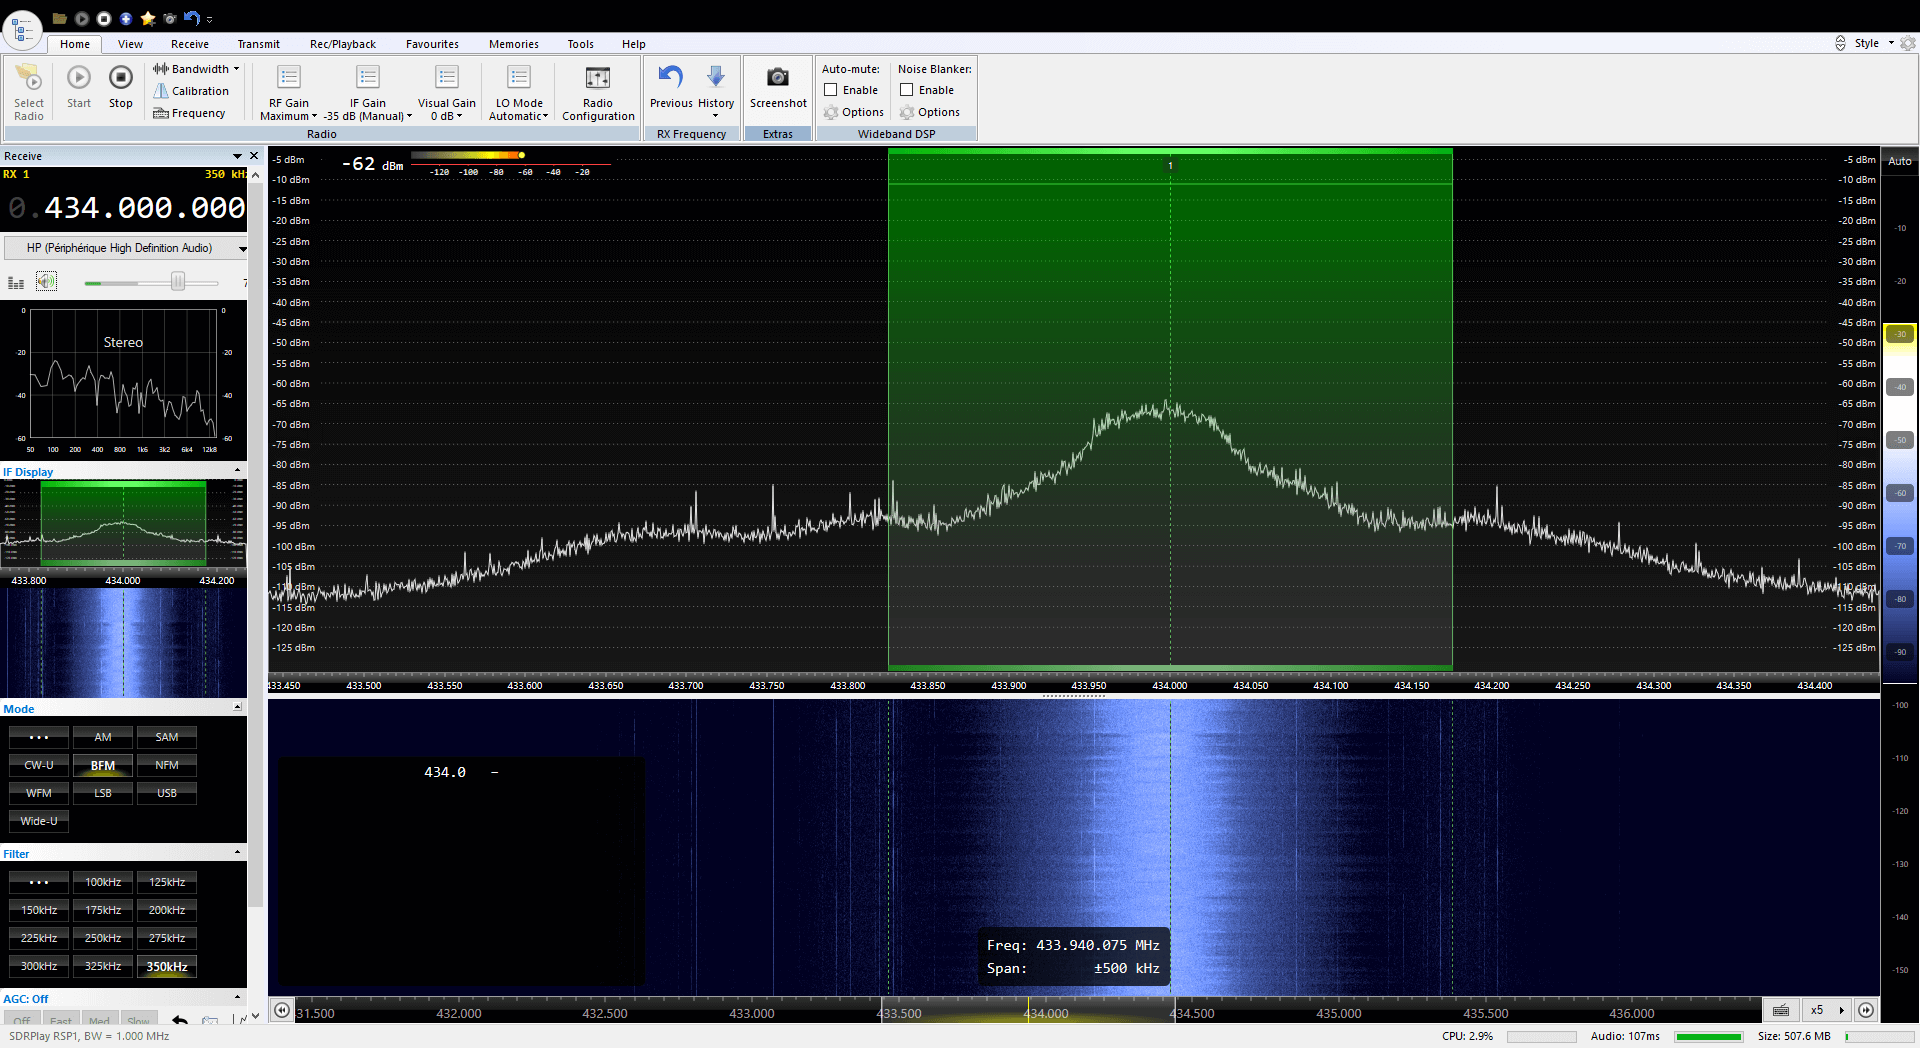
Finally, another application of the RPiTX and RTL-SDR combination is a live RF relay. The software is able to receive a signal at one frequency from the RTL-SDR, and then re-transmit it at another frequency in real time. Additionally, it is also capable of live transmodulation, where it receives an FM radio station, demodulates and then remodulates it as SSB to transmit on another frequency.
The RPiTX V2 RTL-SDR MenuRPiTX v2 re-transmitting a broadcast FM signal live at 434 MHz.
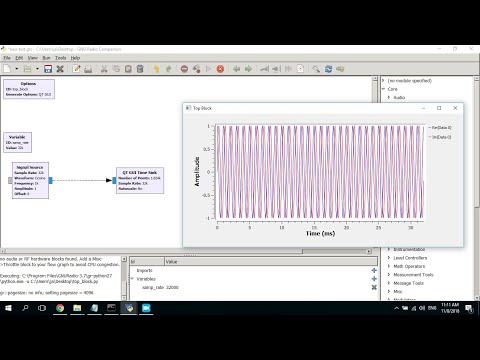
Over on YouTube user Petr Horký has uploaded a helpful tutorial video showing how to install GNU Radio on Windows 10. Petr goes through the steps from installing Python, pip and other dependencies like numpy and pyqt, to installing GNU Radio itself and then ensuring that the system PATH is set correctly.
GNU Radio is a block based programming language for building digital signal processing applications (e.g. demodulators/decoders). It is very useful for experimenting with more advanced SDR concepts, and there are also many RTL-SDR compatible applications built with GNU Radio as well. GNU Radio is typically run on Linux, but can also run on Windows now too, although perhaps not every program will be compatible.
How to install GNU Radio Companion on Windows 10 (pip, environment variables)
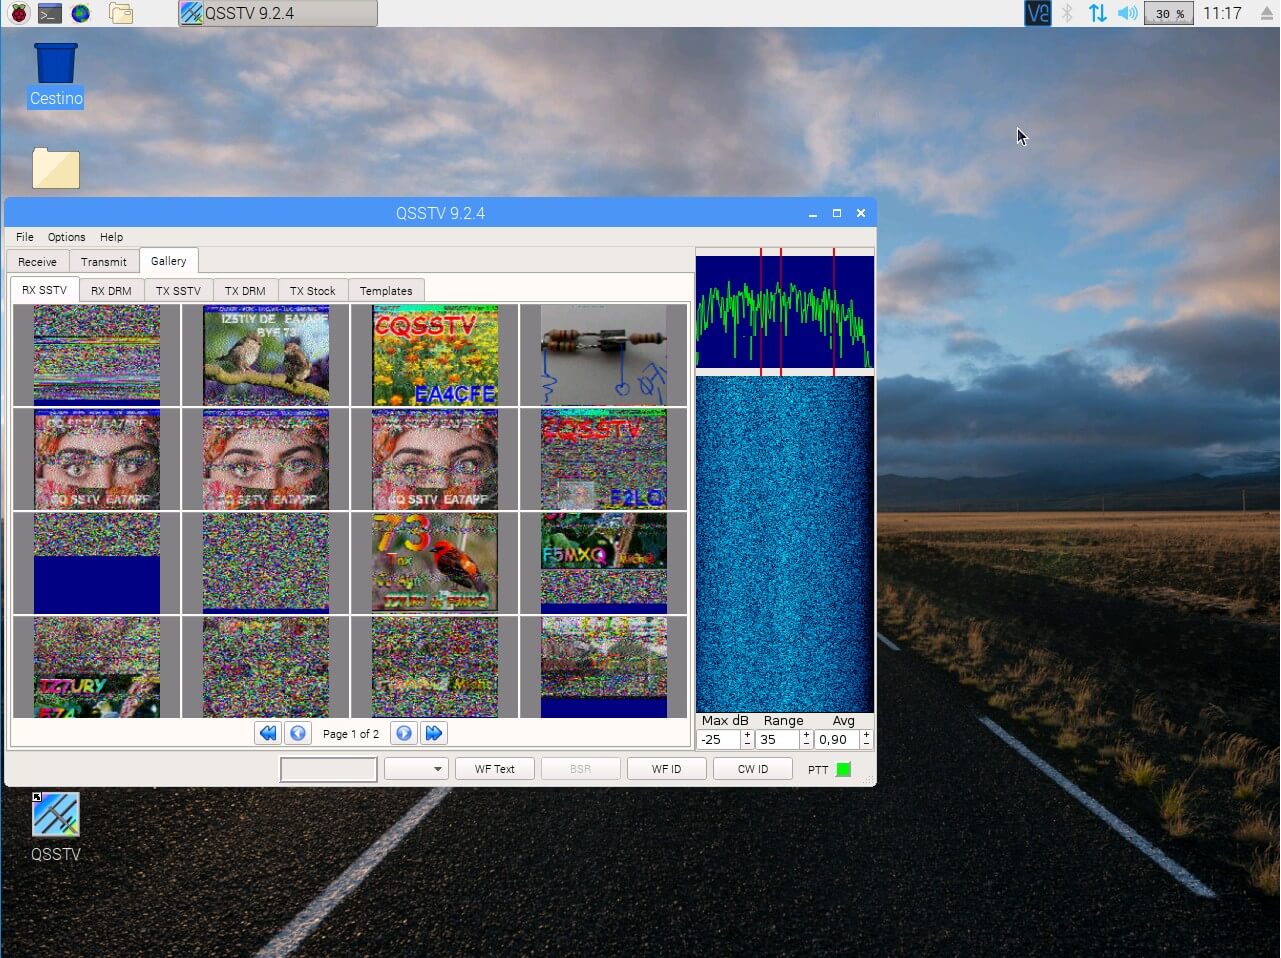
Thank you to Giuseppe (IT9YBG) who has written in to share his tutorial about setting up a direct sampling RTL-SDR V3 based SSTV receiver on a Raspberry Pi. He writes that he uses the receiver to continuously receive images at 14.230 MHz, but with a frequency tweak in the command line code the system could also be used to receive the VHF SSTV images sent by the ISS.
In the tutorial he uses the free QSSTV software for decoding. An RTL-SDR together with the CSDR DSP software is used to set up a command line based receiver, which pipes the SSTV audio into a virtual audio sink, and then into QSSTV. The receiver setup procedure is similar to the method used in our RTL-SDR V3 QRP monitoring station tutorial, and is a very nice way of setting up an efficient command line based RTL-SDR audio output.
QSSTV Running on a Raspberry Pi with RTL-SDR V3 Radio
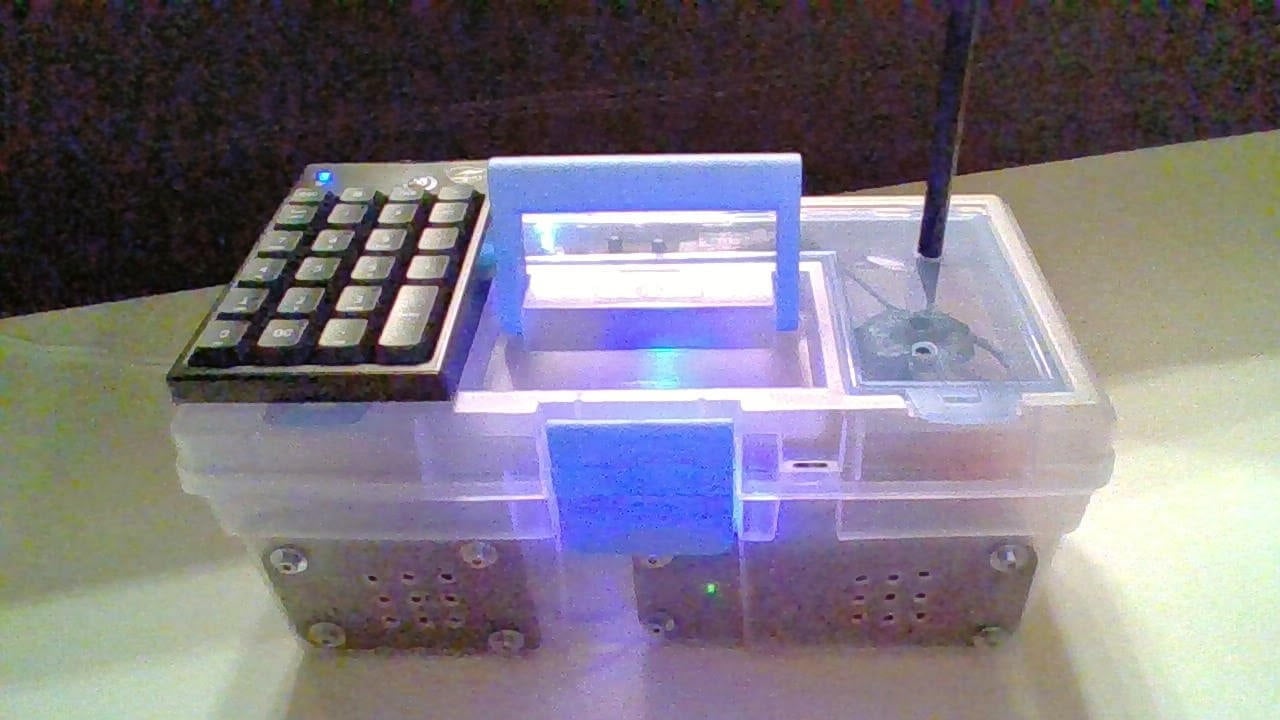
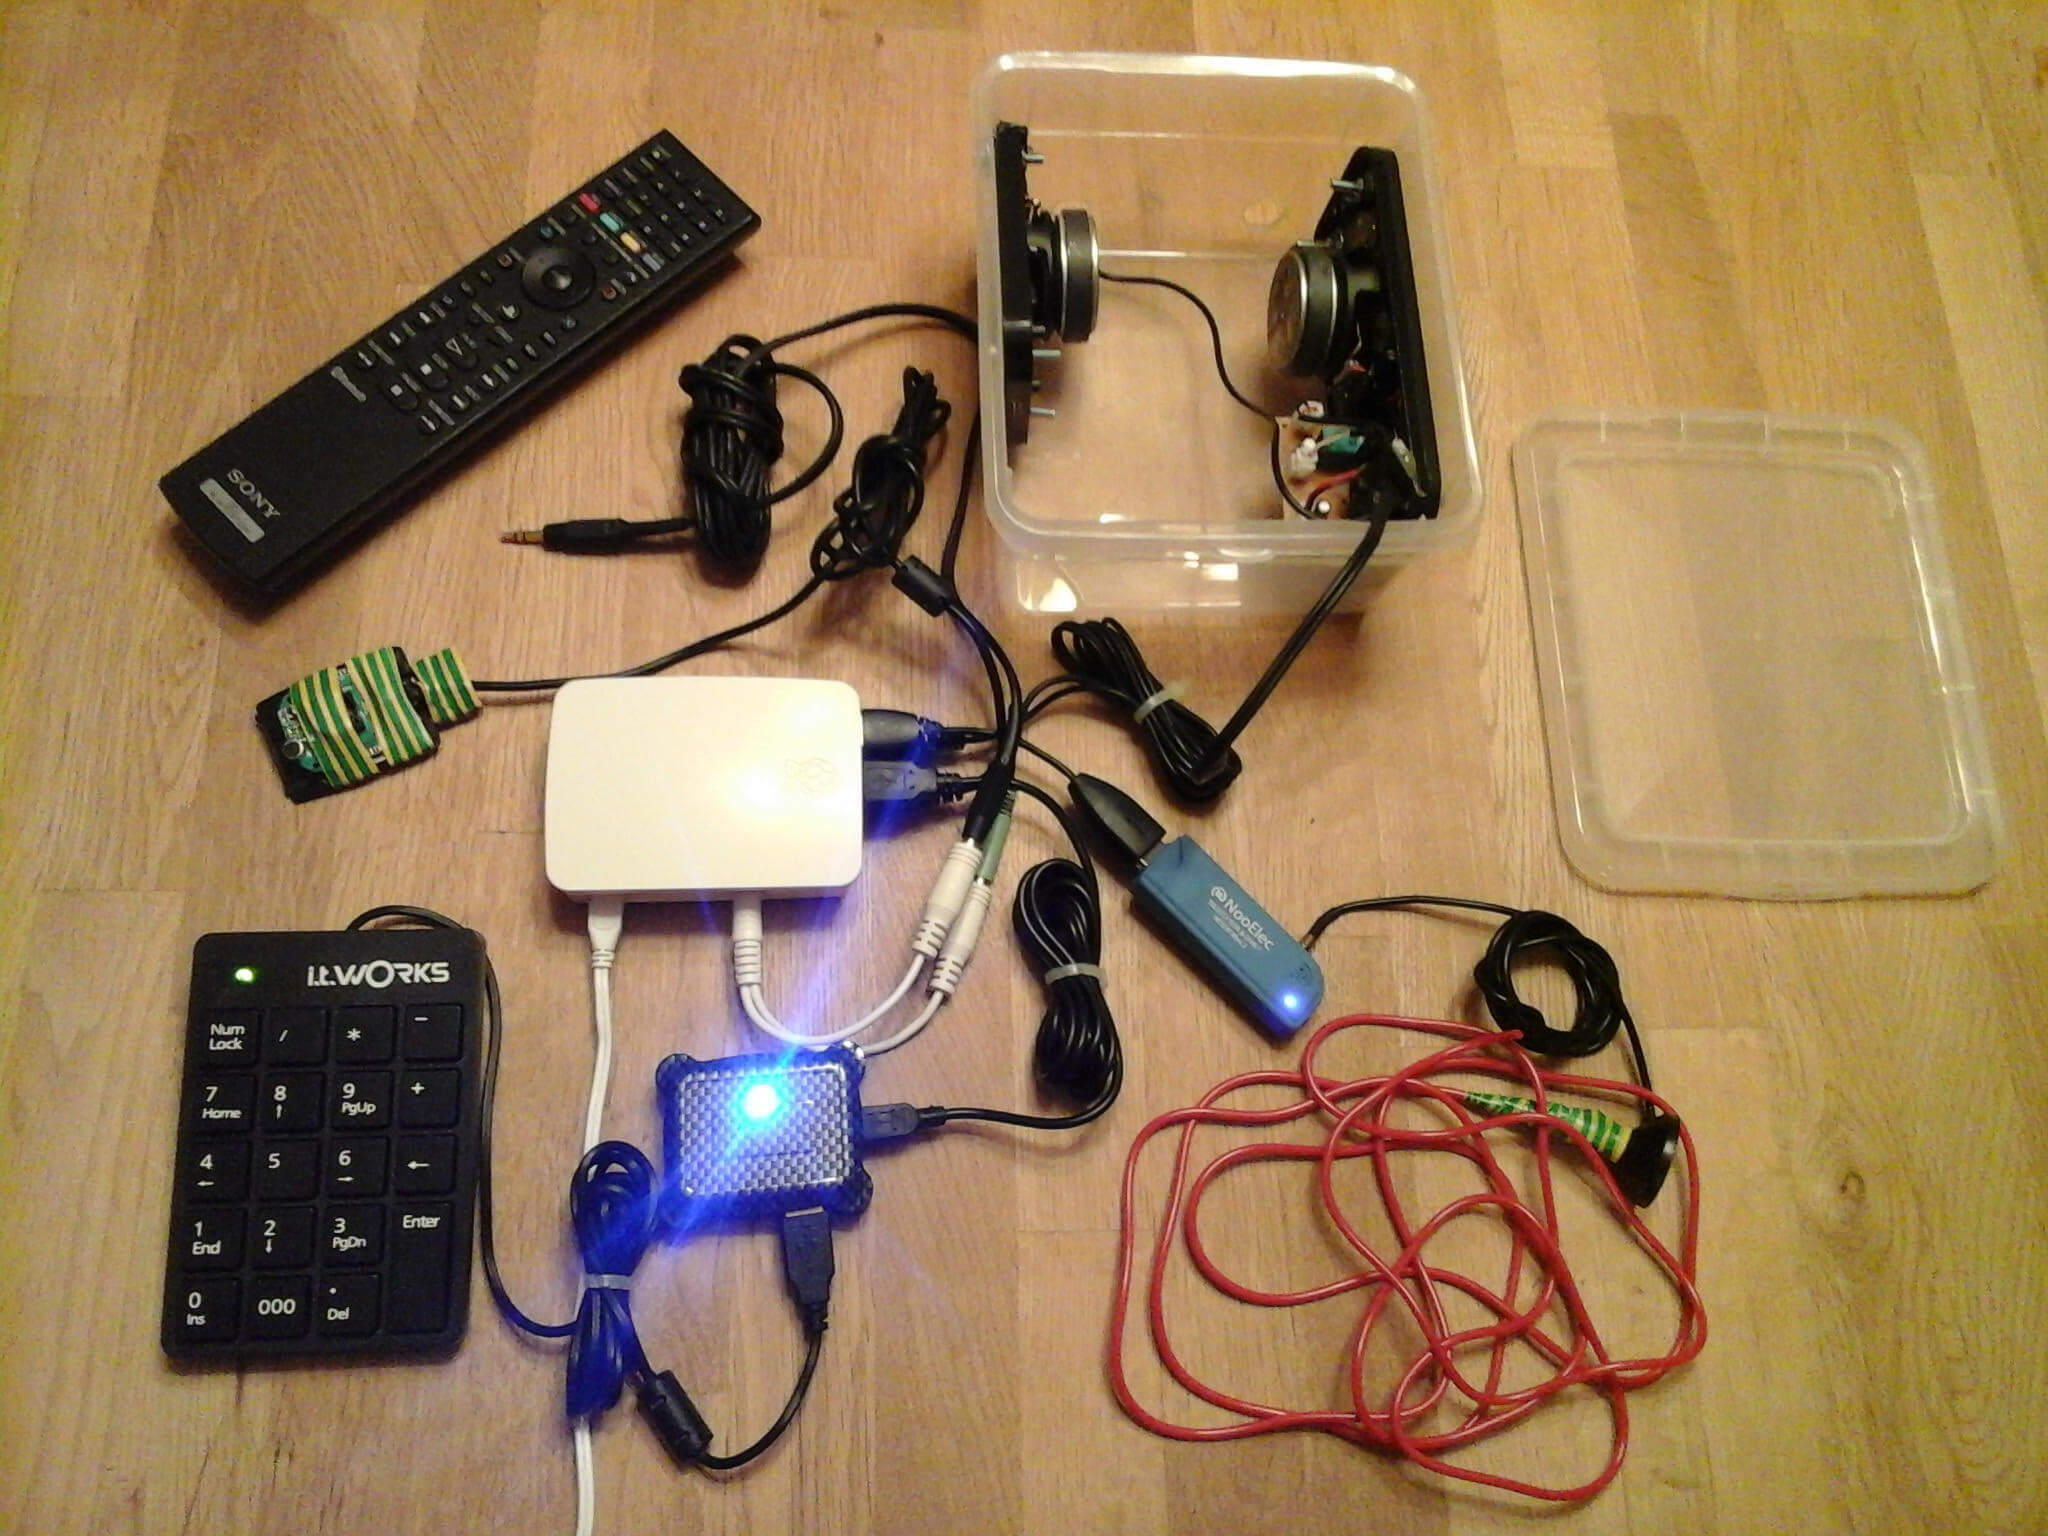
Recently JJ wrote in and wanted to share his multi-feature living room radio that he's created with a Raspberry Pi, RTL-SDR, and various software packages installed on the Pi. Previously we posted about his cute LegoPi radio, and this living room radio is an iteration on that.
The radio is able to tune into live broadcast FM via an RTL-SDR and the NGSoftFM software, and also can be remotely access with SpyServer. It can also tune into internet radio, or play MP3 files. He's also installed Google Assistant and Alexa onto the Pi, so it can work as a digital assistant too. The features and software he uses are noted below:
FM / DAB+ / Internet radio with random mode / MP3 player / Google assistant / Amazon Alexa / SPYserver (SDRsharp), all controlled with a USB keypad or a Bluetooth remote control.
Internet radio VLC (https://www.videolan.org/vlc/index.html) The random internet radio part is a lot of fun to use. You can do random by genre or just random everything. Reminds me when turning the MW dial at night when I was a kid and not knowing what was coming next! It is just a python script that fetch the icecast directory then populate a small SQL database on the pi. I used this (https://github.com/ksc91u/icecast_play) as a starting point.
MP3 player VLC. I used a 16GB SD card on the pi (good compromise between speed of boot versus capacity). The whole system takes a little bit less than 5GB, which means I have 10GB+ for MP3 files.
SPYserver More a gadget than a serious tool because I'm using a wire for antenna (on the last radio) but has proven to be usefull to help position the wire for optimum FM / DAB+ reception by looking at the spectrum and play with the dongle gain in SDRsharp (https://airspy.com/spy-servers/).
Bluetooth remote control I used a PlayStation 3 (PS3) bluetooth remote since the pi 3 has bluetooth built-in. Easily available in used video game stores and very cheap, the remote works very well but it took me a while to get it going. This page helped: https://www.mythtv.org/wiki/Sony_PS3_BD_Remote
Last but not least, the radio is a complete Linux environment so I can connect to it from my Win10 box via SSH (https://www.chiark.greenend.org.uk/~sgtatham/putty/latest.html) and play with all the RTL-SDR goodies, even GNU Radio :-) providing you install a desktop environment (for ex. PIXEL) on top of Raspbian Stretch Lite.
Back in August Maxim who runs his small company "ExpElectroLab" wrote in and shared with us news of his upcoming product called "SDR-Remote" which is a physical tuning knob and control panel for SDR#.
Recently the product was released for sale on his shop, and costs $57.50 USD + shipping. The vk.com store is for Russian customers only, but you contact him at [email protected] if you are non-Russian and are interested in his products. The features of the SDR-Remote are pasted below:
The heart is ARDUINO NANO V3.0, buttons, encoder and software.
Implemented by:
tuning the frequency of reception with frequency of 1 kHz, 100 kHz, 1 MHz (additionally 50 Hz)
Maxim hand builds these in his home country of Russia, and has noted that since the case is 3D printed he can only create a few per week at the moment. The knob interfaces with SDR# via an Arduino driver and SDR# plugin which can be downloaded.
SDR-Remote V2.1
Over on YouTube a Russian reviewer has uploaded a video showing SDR-Remote v2.1 in action. The video is narrated in Russian, but YouTube auto-captions combined with auto-translate does a decent job.
Just a reminder that one week remains in the KerberosSDR Indiegogo campaign. This is your last chance to grab a KerberosSDR at a discounted preorder price. And at the time of posting there are still 50 "second early bird" units remaining at a discounted price of only $115 USD.
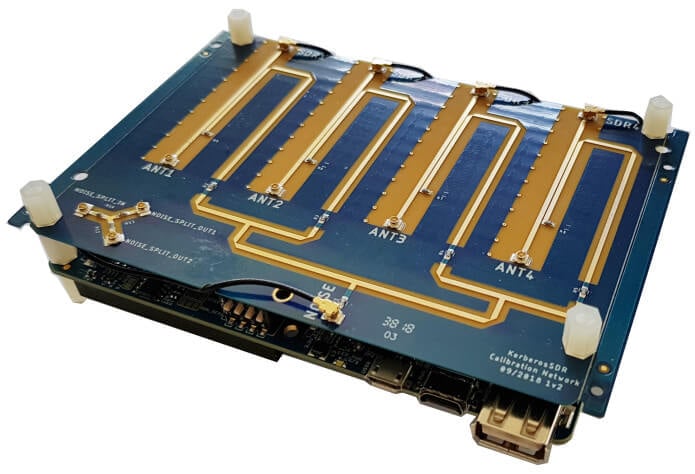
If you weren't already aware, over the past few months we've been working with the engineering team at Othernet.is to create a 4x Coherent RTL-SDR that we're calling KerberosSDR. A coherent RTL-SDR allows you to perform interesting experiments such as RF direction finding, passive radar and beam forming. In conjunction with developer Tamas Peto, we have also had developed open source demo software for the board, which allows you to test direction finding and passive radar. The open source software also provides a good DSP base for extension.
Due to the higher than anticipated number of preorders, we have been able to immediately fund further work on improving the demo software, and will be able to continue to work on improving it throughout this and next year. First on the agenda is improving the code buffering structure and DSP processing speed. Shortly after we'll be looking at adding additional features to aide with calibration and direction finding.
We have also now begun ordering parts, begun prototyping the metal enclosure, and have finalized the PCB. Manufacturing is on track to begin shortly after the campaign ends.
KerberosSDR Prototype with Calibration Board Attached (Metal Enclosure with SMA connectors Not Shown)